This is the full developer documentation for Supervertaler Docs
# Welcome to Supervertaler Docs
> Supervertaler is a translation suite for professional translators,
localisers, and people who work with words. There are two products –
pick the one you use below.
## What each product does
🧩 Supervertaler for Trados
A plugin that brings Supervertaler’s AI and terminology tools right into [Trados Studio](https://www.trados.com/) (2024+) as dockable panels – so you never leave the CAT tool you already use.
What it adds:
* **TermLens** – live, colour-coded terminology under each source segment, with MultiTerm (`.sdltb` / `.ttb`) support and one-key term insertion (`Alt+1`–`9`)
* **Supervertaler Assistant** – a Trados-aware AI chat that knows your current segment, terminology, and TM matches; attach files, go incognito, or draw on its **SuperMemory** knowledge base
* **SuperSearch** – fast concordance search across your whole project
* **Batch Translate & AI Proofreader** – run AI over entire files, with a prompt library you can tailor to your domain
* **QuickLauncher** – one-keystroke prompt actions, hands-free
Source-available, single paid plan. Shares termbases, TMs, and prompts with Supervertaler Workbench.
[Open the Trados Plugin docs →](/trados/)
🖥️ Supervertaler Workbench
A free, open-source desktop translation environment (CAT tool) – editor, AI translation, terminology, and translation memory in one place.
Its real superpower: a set of tools that work **system-wide**, in *any* application, not just inside Supervertaler:
* **Clipboard Manager** – `Ctrl+Alt+C`
* **SuperLookup** – search termbases, translation memories, and web resources in one place, `Ctrl+Alt+L`
* **QuickTrans** – instant translations from several engines at once (AI and classic machine translation like Google Translate), GT4T-style, `Ctrl+Alt+Q`
* **Voice dictation & commands** – dictate or drive other programs hands-free, anywhere
[Open the Workbench docs →](/workbench/)
## Not sure which one you need?
* If you already pay for **Trados Studio** and want to add AI translation, terminology assistance, and voice commands to it → **Supervertaler for Trados**.
* If you want a **free, modern translation tool** that doesn’t depend on any other CAT software → **Supervertaler Workbench**.
* If you use **both**, install them side by side – they share AI providers, termbases, TMs, and prompts, so your setup carries across for one coherent workflow.
# Supervertaler for Trados
Supervertaler for Trados is a plugin for **Trados Studio 2024+** that brings Supervertaler’s terminology and AI features directly into the Trados editor. It runs natively inside Trados Studio as a set of dockable panels, so you never have to leave the editor.
![]()
### Getting Started Screencast
New to Supervertaler? Watch the [Getting Started screencast](https://www.youtube.com/watch?v=bOIwMAoP7xc) (16 min) for a walkthrough of all the basics – TermLens, prompt generation, AI translation, the Chat window, and more.
[Supervertaler for Trados – Getting Started (16 min)](https://www.youtube.com/embed/bOIwMAoP7xc)
### Key Features
#### TermLens (Inline Terminology)
Live terminology display that shows the source text word by word, with termbase translations underneath each matched term. Colour-coded by termbase type:
* **Blue** for regular termbase matches
* **Pink** for project termbase matches (higher priority)
* **Yellow** for non-translatable terms
* **Green** for MultiTerm termbase matches (`.sdltb` files attached to your Trados project, or `.ttb` termbases in Trados Studio 2026)
Numbered badges let you insert terms with **Alt+1** through **Alt+9**. Project termbases are detected automatically from your Trados project and are read-only. On Trados Studio 2026 these are the new `.ttb` termbases –see [Trados Studio 2026 & .ttb](/trados/studio-2026/).
#### Supervertaler
A conversational AI chat panel that is aware of your current segment, matched terminology, and TM matches. Ask questions about translation choices, get alternative phrasings, or request explanations –all without leaving Trados.
#### Batch Translate
Translate multiple segments at once using AI. Choose a scope (empty segments, all segments, filtered segments), pick a prompt, and let the AI work through your file. Progress is shown in real time.
#### Prompt Library
A built-in Default Translation Prompt and Default Proofreading Prompt to get you started, plus QuickLauncher prompts for common tasks. Create your own custom prompts in the Prompt Manager – duplicate the default and tailor it to your domain.
#### Termbase Management
Create, edit, and import termbases in Supervertaler’s `.db` format. Quick-add terms with keyboard shortcuts, mark terms as non-translatable, and manage multiple termbases per project.
#### SuperMemory
Self-organising, AI-maintained translation knowledge base. Stores client profiles, terminology decisions, domain conventions, and style preferences as interlinked Markdown files. The AI consults the active memory bank automatically when translating. Keep separate banks per client or domain and switch between them from the toolbar dropdown. Quick-add terms and corrections while translating with Ctrl+Alt+M. [Learn more →](/trados/ai-assistant/super-memory/)
### System Requirements
| Requirement | Version |
| -------------- | ------------------- |
| Trados Studio | 2024 (v18) or later |
| Windows | 10 or 11 |
| .NET Framework | 4.8 |
There are two builds: one for **Trados Studio 2024** (MultiTerm `.sdltb` termbases) and one for **Trados Studio 2026** (`.ttb` termbases). Install the build that matches your Studio version –see [Trados Studio 2026 & .ttb](/trados/studio-2026/).
### Shared Termbase Format
Supervertaler for Trados uses the same SQLite-based termbase format (`.db`) as [Supervertaler Workbench](https://docs.supervertaler.com/workbench/). Termbases created in either tool are fully compatible – you can open the same `.db` file in both applications.
### Context-Sensitive Help
Press **F1** at any time to open context-sensitive help for the panel or dialogue that currently has focus.
### Next Steps
| | |
| ---------------------- | ------------------------------------------------------------- |
| **Installation** | [Install the plugin →](installation.md) |
| **Getting Started** | [Set up termbases and AI →](getting-started.md) |
| **TermLens** | [Inline terminology display →](termlens.md) |
| **Supervertaler** | [Chat with AI in Trados →](ai-assistant.md) |
| **MultiTerm Support** | [Use MultiTerm termbases in TermLens →](multiterm-support.md) |
| **Batch Translate** | [Translate segments in bulk →](batch-translate.md) |
| **Keyboard Shortcuts** | [All shortcuts at a glance →](keyboard-shortcuts.md) |
# Supervertaler Assistant
The Supervertaler Assistant is a conversational chat panel that runs inside Trados Studio as a separate dockable panel. It is context-aware: it automatically includes your current source and target text, matched terminology, and TM matches in every request, so the AI can give you informed answers about the segment you are working on.
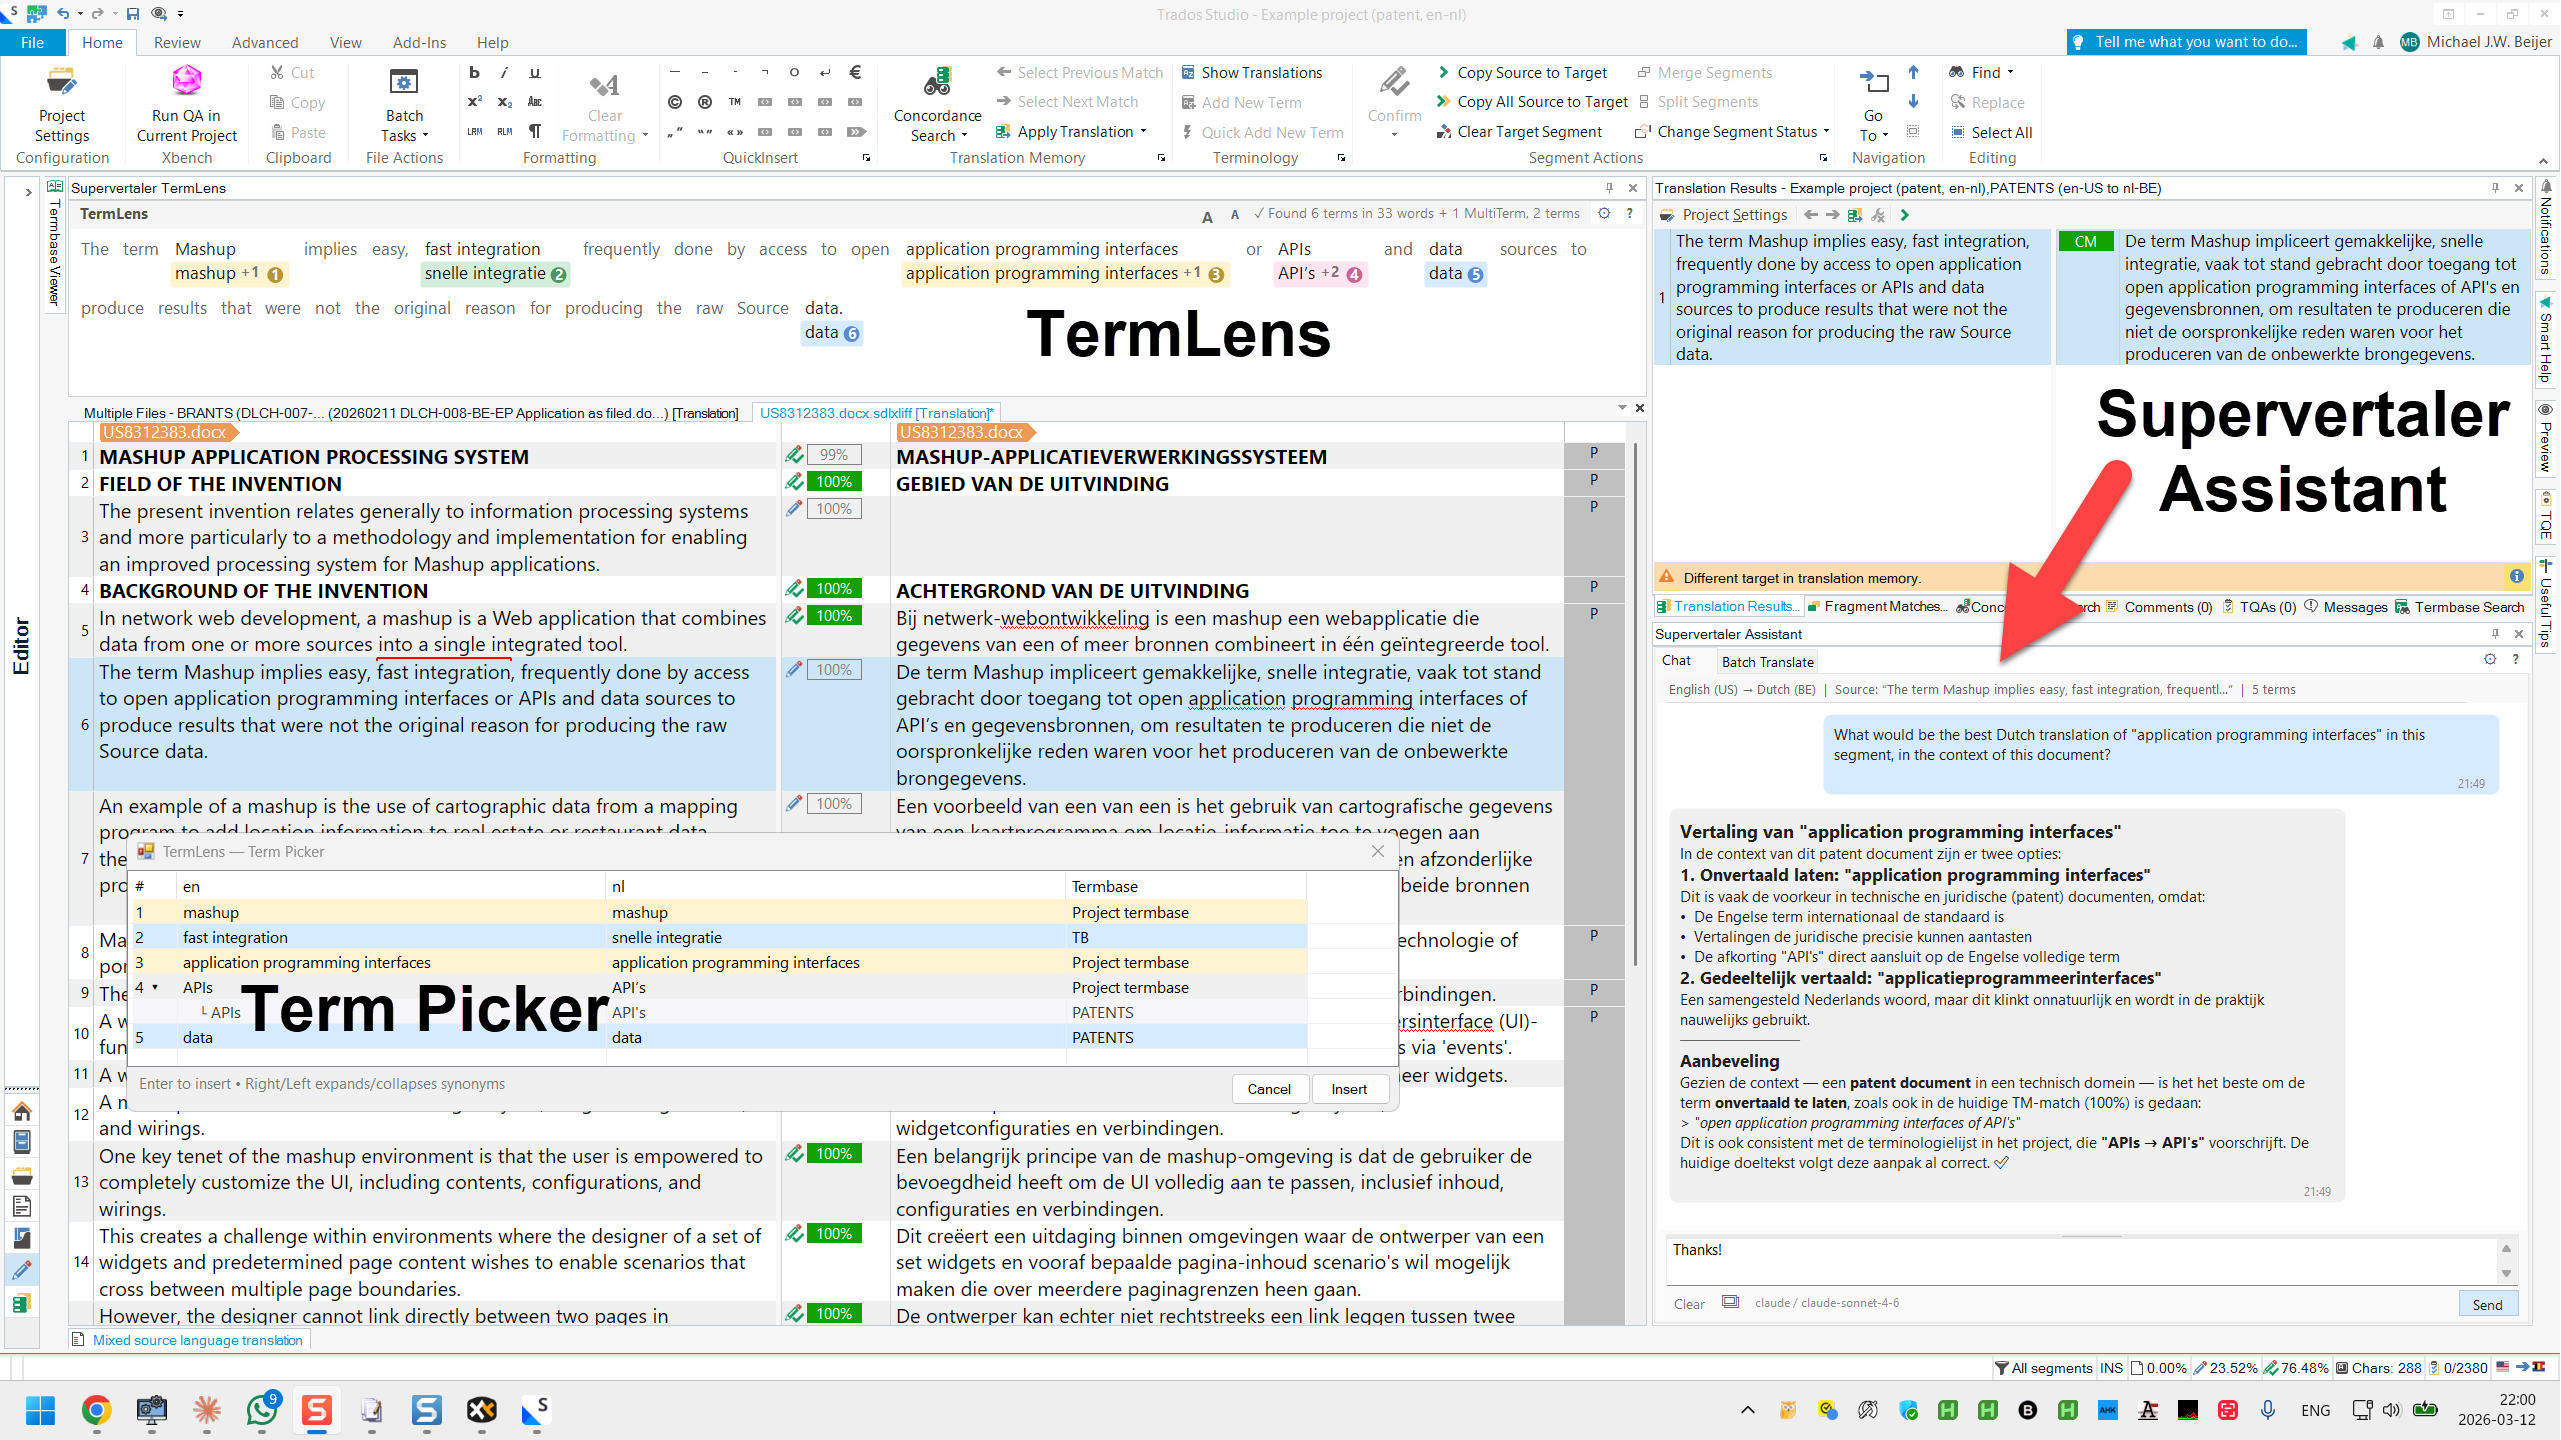
## Opening the Panel
The Supervertaler Assistant lives in its own dockable panel. To open it, go to **View > Supervertaler Assistant**.
You can dock the panel on the right side, bottom, or as a floating window. Trados remembers the panel position between sessions.
## Chat
Type a message in the input field at the bottom and press **Enter** to send. The AI will consider your current source text, target text, matched terminology from your termbases, and TM fuzzy matches when responding.
| Action | How |
| --------------------------- | ------------------------- |
| Send a message | Press **Enter** |
| Insert a line break | Press **Shift+Enter** |
| Stop a response in progress | Click the **Stop** button |
### What You Can Ask
Because the assistant has access to your current segment context, you can ask things like:
* “Translate this segment”
* “What is the difference between these two translations?”
* “Is this terminology correct in a legal context?”
* “Suggest a more formal alternative”
* “Explain this source text”
### Chat History
The conversation is saved automatically after every message and restored the next time Trados starts. Your history persists until you explicitly clear it.
To clear the history, click the **Clear** button in the chat toolbar.
Note
Chat history is stored in `~/Supervertaler/trados/chat_history.json`. It is a single global history — not per project or per file.
### Right-Click Menu
Right-click any assistant response bubble to access:
| Action | Description |
| ----------------------- | -------------------------------------------------------------------------------------------------------------------------------------------------------------------------------------------------------------------------------- |
| **Copy** | Copies the raw Markdown to the clipboard, preserving tables and formatting |
| **Apply to target** | Inserts the plain text (Markdown stripped) into the active target segment |
| **Save as Prompt…** | Saves the response as a reusable prompt template |
| **Save to memory bank** | Saves the question + response as an inbox note in the active memory bank so useful answers are not lost. Run [Process Inbox](/trados/ai-assistant/super-memory/process-inbox/) afterwards to compile it into the knowledge base. |
If you select text within a bubble before right-clicking, **Copy** and **Apply to target** operate on the selection only.
## Features
| Feature | Description |
| ---------------------------------------------------------------------- | ------------------------------------------------------------------------------------------------------------------------------ |
| [**Context Awareness**](/trados/ai-assistant/context-awareness/) | Automatic project, segment, terminology, TM, and document context in every request |
| [**File Attachments**](/trados/ai-assistant/file-attachments/) | Attach images and documents (PDF, DOCX, XLSX, TMX, etc.) for additional context |
| [**Studio Tools**](/trados/ai-assistant/studio-tools/) | Query your Trados Studio projects, TMs, termbases, and statistics using natural language |
| [**Incognito Mode**](/trados/ai-assistant/incognito-mode/) | Anonymise project names, file paths, and personal data in AI responses for safe sharing |
| [**Providers and Models**](/trados/ai-assistant/providers/) | Supports 7 AI providers including OpenAI, Claude, Gemini, Grok, Mistral, Ollama, and custom endpoints |
| [**Supervertaler Bridge**](/trados/ai-assistant/supervertaler-bridge/) | Localhost-only HTTP service that lets Supervertaler Workbench’s floating Sidekick Chat read your active Trados project context |
## See Also
* [QuickLauncher](/trados/quicklauncher/) — One-click prompt shortcuts
* [Batch Translate](/trados/batch-translate/) — Translate multiple segments at once
* [AI Settings](/trados/settings/ai-settings/) — API keys, model selection, context options
* [Keyboard Shortcuts](/trados/keyboard-shortcuts/)
# Chat
The **Chat** tab is the conversational heart of the Supervertaler Assistant – a context-aware chat that already knows your current segment, its terminology and TM matches, so you can ask questions and get answers grounded in the document you are translating. (See the [Overview](/trados/ai-assistant/) for opening the pane and the basics of chatting.)
Two features extend what a chat can do:
* **[File Attachments](/trados/ai-assistant/file-attachments/)** – attach images or documents (a reference PDF, a style guide, a screenshot of the source layout) to a message for the AI to use as context.
* **[Studio Tools](/trados/ai-assistant/studio-tools/)** – ask the assistant about your Trados installation in plain language (projects, translation memories, termbases, templates) and it looks the answer up for you.
# Context Awareness
The Supervertaler Assistant is deeply integrated with your Trados project. Every time you send a chat message, translate a batch of segments, or ask AutoPrompt to draft a prompt, the assistant assembles a fresh snapshot of your current work and hands it to the AI. This snapshot is the **context** – everything the AI sees before it produces a reply.
This page is the single place that lists every context source. Each section is a brief overview with a link to the feature’s canonical page for more depth. If you have ever wondered *“what exactly does the AI know when I ask it something?”*, the answer is this page.
## The context sources
Supervertaler draws context from eight sources. They are all independent, they can all be toggled individually, and most of them are on by default.
### 1. Project and file information
The assistant knows which project and file you are working in, the language pair (e.g. Dutch → English), and your current position in the document (e.g. “Segment 42 of 318”). This is always included – there are no user-facing toggles for it.
### 2. Full document content
When enabled, all source segments in the current document are included in the AI prompt. This lets the assistant analyse the document as a whole and determine its type – legal, medical, technical, marketing, financial, scientific – then use that assessment to inform its advice on terminology, style, and translation choices.
For very large documents, the content is automatically truncated to the configured maximum (default: 500 segments). The truncation preserves the first 80 % and the last 20 % of the document so the AI still sees both the beginning and the end.
**Toggle:** AI Settings → *Include full document content*.
### 3. Current segment
The source text you are translating and any target translation you have already entered. Always included – this is the minimum context needed for most AI operations.
### 4. Surrounding segments
Two segments before and two segments after your current position, with their translations where available. This gives the AI local context for cohesion and consistency – it can see how a pronoun was resolved in the previous sentence, or whether the current clause is continuing a thought from the segment above.
Always included – the window size is fixed.
### 5. Translation memory matches
TM fuzzy matches for the current segment are included, showing the match percentage, source text, and target text. This gives the AI reference material from your previous translations – it can see how you or your team rendered a similar phrase last time and stay consistent with that.
**Toggle:** AI Settings → *Include TM matches*.
### 6. Termbase terms
Matched terms from your active termbases are included with their approved translations and synonyms. Optionally, term definitions, domains, and usage notes are also included, giving the AI deeper understanding of your terminology requirements. Terms marked as non-translatable or forbidden are flagged so the AI can respect those constraints.
Both Supervertaler termbases and MultiTerm .sdltb termbases attached to the Trados project contribute. See [TermLens](/trados/termlens/) and [MultiTerm Support](/trados/multiterm-support/) for how those termbases are loaded.
**Toggles:** AI Settings → *Include termbase terms* / *Include term metadata* / per-termbase contribution list.
### 7. SuperMemory context
[**SuperMemory**](/trados/ai-assistant/super-memory/) is Supervertaler’s self-organising translation knowledge base system. If a memory bank is active, the assistant loads the most relevant articles from it before every AI call:
* the **client profile** matching the current Trados project name, from `01_CLIENTS/`
* the **domain article** matching the document type the AI just detected, from `03_DOMAINS/`
* the most relevant **style guide** from `04_STYLE/`, preferring client-specific guides over general ones
* matching **terminology articles** from `02_TERMINOLOGY/`, which include not just approved translations but also rejected alternatives and the reasoning behind each decision
Unlike a termbase – which gives the AI flat pairs of source and target terms – SuperMemory gives it the **reasoning** behind those pairs: the decisions, the caveats, and the client-specific overrides. The two are complementary, not competitive.
Only articles from the **active** memory bank are loaded. If you keep separate banks per client or domain, switch to the relevant one from the Memory Bank dropdown in the toolbar before translating. See [SuperMemory → AI Integration](/trados/ai-assistant/super-memory/ai-integration/) for the full loading algorithm and token budget.
**Toggles:** AI Settings → *Include memory bank context* / *Use memory bank in AutoPrompt*.
### 8. Attached files
Files you attach to the chat panel – images (paste, drag-drop, or browse), and documents (DOCX, PDF, PPTX, XLSX, CSV, TMX, SDLXLIFF, TBX, TXT, Markdown, HTML, and more) – are added to the context for that turn. Images are sent through each provider’s vision API; documents are text-extracted and appended as prompt context.
Attachments only apply to the turn you attached them on – they do not persist across messages. See [File Attachments](/trados/ai-assistant/file-attachments/) for details.
## Composing the context
All eight sources can be combined freely. For most projects, the default composition – project info, current segment, surrounding segments, document content, TM matches, termbase terms, and memory bank context all enabled – is a strong baseline and the one we recommend starting from.
That said, more context is not automatically better. The AI’s context window is finite, and large projects with rich termbases and a mature memory bank can easily push the prompt into the 50 000–100 000-token range. At some point:
* adding **TM matches** on top of a memory bank that already knows the client’s preferred wordings may introduce noise rather than signal;
* including **full document content** for a very long document may leave too little room for memory bank articles to load;
* layering **three overlapping sources** (TM + termbase + memory bank) on the same concept may produce contradictions the AI has to reconcile on the fly.
Note
**Composing tip:** for clients where you have a well-built memory bank, try running a small batch with TM matches disabled and compare the output to a run with everything enabled. The cleaner prompt often produces more consistent terminology, because the memory bank already knows which wording the client prefers and the TM matches are no longer adding anything the bank does not already say better. For unfamiliar domains or one-off projects, keep everything enabled – the TM and termbase are carrying the weight there.
Caution
We have not yet published composition presets (e.g. “Mature client – memory bank only”, “Unfamiliar domain – TM + termbase”). Until we do, the sensible approach is to leave everything enabled by default and experiment on a per-project basis. If you find a configuration that works particularly well for your workflow, drop a note in [GitHub Discussions](https://github.com/orgs/Supervertaler/discussions).
## Controlling the context
Note
You can control exactly what context the assistant receives. In the settings dialogue on the **AI Settings** tab, you can toggle document content, TM matches, term metadata, memory bank context, and select which termbases contribute to the AI prompt.
Tip
**Tip:** The document-type analysis is especially valuable – it helps the AI understand that “consideration” means something different in a legal contract than in a marketing brochure. Keep full document content and memory bank context enabled unless you have a specific reason to disable them.
## See Also
* [Supervertaler](/trados/ai-assistant/) – Overview
* [AI Settings](/trados/settings/ai-settings/) – Configure context options
* [SuperMemory](/trados/ai-assistant/super-memory/) – Supervertaler’s self-organising translation knowledge base system
* [SuperMemory → AI Integration](/trados/ai-assistant/super-memory/ai-integration/) – The loading algorithm and token budget for SuperMemory context
* [File Attachments](/trados/ai-assistant/file-attachments/) – Add images and documents to a chat turn
* [TermLens](/trados/termlens/) – How termbase terms are matched and loaded
# File Attachments
The Supervertaler Assistant supports attaching both images and documents to your messages. Use the **paperclip button** next to the chat input, or drag and drop files directly onto the chat area.
## Images
Attach images for visual context — for example, a screenshot of the source document layout, a reference image, or a table that is hard to describe in text. Images are sent to the AI using each provider’s native vision API.
| Method | How |
| ------------- | --------------------------------------------------- |
| Paste | Press **Ctrl+V** with an image on the clipboard |
| Drag and drop | Drag an image file into the chat input area |
| Browse | Click the paperclip button and select an image file |
Supported image formats: PNG, JPEG, GIF, WebP, BMP. Up to **5 images** per message, **10 MB** maximum per image.
## Documents
Attach documents to provide the AI with additional reference material — for example, a client style guide, a termbase in spreadsheet form, a reference PDF, or a translation memory export. The text content is automatically extracted from the document and included in your message as context.
| Method | How |
| ------------- | ----------------------------------------------------- |
| Drag and drop | Drag a document file into the chat input area |
| Browse | Click the paperclip button and select a document file |
The chat bubble shows a compact summary (file name and size) instead of the full extracted text, keeping the conversation readable.
### Supported Document Formats
| Category | Formats |
| ----------------- | ------------------------------ |
| Documents | DOCX, DOC, PDF, RTF |
| Presentations | PPTX, PPT |
| Spreadsheets | XLSX, XLS, CSV, TSV |
| Translation files | TMX, SDLXLIFF, XLIFF/XLF, TBX |
| Text and markup | TXT, Markdown, HTML, JSON, XML |
Note
Up to **5 documents** per message, **20 MB** maximum per file. Very large documents are automatically truncated to avoid exceeding AI context limits. Legacy binary formats (DOC, XLS, PPT) use best-effort text extraction — for best results, save as the modern format (DOCX, XLSX, PPTX) first.
Tip
**Tip:** Attaching a client style guide or reference document alongside your translation question gives the AI much better context for providing accurate, style-consistent suggestions.
## See Also
* [Supervertaler](/trados/ai-assistant/) — Overview
* [Context Awareness](/trados/ai-assistant/context-awareness/) — What context is sent automatically
# How the assistant works
Whatever you do in the Supervertaler Assistant – chat, a batch translation, a proofread, or an AutoPrompt – it works the same way under the hood: it gathers **context** from your project and sends it to an **AI provider**, then returns the result. These pages explain what the AI sees and how to control it:
* **[Context Awareness](/trados/ai-assistant/context-awareness/)** – exactly what Supervertaler puts in front of the AI (current segment, surrounding segments, terminology, TM matches, memory bank) and how to tune how much is included.
* **[Providers and Models](/trados/ai-assistant/providers/)** – which AI you talk to (Claude, OpenAI, Gemini, local models …), and how to set up your API key and choose a model.
* **[Incognito Mode](/trados/ai-assistant/incognito-mode/)** – a privacy filter that anonymises project names, file paths, TM names and other identifying data in the AI’s responses, so you can screen-share, record or post screenshots without exposing client information.
# Incognito Mode
Incognito Mode tells the AI to **anonymise all personal and project data** in its responses. When enabled, project names, file paths, TM names, user names, and other identifying information are automatically replaced with plausible placeholders — so you can share your screen, record videos, or post screenshots without worrying about exposing confidential client data.
🕵️ Think of it as a privacy filter for your AI chat.
## When to Use It
| Scenario | Example |
| ------------------------ | ----------------------------------------------------------------------------- |
| **Screen sharing** | Presenting to colleagues or in a webinar while working on a real project |
| **Recording demos** | Making tutorial videos that show real workflows without real client names |
| **Forum posts** | Sharing a helpful AI response in a community without revealing client details |
| **Client presentations** | Showing how the tool works without exposing other clients’ data |
| **Training** | Onboarding new team members on live projects |
## How It Works
When Incognito Mode is enabled, the AI receives an instruction to replace all identifying data with anonymised equivalents. For example:
| Real data | Anonymised |
| ---------------------------- | -------------------------------------- |
| Acme Corporation | Client Alpha |
| D:\Jobs\ACME\Q1\_report.docx | D:\Projects\Client Alpha\document.docx |
| Jane Smith | User A |
| ACME\_NL-EN.sdltm | Client\_Alpha\_NL-EN.sdltm |
The AI uses **consistent replacements** within a conversation, so if “Acme Corporation” becomes “Client Alpha” in one response, it stays “Client Alpha” throughout the session.
### What is NOT anonymised
Some data is left untouched because it carries no identifying information:
* Language codes (en-GB, nl-NL, de-DE, etc.)
* Segment counts, word counts, and statistics
* Translation status values (draft, translated, approved, etc.)
* The actual source and target text you are translating
* Technical identifiers (tool names, status labels)
## Enabling Incognito Mode
1. Open **Settings** (gear icon in the Assistant toolbar)
2. Go to the **AI Settings** tab
3. Scroll down to **AI context (Chat and QuickLauncher)**
4. Tick **Incognito mode**
5. Click **OK**
The setting takes effect immediately on your next message. Toggle it off when you no longer need anonymisation.
Tip
**Tip:** The setting persists across Trados sessions, so remember to toggle it off when you are done sharing. You do not want anonymised data in your regular workflow — it can make the AI’s answers less specific.
Note
Incognito Mode works with all AI providers, not just Claude. The anonymisation instructions are included in the system prompt that every provider receives.
## Limitations
* Incognito Mode instructs the AI to anonymise data in its **responses**. It does not prevent data from being sent to the AI provider — your source text, TM matches, and terminology are still included in the prompt as usual. If you need to prevent data from being sent entirely, disable those context options individually in AI Settings.
* The AI does its best to catch all identifying information, but it cannot guarantee 100% coverage. Always review responses before sharing publicly.
* [Studio Tools](/trados/ai-assistant/studio-tools/) results (project lists, TM searches, etc.) are also anonymised — the AI receives the real data from the tools but presents it with placeholder names.
## See Also
* [Supervertaler](/trados/ai-assistant/) — Overview
* [AI Settings](/trados/settings/ai-settings/) — Configure context options and Incognito Mode
* [Context Awareness](/trados/ai-assistant/context-awareness/) — What context is sent to the AI
# Providers
The Supervertaler Assistant supports multiple AI providers. You only need one to get started.
## Switching Models
The current provider and model are shown in the status area at the bottom of the chat panel. You can switch models in two ways:
* **Quick switch** — click the provider/model label directly. A dropdown menu appears with all available models grouped by provider. The current model is marked with a tick. Select a different model to switch instantly.
* **Settings** — open the settings dialogue (gear icon) and switch to the **AI Settings** tab for full configuration including API keys, endpoints, and advanced options.
## Supported Providers
| Provider | Models |
| -------------- | -------------------------------------------------------------------------------- |
| **OpenAI** | GPT-5.5, GPT-5.4 Mini |
| **Anthropic** | Claude Sonnet 4.6, Claude Haiku 4.5, Claude Opus 4.8 |
| **Google** | Gemini 3.1 Flash-Lite, Gemini 2.5 Pro, Gemini 3.1 Pro (Preview), Gemma 4 26B MoE |
| **Grok** | Grok 4.3 |
| **Mistral** | Mistral Large, Mistral Small |
| **DeepSeek** | DeepSeek V4 Pro, DeepSeek V4 Flash |
| **OpenRouter** | Claude, GPT, Gemini, DeepSeek, and 200+ others via a single API key |
| **Ollama** | TranslateGemma, Qwen 3, Aya Expanse (local, no API key needed) |
| **Custom** | Any OpenAI-compatible API endpoint |
Note
If you want privacy or offline use, try **Ollama** with a local model. No API key or internet connection needed.
If you prefer a single account that covers many providers, **OpenRouter** gives you access to 200+ models with one key.
## Choosing a Model
For everyday translation questions, a smaller and cheaper model like **GPT-5.4 Mini**, **Claude Haiku 4.5**, or **DeepSeek V4 Flash** works well. For complex tasks like document analysis, prompt generation, or when you need the highest quality suggestions, use a larger model like **Claude Sonnet 4.6**, **GPT-5.5**, or **DeepSeek V4 Pro**.
Some features are provider-specific:
| Feature | Availability |
| ------------------------------------------------------------------------ | --------------------------------- |
| [Studio Tools](/trados/ai-assistant/studio-tools/) | All providers except Ollama |
| Image attachments | All providers with vision support |
| Document attachments | All providers |
| [Memory bank](/trados/ai-assistant/super-memory/ai-integration/) context | All providers |
## See Also
* [Supervertaler](/trados/ai-assistant/) — Overview
* [AI Settings](/trados/settings/ai-settings/) — API keys, endpoints, advanced options
* [AI Cost Guide](/trados/ai-cost-guide/) — Token pricing and cost estimates
# Studio Tools
Studio Tools lets you query your Trados Studio installation using natural language in the Supervertaler Assistant chat. Instead of navigating through menus and dialogs, you can simply ask the assistant about your projects, translation memories, termbases, and project templates — and it will look up the answer for you.
Tip
Studio Tools works with all major AI providers: **Claude**, **OpenAI**, **Gemini**, **Grok**, and **Mistral**. Only Ollama (local models) does not support tool use and will work as before — plain chat without Trados queries.
Caution
Studio Tools is under active development and some commands might not yet work as expected. If something doesn’t work, please contact and I’ll get it working as fast as I can.
## How It Works
When you send a message in the Supervertaler, the AI automatically decides whether it needs to query Trados Studio to answer your question. If it does, it calls the appropriate tool behind the scenes, reads the result, and presents the information in a clear format.
You do not need to use any special syntax or commands. Just ask your question naturally.
While a tool is running, the thinking indicator shows what is happening — for example, “Checking Trados projects…” or “Searching translation memory…”.
## Available Tools
| Tool | What It Does |
| -------------------------- | ------------------------------------------------------------------------------------------------------------------------------------------------------------ |
| **List Projects** | Lists all projects registered in Trados Studio with their name, status, and creation date. Supports filtering by status (in progress, completed, archived) |
| **Get Project Details** | Shows detailed information about a specific project, including source and target languages, files, and folder path |
| **Project Statistics** | Shows word count and analysis statistics for a project, broken down by match category (perfect, context, exact, fuzzy, new, repetitions) |
| **File Status** | Shows the confirmation status of all files in a project — how many segments are not started, draft, translated, approved, or signed off |
| **Project Termbases** | Lists termbases attached to a project, with their file paths, enabled/disabled state, and language index mappings |
| **TM Info** | Shows detailed information about a specific translation memory, including language pair, segment count, file size, and creation date |
| **Search TM** | Searches a translation memory for segments containing specific text. Returns matching source/target pairs so you can see how something was translated before |
| **List TMs** | Lists all translation memories found in the Trados Studio TM folders |
| **List Project Templates** | Lists all project templates available in Trados Studio |
## Example Questions
Here are some things you can try asking in the Assistant chat:
### Projects
* “What projects do I have in Trados Studio?”
* “Show me all my in-progress projects”
* “How many projects do I have?”
* “Tell me about the Client Alpha project”
* “What languages does the Client Alpha project use?”
* “What files are in my latest project?”
* “Do I have any completed projects?”
* “Which project was created most recently?”
### Project Statistics and Progress
* “What are the word counts for the Client Alpha project?”
* “Show me the analysis statistics for my project”
* “How many new words are in the Client Alpha project?”
* “What is the fuzzy match breakdown for this project?”
* “What is the translation status of the files in Client Alpha?”
* “How many segments are translated vs. not started?”
* “Which files still need work?”
* “Are any files fully approved?”
### Termbases
* “What termbases are attached to the Client Alpha project?”
* “Show me the terminology resources for this project”
* “Which termbases are enabled?”
### Translation Memories
* “What translation memories do I have?”
* “List my TMs”
* “Tell me about the English-Dutch TM”
* “How many segments are in my main TM?”
* “How big is my TM?”
### TM Search
* “Search my English-Dutch TM for ‘compliance’”
* “How was ‘annual report’ translated before?”
* “Find segments containing ‘data protection’ in the TM”
* “Look up ‘user interface’ in my TM”
### Combined Questions
You can combine Studio Tools queries with the assistant’s regular translation capabilities:
* “What projects am I working on? And can you also translate this segment?”
* “List my projects, then explain the terminology in the current segment”
* “Search the TM for ‘privacy policy’ and suggest a translation for the current segment”
The assistant handles the tool calls first, then continues with the rest of your question seamlessly.
## Technical Details
Studio Tools reads data directly from your local Trados Studio installation. Specifically:
* **Projects** are read from the `projects.xml` file in your Documents folder (e.g., `Documents\Studio 2024\Projects\projects.xml`). Project details, statistics, and file status are read from the individual `.sdlproj` files.
* **Termbases** are read from the termbase configuration stored in each `.sdlproj` file.
* **Translation memories** are found by scanning the `Translation Memories` folder and project folders. TM metadata and search use direct SQLite read-only access to the `.sdltm` files.
* **Project templates** are found in the `Project Templates` folder.
No data is sent to external services other than the AI provider. The tool results are passed to the AI as part of the conversation so it can format and present them to you.
Note
Studio Tools currently provides **read-only** access to your Trados data. It cannot create, modify, or delete projects, TMs, or templates.
## See Also
* [Supervertaler](/trados/ai-assistant/) — The chat interface where Studio Tools is available
* [AI Settings](/trados/settings/ai-settings/) — Configure your AI provider
# SuperMemory
> >-
**SuperMemory** is Supervertaler’s self-organising translation knowledge base system – a [Karpathy-inspired](https://venturebeat.com/data/karpathy-shares-llm-knowledge-base-architecture-that-bypasses-rag-with-an) feature that captures the reasoning behind your translation decisions and makes it available to the AI on every translation. Where a translation memory gives the AI previous wordings and a termbase gives it approved term pairs, SuperMemory gives it the *why*: client preferences, rejected alternatives, domain conventions, style rules, and the accumulated institutional knowledge for each piece of work.
Knowledge inside SuperMemory is organised into one or more **memory banks** – self-contained folders that each act as an Obsidian-compatible vault. You can keep a single default bank, or several banks side by side (one per client, one per domain, one per language pair) and switch between them in one click from the Supervertaler Assistant toolbar. This page covers both SuperMemory as a system and how to work with the memory banks inside it.
SuperMemory is one of several [context sources](/trados/ai-assistant/context-awareness/) the assistant consults when it translates a segment, drafts a prompt, or answers a chat message. It sits alongside termbases, translation memories, document content, and segment metadata – you can enable any combination of the five, and the AI draws from whichever are active in AI Settings.
Each memory bank is stored as interlinked Markdown files on disk – human-readable, portable, and future-proof. You can open and edit a bank in any text editor, version-control it with Git, and sync it between machines with Dropbox or OneDrive. [Obsidian](https://obsidian.md/) is optional but recommended: it gives you a visual knowledge graph, backlink navigation, and the Web Clipper browser extension for clipping web content directly into your bank. See [Obsidian Setup](/trados/ai-assistant/super-memory/obsidian-setup/) for installation instructions.
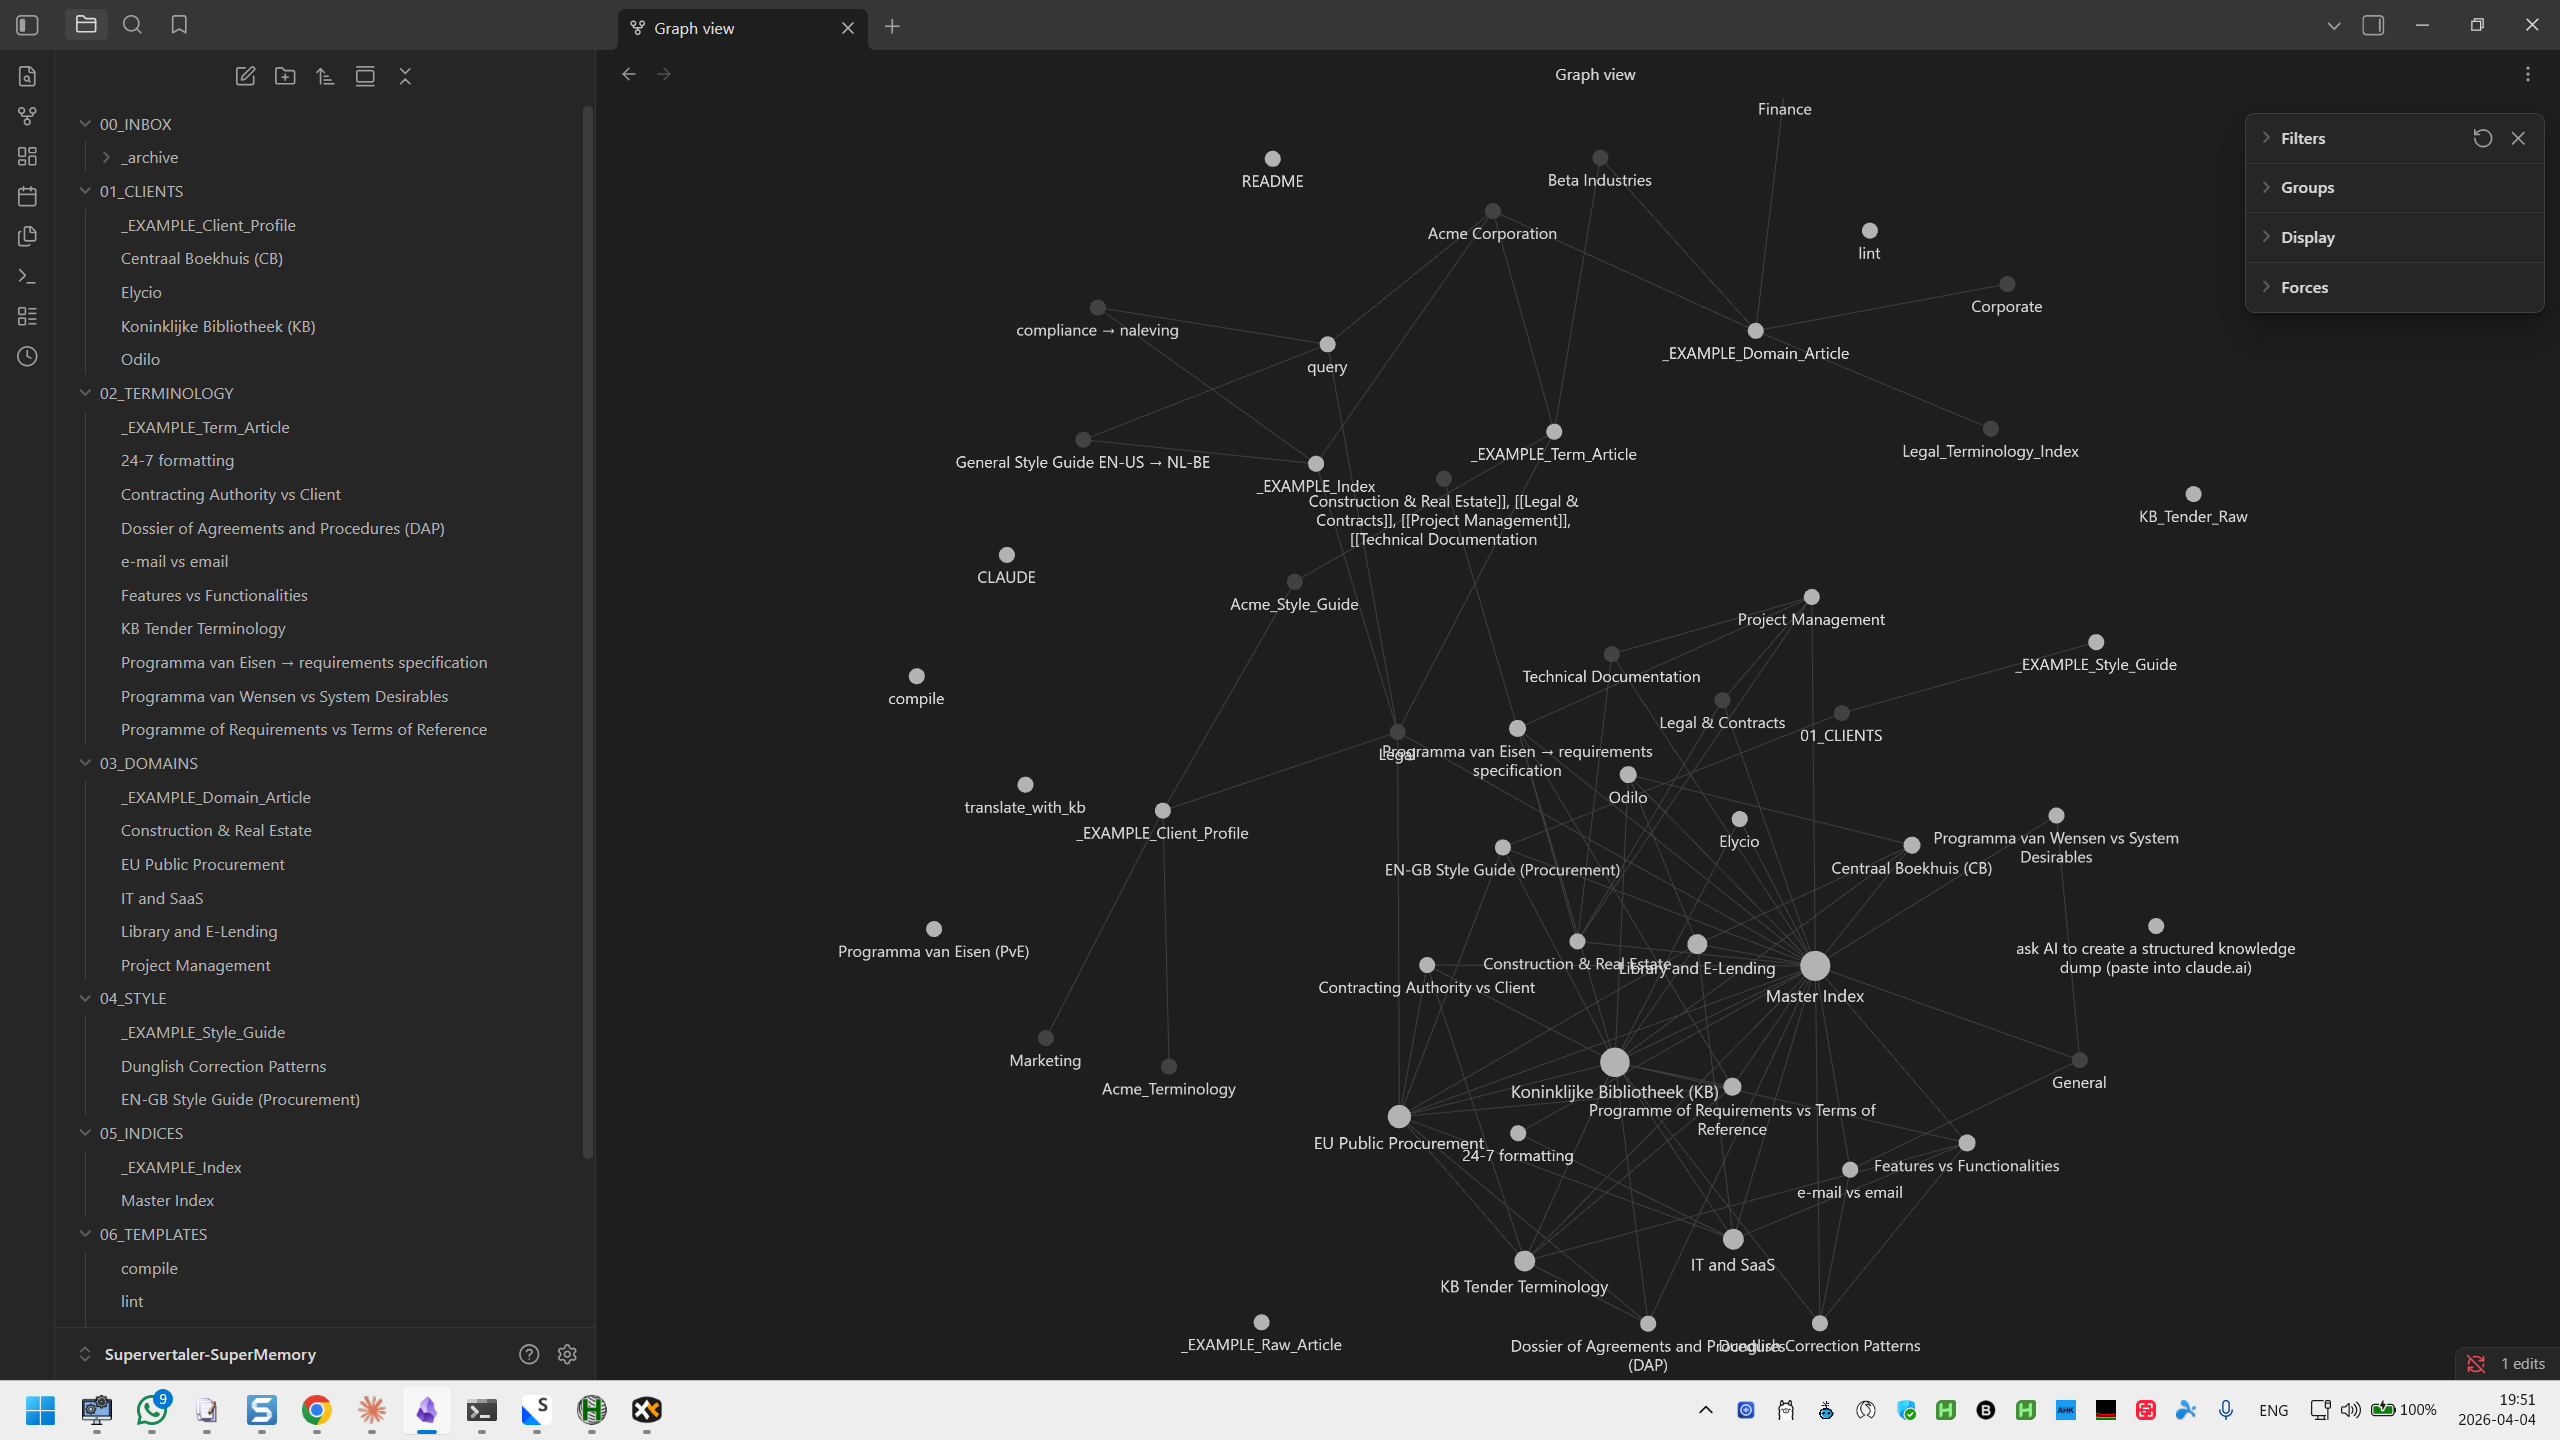
A memory bank knowledge graph showing interconnected clients, terminology, and domain knowledge
## How knowledge is organised
Every memory bank has the same seven-folder skeleton. The skeleton is created automatically when you make a new bank, and it is shared byte-for-byte with the Python Supervertaler – so a bank created in Trados works unchanged in the standalone app and vice versa.
| Folder | Contents |
| ---------------- | ----------------------------------------------------------------------------------------------------- |
| `00_INBOX` | Raw material – drop zone for unprocessed briefs, feedback notes, termbases, reference articles |
| `01_CLIENTS` | Client profiles: language preferences, style rules, terminology decisions, project history |
| `02_TERMINOLOGY` | Term articles with approved translations, rejected alternatives, and the reasoning behind each choice |
| `03_DOMAINS` | Domain-specific conventions and common pitfalls (legal, medical, technical, marketing, financial) |
| `04_STYLE` | Style guides, formatting rules, register notes, localisation conventions |
| `05_INDICES` | Auto-generated indexes and maps of content |
| `06_TEMPLATES` | Reusable templates for new articles |
The assistant loads content from `01_CLIENTS`, `02_TERMINOLOGY`, `03_DOMAINS`, and `04_STYLE` as context before each AI call. `00_INBOX`, `05_INDICES`, and `06_TEMPLATES` are workflow folders – they do not feed the AI directly, they support the processing pipeline. See [AI Integration](/trados/ai-assistant/super-memory/ai-integration/) for the full loading algorithm.
## Creating and switching banks
### Where banks live on disk
All of your memory banks live under a single parent folder – the **memory banks folder** – which defaults to:
```plaintext
C:\Users\{you}\Supervertaler\memory-banks\
```
Each bank is a subfolder with the seven-folder skeleton shown above:
```plaintext
memory-banks\
├── default\
│ ├── 00_INBOX\
│ ├── 01_CLIENTS\
│ └── …
├── acme-legal\
│ ├── 00_INBOX\
│ └── …
└── pharma\
└── …
```
A fresh install ships with one empty bank named `default`. You can keep that as your only bank, rename it (see below), or add others alongside it.
### Switching banks
The **Memory Bank** dropdown in the Supervertaler Assistant toolbar lists every bank it finds under the memory banks folder. The one you pick is the **active bank** – the assistant reads from it until you choose another. Switching is immediate: the next chat turn, the next batch translation, and the next Process Inbox run all use the new bank. No restart needed, and your chat history is preserved across the switch.
The active bank persists across Trados sessions. If you close Trados with `acme-legal` selected, it will still be `acme-legal` when you reopen.
### Creating a new bank
To create a new bank without leaving the chat panel:
1. Click the **Memory Bank** dropdown in the Supervertaler Assistant toolbar.
2. Scroll to the bottom of the list and choose **+ New memory bank…**
3. A small dialog appears asking for a short name. Valid names are lowercase letters, digits, hyphens, or underscores – for example, `legal`, `medical`, `acme-corp`, `eu_procurement`. As you type, the dialog shows a live preview of the folder name that will be created.
4. Click **Create**. The new bank is created on disk with the full seven-folder skeleton, the dropdown refreshes to show it, and the assistant switches to it immediately.
A confirmation banner appears in the chat summarising what was created.
### Renaming and deleting banks
Renaming and deleting banks from inside the plugin is not yet available. Until those land, you can rename or delete a bank folder directly under `memory-banks\` using File Explorer, with Trados closed. Be sure to update `AiSettings.ActiveMemoryBankName` in your settings file if you rename the active bank, or simply switch to another bank from the toolbar dropdown the next time you open Trados.
## Why run several banks
A single `default` bank is enough if you work with one client or one domain. But most working translators will benefit from splitting their knowledge across several banks – one per major client, or one per domain, or one per language pair – because:
* **Context stays sharp.** The AI’s context window is finite. A focused bank for a single client fits entirely in the prompt; a monolithic bank covering ten clients either exceeds the budget or has to be aggressively pruned before loading, losing detail.
* **Switching is instant.** When you move from translating a pharma clinical trial to a tech product manual, you want the AI to forget the pharma terminology immediately. Switching banks does that in one click.
* **Confidentiality is structural.** A bank for Client A physically cannot leak into a translation for Client B because the folders are separate on disk. No accidental cross-contamination.
* **Backups and syncing are per-client.** You can version-control, archive, or share a single client bank without exposing your other clients’ data.
Typical layouts:
* **One bank per major client** – `acme-legal`, `novartis`, `eu-commission`, plus a small `default` for one-off work.
* **One bank per domain** – `legal`, `medical`, `technical`, `marketing`.
* **One bank per language pair** – `nl-en`, `de-en`, `fr-en` if your domains are similar across clients but the style and terminology vary by direction.
## Sharing banks with the Python Supervertaler
Memory banks are stored in the **shared Supervertaler data folder** – the same folder the Python Supervertaler uses – so banks created on either side are immediately visible to the other. The folder layout, skeleton, and naming rules are identical byte-for-byte. You can create a bank in the Python assistant, drop files into its inbox from the web clipper, and then switch to it from the Trados plugin; both products will see the same articles.
The shared folder also means you can keep your memory banks in a cloud-synced location (OneDrive, Dropbox, iCloud) and have the same banks available on any machine where either product is installed.
## Working with a memory bank
Once a bank exists, you fill it with knowledge in one of several ways:
1. **Drop Markdown notes into `00_INBOX`** – client briefs, termbases, feedback notes, style guides, reference articles you have written down as `.md` files. These are compiled by Process Inbox.
2. **Use** [**Distill**](/trados/ai-assistant/super-memory/distill/) for everything that is **not** plain Markdown – TMX translation memories, DOCX style guides, PDF reference documents, XLSX/CSV termbases, MultiTerm termbases. Distill reads each file and writes draft Markdown articles into `00_INBOX/`, ready for Process Inbox to compile.
3. **Use** [**Quick Add**](/trados/ai-assistant/super-memory/quick-add/) (Ctrl+Alt+M) to capture a terminology decision or correction while translating. Quick Add appends a short note to the inbox so you can keep working without context-switching.
4. **Run** [**Process Inbox**](/trados/ai-assistant/super-memory/process-inbox/) periodically. The AI reads every Markdown file in `00_INBOX` and files it into `01_CLIENTS`, `02_TERMINOLOGY`, `03_DOMAINS`, or `04_STYLE` as structured articles, interlinked with backlinks.
5. **Run** [**Health Check**](/trados/ai-assistant/super-memory/health-check/) when the bank starts to feel stale. It scans for conflicting terminology, broken links, stale content, and missing cross-references – and heals what it can.
The result is a knowledge graph that grows with your work and that the AI consults before every translation.
Note
**Markdown vs binary files in the inbox.** Process Inbox is a Markdown compiler – it reads `.md` files only. Distill is the feature that reads binary formats (TMX, DOCX, PDF, XLSX, termbases) and turns them into Markdown. If you drop a TMX or PDF in `00_INBOX/` directly, Process Inbox will spot it and tell you to run Distill on it instead, rather than silently ignoring the file. See [Process Inbox](/trados/ai-assistant/super-memory/process-inbox/#markdown-only-use-distill-for-everything-else) for the full table.
### Templates and the heal-on-activation prompt
Process Inbox and Health Check are driven by AI prompts that live inside each bank under `06_TEMPLATES/` (`compile.md` and `lint.md` respectively). The plugin ships these template files as built-in defaults, and `+ New memory bank…` writes them automatically into every newly created bank.
If you activate an older bank that is missing one of these template files – for example a bank you created before template bundling shipped, or one where you deleted a template by accident – the plugin shows a one-time *“Missing memory bank templates”* dialog offering to restore the missing files from the built-in defaults. Click **Yes** and the bank is fixed in place; click **No** and the plugin leaves the bank alone (you can switch away and back to see the prompt again). Existing template files are never overwritten – only missing ones are written – so your per-bank edits are safe.
## Features
| Feature | Description |
| ----------------------------------------------------------------------- | -------------------------------------------------------------------- |
| [**Quick Add**](/trados/ai-assistant/super-memory/quick-add/) | Capture terms and corrections while translating (Ctrl+Alt+M) |
| [**Process Inbox**](/trados/ai-assistant/super-memory/process-inbox/) | Organise raw material into structured KB articles |
| [**Health Check**](/trados/ai-assistant/super-memory/health-check/) | Scan and repair the knowledge base |
| [**Distill**](/trados/ai-assistant/super-memory/distill/) | Extract knowledge from translation files (TMX, DOCX, PDF, termbases) |
| [**Active Prompt**](/trados/ai-assistant/super-memory/active-prompt/) | Per-project prompt that Quick Add appends terminology to |
| [**AI Integration**](/trados/ai-assistant/super-memory/ai-integration/) | How the memory bank enhances translations and chat |
| [**Obsidian Setup**](/trados/ai-assistant/super-memory/obsidian-setup/) | Installing Obsidian and the Web Clipper |
## Related
* [**Context Awareness**](/trados/ai-assistant/context-awareness/) – the full menu of context sources the assistant uses, with memory banks as one section among several.
* [**AI Integration**](/trados/ai-assistant/super-memory/ai-integration/) – the loading algorithm, token budget, and article prioritisation when a memory bank is consulted by the AI.
* [**AI Settings**](/trados/settings/ai-settings/) – toggles for enabling or disabling memory bank context.
## Learn more
The memory bank design is inspired by Andrej Karpathy’s [LLM Knowledge Base](https://venturebeat.com/data/karpathy-shares-llm-knowledge-base-architecture-that-bypasses-rag-with-an) architecture. Templates for the seven-folder skeleton are available on [GitHub](https://github.com/Supervertaler/Supervertaler-SuperMemory) (the repository still uses the project’s original name).
# Active Prompt
> Per-project prompt that Quick Add appends terminology to
Each Trados project can have an **active prompt** — the prompt that Quick Add appends terminology to. This is also the prompt that is auto-selected in the [Batch Translate](/trados/batch-translate/) dropdown when you open the project.
## Setting the active prompt
1. Open **Settings → Prompts**
2. Right-click any prompt in the tree
3. Choose **Set as active prompt for this project**
The active prompt is shown with a pin icon and bold blue text in the Prompt Manager, and a checkmark appears next to its name in the Batch Translate dropdown. The Batch Translate dropdown updates **live** – you do not have to close the Settings dialog for the change to take effect. Cancelling the dialog reverts the change; clicking OK persists it.
To clear the active prompt, right-click it again and choose the same menu item (it toggles).
Note
The active prompt works for any prompt regardless of folder or category. Even if a prompt’s `Category` is not `Translate` (for example, a prompt at the root of the tree with no category set), it will still appear and be pre-selected in the Batch Translate dropdown once you mark it as active.
Note
The active prompt is saved [per project](/trados/settings/project-settings/). Different Trados projects can have different active prompts.
## See Also
* [Quick Add](/trados/ai-assistant/super-memory/quick-add/)
* [Batch Translate](/trados/batch-translate/)
* [Prompts](/trados/settings/prompts/)
* [Per-Project Settings](/trados/settings/project-settings/)
# AI Integration
> How SuperMemory is loaded into the AI context – the algorithm, ranking, and token budget
This page is the technical deep dive into **how** SuperMemory – Supervertaler’s self-organising translation knowledge base system – loads the active memory bank into the AI context. For the broader picture of all context sources, start with [Context Awareness](/trados/ai-assistant/context-awareness/). For what SuperMemory is and how to create and switch memory banks, start with [SuperMemory](/trados/ai-assistant/super-memory/).
When SuperMemory context is enabled in [AI Settings](/trados/settings/ai-settings/), every AI call – chat messages, batch translations, single-segment translations, AutoPrompt runs – triggers a fresh load of the active memory bank before the prompt is sent. The load is deterministic, fast, and scoped to the current project and document.
## What the AI loads
Before every AI call, Supervertaler reads the active memory bank and loads the most relevant articles from it:
1. **Client profile.** The assistant matches your Trados project name against client profile filenames in `01_CLIENTS/`. If your project is called “Acme Legal Contract 2026”, it finds the Acme Corporation profile and loads the client’s language preferences, terminology decisions, style rules, and project history. The match is a case-insensitive substring search against the filename and the top-level heading of each article.
2. **Domain article.** The assistant analyses your document to detect the domain (legal, medical, technical, marketing, financial, scientific) and loads the matching article from `03_DOMAINS/` with conventions, common pitfalls, and reference material for that field.
3. **Style guide.** The assistant loads the most relevant style guide from `04_STYLE/`, preferring client-specific guides (e.g. `acme-style.md`) over general ones (e.g. `general-en-gb.md`).
4. **Terminology articles.** The assistant loads term articles from `02_TERMINOLOGY/` that match your client, domain, or language pair. These include not just the approved translations, but also rejected alternatives and the reasoning behind each decision – the kind of context a flat termbase entry does not carry.
Only articles from the **active** memory bank are loaded. If you keep separate banks per client or domain, switch to the relevant one from the Memory Bank dropdown in the toolbar before translating. See [SuperMemory → Creating and switching banks](/trados/ai-assistant/super-memory/#creating-and-switching-banks) for the switching workflow.
Workflow folders – `00_INBOX`, `05_INDICES`, and `06_TEMPLATES` – are **not** loaded into the AI context. `00_INBOX` is a processing queue, `05_INDICES` holds auto-generated maps, and `06_TEMPLATES` holds templates for new articles.
## Token budget and prioritisation
To avoid overloading the AI’s context window, memory bank context is allocated a token budget of approximately **4000 tokens** per AI call. This is a soft ceiling – smaller banks will simply fit; larger ones are trimmed.
When the active bank contains more relevant content than fits in the budget, articles are prioritised in this order:
1. **Client profile** – highest priority, loaded first. The client profile is often the single most valuable article in the bank because it sets the stage for everything else.
2. **Domain knowledge** – loaded second, with the strongest match for the detected document type.
3. **Style guide** – loaded third, preferring client-specific over general.
4. **Terminology articles** – loaded last, filling whatever budget remains. Articles matching the client take priority over generic ones.
If even the client profile exceeds the budget, Supervertaler logs a warning to the chat history and loads a truncated version rather than silently dropping it.
## How memory banks compare with other context sources
A memory bank does not replace your termbases, translation memories, or document context – it **complements** them, adding a layer of reasoning that flat data sources cannot provide.
| Context source | What it provides | What the memory bank adds |
| ----------------------------------------- | ----------------------------------------- | ----------------------------------------------------------------------------------- |
| **Termbases** (Supervertaler + MultiTerm) | Flat term pairs: term A = term B | The *why*: reasoning, rejected alternatives, client-specific overrides |
| **Translation memories** | Previous translations for style anchoring | Domain conventions and style rules that transcend any single segment |
| **Document content** | Document type detection | Domain-specific pitfalls and formatting conventions the AI would not otherwise know |
| **AutoPrompt** | AI-generated translation instructions | Client and domain context for more accurate prompt generation |
All four work together. Termbases give the AI the terms; the memory bank tells it *why* those terms were chosen and what to watch out for. A TM gives it previous translations to anchor against; the memory bank tells it which previous translations are from a client with strict style rules and which are from one-off work that can be safely overridden.
For a discussion of when stacking all four sources may or may not be optimal, see the **Composing the context** section of [Context Awareness](/trados/ai-assistant/context-awareness/#composing-the-context).
## Memory-aware chat
Once memory-bank context is enabled (see below), the chat panel is memory-aware. When you ask the assistant a question about the current segment, it has access to the active memory bank alongside the document context, terminology, and TM matches – so you can ask things like:
* “What register should I use for this client?”
* “Does this client prefer *whilst* or *while*?”
* “Has this term come up before in this client’s projects?”
* “What’s the usual translation for *furtherance* in this domain, and why?”
…and the answer comes from your actual KB articles, not from generic training data. If the memory bank does not contain the relevant article, the assistant falls back to its general knowledge and says so.
## Enabling and disabling
Memory bank context can be toggled on or off in [AI Settings](/trados/settings/ai-settings/):
* **Include memory bank in AI context** – enables KB context for translations and chat.
* **Use memory bank when generating prompts (AutoPrompt)** – enables KB context when AutoPrompt drafts a new translation prompt.
Both are **off by default** – turn on *Include memory bank in AI context* to activate the integration described on this page. Disabling them again does not delete your memory banks – the content stays on disk and can be re-enabled at any time.
## See Also
* [Context Awareness](/trados/ai-assistant/context-awareness/) – The full menu of context sources, including memory banks as one section among several
* [SuperMemory](/trados/ai-assistant/super-memory/) – What SuperMemory is, what memory banks are, and how to create one
* [AI Settings](/trados/settings/ai-settings/) – Toggles for memory bank context
* [Supervertaler](/trados/ai-assistant/) – Overview of the chat panel
* [Batch Translate](/trados/batch-translate/) – Batch translation with full context
# Distill
> Extract knowledge from translation files using AI
**Distill** extracts knowledge from professional translation files and creates structured knowledge base articles in the active memory bank’s inbox. Instead of manually reading through a 50,000-segment translation memory or a 30-page client style guide, the AI analyses the content and distils it into actionable articles: terminology decisions, style conventions, client preferences, and domain knowledge.
## Supported formats
| Format | Extension | What the AI extracts |
| ---------------------- | ----------------------- | ------------------------------------------------------------------------ |
| **Translation Memory** | `.tmx` | Terminology patterns, consistent style choices, domain-specific phrasing |
| **MultiTerm termbase** | `.sdltb`, `.xml` | Term pairs with definitions, domains, usage notes |
| **Word document** | `.docx` | Style rules, client preferences, formatting conventions, terminology |
| **PDF** | `.pdf` | Style guides, reference material, termbases, specifications |
| **Excel / CSV** | `.xlsx`, `.csv`, `.tsv` | Termbases, terminology lists, term pairs |
| **TBX termbase** | `.tbx` | Term entries with metadata |
| **Plain text** | `.txt` | Notes, guidelines, reference material |
## How to use
### From the SuperMemory toolbar
1. Click the **Distill** button (⚗) on the SuperMemory toolbar in the Supervertaler Assistant panel
2. A choice dialog appears with two options:
* **Distill inbox** – automatically distils all non-Markdown files (TMX, DOCX, PDF, XLSX, etc.) currently sitting in the active memory bank’s `00_INBOX` folder. The button shows how many files are available and lists their names. Disabled when the inbox has no distillable files.
* **Select files…** – opens a file picker to choose files from anywhere on disk.
3. The AI analyses the content and creates draft articles in the active memory bank’s `00_INBOX` folder
4. Review the draft articles in Obsidian, then click **[Process Inbox](/trados/ai-assistant/super-memory/process-inbox/)** to compile them into the knowledge base
Distill always writes into the **active** memory bank – the one currently selected in the toolbar dropdown. To distil into a different bank, switch the dropdown first.
Note
**Ignored sidecar files.** Distill automatically skips Obsidian plugin sidecar files (currently `.edtz`) sitting in the inbox. These are editor metadata that accompany Markdown notes, not knowledge content, so they are neither sent to the AI nor counted in the “Distill inbox” file count.
### From the termbase list (shortcut)
You can distil a termbase directly from the [termbase settings](/trados/termbase-management/) without exporting it first:
1. Open **Settings → TermLens** to see your termbase list
2. Right-click any Supervertaler or MultiTerm termbase
3. Select **⚗ Distill into memory bank** from the context menu
The plugin reads all terms from the termbase, formats them as a structured table, and sends them straight to the Distill pipeline. Draft articles appear in the active memory bank’s `00_INBOX` folder – review them in Obsidian, then run **[Process Inbox](/trados/ai-assistant/super-memory/process-inbox/)** as usual.
Note
This shortcut is especially useful for MultiTerm termbases attached to your Trados project. Instead of exporting to a file first, you can distil them in one click.
## What the AI produces
Depending on the source material, Distill creates one or more Markdown articles containing:
* **Terminology decisions** — terms the translator consistently chose, with reasoning inferred from context and usage patterns
* **Style profile** — register, voice, formatting conventions, and writing patterns observed across the translations
* **Client preferences** — conventions specific to the client or project (e.g. “always use ‘Schedule’ instead of ‘Appendix’ in procurement documents”)
* **Domain knowledge** — subject-matter conventions, technical vocabulary, and common pitfalls identified from the source material
### Example: Distilling a TMX
A translation memory with 10,000 Dutch-English legal segments might produce:
* A **terminology article** listing the key legal terms with the translations used and why (e.g. “overeenkomst → agreement (not contract), because the client uses ‘contract’ only for formal notarial documents”)
* A **style article** noting the register (formal, third-person, passive voice) and formatting conventions (numbered clauses, capitalised defined terms)
* A **domain article** capturing Dutch legal system conventions relevant to translation (e.g. “Dutch notarial acts use specific formulaic language that should be preserved, not naturalised”)
### Example: Distilling a client style guide
A 20-page Word document from a client might produce:
* A **client profile** with their language preferences, terminology decisions, and contact details
* A **style article** with their formatting rules, preferred register, and localisation conventions
* A **terminology article** with their approved terms and rejected alternatives
## Tips
* **Start with your most important client.** Distill their largest TM first — you’ll immediately see the value as the AI surfaces terminology patterns you may not have been consciously aware of.
* **Combine sources.** Select a client’s TM, their style guide PDF, and their termbase Excel file together — the AI cross-references them to produce richer articles.
* **Review before processing.** Distill outputs draft articles to the inbox, not directly to the knowledge base. Always review them in Obsidian before running Process Inbox.
* **Large files are truncated.** Very large TMX files (100K+ segments) are automatically truncated to fit the AI’s context window. For best results with huge TMs, export a representative subset first.
## See Also
* [Process Inbox](/trados/ai-assistant/super-memory/process-inbox/)
* [Quick Add](/trados/ai-assistant/super-memory/quick-add/)
* [AI Settings](/trados/settings/ai-settings/)
# Health Check
> Scan and repair a memory bank
The **Health Check** button scans the active memory bank for problems and fixes what it can — like a librarian who keeps the shelves organised.
## What it checks
* **Conflicting terminology** — the same source term translated differently in different articles
* **Broken links** — `[[backlinks]]` that point to articles that don’t exist
* **Orphaned articles** — articles that nothing links to (disconnected from the graph)
* **Stale content** — articles not updated in more than four weeks that have newer siblings on related topics are flagged, and when a newer article contradicts an older one the older article is flagged as potentially superseded
* **Duplicate content** — overlapping articles that should be merged
* **Missing cross-references** — terms or domains that should be linked but aren’t
* **Low confidence** — articles carrying `confidence: low` in their frontmatter are reported as needing human verification (see [Process Inbox](/trados/ai-assistant/super-memory/process-inbox/#enriched-frontmatter) for the confidence scoring)
* **Missing frontmatter fields** — articles created before the enriched-frontmatter schema shipped have missing `tldr`, `confidence`, `sources`, etc. filled in automatically by inferring values from the article content and folder location
* **Index accuracy** — the `05_INDICES/` master files (master-terminology, client-summary, domain-summary) are refreshed so they reflect the current contents of the bank
## How it works
The AI produces a detailed report in the chat and automatically applies safe fixes (creating stub articles, updating indexes, fixing broken references). Changes that need human judgement are flagged for review.
Health Check runs against the **active** memory bank only. If you keep several banks side by side, run it once per bank.
## Completion summary
When Health Check finishes, a summary bubble always appears at the bottom of the chat so you know the operation is done:
* **“Health Check: applied N changes”** – the AI auto-fixed N files. The summary lists each updated or newly created file. Scroll up to read the full report, and open Obsidian to review the changes.
* **“Health Check complete – no changes applied”** – the AI scanned the bank and wrote its report above but did not auto-fix any files. Any issues it flagged are for your review.
Caution
**Important:** The AI can and will create, update, and reorganise files in the active memory bank when you run Health Check. To stay safe:
* **Keep originals elsewhere.** Don’t put your only copy of a termbase or style guide in a memory bank — keep the original in its own folder.
* **Back up your memory banks regularly.** Copy the entire `memory-banks` folder to a backup location before running Health Check for the first time, and periodically after that. If something goes wrong, you can simply replace the bank folder with your backup.
* **Review changes in Obsidian.** After running Health Check, open Obsidian and browse the recently modified files to verify the AI made sensible changes. Obsidian’s search and graph view make this easy.
## See Also
* [Process Inbox](/trados/ai-assistant/super-memory/process-inbox/)
* [Distill](/trados/ai-assistant/super-memory/distill/)
* [SuperMemory](/trados/ai-assistant/super-memory/)
# Obsidian Setup
> Setting up Obsidian for your memory banks
Memory banks store all knowledge as Markdown files, which you can browse and edit with any text editor. For the best experience, we recommend [Obsidian](https://obsidian.md/) — a free knowledge-base app that visualises the links between your articles as an interactive graph.
## Installing Obsidian
1. Download Obsidian from (available for Windows, Mac, and Linux)
2. Install and open it — choose **Open folder as vault** and select one of your memory bank folders, for example:
```plaintext
C:\Users\{you}\Supervertaler\memory-banks\default\
```
If you keep several banks side by side, you can open each one as its own Obsidian vault and switch between them from Obsidian’s vault switcher.
3. The free version of Obsidian includes everything you need — no subscription required. (The paid Sync and Publish add-ons are not needed.)
## Web Clipper
The [Obsidian Web Clipper](https://obsidian.md/clipper) is a free browser extension that lets you clip web pages directly into a memory bank’s inbox. Install it for Chrome, Firefox, Safari, or Edge.
### Setting up the Web Clipper
1. Install the extension from [obsidian.md/clipper](https://obsidian.md/clipper)
2. Make sure Obsidian is running with the memory bank you want to clip into open as a vault
3. Click the Web Clipper icon in your browser toolbar, then the gear icon (settings)
4. Create a new template (e.g. “memory-bank”) and set:
* **Note location:** `00_INBOX`
* **Vault:** select the memory bank vault you want clippings to land in
5. Optionally add properties: `source_url` = `{{url}}`, `clipped` = `{{date}}`
Now when you find a useful reference — a client style guide, a terminology resource, a domain article — click the clipper, hit save, and it drops straight into that bank’s inbox. Next time you click **[Process Inbox](/trados/ai-assistant/super-memory/process-inbox/)** with that bank active in the toolbar, the AI organises it into structured articles.
Note
If you keep several memory banks, create one Web Clipper template per bank so you can choose the destination from the clipper dropdown at clip time.
## Recommended plugins
These free Obsidian community plugins enhance the memory bank experience:
* **Dataview** — query your vault like a database (e.g. list all terminology articles for a specific client)
* **Calendar** — visualise when articles were created or modified
* **Graph Analysis** — enhanced graph view with clustering and statistics
To install plugins: **Settings → Community plugins → Browse**.
## See Also
* [SuperMemory](/trados/ai-assistant/super-memory/)
* [Process Inbox](/trados/ai-assistant/super-memory/process-inbox/)
* [User Data Folder](/trados/data-folder/)
# Process Inbox
> Organise raw Markdown notes into structured knowledge base articles
The **Process Inbox** button in the Supervertaler Assistant toolbar reads raw Markdown notes from the active memory bank’s `00_INBOX/` folder and uses AI to organise them into structured knowledge base articles – client profiles, terminology entries, domain knowledge, and style guides.
## How to use
1. Drop **Markdown notes** into the active memory bank’s `00_INBOX/` folder: client briefs, termbases, feedback notes, style guides, reference articles, or anything else you have written down as plain `.md` text.
2. Open the **Supervertaler Assistant** panel and look for the SuperMemory toolbar below the context bar.
3. The toolbar shows how many files are waiting in the active bank (e.g. “3 files in inbox”).
4. Click **Process Inbox**.
5. The AI reads each Markdown file, creates structured articles in the appropriate folders, and archives the originals to `00_INBOX/_archive/`.
A summary of all created files appears in the chat when processing is complete.
Note
Process Inbox always runs against the **active** memory bank – the one currently selected in the toolbar dropdown. If you want to process material into a different bank, switch the dropdown first.
Note
The inbox count updates automatically when files are added externally (e.g. via the [Obsidian Web Clipper](/trados/ai-assistant/super-memory/obsidian-setup/#web-clipper)). You can also click the refresh button (↻) on the toolbar to update the count manually.
## Markdown only – use Distill for everything else
Process Inbox is a Markdown compiler. It reads `.md` files and writes structured `.md` articles. It does **not** read translation memories, termbases, Word documents, PDFs, or spreadsheets. For any file that is not plain Markdown, use [**Distill**](/trados/ai-assistant/super-memory/distill/) instead – it knows how to extract knowledge from binary formats and writes its output as Markdown into the same `00_INBOX/` folder, ready for Process Inbox to compile.
If you drop a non-Markdown file (e.g. a `.tmx` or `.pdf`) into the inbox folder by mistake, the inbox count still includes it – so the Process Inbox button lights up – but clicking the button shows a message pointing you at Distill instead. Process Inbox will not silently ignore your file, and it will not crash trying to compile a binary blob as Markdown.
Obsidian plugin sidecar files (currently `.edtz`) are a special case: they are editor metadata, not knowledge content, so they are skipped silently by both Process Inbox and Distill. They do not count towards the inbox total and they do not trigger the “non-Markdown files” warning.
| You have… | Use this |
| ------------------------------------------------------------------------------------ | --------------------------------------------------------------------------- |
| A Markdown brief, termbase, feedback note, or anything plain-text you wrote yourself | **Process Inbox** |
| A `.tmx` translation memory | **Distill** |
| A `.docx` style guide or client briefing | **Distill** |
| A `.pdf` reference document | **Distill** |
| A `.xlsx` / `.csv` termbase | **Distill** |
| A `.sdltb` MultiTerm termbase | **Distill** (right-click in TermLens settings → *Distill into memory bank*) |
| A `.tbx` termbase | **Distill** |
The two features compose: run Distill on your binary files first, review the draft `.md` articles it produces in the inbox, then run Process Inbox to compile them into the structured knowledge base.
## What gets created
Depending on the content of your raw material, Process Inbox creates articles in one or more of these folders:
| Folder | Article type | Example |
| ---------------- | ---------------- | -------------------------------------------------------------- |
| `01_CLIENTS` | Client profiles | Language preferences, terminology decisions, contact details |
| `02_TERMINOLOGY` | Term articles | Approved translations with rejected alternatives and reasoning |
| `03_DOMAINS` | Domain knowledge | Conventions, common pitfalls, reference material |
| `04_STYLE` | Style guides | Formatting rules, register, localisation conventions |
Each article includes rich YAML frontmatter with metadata and backlinks to related articles, building up an interconnected knowledge graph. The frontmatter fields are:
| Field | Purpose |
| --------------------- | ----------------------------------------------------------------------------------------------------------------------------------------------------------------------------------------------------------------- |
| `type` | Article type – `terminology`, `client`, `domain`, `style`, or `template` |
| `domain` | Subject area (e.g. Legal, Medical, Marketing) |
| `client` | Client name when applicable |
| `language_pair` | Source → target language codes |
| `confidence` | `high` / `medium` / `low` – set by the AI based on the authority of the source material. Low-confidence articles are flagged for human review by [Health Check](/trados/ai-assistant/super-memory/health-check/). |
| `sources` | Original filenames the article was derived from, for traceability. Terminology articles always quote exact source and target terms verbatim. |
| `tldr` | One-sentence summary for fast scanning in Obsidian previews and the master indices below |
| `created` / `updated` | Timestamps maintained automatically |
## Automatic indexes
After every successful Process Inbox run, three master index files are refreshed in the bank’s `05_INDICES/` folder:
* `master-terminology.md` – a flat table of all source → target term decisions across the bank, with domain, client, confidence, and status columns
* `client-summary.md` – one section per client with their `tldr` or first paragraph
* `domain-summary.md` – one section per domain with their `tldr` or first paragraph
These indexes are built by scanning frontmatter directly – no extra LLM call – and complete in under a second. Open them in Obsidian to browse the whole bank at a glance. [Health Check](/trados/ai-assistant/super-memory/health-check/) refreshes them as well.
## Templates and the heal-on-activation prompt
Process Inbox is driven by an AI prompt that lives inside the active memory bank at `06_TEMPLATES/compile.md`. Health Check uses a sister file at `06_TEMPLATES/lint.md`. Both files are bundled with the plugin and copied automatically into every newly created bank, so a fresh bank works out of the box.
If you switch to an older bank that does **not** have these template files (for example, a bank you created before the template-bundling feature shipped, or a bank where you accidentally deleted one of them), the plugin notices the gap and offers to restore the missing files from its built-in defaults. You will see a small dialog titled *“Missing memory bank templates”* listing the missing files with **Yes / No** buttons. Click **Yes** to restore them and Process Inbox / Health Check immediately become usable on that bank. Click **No** if you have a reason to want the templates absent (e.g. you are intentionally disabling those features for that bank), and the plugin will leave the bank as-is.
The restore is non-destructive: existing template files in the bank are never overwritten, only missing ones are added. Your edits to template files are per-bank and safe.
## See Also
* [Distill](/trados/ai-assistant/super-memory/distill/) – extract knowledge from translation files (TMX, DOCX, PDF, termbases)
* [Health Check](/trados/ai-assistant/super-memory/health-check/) – scan and repair the active memory bank
* [SuperMemory](/trados/ai-assistant/super-memory/) – overview of SuperMemory and memory banks
* [Obsidian Setup](/trados/ai-assistant/super-memory/obsidian-setup/) – installing Obsidian and the Web Clipper
# Quick Add (Ctrl+Alt+M)
> Capture terms, translations, and knowledge while translating
While translating in Trados, you can instantly capture a term, a translation pair, or a free-form note to the active memory bank – and optionally inject it into your active translation prompt so the next Ctrl+T picks it up immediately.
## How to use
1. In the Trados editor, select the source text you want to capture (optional – the full source segment is used if nothing is selected)
2. Press **Ctrl+Alt+M** or right-click and choose **Add to memory bank**
3. Fill in the dialogue:
* **Source term** – the source-language term (pre-filled from your selection). The label shows your project’s source language, e.g. “Source term (Dutch):”
* **Target term** – the target-language translation (pre-filled from target selection, if any). The label shows your project’s target language, e.g. “Target term (English):”
* **Notes** – optional context, alternatives, or client preferences
* **Save as raw note** – when ticked, the entry goes to `00_INBOX/` as a free-form note for the AI to compile via [Process Inbox](/trados/ai-assistant/super-memory/process-inbox/) rather than directly to `02_TERMINOLOGY/` as a structured article. Useful when the knowledge is ambiguous or context-dependent (e.g. “fiche can mean either sheet or plug depending on context”)
* **Also append to active translation prompt** – when ticked, a row is added to the TERMINOLOGY table in your [active prompt](/trados/ai-assistant/super-memory/active-prompt/) so the translation takes effect immediately (only available in structured article mode, not raw note mode)
4. Click **Add**
The entry lands in whichever memory bank is currently selected in the toolbar dropdown. To capture into a different bank, switch the dropdown first and then press Ctrl+Alt+M.
## Two save modes
### Structured article (default)
When “Save as raw note” is **unchecked**, Quick Add creates a finished Markdown article directly in the active memory bank’s `02_TERMINOLOGY/` folder with YAML frontmatter (source term, target term, domain, status, date). The article is immediately available to the AI on the next translation – no Process Inbox step needed.
The filename uses the format `source term → target term.md` (e.g. `fiche → plug.md`).
### Raw note
When “Save as raw note” is **checked**, Quick Add writes a free-form Markdown note to `00_INBOX/` instead. The note contains whatever you entered in the source, target, and notes fields, timestamped and labelled as a Quick Add capture. Run [Process Inbox](/trados/ai-assistant/super-memory/process-inbox/) to have the AI compile it into one or more structured articles.
This mode is useful when:
* The knowledge doesn’t fit a clean source → target pair (e.g. a term with multiple context-dependent translations)
* You want to capture a general observation or client preference rather than a specific term
* You’d rather let the AI figure out the right article structure
Tip
**Tip:** Quick Add is the fastest way to build up a memory bank while translating. Spotted an interesting term? Ctrl+Alt+M, type the translation, and carry on – the AI picks it up on the next turn. For ambiguous cases, tick “Save as raw note” and let Process Inbox sort it out later.
## See Also
* [Active Prompt](/trados/ai-assistant/super-memory/active-prompt/)
* [Process Inbox](/trados/ai-assistant/super-memory/process-inbox/)
* [SuperMemory](/trados/ai-assistant/super-memory/)
# Supervertaler Bridge
The **Supervertaler Bridge** is a pair of small localhost-only HTTP services – one in each product – that let Supervertaler for Trados and Supervertaler Workbench cooperate while you translate. Each bridge runs in the background, exposes a few endpoints on `127.0.0.1` only, and is gated behind a per-session bearer token.
The two directions are independent and either side can be used without the other:
* **Trados → Workbench (read context).** The Trados plugin exposes the active project’s segment, TM matches, termbase hits, and surrounding context so Workbench’s floating Sidekick Chat can answer questions about your real Trados work.
* **Workbench → Trados (route QuickLauncher).** Workbench exposes a single endpoint that lets the Trados plugin push a [QuickLauncher](/trados/quicklauncher/) prompt into Sidekick Chat – the response then appears in Sidekick instead of in the Trados Assistant.
The rest of this page covers the Trados-side bridge first (the read direction, which has been around longer), then the Workbench-side bridge (the QuickLauncher-routing direction).
## Trados-side bridge: read project context
### What it does
When Supervertaler Workbench’s Sidekick Chat is asked a question (with the **🔗 Trados** chip on), it asks the bridge for a snapshot of the current project state. The snapshot contains:
* The active source segment and your current target draft
* A few surrounding segments (default 5 before and 5 after)
* TM matches Trados has found for the active segment
* Termbase hits from your enabled termbases
* Project name, file name, source and target language
This is the same context the in-Trados Supervertaler Assistant chat already uses for its own answers — the bridge just exposes it to the Workbench client.
The bridge also accepts an “insert translation” command from the Workbench client, so a future build of Workbench Sidekick will be able to drop AI-suggested translations directly into your active Trados target cell.
### When it runs
The bridge is started automatically by the Supervertaler Assistant panel when **all** of these are true:
1. You have **Assistant access** — a paid subscription or an active trial. Users without Assistant access never start the bridge.
2. The hidden setting `AiSettings.SidekickBridgeEnabled` in `settings.json` is `true` (the default).
3. You have **opened the Supervertaler Assistant panel** at least once in this Trados session. The panel is lazy – Trados doesn’t initialise it until you activate it.
The bridge is stopped automatically when Trados Studio exits. If Trados crashes or is force-killed, the next start of Trados detects the stale handshake file and replaces it with a fresh one.
### Privacy and security
The bridge is designed to be safe for everyday use:
* **Loopback-only.** The HTTP listener binds exclusively to `127.0.0.1`. Other devices on your network — even on the same Wi-Fi — can never reach it. There is a defence-in-depth check that rejects any non-loopback `RemoteEndPoint` even if the binding ever drifts.
* **Per-session authentication token.** A fresh GUID is generated every time the bridge starts. Clients must present it as a `Bearer` token. Stale tokens from previous sessions are useless.
* **Random high port.** The bridge picks a random port in the 49152–65535 range to avoid collisions with other local services.
* **No external network access.** The bridge only listens; it never reaches out to any external service.
### How to disable
The bridge has no UI checkbox – it’s a hidden setting. To disable it entirely:
1. Close Trados Studio.
2. Open `~/Supervertaler/trados/settings/settings.json` in a text editor.
3. Find or add the field `"sidekickBridgeEnabled": false` inside the `aiSettings` object.
4. Save and restart Trados.
With this setting off, no bridge listener is started, no handshake file is written, and Workbench Sidekick will not detect a Trados plugin to talk to.
### Troubleshooting
The bridge writes a diagnostic log to two locations on every start:
* `~/Supervertaler/trados/runtime/bridge.log` — under your Supervertaler user-data folder
* `%TEMP%\Supervertaler-bridge.log` — guaranteed-writable fallback
The log is truncated on every plugin start, so it always reflects the current Trados session. The first lines record the resolved data-folder path so you can see exactly where the plugin is looking.
Useful entries to look for:
| Log line | Meaning |
| ---------------------------------------------------------- | ---------------------------------------------------------------------------------------------------------------------- |
| `Initialize: HasAssistantAccess=false` | Your licence isn’t picked up as paid or trial. The bridge is correctly skipped in this case. |
| `guard: AiSettings.SidekickBridgeEnabled=false` | You’ve explicitly disabled the bridge in settings.json. |
| `port NNNNN bind failed: HttpListenerException code=5` | Windows is refusing to let the plugin bind to a localhost port. Rare; usually means a strict group-policy environment. |
| `Start() complete. Bridge live on http://127.0.0.1:NNNNN/` | All good – the bridge is running and the handshake file should be at `~/Supervertaler/trados/runtime/bridge.json`. |
If `bridge.json` exists and contains `port`, `token`, `pid`, and `startedAt`, the bridge is healthy. Workbench Sidekick should detect it within \~3 seconds of opening the chat tab.
### Endpoint reference (advanced)
For developers who want to integrate other tools with the bridge, here’s the wire protocol. **The URL prefix is versioned** so future schema changes can ship without breaking older clients.
#### `GET /v1/active-context`
Returns a JSON snapshot of the current Trados project state. Authentication via `Authorization: Bearer ` from the handshake file.
```json
{
"available": true,
"project": {
"name": "BRANTS-CARG-001",
"fileName": "20260331 CARG-003-BE-EP Application as filed.docx",
"sourceLang": "nl-BE",
"targetLang": "en-US"
},
"activeSegment": { "source": "...", "target": "..." },
"surroundingSegments": [
{ "source": "...", "target": "..." }
],
"tmMatches": [
{ "score": 95, "source": "...", "target": "...", "tmName": "..." }
],
"termbaseHits": [
{ "source": "...", "target": "...", "termbaseName": "...",
"definition": "...", "domain": "...", "notes": "..." }
]
}
```
When no document is active, returns `{"available": false}` with HTTP 200.
#### `POST /v1/insert-translation`
Inserts text into the active Trados target segment via the same code path as the in-Chat Apply-To-Target button.
Request body:
```json
{ "text": "The translation to insert" }
```
Response on success:
```json
{ "ok": true }
```
Response on failure (e.g. no active segment):
```json
{ "ok": false, "error": "no active document" }
```
***
## Workbench-side bridge: route QuickLauncher to Sidekick
The Workbench-side bridge is the inverse of the one above: instead of exposing Trados context for Workbench to read, it lets the Trados plugin **push a QuickLauncher prompt into Workbench’s Sidekick Chat**. The response then renders in Sidekick instead of in the in-Trados Assistant.
This is the bridge that makes the **QuickLauncher prompts go to: Workbench Sidekick** option in [AI Settings](/trados/settings/ai-settings/#quicklauncher-prompts-go-to) actually do something.
### When it runs
The Workbench-side bridge is started automatically by Workbench when its **Sidekick** is initialised (i.e. as soon as Workbench is running with Sidekick available). It writes its own handshake file at `~/Supervertaler/workbench/runtime/sidekick-bridge.json` and is stopped when Workbench exits.
The Trados plugin discovers this handshake the same way Workbench discovers the Trados handshake: it reads the file, validates the PID is alive, and posts a Bearer-authenticated HTTP request.
### What happens on a QuickLauncher click
When you press Ctrl+Q in Trados, pick a prompt, and have **Workbench Sidekick** selected as the target:
1. The Trados plugin expands the prompt’s variables (selection, surrounding segments, TM matches, project text, etc.) exactly as it would for the in-Trados Assistant.
2. It calls Windows’ `AllowSetForegroundWindow` with the Workbench PID so Sidekick is allowed to come to the front, then POSTs the expanded prompt to the Workbench bridge.
3. Workbench’s Sidekick window pops forward, maximises to the screen it’s on, switches to the Chat tab, echoes the display version of the prompt as a “user” message, and sends the full expansion through Sidekick’s normal LLM pipeline.
4. The response renders in Sidekick. The window stays on top throughout (Sidekick uses a topmost-flip + AttachThreadInput trick to defeat the Windows foreground lock when the response arrives).
### Fallback when Workbench isn’t running
If Workbench isn’t running, the handshake file is missing, the PID is stale, or any HTTP error fires, Trados silently falls back to the in-Trados Assistant. Your prompt is never lost – it just lands where it always used to.
### Endpoint reference (advanced)
#### `POST /v1/run-prompt`
Runs a QuickLauncher prompt in Sidekick Chat. Authentication via `Authorization: Bearer ` from the Workbench-side handshake file.
Request body:
```json
{
"prompt": "",
"displayPrompt": "",
"promptName": "Explain selection (in general)"
}
```
`displayPrompt` is what the user sees as their own message in Sidekick. It’s typically a shortened form of `prompt` (e.g. `[source document — 173 segments]` instead of the full project text) so the chat doesn’t get spammed with the kilobytes of context the LLM needs.
Response on success:
```json
{ "ok": true }
```
Response on failure:
```json
{ "ok": false, "error": "" }
```
#### `GET /v1/ping`
Cheap health check. No authentication required because the response carries no privileged information.
```json
{ "ok": true }
```
### Troubleshooting
The Workbench-side bridge writes its own diagnostic log at `~/Supervertaler/workbench/runtime/sidekick-bridge.log` – truncated on every Workbench start. Each accepted prompt logs a line like:
```plaintext
[2026-05-02 22:29:44.634588] POST /v1/run-prompt accepted (name='Explain selection (in general)', prompt=86 chars, displayPrompt=86 chars)
```
If you’ve set the QuickLauncher target to Workbench Sidekick but nothing’s appearing in Sidekick:
1. Check that Workbench is actually running.
2. Check that `~/Supervertaler/workbench/runtime/sidekick-bridge.json` exists and contains a `port`, `token`, and a non-zero `pid`.
3. Trigger a QuickLauncher prompt, then check the bridge log for an `accepted` line. If the line is there, the prompt was delivered – the issue is on the Sidekick render side. If it isn’t, the Trados-side request never arrived (most likely cause: Workbench was started after Trados, so Trados is using a stale handshake; restart Trados).
***
## Related pages
* [QuickLauncher](/trados/quicklauncher/) – the action that drives the Workbench-side bridge
* [Supervertaler](/trados/ai-assistant/) – the in-Trados chat that uses the same context fields the Trados-side bridge exposes
* [Chat – Trados-aware mode (Workbench)](https://docs.supervertaler.com/workbench/ai-translation/chat/) – the primary consumer of the Trados-side bridge
* [User Data Folder](/trados/data-folder/) – where both handshake files live
# AI Cost Guide
This page explains how AI costs work in Supervertaler for Trados and how to keep them under control. It deliberately avoids quoting exact per-model prices – those change often, and Supervertaler already shows you the **real, current cost** of every operation in the **Reports** tab. For exact figures, see [Estimates vs actual cost](#estimates-vs-actual-cost) below.
Note
AI provider costs are **separate** from your Supervertaler licence. You pay the AI provider directly for the tokens your requests consume. Supervertaler does not add any markup.
### Estimates vs actual cost
The **Reports** tab shows **real billed token counts and cost** as reported by your provider’s API – with cache-hit tokens broken out (e.g. `830,000 in (720,000 cached) / 32,000 out · $1.36`). When the cost has no `~` prefix, that’s the actual amount your provider will charge. **This is the single best place to see what you’re actually spending** – it’s live, per-operation, and provider-reported.
The number is cache-aware:
* **Anthropic (Claude) native + OpenRouter → Claude**: real usage from `usage.input_tokens` + `cache_creation_input_tokens` + `cache_read_input_tokens`. Cache reads are billed at 0.1× the input rate, cache writes at 1.25×.
* **OpenAI**: real `prompt_tokens` and `completion_tokens` plus `prompt_tokens_details.cached_tokens` for the auto-cache discount (50% off cached input).
* **DeepSeek**: real `prompt_tokens` / `completion_tokens` with auto-cache (90% off cached input).
* **Gemini 2.5+**: real `usageMetadata` with implicit cache (75% off cached input).
For these providers the in-app number is the authoritative billable figure (modulo any account-level credits or monthly minimums you may have).
The chars/4 estimate is still used as a fallback when the provider didn’t return usage info – this affects Ollama (local, free anyway), some provider edge cases, and any response shape we couldn’t parse. In those cases the cost still appears with a `~` prefix to flag it as an estimate.
If you want to cross-check against your provider’s own dashboard:
| Provider | Where to look |
| ---------------------- | --------------------------------------------------------------------------------------- |
| **Anthropic (Claude)** | [platform.claude.com – Cost](https://platform.claude.com/workspaces/default/cost) |
| **OpenAI (GPT)** | [platform.openai.com – Usage](https://platform.openai.com/settings/organization/usage) |
| **Google (Gemini)** | [console.cloud.google.com – Billing reports](https://console.cloud.google.com/billing/) |
| **xAI (Grok)** | [console.x.ai – Usage](https://console.x.ai/team/default/usage) |
| **Mistral AI** | [console.mistral.ai – Usage](https://console.mistral.ai/usage) |
| **OpenRouter** | [openrouter.ai – Activity](https://openrouter.ai/activity) |
| **DeepSeek** | [platform.deepseek.com – Usage](https://platform.deepseek.com/usage) |
| **Ollama** | Free – local execution, no provider console. |
The in-app number and the provider dashboard should agree to within rounding for any given run. If you see a meaningful gap, the most likely causes (in order) are: a provider-side credit or volume discount the in-app calculator can’t see; the in-app pricing table being a little behind a recent rate change; or, for fallback (estimate) cases, the chars/4 heuristic over- or under-counting tokens for that particular language and content type.
### How costs are calculated
AI providers charge per **token** – a unit of text roughly equal to ¾ of a word. Costs depend on:
* **Input tokens** – the text you send (source segment, system prompt, terminology context)
* **Output tokens** – the text the model returns (translated segment, proofread text, generated prompt)
Because Supervertaler translates **segment by segment**, the system prompt and terminology context are included with every segment. For a typical 5,000-word document (\~250 segments), the token usage works out roughly like this:
| Task | Input tokens | Output tokens |
| ------------------- | ------------ | ------------- |
| **Batch Translate** | \~125,000 | \~8,000 |
| **AI Proofreader** | \~140,000 | \~8,000 |
| **AutoPrompt** | \~10,000 | \~2,000 |
These are estimates for a representative document – actual usage varies with segment length, terminology context size, and prompt complexity. Token counts like these are fairly stable; what changes is the **price per token**, which is why this guide points you to live figures rather than quoting them.
### How much will it cost?
There’s a wide spread between models. As a rough mental model:
* **Local models (Ollama)** are **free** – they run on your own computer, with no API charges at all. The trade-off is that quality depends on your hardware, and they’re generally less capable than cloud-hosted models. If you have a computer with 8+ GB of RAM, TranslateGemma 12B delivers surprisingly good results for free.
* **Budget cloud models** – the “Mini”, “Flash-Lite” and “Small” tier from each provider (e.g. GPT-5.4 Mini, Gemini 3.1 Flash-Lite, Mistral Small, Claude Haiku 4.5) – typically cost a small fraction of a cent per segment. They’re excellent for routine, high-volume translation.
* **Flagship models** – Claude Opus 4.8, GPT-5.5, Gemini 3.1 Pro and the like – can run roughly 10–50× the price of the budget tier. Reserve them for specialised content where the quality difference earns its keep.
To see what a model **actually** costs for your work, run one operation and check the **Reports** tab – it shows the real billed cost. For OpenRouter, expect the underlying provider’s rate plus a small platform fee.
### Our recommendation
Tip
**If you could only pick one model for everything – translation, proofreading, and chat – we would recommend Claude Sonnet 4.6.** It follows translation instructions precisely, handles terminology constraints well, is fast enough for batch operations, and delivers consistently high quality across legal, technical, and general content – at a cost that works out to a small fraction of a cent per segment.
For budget-conscious batch work, **GPT-5.4 Mini** or **Gemini 3.1 Flash-Lite** offer excellent quality at a fraction of the price. For the absolute highest quality on specialised content, **Claude Opus 4.8** or **GPT-5.5** are worth the premium.
### Token pricing
Supervertaler’s in-app cost figures come from a built-in per-token pricing table. Because provider prices change regularly, that table is occasionally a little behind a recent rate change – the **Reports** tab’s provider-reported figures are always the authoritative ones. For the definitive current rates, check the provider’s own pricing page:
[OpenAI](https://openai.com/api/pricing/) · [Anthropic](https://www.anthropic.com/pricing#anthropic-api) · [Google Gemini](https://ai.google.dev/gemini-api/docs/pricing) · [xAI](https://docs.x.ai/developers/models) · [Mistral](https://mistral.ai/technology/) · [DeepSeek](https://api-docs.deepseek.com/quick_start/pricing/) · [OpenRouter](https://openrouter.ai/models)
### Tips for managing costs
* **Start with a budget model** – GPT-5.4 Mini, Gemini 3.1 Flash-Lite, or Mistral Small are excellent for routine translation at a fraction of the cost of a flagship.
* **Use premium models selectively** – reserve GPT-5.5, Claude Opus 4.8, or Gemini 2.5 Pro for specialised content (legal, medical, patents) where the quality difference justifies the cost.
* **Try Ollama for zero cost** – if you have a computer with 8+ GB of RAM, TranslateGemma 12B delivers surprisingly good results for free.
* **Check your usage** – the **Reports** tab lists every AI call live with its token count and cost; the **[Token Usage & Costs](/trados/usage-costs/)** report totals your spend over time (by project, client, model or month) and exports it to CSV/Excel; and your provider’s own console (see the [Estimates vs actual cost](#estimates-vs-actual-cost) table above) shows the authoritative billable figure.
* **Set a monthly budget** – give Supervertaler a soft monthly limit (Settings → AI Settings) and it will warn you before a batch once you’ve reached it. See [Token Usage & Costs](/trados/usage-costs/#monthly-budget).
### Built-in cost protection
Supervertaler includes several safeguards to help you avoid unexpected costs:
#### QuickLauncher prompts are standalone
When you run a prompt from the QuickLauncher menu (Ctrl+Q), only the prompt itself is sent to the AI – **not the chat history**. This means a simple terminology query costs only what it needs to, even if you have a long conversation in the chat window.
#### Chat token budget
Regular chat messages include recent conversation history so the AI can follow your discussion. However, Supervertaler automatically trims older messages when the history grows too large (\~50,000 tokens). This prevents costs from spiralling when previous messages contained large context blocks (e.g. full document content).
#### Cost warning
If a request is estimated to cost more than $0.50 in input tokens, a confirmation dialogue appears showing the estimated token count and cost. You can cancel before the expensive request is sent.
![]()
Note
**Keep an eye on the cost indicators.** Every AI response in the chat shows the estimated token count and cost. You can also review all prompts and their costs in the **Reports** tab.
#### Choosing the right model
For everyday work – chat queries, terminology questions, QuickLauncher prompts – use **GPT-5.4 Mini** or another budget model. Reserve premium models like **GPT-5.5** or **Claude Opus 4.8** for AutoPrompt and complex tasks where the quality difference justifies the cost.
### See also
* [Token Usage & Costs](/trados/usage-costs/) – the persistent usage log, the Usage & Costs report, CSV/Excel export, and the monthly budget
* [AI Settings](/trados/settings/ai-settings/) – configure your API keys and choose a model
* [Batch Translate](/trados/batch-translate/) – translate segments in bulk
* [AI Proofreader](/trados/ai-proofreader/) – proofread translated segments
* [AutoPrompt](/trados/generate-prompt/) – generate translation prompts
* [Licensing & Pricing](/trados/licensing/) – Supervertaler subscription plans
# Ai Proofreader
The AI Proofreader checks your translated segments for errors using AI. It identifies issues such as mistranslations, omissions, grammar problems, and inconsistencies, and presents the results as clickable issue cards in the **Reports** tab.
## Starting a Proofreading Run
1. Open the **Supervertaler Assistant** panel (View > Supervertaler Assistant)
2. Switch to the **Batch Operations** tab
3. Select **Proofread** (instead of Translate)
4. Choose a **scope** from the dropdown
5. Optionally select a proofreading **prompt** from the prompt selector
6. Click **Proofread**
## Scope
The scope dropdown controls which segments are checked:
| Scope | Description |
| ------------------------------------ | ------------------------------------------------------------------- |
| **Translated only** | Checks only segments with Translated status |
| **Translated + approved/signed-off** | Checks segments with Translated, Approved, or Signed-off status |
| **All segments** | Checks every segment that has target text |
| **Filtered segments** | Checks only segments visible after applying a Trados display filter |
| **Filtered (translated only)** | Checks translated segments within the current filter |
## Prompt Selection
When in Proofread mode, the prompt dropdown shows only prompts with the **Proofread** category. This keeps the list focused – translation prompts are hidden.
If no prompt is selected, the AI uses a default proofreading instruction that checks for accuracy, completeness, grammar, and consistency.
Note
You can create custom proofreading prompts in the [Prompt Manager](/trados/settings/prompts/). Set the category to **Proofread** so they appear in the dropdown when proofreading.
### Default Proofreading Prompt
The shipped **Default Proofreading Prompt** is deliberately slim. The hardcoded base of every Batch Proofread already includes the persona, the five quality categories (accuracy / completeness / terminology / grammar / number formatting), the output format, the “no full corrected translations” rule, and language-specific checks for Dutch, German, and French – so the prompt itself only needs to add what’s missing from the base.
What the default prompt *does* add:
* **Default to OK.** Raise an ISSUE only when a specific, demonstrable problem can be pointed to in the translation – never speculative or hypothetical concerns.
* **Citation discipline.** When flagging a terminology consistency issue, the AI must cite specific source segment numbers in the **Evidence:** field – e.g. *“`'trekriem'` rendered as `'pull belt'` in `[SEGMENT 0031]`, `'draw strap'` in `[SEGMENT 0084]`”*. Inconsistency claims without concrete citations are not allowed.
* **Source query distinction.** If the source itself contains an error (typo, duplication, missing word, internal inconsistency), the AI prefixes the Issue line with **“Source query:”** and notes whether the translation handled it correctly. A faithful rendering of a flawed source is not a translation error.
* **Explicit boundaries.** The AI does not re-engineer the source, propose alternative terminology without a citation, flag stylistic preferences as errors, or flag empty target lines (those mean the segment hasn’t been translated yet).
Note
**If you want to customise:** clone the default in the [Prompt Manager](/trados/settings/prompts/) and edit your copy. The default itself is read-only and gets refreshed when the plugin updates. Your clone keeps all your changes.
## Reports Tab
Proofreading results appear in the **Reports** tab of the Supervertaler Assistant panel. Each issue is shown as a clickable card containing:
* **Segment number** – the actual per-file segment number as shown in the Trados editor grid
* **Issue description** – what the AI found wrong
* **Evidence** *(when applicable)* – specific source segment numbers the AI cites to back up the claim, shown in italic grey between the issue and the suggestion. Required for terminology consistency claims (see *Default Proofreading Prompt* below) so you can verify the inconsistency yourself by jumping to the cited segments.
* **Suggestion** – the AI’s recommended fix (if available)
Right-click any card to copy the issue, the evidence, the suggestion, or the whole card to the clipboard.
### Navigating to Issues
Click any issue card to navigate directly to that segment in the Trados editor. This works correctly in multi-file projects – the plugin uses the segment’s internal identifiers to find the exact segment.
### Dismissing Issues
Each issue card has a checkbox. Tick it to dismiss the issue and remove it from the list. This lets you work through the results one by one, keeping track of which issues you have already addressed. When all issues have been dismissed, the Reports tab shows “All issues addressed – well done!”
### Clearing Results
Click the **Clear** button at the top of the Reports tab to remove all results and start fresh.
### Run Summary
After a proofreading run, the Reports tab shows:
* Total number of issues found and segments checked
* Run timestamp and duration in the footer
## Adding Issues as Trados Comments
Check the **“Also add issues as Trados comments”** checkbox in the Batch Operations tab (visible only in Proofread mode) before starting the run. When enabled, each issue found by the proofreader is also inserted as a Trados segment comment, so you can see the issues directly in the editor without switching to the Reports tab.
## AI Context in Proofreading
Batch Proofread builds a richer context than Batch Translate – it has to, because verifying whether a term is rendered consistently across the document is exactly the kind of question the AI needs the whole document to answer.
* **Full bilingual document context** – when **Include document context** is enabled in [AI Settings](/trados/settings/ai-settings/), every segment in the document is included with both source AND target text, with no truncation. This is what makes target-side consistency verifiable: the AI can check “this term is rendered as X in \[SEGMENT 0031] and Y in \[SEGMENT 0084]” against the actual document, not against a guess. Segment numbers in the document context match the `[SEGMENT XXXX]` numbers the AI sees in the batch it’s reviewing, so citations cross-reference both ways.
* **Termbase terms** – terminology from enabled termbases is checked against the translations, including term definitions and domains when that option is enabled. Forbidden terms are flagged with a `⚠️ DO NOT USE` marker so the AI knows to flag them as issues if it sees them in the translation.
* **Language-specific checks** – Dutch, German, and French targets get auto-included quality checks (compound spelling, dt-errors, de/het articles for Dutch; capitalisation and case system for German; accents and punctuation spacing for French). These come from the hardcoded base and don’t need to be in your custom prompt.
* **Custom prompts** – the selected proofreading prompt provides domain-specific quality checks on top of all of the above.
TM matches and surrounding segments are **not** included in proofreading – these are Chat & QuickLauncher features only. See the [AI Settings](/trados/settings/ai-settings/) page for a full comparison table.
Caution
**Token cost:** Sending the full bilingual document roughly doubles the context size compared to source-only. For typical patent / legal / technical jobs (under \~500 segments) this is a minor cost increase – usually a few extra cents per batch on Sonnet-class models. For very long documents the cost scales linearly; if you proofread a 5,000-segment book you may want to disable Include document context and rely on per-batch context only.
## Clipboard Mode
If you prefer to use a web-based AI (ChatGPT, Claude, Gemini, etc.) instead of an API, tick the **Clipboard Mode** checkbox. Supervertaler builds a complete proofreading prompt with both source and target text for each segment and copies it to your clipboard. See [Clipboard Mode](/trados/clipboard-mode/) for full details.
## Tips
### Start with Confirmed Segments
Use the **Confirmed Only** scope to check segments you consider finished. This avoids noise from segments that are still being worked on.
### Use Domain-Specific Proofreading Prompts
Create custom proofreading prompts tailored to your domain. For example, a medical proofreading prompt can check for correct use of clinical terminology, while a legal proofreading prompt can verify that defined terms are used consistently.
### Review After AI Translation
The AI Proofreader pairs well with [Batch Translate](/trados/batch-translate/). After translating a batch of segments with AI, run the proofreader to catch any issues before final review.
### Combine with Display Filters
Use Trados display filters to isolate specific segments (e.g., segments containing a certain term), then proofread only those filtered segments for targeted quality checks.
***
## See Also
* [Clipboard Mode](/trados/clipboard-mode/)
* [Batch Translate](/trados/batch-translate/)
* [Prompts](/trados/settings/prompts/)
* [Supervertaler](/trados/ai-assistant/)
* [Keyboard Shortcuts](/trados/keyboard-shortcuts/)
# AutoTagger
AutoTagger looks at where the inline tags sit in the **source** segment and inserts that same set of tags into your **existing translation** at the right places – without changing any of the translated words.
It is for the common case where a target has the correct translation but is **missing its tags or has them in the wrong spots** – typically after machine translation, pasting from another tool, or typing the target by hand. In Trados Studio those segments otherwise trip the tag QA checks even though the wording is fine.
## How to use it
With an active segment that has a correct translation but wrong/missing tags:
* Right-click in the editor → **Auto-tag active segment**, or
* Press **Ctrl+Alt+G**.
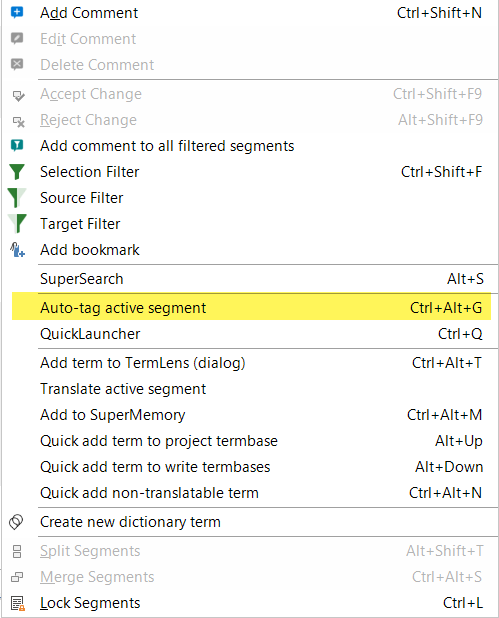
Trados Undo (`Ctrl+Z`) reverts it.
AutoTagger works **without opening the Supervertaler Assistant pane**, and it never opens that pane – it reads the active segment from the editor and its settings from disk, so it just works without disturbing your layout, even straight after a Trados restart.
## How it works
1. AutoTagger reads the source segment’s inline tags and your current target text.
2. It asks the AI to place that exact set of tags into your translation at the correct positions.
3. It **validates** the result before writing: the tag set must match the source, the words must be unchanged, and the tags must be well-formed.
4. It re-inserts the tags into your **exact** target, so punctuation such as curly quotes is preserved verbatim.
5. If the AI’s output doesn’t validate it **retries once**, and otherwise leaves the segment **untouched** – so it never writes broken tags.
AutoTagger reuses the same tag engine as Batch Translate, so the tags it writes are real Trados inline tags, not placeholders.
## Configuring it
Settings → **Prompts** → **AutoTagger Instruction**. This editable field tells the AI how to place the tags. It supports these placeholders:
| Placeholder | Meaning |
| ----------------- | ---------------------------------------- |
| `{{SOURCE_TEXT}}` | The source segment, with its inline tags |
| `{{TARGET_TEXT}}` | Your current translation (tags stripped) |
| `{{TAG_LIST}}` | The list of tags that must be placed |
## Tracking cost
AutoTagger’s AI calls are logged under their own **“AutoTagger”** task in [Token Usage & Costs](/trados/usage-costs/), with token counts and cost like every other AI call.
## Notes
* **v1 is single-segment.** A batch mode may follow.
* **Shortcut:** Ctrl+Alt+G triggers AutoTagger. The floating TermLens popup keeps its **Ctrl-tap** trigger; you can reassign a key to it in Trados’ keyboard settings if you like.
* AutoTagger mirrors the [AutoTagger feature in Supervertaler Workbench](/workbench/ai-translation/autotagger/).
***
## See Also
* [Batch Translate](/trados/batch-translate/)
* [Import/Export](/trados/import-export/)
* [Token Usage & Costs](/trados/usage-costs/)
* [Keyboard Shortcuts (Trados)](/trados/keyboard-shortcuts/)
# Batch Operations
The **Batch Operations** tab in the Supervertaler Assistant panel provides two AI-powered modes for processing multiple segments at once:
| Mode | Description |
| ----------------------------------------------- | ---------------------------------------------------------------- |
| **[Batch Translate](/trados/batch-translate/)** | Translate segments using AI with customisable prompts |
| **[AI Proofreader](/trados/ai-proofreader/)** | Check translations for errors, inconsistencies, and style issues |
Switch between modes using the **Mode** dropdown at the top of the Batch Operations tab.
Both modes share the same prompt selector, provider/model configuration, and scope options. Prompts are filtered by mode – Translate prompts appear in Translate mode, Proofread prompts appear in Proofread mode. You can click the **provider/model label** to quickly switch AI models via a flyout menu – the same menu available in the Chat tab.
### Clipboard Mode
Both Translate and Proofread modes support **[Clipboard Mode](/trados/clipboard-mode/)** – an alternative workflow that lets you use any web-based AI (ChatGPT, Claude, Gemini, etc.) without an API key. Tick the **Clipboard Mode** checkbox to switch from API-based processing to a manual copy/paste workflow. See [Clipboard Mode](/trados/clipboard-mode/) for full details.
### Preview prompt
Next to the action button, the **👁 Preview prompt** link opens a read-only dialog showing **exactly what would be sent to the AI** for the current configuration: the assembled system prompt (including the active custom prompt, termbase entries, language-specific checks, and the full bilingual document context for proofread), followed by the numbered segment list. No LLM call is made.
This is useful for:
* **Sanity-checking before an expensive call** – see what the model will actually receive (including how many tokens of context, whether your termbase is being included, whether the right segments are in scope) before clicking Translate / Proofread.
* **Debugging unexpected output** – if the AI produces an odd suggestion, the preview shows you the exact prompt the model was answering, so you can see whether the issue is in your custom prompt, the termbase, the document context, or the segment list.
* **Manually pasting into a web LLM** – the dialog has its own *Copy to clipboard* button, so you can use it as a one-shot “send this to ChatGPT/Claude/Gemini” path without toggling Clipboard Mode.
The preview works in both **API mode** and **Clipboard Mode** without switching, and is available for both Translate and Proofread.
### AutoPrompt
The Batch Operations tab also includes an **[AutoPrompt](/trados/generate-prompt/)** link that uses AI to create a comprehensive, domain-specific translation prompt based on your project’s content, terminology, and TM data.
## See Also
* [Clipboard Mode](/trados/clipboard-mode/)
* [AutoPrompt](/trados/generate-prompt/)
* [Prompts](/trados/settings/prompts/)
* [AI Settings](/trados/settings/ai-settings/)
* [Keyboard Shortcuts](/trados/keyboard-shortcuts/)
# Batch Translate
Batch Translate lets you translate multiple segments at once using AI. It is located in the **Supervertaler Assistant** panel, on the **Batch Operations** tab.
Note
The Batch Operations tab also supports **Proofread** mode for AI-powered quality checking. See [AI Proofreader](/trados/ai-proofreader/) for details.
![]()
### Starting a Batch Translation
1. Open the **Supervertaler Assistant** panel (View > Supervertaler Assistant)
2. Switch to the **Batch Translate** tab
3. Choose a **scope** from the dropdown
4. Choose a **prompt** from the prompt selector
5. Click **Translate**
### Scope
The scope dropdown controls which segments are translated:
| Scope | Description |
| ----------------------- | ---------------------------------------------------------------------- |
| **Empty Segments Only** | Translates segments that have no target text |
| **All Segments** | Translates every segment in the file |
| **Filtered Segments** | Translates only the segments currently visible after applying a filter |
| **Filtered Empty Only** | Translates empty segments within the current filter |
### Prompt Selection
Choose a prompt to guide the AI translation style and domain. The prompt selector shows:
* **Default Translation Prompt** – a general-purpose prompt that works well for most content types. Use it as-is or duplicate it in the Prompt Manager and customise it for your domain.
* **Custom prompts** – your own prompts created in the Prompt Manager
The **active prompt** for the current project is marked with a checkmark in the dropdown. When you open a project that has an active prompt set, it is automatically selected. See [Memory banks – Active Prompt](/trados/ai-assistant/super-memory/active-prompt/) for how to set the active prompt.
Tip
**Tip:** If you save a prompt with the same name as your Trados project, the dropdown will auto-select it whenever you open that project. For example, a prompt called “HAYNESPRO” will be auto-selected when working in a project called HAYNESPRO.
Note
For specialised fields (medical, legal, patent, etc.), create a custom prompt with domain-specific terminology rules and instructions. A tailored prompt is the single most effective way to improve translation quality.
### Provider and Model
The current AI provider and model are displayed below the prompt selector. Click the provider/model label to open a flyout menu where you can switch models instantly – the same menu available in the Chat tab. Alternatively, open the settings dialogue (gear icon in the TermLens header) and go to the **AI Settings** tab.
### Progress and Logging
During translation:
* A **progress bar** shows overall completion
* A **real-time log** displays the status of each segment as it is translated
* The **Stop** button aborts the batch at any time – segments already translated are kept
### Translate Active Segment (Ctrl+T)
Press **Ctrl+T** to translate the active segment instantly. This uses the same provider, model, and prompt as Batch Translate, so you can switch prompts or providers and immediately use them for single segments with Ctrl+T.
Ctrl+T is also available via right-click in the editor (“Translate active segment”).
#### How it works
1. The active segment’s source text is sent to the AI provider configured in AI Settings
2. The selected prompt (from the Batch Translate tab) is applied, along with termbase terms
3. The translation is written directly into the target cell
4. Inline tags (bold, italic, field codes, etc.) are preserved in the translation
### AI Context in Batch Translate
Batch Translate uses several context sources from your [AI Settings](/trados/settings/ai-settings/) to improve translation quality:
* **Document content** – when enabled, all source segments are included in the system prompt so the AI can determine the document type (legal, medical, technical, etc.) and adapt its style accordingly. This is shared across all batches.
* **Termbase terms** – terminology from enabled termbases is injected into the prompt, including term definitions and domains when that option is enabled.
* **Custom prompts** – the selected prompt provides domain-specific translation instructions.
TM matches and surrounding segments are **not** included in Batch Translate – these are Chat & QuickLauncher features only. See the [AI Settings](/trados/settings/ai-settings/) page for a full comparison table.
### Backup TMX
The **Auto-backup translations to TMX** checkbox is ticked by default. When enabled, Supervertaler writes every translated segment to a TMX file as it arrives from the AI. If Trados crashes mid-run, you can recover the completed translations without re-running the batch.
The TMX files are also useful outside of crash recovery – you can import them into any TM in Trados, memoQ, Wordfast, or any other CAT tool that accepts standard TMX.
Click **Open folder…** next to the checkbox to open the backup folder directly in Windows Explorer.
To disable backups for a particular run, simply untick the checkbox before clicking Translate.
#### How it works
* A new `.tmx` file is created at the start of each batch run.
* Every **10 translated segments**, the file is rewritten in full – so at most 10 segments are lost in a crash.
* The file is written atomically (via a temp file + rename) so it is always a valid, complete TMX – never a partial or corrupt file.
* At the end of a completed or cancelled run, the file is flushed one final time.
#### Where the files are saved
```plaintext
C:\Users\\Supervertaler\trados\batch_backups\
```
Files are named by timestamp and project name, for example:
```plaintext
batch_2026-04-10_14-23-01_YAXINCHENG.tmx
```
The exact path is also printed to the **Batch Translate log** at the start of each run.
#### Recovering after a crash
1. Reopen Trados Studio and your project.
2. Open your TM in **Trados Translation Memories** (or via the project’s TM settings).
3. Use **Import** → browse to the backup `.tmx` file → import.
4. Run **Pre-translate** on your project to apply the recovered translations from the TM.
Note
Backup files are **not deleted automatically**. Tidy up the `batch_backups` folder occasionally if disk space is a concern, or keep them as a translation archive.
### Clipboard Mode
If you prefer to use a web-based AI (ChatGPT, Claude, Gemini, etc.) instead of an API, tick the **Clipboard Mode** checkbox. This replaces the Provider and Translate button with **Copy to Clipboard** and **Paste from Clipboard** buttons. Supervertaler builds a complete, ready-to-use prompt – including your selected prompt, terminology, document context, and numbered bilingual segments – and copies it to your clipboard. See [Clipboard Mode](/trados/clipboard-mode/) for full details.
### Tips
#### Translate Empty Segments First
Start by translating only the empty segments (scope: **Empty Segments Only**). Review the results, then fix any issues. This avoids overwriting segments you have already edited.
#### Generate a Domain-Specific Prompt Automatically
Click **AutoPrompt…** next to the prompt dropdown. Supervertaler analyses your entire document, detects the domain, and uses AI to generate a comprehensive translation prompt with terminology rules, style guidelines, and anti-truncation controls – all tailored to your specific project. See [AutoPrompt](/trados/generate-prompt/) for details.
#### Create Domain-Specific Prompts Manually
For specialised content, you can also duplicate the Default Translation Prompt in the Prompt Manager and add domain-specific instructions (terminology rules, style preferences, formatting requirements). A tailored prompt is the single most effective way to improve translation quality.
#### Combine with TM
If your project has a translation memory, TM matches are shown alongside AI translations. You can pre-translate with TM first (using Trados’s built-in batch tasks), then use Batch Translate to fill in the remaining empty segments with AI.
#### Review After Batch
AI translation is a first draft. After a batch run:
1. Review each translated segment
2. Fix any terminology or style issues
3. Confirm segments with **Ctrl+Enter** (Trados default)
***
### See Also
* [Clipboard Mode](/trados/clipboard-mode/)
* [AutoPrompt](/trados/generate-prompt/)
* [AI Proofreader](/trados/ai-proofreader/)
* [Supervertaler](/trados/ai-assistant/)
* [TermLens](/trados/termlens/)
* [SuperMemory](/trados/ai-assistant/super-memory/)
* [Keyboard Shortcuts](/trados/keyboard-shortcuts/)
# Clipboard Mode
Clipboard Mode lets you translate or proofread segments using **any web-based AI** – ChatGPT, Claude, Gemini, DeepSeek, or any other LLM with a chat interface – without needing an API key. Instead of sending segments to an AI provider via API, Supervertaler builds a ready-to-use prompt and copies it to your clipboard. You paste it into the AI of your choice, copy the response, and paste it back.
Tip
**No API key? No problem.** Clipboard Mode is the fastest way to start using AI translation in Supervertaler for Trados. If you already have access to a web-based AI chat – and most people do these days – you can start translating immediately after installing the plugin. No API keys, no provider configuration, no per-token billing. Just tick Clipboard Mode, copy, paste, and translate.
Clipboard Mode is also ideal if you want to use a model that is not available via API, if you prefer a pay-as-you-go chat subscription, or if you want to try different AI models before committing to a specific provider’s API.
## How It Works
Clipboard Mode is available in both **Translate** and **Proofread** modes on the Batch Operations tab.
### Translating with Clipboard Mode
1. Open the **Supervertaler Assistant** panel and switch to the **Batch Operations** tab
2. Set the mode to **Translate**
3. Tick the **Clipboard Mode** checkbox
4. Choose a **scope** (Empty Segments Only, All Segments, etc.)
5. Optionally select a **prompt** to customise the translation instructions
6. Click **Copy to Clipboard**
7. Open your preferred web-based AI (ChatGPT, Claude, Gemini, etc.)
8. Paste the prompt into the chat and send it
9. Copy the AI’s full response
10. Switch back to Trados and click **Paste from Clipboard**
The translations are written into the target segments automatically, with full tag reconstruction and validation.
### Proofreading with Clipboard Mode
1. Set the mode to **Proofread** and tick **Clipboard Mode**
2. Click **Copy to Clipboard** – the prompt includes both source and target text for each segment
3. Paste into your AI, copy the response, and click **Paste from Clipboard**
## What Gets Copied
When you click **Copy to Clipboard**, Supervertaler builds a comprehensive prompt that includes:
* **System instructions** – the same translation or proofreading instructions used by the API-based batch modes
* **Custom prompt** – your selected prompt from the Prompt Manager, if any
* **Terminology** – terms from your enabled termbases, including definitions and domains (when term metadata is enabled in AI Settings)
* **Document context** – source segments from the document (when enabled in AI Settings), so the AI understands the document type and domain
* **Numbered bilingual segments** – each segment is numbered and formatted with status annotations
This is not just a list of segments – it is a fully self-contained prompt ready to paste into any LLM chat window.
### Segment Format
Each segment is formatted as a numbered bilingual block:
```plaintext
Segment 1 [new]:
Dutch: Polyvision breidt de mogelijkheden uit.
English:
Segment 2 [fuzzy, 85%]:
Dutch: Nieuwe toepassingen in onderwijs.
English: New applications in education.
Segment 3 [translated, 100%]:
Dutch: Doelstelling lange termijn.
English: Long-term objective.
```
The per-segment labels use short language names (e.g. “Dutch”, “English”) to save tokens. The full language names with regional variants (e.g. “Dutch (Netherlands)”, “English (United Kingdom)”) are stated once in the system prompt at the top.
### Status Annotations
Each segment header includes a status annotation in square brackets:
| Status | Meaning |
| ------------------------- | ---------------------------------------- |
| **\[new]** | No target text – needs translation |
| **\[fuzzy, N%]** | TM fuzzy match at N% – may need revision |
| **\[translated, 100%]** | 100% TM match – likely correct |
| **\[translated]** | Human-edited translation |
| **\[machine translated]** | Machine translation output |
| **\[draft]** | Has target text but origin is unclear |
These annotations help the AI understand the state of each segment and respond appropriately – for example, a fuzzy match may only need minor adjustments rather than a full retranslation.
## Tag Handling
Inline tags (bold, italic, hyperlinks, field codes, etc.) are serialised as numbered placeholders before being sent to the AI:
| Tag type | Placeholder |
| ---------------- | ---------------------- |
| Opening tag | ``, ``, etc. |
| Closing tag | ``, ``, etc. |
| Self-closing tag | ``, ``, etc. |
For example, a segment like “Click **here** for details” becomes:
```plaintext
Click here for details
```
The AI is instructed to preserve these placeholders exactly as they appear. When you paste the response back, Supervertaler reconstructs the original Trados tags from the placeholders – the same tag reconstruction pipeline used by API-based Batch Translate.
Caution
If a tag is missing or malformed in the AI’s response, Supervertaler reports a warning but still writes the translation. Check the log for any tag validation messages.
## Choosing an AI Model
Any web-based LLM with a chat interface works with Clipboard Mode. Some recommendations:
* **Claude** (claude.ai) – excellent at following the bilingual format precisely and preserving tags
* **ChatGPT** (chatgpt.com) – widely available, works well with the structured format
* **Gemini** (gemini.google.com) – large context window, good for bigger batches
* **DeepSeek** (chat.deepseek.com) – strong multilingual capabilities
For best results, use the most capable model available in your subscription (e.g., Claude Opus, GPT-4o, Gemini Pro).
Note
Most web-based AI chat interfaces have a context limit that determines how many segments you can process at once. If you have a large number of segments, consider using a smaller scope (e.g., Filtered Segments) or processing in multiple rounds.
## Clipboard Mode vs API Mode
| | Clipboard Mode | API Mode |
| -------------------- | ---------------------------------------------- | -------------------------------------------- |
| **API key required** | No | Yes |
| **Setup time** | None – works immediately | Requires provider account and API key |
| **Cost** | Included in your AI chat subscription | Pay-per-token via API |
| **Automation** | Manual copy/paste | Fully automatic |
| **Model choice** | Any web-based LLM | OpenAI, Anthropic, Google, Ollama |
| **Best for** | Getting started, quick jobs, trying new models | Large projects, automation, batch processing |
Both modes use the same prompts, terminology, document context, and tag handling – the only difference is how the text gets to and from the AI.
Note
Many users start with Clipboard Mode to explore AI translation with zero setup, then move to API Mode later for larger projects where full automation is more efficient. The two modes complement each other – you can switch between them at any time by ticking or unticking the Clipboard Mode checkbox.
## Combining with AutoPrompt – the hybrid pattern
[AutoPrompt](/trados/generate-prompt/) **always uses your configured AI provider** to generate the meta-prompt – Clipboard Mode does **not** apply to AutoPrompt, only to the actual Translate / Proofread passes. This is intentional, and it enables a useful hybrid workflow:
1. Tick **Clipboard Mode**.
2. Click **AutoPrompt…** – the prompt-generation request still goes through your configured API (a small, one-shot call, even on an Opus-class model this is cheap relative to bulk translation).
3. Refine the generated prompt in the AI Assistant chat and **Save as Prompt…**.
4. Select the saved prompt from the dropdown.
5. Click **Copy to Clipboard** – Supervertaler builds a ready-to-paste batch for your web-based AI using the AutoPrompt-generated system prompt.
6. Paste into ChatGPT / Claude.ai / Gemini, copy the response, click **Paste from Clipboard**.
The result: paid API for the small-but-clever prompt-writing call, free web tier for the expensive bulk translation. You get the full AutoPrompt analysis pipeline (TermScan, domain detection, sampling of confirmed reference pairs) without paying per-token API rates for the bulk Translate.
Note
If you want to run AutoPrompt without using any API key – for example before you have signed up for a provider – you’ll need to use API Mode-only features (the in-app Chat panel) at least once for the prompt-generation step. There is currently no clipboard-only AutoPrompt path; AutoPrompt always sends the meta-prompt request to a configured provider.
## Tips
### Use the Best Model Available
Since you are not paying per token in Clipboard Mode, there is no cost difference between models. Use the most capable model your subscription offers.
### Check the Response Format
Before clicking Paste from Clipboard, glance at the AI’s response to make sure it followed the numbered bilingual format. Most modern LLMs handle this correctly, but if the format is off, you can ask the AI to reformat its response.
### Combine with Terminology
Clipboard Mode includes your termbase terms in the prompt, just like API mode. Make sure your termbases are set up and enabled in AI Settings for the best results.
### Name Prompts After Your Projects
If you save a custom prompt with the same name as your Trados project (e.g. “HAYNESPRO” for a project called HAYNESPRO), the prompt dropdown will auto-select it whenever you open that project. This works for both Translate and Proofread modes and saves you from having to reselect the correct prompt each time.
### Process in Batches
For large documents, use the scope dropdown to work through segments in manageable batches – for example, use display filters to select a section at a time, then use the **Filtered Segments** scope.
***
## See Also
* [Batch Translate](/trados/batch-translate/)
* [AI Proofreader](/trados/ai-proofreader/)
* [Batch Operations](/trados/batch-operations/)
* [AI Settings](/trados/settings/ai-settings/)
* [Prompts](/trados/settings/prompts/)
# User Data Folder
Supervertaler for Trados shares a user data folder with [Supervertaler Workbench](https://supervertaler.com/workbench). This allows both programs to access the same termbases, translation memories, and prompt library without duplicating files.
## Folder Location
By default, the shared data folder is located at:
```plaintext
C:\Users\\Supervertaler\
```
You can choose a different location during first-run setup. Both programs read the configured path from the same pointer file at `%APPDATA%\Supervertaler\config.json`.
## Folder Structure
```plaintext
Supervertaler/
│
├── prompt_library/ Shared
│ ├── domain_expertise/
│ ├── project_prompts/
│ └── style_guides/
│
├── resources/ Shared
│ ├── supervertaler.db
│ ├── termbases/
│ ├── tms/
│ ├── non_translatables/
│ └── segmentation_rules/
│
├── workbench/ Supervertaler Workbench only
│ ├── settings/
│ │ ├── settings.json
│ │ ├── themes.json
│ │ ├── shortcuts.json
│ │ └── ...
│ ├── dictionaries/
│ ├── projects/
│ ├── ai_assistant/
│ ├── voice_scripts/
│ └── web_cache/
│
└── trados/ Supervertaler for Trados only
├── settings/
│ ├── settings.json
│ ├── license.json
│ └── chat_history.json
├── projects/
└── batch_backups/
```
### Shared resources
The **prompt library** and **resources** folders are shared between both programs. Prompts you create or edit in one program are immediately available in the other. The SQLite database (`supervertaler.db`) holds your termbases and translation memories – Workbench has full read-write access, while the Trados plugin reads from it.
### Program-specific folders
Each program stores its own settings, projects, and runtime data in a dedicated subfolder (`workbench/` or `trados/`). This keeps configuration separate so the two programs never interfere with each other.
The `trados/batch_backups/` folder contains automatic TMX backup files created during Batch Translate runs. One file is written per run, named by timestamp and project name. These files are not deleted automatically – you can remove old ones manually once your project is safely delivered, or keep them as a translation archive for use in other CAT tools. See [Batch Translate – Backup TMX](/trados/batch-translate/#backup-tmx) for details.
## Automatic Migration
If you are updating from an older version, both programs will automatically reorganise the folder on their next startup. No manual action is required – your settings, licence, and data are preserved.
# AutoPrompt
AutoPrompt uses AI to analyse your entire project and generate a comprehensive, domain-specific translation prompt tailored to your document. The generated prompt includes terminology rules, style guidelines, anti-truncation controls, and domain-specific instructions – ready to use with Batch Translate.
![]()
#### How It Works
**1. Start the analysis**
On the **Batch Operations** tab, click the **AutoPrompt…** link next to the prompt dropdown.
**2. What gets analysed**
Supervertaler gathers the following data from your project and sends it to your configured AI provider:
| Data | Purpose |
| ----------------------- | ------------------------------------------------------------------------------------------------------------------------------------------------------------------------------ |
| **All source segments** | Domain detection, document content analysis, project context |
| **Termbase terms** | Filtered to only document-relevant terms (TermScan), then included as a locked termbase in the generated prompt |
| **Translated segments** | Human-confirmed segments only (Translated, Approved, or Signed-off status) – used as TM reference pairs and style anchors. Unconfirmed AI-generated translations are excluded. |
| **Language pair** | Embedded in the generated prompt |
Note
The full document is sent to the AI for analysis. For a typical 30,000-word document, this costs approximately $0.20–$0.25 with a Sonnet-class model, or $1.00–$1.15 with an Opus-class model.
**2b. TermScan – automatic termbase extraction**
Before building the prompt, AutoPrompt runs **TermScan**: it concatenates all source segments in the document and checks each termbase entry against this text. Only terms whose source term, source abbreviation, or source synonyms actually appear in the document are included in the generated prompt.
This dramatically reduces the termbase size – for example, a general patent termbase with 2,680 entries might yield only 123 relevant terms for a specific document. The status message in the AI Assistant confirms the filter: *“Termbase terms (filtered 123 relevant from 2,680 total)”*.
The filtering is case-insensitive and checks all variants of each term (source term, abbreviation forms, and synonyms). Terms that do not appear anywhere in the source text are excluded entirely.
Caution
**TermScan filters by content, not by domain.** A patent termbase contains many common technical words – “system”, “board”, “fan”, “screen”, “installation” – that will match nearly any engineering document. TermScan will include those entries even though they belong to a completely different translation context, and the AI will be forced to follow them. **Before running AutoPrompt, disable every termbase that does not belong to the current project’s domain.** Use [AI Settings](/trados/settings/ai-settings/) → *Termbases included in AI prompts* to control which termbases contribute to the generated prompt without affecting your TermLens display.
Caution
**Termbase quality matters.** Only enable termbases in [AI Settings](/trados/settings/ai-settings/) if you are confident they contain accurate, high-quality terminology for your project. A poorly maintained termbase with incorrect or outdated translations will constrain the AI and produce worse results. Modern LLMs – especially Opus-class and GPT-4-class models – are often better at choosing the right translation on their own than when forced to follow a low-quality termbase. When in doubt, disable termbases and let the AI translate freely, then add terms incrementally as you review.
**3. Domain detection**
Before sending to the AI, AutoPrompt runs a local keyword-based analysis to detect the document’s domain. Supported domains:
* **Patent** – claims, embodiments, prior art, figure references
* **Legal** – contracts, clauses, statutory references
* **Medical** – clinical terms, dosages, ICD/ATC codes
* **Technical** – specifications, software terms, standards
* **Financial** – figures, IFRS/GAAP, regulatory language
* **Marketing** – brand, audience, campaign language
* **General** – fallback for mixed or unclassified content
The detected domain determines which template the AI uses to generate the prompt – including domain-specific roles, rules, and section structure.
**4. Review and refine in the AI Assistant**
The generated prompt appears as a message in the **AI Assistant** chat. You can:
* **Read through the prompt** to verify it matches your project
* **Ask follow-up questions** to refine specific sections (e.g., “Make the termbase section more strict” or “Add a rule about chemical formula formatting”)
* **Iterate** as many times as needed – each refinement builds on the conversation history
**5. Save the prompt**
When you are satisfied with the generated prompt:
1. **Right-click** the assistant message containing the prompt
2. Select **Save as Prompt…**
3. Enter a name for your prompt (e.g., “DLCH Patent NL-EN”)
4. Click **Save**
The prompt is saved to the **Translate** category in the Prompt Manager and immediately appears in the prompt dropdown on the Batch Operations tab.
Note
**Generated prompts are formatted in proper Markdown** – `##` headings for each major section, `-` bullet lists, `**bold**` for emphasised terms, and a Markdown table for the project-specific termbase. Open one in Obsidian, VS Code, GitHub, or any Markdown-aware viewer and it renders cleanly with a navigable outline. The prompt is also still a perfectly valid system prompt for the translator AI – the Markdown markup is structural, not output instruction.
#### Translator’s Comment methodology (always-on)
Since v4.19.111, every AutoPrompt-generated prompt embeds the **Translator’s Comment** (TC) methodology by default, regardless of source language or domain. The methodology asks the translator AI to silently correct obvious mechanical defects in the source (typos, broken words, hanging mid-sentence breaks, doubled spaces, stray punctuation, reference-numeral mismatches that are unambiguous in context, missing diacritics, etc.) and append a single concise comment at the end of the segment in this exact format:
```plaintext
⟦TC: short factual description of the fix(es)⟧
```
* The brackets are the mathematical white square brackets **U+27E6** (⟦) and **U+27E7** (⟧). These characters do not occur in source documents, so they are safe as out-of-band markers that can be extracted reliably in post-processing.
* One marker per segment maximum; multiple fixes are joined with semicolons inside one marker.
* Segments with no defects emit no marker.
* When the translator AI inserts a word or short phrase to fill a clear gap, that supplied text is wrapped in standard ASCII square brackets `[like this]` inside the running translation, and the trailing marker references it (e.g. `⟦TC: [bracketed text] supplied to close hanging sentence⟧`).
* Numerical values, dates, dosages, claim language, statutory references, headings, identifiers, and proper names are never silently “corrected” – defects in those zones are preserved verbatim, with an optional `⟦TC: source ambiguous – ...⟧` marker if doubt exists.
The defect categories that count as “obvious” are adapted to the actual source language by the LLM (Dutch -d/-t verb typos, German missing umlauts, French accent slips, Spanish/Italian conjugation typos, etc.).
Note
**The markers appear inline in the target segment** in Trados Studio – they are not yet auto-extracted into the Studio comments panel. Extraction into the existing Studio comment infrastructure is a planned follow-up; the spec is locked (⟦ and ⟧ delimiters never collide with source text) so the extraction step is small once it gets prioritised.
Caution
**Want a generated prompt without the TC methodology?** Edit the generated prompt in the Prompt Manager after creation and remove the TRANSLATOR COMMENT FORMAT section plus any TRANSLATION MANDATE language about silent correction. A per-project opt-out via a UI toggle may be added in a future version – open an issue if you’d like to see it.
#### What the Generated Prompt Contains
A generated prompt follows the structure of professional translation prompts used by experienced translators. Depending on the domain, it typically includes:
* **Role** – domain-specific translator role with expertise areas
* **Translation mandate** – strict rules against simplification, paraphrasing, or “improving” the source
* **Anti-truncation controls** – explicit prohibition of omitting repetitive phrases or collapsing clauses
* **Input handling rules** – instructions for segment-by-segment translation in Supervertaler
* **Domain-specific style rules** – mandatory term mappings, register requirements, formatting rules
* **Terminology hierarchy** – priority order: TM matches > project termbase > domain conventions
* **Preflight self-check** – internal verification step before producing output
* **Post-translation integrity assertion** – completeness and faithfulness check
* **Project context** – AI-generated summary of what the document is about
* **Project-specific termbase** – all termbase terms, marked as locked and mandatory
* **TM reference translations** – validated translation pairs as style anchors
* **Output format** – translation only, no commentary, preserve formatting
#### Tips
**Start with a confirmed translated sample**
The generator includes **confirmed** segments (Translated, Approved, or Signed-off status) as reference pairs – up to 50, sampled evenly across the document. This gives the AI concrete examples of your preferred style and terminology, resulting in a more accurate prompt. Unconfirmed segments (e.g. from a previous AI batch translation that you haven’t reviewed yet) are excluded to avoid feeding unverified output back as “correct” references.
**Tip:** Before generating a prompt, confirm a handful of segments you are happy with. Even 10–20 confirmed segments give the AI meaningful style anchors to work from.
**Only enable termbases that belong to this project**
Before clicking AutoPrompt, go to **AI Settings → Termbases included in AI prompts** and enable only termbases that are directly relevant to the current project. Disable everything else – including large general-purpose termbases, termbases from other clients or domains, and any termbase you are not actively maintaining for this project.
This setting is independent of your TermLens display: disabling a termbase for AI context does not hide its chips in the editor. You can keep a termbase visible for reference while excluding it from the generated prompt.
Note
**Prefer compact, project-specific termbases.** A small termbase of 50–200 carefully curated entries for this client will produce a far better termbase than a general termbase of 2,000 entries, even after TermScan filtering. Large termbases increase the chance of incorrect or misleading entries being injected into the prompt.
**Review the termbase section**
The generated prompt includes only the document-relevant terms extracted by TermScan from your enabled termbases. Check that the termbase accurately reflects your terminology preferences. You can ask the AI to reorganise terms by category or add missing mappings.
Caution
If your termbase contains incorrect or low-quality entries, these will be injected into the prompt and the AI will be forced to follow them. Only enable termbases that you trust. When starting a new project with no established terminology, consider disabling termbases entirely and letting the AI translate freely – then add terms as you review.
**Use with Batch Translate**
After saving the generated prompt, select it from the prompt dropdown on the Batch Operations tab. It works with all scopes and providers, just like any other prompt.
**AutoPrompt always uses your configured AI provider**
[Clipboard Mode](/trados/clipboard-mode/) does **not** apply to AutoPrompt – ticking the Clipboard Mode checkbox affects only the actual Translate / Proofread passes, not prompt generation. AutoPrompt always sends the meta-prompt request to whichever provider is selected in [AI Settings](/trados/settings/ai-settings/). This enables a useful pattern: keep Clipboard Mode ticked, click AutoPrompt to generate the prompt via your paid API, then run the bulk Translate via clipboard against a free web-tier model. See [Combining with AutoPrompt – the hybrid pattern](/trados/clipboard-mode/#combining-with-autoprompt--the-hybrid-pattern) for the full workflow.
**Regenerate when the project changes**
If your project evolves significantly (new terminology, different document sections, additional termbases), run AutoPrompt again to generate an updated prompt.
***
#### See Also
* [Batch Translate](/trados/batch-translate/)
* [Prompts](/trados/settings/prompts/)
* [Supervertaler](/trados/ai-assistant/)
* [AI Settings](/trados/settings/ai-settings/)
# Getting Started
This page walks you through the first-time setup so you can start using TermLens terminology and AI translation inside Trados Studio.
Tip
**Prefer to watch?** The [Getting Started screencast](https://www.youtube.com/watch?v=bOIwMAoP7xc) (16 min) covers everything on this page and more – TermLens, prompt generation, AI translation, the Chat window, and purchasing.
## First-Time Setup
### 1. Open Settings
Click the **gear icon** in the TermLens panel header to open the settings dialogue.
### 2. Configure Termbases (TermLens tab)
On the **TermLens** tab:
1. Click **Browse** to select an existing Supervertaler termbase (`.db` file)
2. Or click **New** to create a new empty termbase
You can add multiple termbases. Designate one as the **Project termbase** to give its terms higher priority (shown in pink).
Note
Supervertaler for Trados uses the same `.db` termbase format as Supervertaler Workbench. Any termbase created in either tool works in both. On Windows, both tools can point to the same `.db` file in a shared data folder. On a Mac running Trados via Parallels, the two products use separate filesystems – see [Running on a Mac](/trados/installation/#running-on-a-mac-parallels) for details.
### 3. Configure AI (AI Settings tab)
On the **AI Settings** tab:
1. Select a **provider** (OpenAI, Anthropic, Google, OpenRouter, Ollama, or others)
2. Enter your **API key** for the selected provider
3. Choose a **model**
Note
**Don’t have an API key yet?** You can skip this step entirely and use **[Clipboard Mode](/trados/clipboard-mode/)** instead. Clipboard Mode lets you translate and proofread using any web-based AI you already have access to – ChatGPT, Claude, Gemini, or any other LLM chat interface. No API key required. It is the fastest way to start using AI translation in Supervertaler for Trados.
### 4. Click OK
Settings are saved and applied immediately.
## Try It Out
### TermLens
1. Open a project in the Trados **Editor** view
2. Navigate to any segment – TermLens automatically displays term matches for the source text
3. Click a term translation to insert it into the target, or press **Alt+1** through **Alt+9**
### Clipboard Mode (no API key needed)
1. Open the **Supervertaler Assistant** panel and switch to the **Batch Operations** tab
2. Tick the **Clipboard Mode** checkbox
3. Click **Copy to Clipboard** – a ready-to-use prompt with your segments, terminology, and instructions is copied
4. Paste it into any web-based AI (ChatGPT, Claude, Gemini, etc.) and send it
5. Copy the AI’s response and click **Paste from Clipboard** – the translations are written back into Trados
See [Clipboard Mode](/trados/clipboard-mode/) for the full walkthrough.
### AI Translate (API key required)
1. Place the cursor in a segment
2. Press **Ctrl+T** to translate the active segment with AI
3. The AI translation appears in the target cell
### Supervertaler
1. Open the **Supervertaler Assistant** panel (View > Supervertaler Assistant)
2. Switch to the **Chat** tab
3. Type a question about the current segment and press **Enter**
4. The assistant responds with context from your terminology and TM matches
## Quick Links
| Feature | Page |
| ----------------------------- | ------------------------------------------------- |
| TermLens terminology display | [TermLens](/trados/termlens/) |
| AI via clipboard (no API key) | [Clipboard Mode](/trados/clipboard-mode/) |
| AI chat interface | [Supervertaler](/trados/ai-assistant/) |
| Bulk AI translation | [Batch Translate](/trados/batch-translate/) |
| All shortcuts | [Keyboard Shortcuts](/trados/keyboard-shortcuts/) |
***
## See Also
* [Installation](/trados/installation/)
* [Clipboard Mode](/trados/clipboard-mode/)
* [TermLens](/trados/termlens/)
* [Supervertaler](/trados/ai-assistant/)
# Import/Export
The **Import/Export** tab in the Supervertaler Assistant panel exports the active Trados document’s segments to a proofreader-friendly file (Word DOCX, Bilingual Text, or HTML), then re-imports the proofreader’s edits back into Trados with a confirmation diff.
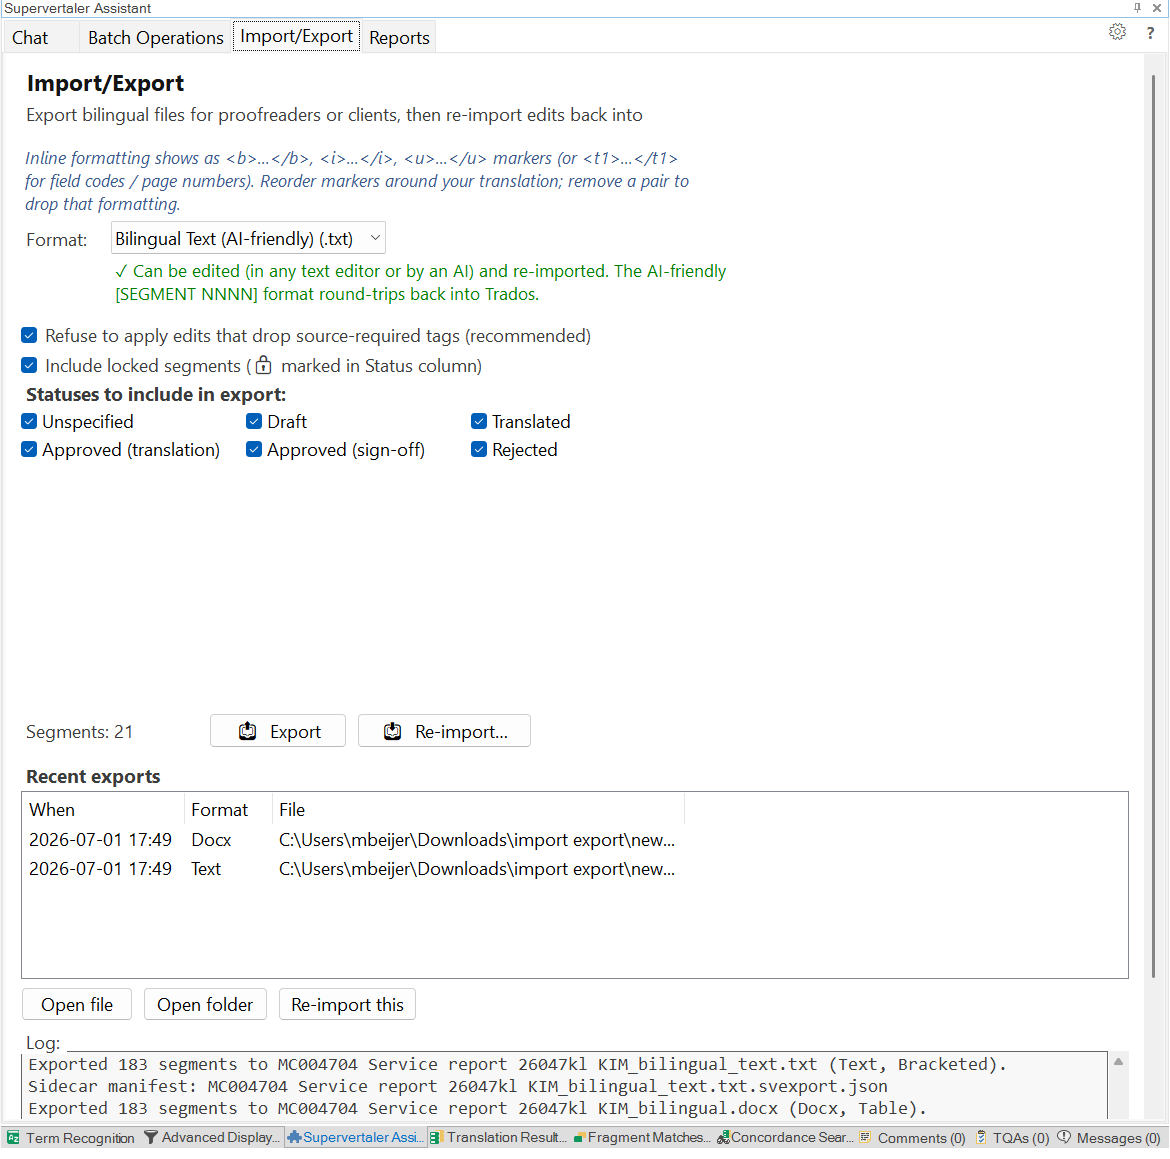
This is the workflow you’d use for:
* **External review** — send a bilingual DOCX to a colleague who doesn’t have Trados, get it back with edits, apply.
* **Quick AI proofreading via web LLM** — copy the bilingual text into ChatGPT/Claude/Gemini, paste the corrected version back, re-import.
* **Multi-file project review** — export every file in a merged project into one combined DOCX with section breaks between each source file.
## Formats
The export offers three formats, matching the Supervertaler Workbench:
| Format | Re-importable | When to use |
| --------------------------------------- | ------------- | -------------------------------------------------------------------------------------------------------------------------------------------------------------------------------------------------------------------------------------------- |
| **Word document (.docx)** | ✅ | The default. A 5-column bilingual table (`#`, source, target, status, notes) the proofreader edits in Word. Identical to the Workbench’s [Bilingual Table](/workbench/import-export/bilingual-tables/), so files move between both products. |
| **Bilingual Text (AI-friendly) (.txt)** | ✅ | A compact plain-text format — one block per segment — ideal for pasting into ChatGPT / Claude / Gemini or editing in any text editor. Identical to the Workbench’s [Bilingual Text](/workbench/import-export/bilingual-text/). |
| **HTML report (.html)** | ❌ | Client-facing read-only report. Cannot be re-imported. |
There’s no separate “layout” picker: each format has one shape — DOCX and HTML use the 5-column table, and Bilingual Text uses the bracketed `[SEGMENT NNNN]` blocks below.
Note
**Why “Text” and not “Markdown”?** The `.txt` file is deliberately plain text: its segment blocks rely on line breaks being preserved, which a Markdown renderer would collapse. AI agents read the raw characters when you paste the file into a chat, so plain text is both safe and maximally readable. *(Earlier versions offered a Markdown (.md) format and stacked source/target layouts; these were retired in favour of the two round-trippable formats above. Files exported by those older versions can still be re-imported.)*
## The Bilingual Text format
Each segment is one block, blank-line separated, with 2-letter language codes labelling the source and target lines:
```plaintext
[SEGMENT 0001]
EN: MASHUP APPLICATION PROCESSING SYSTEM
NL: MASHUP-APPLICATIEVERWERKINGSSYSTEEM
[SEGMENT 0002]
EN: FIELD OF THE INVENTION
NL: GEBIED VAN DE UITVINDING
```
* The `EN:` line is the **source** — leave it alone. It stays on **one line**; a `[newline]` token in it marks where the original source broke across two lines (read-only reference, never written back).
* The `NL:` line is the **target** — edit it freely, but **keep it on one line**. Where the target needs a hard line break (e.g. to split a subtitle across two lines), write the literal token `[newline]`; on re-import it’s turned back into a real break. Older files that wrapped a field over several physical lines still re-import unchanged.
* The `[SEGMENT NNNN]` markers are the alignment anchors — don’t rename them.
Because each field is one labelled line (not a table column), it survives pipe characters and long inputs without the source/target roles getting confused, and keeping targets to one line stops an LLM from accidentally reflowing them. This matches the Workbench’s Bilingual Text export byte-for-byte, so a file produced by either tool round-trips through the other.
## Inline formatting markers
Source and target cells use semantic placeholders for inline formatting so the proofreader can move them around without breaking Trados:
* `...` — bold pair
* `...` — italic pair
* `...` — underline pair
* `...` — bold + italic pair
* `...`, ``, … — numbered placeholders for everything else (field codes, page numbers, custom format pairs)
In the DOCX, the markers render in red and the text between a semantic pair is shown in matching bold / italic / underline so the proofreader can see what the formatting will look like.
**Round-trip rules:**
* Semantic markers (`` / `` / `` / ``) can be freely **added, removed, or reordered** in the target — they only affect cosmetic rendering and don’t drive Trados QA.
* Numbered structural markers (``, ``, …) **must round-trip exactly**. Adding a `` the source doesn’t have, or dropping one the source requires, would break the Trados file. The importer counts numbered markers on both sides and skips any segment whose count has changed (with a per-segment log entry).
The **“Refuse to apply edits that drop source-required tags”** checkbox enables this strict check. Leave it on unless you know what you’re doing.
## Multi-file projects
When the active Trados editor view contains more than one file merged (common when the Trados project was prepared with file merging), the tab grows extra controls:
### Files to export
A checkbox list of every file in the active document, each with its segment count. Quick-select buttons:
* **Active only** — checks only the file your cursor is currently in
* **All** — checks every file
* **None** — unchecks every file (Segments: 0)
The **Segments: N** label tracks the current selection live.
### Output mode
* **Combine into one file** (default) — produces a single bilingual file containing all selected files joined together, with a file-boundary marker between each source file so the proofreader can see where one file ends and the next begins. In a **DOCX** the table grows a 6th **File** column with a highlighted ”📄 File: ``” section-break row; in a **Bilingual Text** file a `📄 File: ` marker line prefaces each new file’s first segment.
* **Separate file per file** — asks for a folder and writes one bilingual file per selected source file.
Single-file documents see no change — the file list, output radio, and per-file UI are all hidden. (On re-import, the DOCX table’s 5- vs 6-column form is auto-detected.)
## Locked segments
Trados segments can be **locked** (read-only in the editor) independently of their confirmation level — so a segment can be both `ApprovedTranslation` and locked, or `Draft` and locked. On large projects with a lot of locked-approved content, sending those segments to a proofreader is usually noise: any edits they make there can’t be written back to Trados anyway.
A dedicated checkbox controls how the export handles them:
> **Include locked segments (🔒 marked in Status column)** — default ON.
* **ON (default)** — locked segments are exported alongside everything else, and every locked row gets a **🔒** prefix in the Status column (e.g. `🔒 ApprovedTranslation`). The proofreader can see at a glance which rows aren’t editable round-trippable, and the re-import will refuse to overwrite them.
* **OFF** — locked segments are skipped entirely. The exported file only contains rows that are actually still editable. Useful on multi-thousand-segment projects where the bulk of the work is already locked.
The checkbox lives right under the **“Refuse to apply edits that drop source-required tags”** option on the tab.
**On re-import**, locked segments are honoured regardless of the export-side setting: edits made to a locked row are reported as a *locked-segment* item in the re-import summary’s “other issues” count, and **not** written back to Trados. To genuinely change a locked segment, unlock it in Trados first, then re-import.
The locked flag also lives in the sidecar manifest (`is_locked: true` / `false` per segment) so the source of truth for which segments were locked at export time is preserved.
## Filtering by confirmation status
Just below the locked-segments option is a **Statuses to include in export** group of six checkboxes — one per Trados confirmation level:
* **Unspecified** — not yet translated (the initial state of a fresh segment)
* **Draft** — in progress
* **Translated** — confirmed by the translator
* **Approved (translation)** — first-pass approval
* **Approved (sign-off)** — final approval
* **Rejected** — marked for rework
All six are checked by default — no filter, every segment is included. Untick any subset to narrow the export to just those statuses. Common use-cases:
* **Tick only Translated** — send a draft pass to a proofreader.
* **Tick only Approved (translation)** — send near-final material out for a sign-off review.
* **Untick Approved (sign-off)** — exclude locked-down rows the client has already signed off on, so the proofreader only sees what’s still in play.
* **Tick only Draft + Unspecified** — generate a worklist of what’s still unfinished.
This filter composes orthogonally with the **Include locked segments** option and the multi-file **Files to export** list — every segment must pass all three filters to make it into the bilingual file.
## Re-import workflow
Click **📥 Re-import…**, pick the round-tripped file. Supervertaler:
1. Loads the file’s sidecar manifest (the `.svexport.json` written alongside the export).
2. For each row in the file, looks up the matching segment in Trados via the manifest’s `(ParagraphUnitId, SegmentId)` mapping.
3. Compares the file’s target text against the current Trados target — same serialisation pipeline on both sides, so only real edits register as changes.
4. Counts up: **changes to apply**, **unchanged**, **tag-mismatch** (will be skipped under strict mode), and **other issues** (segment missing, **locked**, source text was tampered with).
5. Shows you a summary dialog with **OK** / **Cancel**.
Click **OK** and Supervertaler writes the accepted changes back via the same code path the batch AI translator uses — confirmation level is preserved, and **locked segments are skipped automatically** (the writeback queries `IsLocked` on every segment, so a lock toggled in Trados between export and re-import is also respected).
## Recent exports
At the bottom of the tab, a list tracks every export from this session with:
* **Open file** — opens the bilingual file in its default app
* **Open folder** — opens the containing folder
* **Re-import this** — same as the main Re-import button, pre-pointed at this file
## Sidecar manifest
Every export writes a small `.svexport.json` file alongside the bilingual file. It contains:
* Project name, source filename, language pair, export timestamp, tool version
* Per-segment `(number → ParagraphUnitId / SegmentId)` mapping
* A SHA-256 prefix of the source text for tamper detection
* For multi-file exports: per-segment source file id + name
* Per-segment `is_locked: true | false` flag (snapshot at export time)
The manifest is what lets re-import find the exact Trados segments even if the proofreader accidentally reorders rows. If the manifest goes missing, re-import falls back to current-document mapping (which loses source-tamper protection but still works).
## See Also
* [Batch Operations](/trados/batch-operations/) — for AI-driven proofreading directly in Trados
* [AI Proofreader](/trados/ai-proofreader/) — in-Trados proofreading mode
# Installation
### Installation
#### Download
Install Supervertaler for Trados from the [RWS App Store](https://appstore.rws.com/plugin/432) – it’s the only supported install channel. Every published build is RWS-signed, which avoids the “Unsigned Trados Studio Plug-in Found” warning that would otherwise appear when Trados loads a plugin from a different source.
Note
Supervertaler for Trados comes in two builds: one for **Trados Studio 2024** and one for **Trados Studio 2026** (which uses the new `.ttb` termbase format). Install the build that matches your Studio version – the 2024 build will not load in Studio 2026, and vice versa. See [Trados Studio 2026 & .ttb](/trados/studio-2026/) for details. The installation steps below apply to both; only the version you select in the Plugin Installer differs.
You can either install from inside Trados Studio (**Add-Ins > RWS App Store**, search for “Supervertaler”, click **Download**) or download the `Supervertaler for Trados.sdlplugin` file from the [App Store website](https://appstore.rws.com/plugin/432) and double-click it. Either path opens the Trados Plugin Installer.
Note
The [GitHub repository](https://github.com/Supervertaler/Supervertaler-for-Trados) is for source-code review, release notes, and issue tracking only. GitHub releases no longer include a `.sdlplugin` binary attachment – the App Store is the single source of truth for the plugin binary.
#### Install
1. **Close Trados Studio** if it is running
2. **Double-click** the downloaded `Supervertaler for Trados.sdlplugin` file
3. The Trados Plugin Installer opens – select your Trados Studio version and choose an installation location:
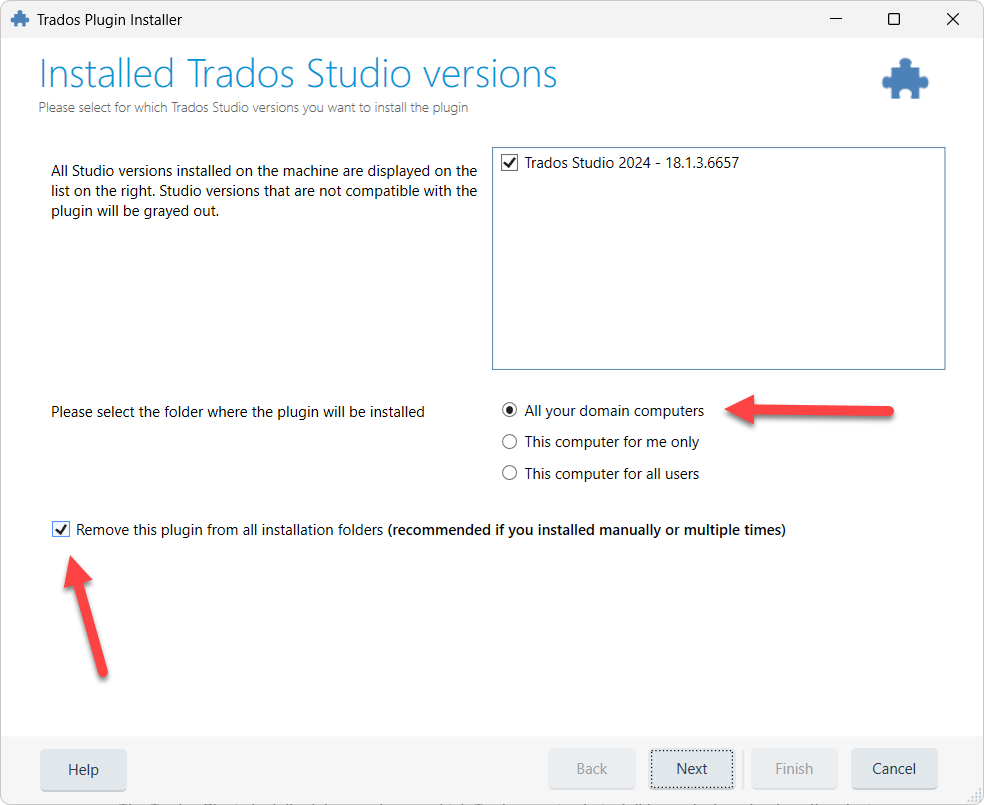
The Trados Plugin Installer lets you choose which Trados version to install for and where to place the plugin.
4. Click **Next**, then **Finish** to complete the installation
5. **Start Trados Studio** – the plugin loads automatically
**Installation locations**
The installer offers three options for where to place the plugin. Each option stores the plugin in a different Windows folder, which determines who can use it and whether it follows you to other computers.
**“All your domain computers”** (default) : Installs to: `C:\Users\\AppData\Roaming\Trados\Trados Studio\18\Plugins\Packages\` : The Windows **Roaming** profile folder. In environments that sync the Roaming profile across machines – classic Active Directory roaming profiles, FSLogix profile containers, and similar setups – the plugin follows your Windows account from one PC to another. (OneDrive Known Folder Move does **not** sync `AppData\Roaming` by default, so OneDrive on its own is not a roaming mechanism.) On a single-PC personal install without any profile-sync setup, the plugin simply stays on the machine – functionally similar to “This computer for me only”, though the folder is still `Roaming` rather than `Local`, which can matter if the machine later joins a profile-sync environment.
**“This computer for me only”** : Installs to: `C:\Users\\AppData\Local\Trados\Trados Studio\18\Plugins\Packages\` : The Windows **Local** profile folder. The plugin stays on this specific machine and is only available to your Windows user account. If another person logs into the same PC with a different Windows account, they will not have the plugin.
**“This computer for all users”** : Installs to: `C:\ProgramData\Trados\Trados Studio\18\Plugins\Packages\` : The shared **ProgramData** folder. The plugin is available to every Windows user account on this machine. Use this on shared workstations where multiple people log in with their own Windows accounts and all need the plugin. Rarely needed for most translators.
Note
**Which should I choose?** **Just leave it on the default** (“All your domain computers”) and click Next. The dialogue always opens with this option pre-selected and it works correctly for everyone. On a single-PC personal install it behaves the same as “This computer for me only” in practical terms (the plugin loads identically) – the only real difference is the install folder (`Roaming` vs `Local`), which only matters in environments that sync the Roaming profile across machines. **All three options work fine** – pick a different one only if you have a specific reason. As long as the **“Remove this plugin from all installation folders”** checkbox stays ticked (it is by default), any orphan-copy issues from previous installs are cleaned up automatically, regardless of which option you pick.
**“Remove this plugin from all installation folders” checkbox**
The Trados Plugin Installer shows a checkbox below the install-scope radio buttons:
> ☑ **Remove this plugin from all installation folders** *(recommended if you installed manually or multiple times)*
It is ticked by default. **Always leave it ticked.** Before placing the fresh install in the location you’ve selected, the installer sweeps all three locations (Roaming, Local, ProgramData) and removes any existing Supervertaler copies. On a first-time install there’s nothing to remove and the checkbox is a harmless no-op; on an upgrade or after a previous manual install, it prevents the multi-scope-orphan problem where Trados ends up with two copies of the plugin in different folders and loads the wrong one on next start.
#### Verify Installation
After restarting Trados Studio, open a project in the Editor view. You should see:
* **TermLens panel** – docked above the editor area (or in the bottom panel area)
* **Supervertaler Assistant panel** – docked on the right side
**If the TermLens panel is not visible**
Go to **View > TermLens** to show the panel.
**If the Supervertaler Assistant panel is not visible**
Go to **View > Supervertaler Assistant** to show the panel.
Tip
Both panels are standard Trados dockable panels. You can drag them to any docking position (left, right, top, bottom, floating) or move them to a second monitor. Trados remembers their position between sessions.
#### Free up the keyboard shortcuts
Trados Studio’s own default bindings sit on several of the key combinations Supervertaler uses (`Ctrl+Alt+T`, `Ctrl+Alt+N`, `Ctrl+Alt+G`, `Alt+Up`, `Ctrl+Q`) – and the Trados binding wins, so those Supervertaler shortcuts do nothing until you clear the defaults. This takes two minutes in **File → Options → Keyboard Shortcuts** and only needs doing once per Trados installation.
See [First-time setup: free up Trados shortcuts](/trados/keyboard-shortcuts/#first-time-setup-free-up-trados-shortcuts) for the full table of what to delete.
#### Running on a Mac (Parallels)
If you are running Trados Studio inside **Parallels Desktop** on a Mac, there is one important rule for the first-run setup:
**Keep your data folder on the Windows side** – use the default path (e.g., `C:\Users\\Supervertaler`). Do **not** point it to a Mac-side path like `\\Mac\Home\Supervertaler`.
Supervertaler stores termbases as SQLite databases, and SQLite requires a local filesystem to work reliably. The `\\Mac\Home\...` paths in Parallels are mounted via a virtual network share, which can cause database locking errors or data loss.
Caution
**Mac users:** When the first-run setup dialogue appears, accept the default `C:\Users\\Supervertaler` path. If you previously used Supervertaler Workbench on the Mac side, copy your termbases into the Windows-side folder rather than pointing to the Mac path directly.
The plugin automatically detects Parallels and shows a warning if you select a Mac-side path during setup.
**Sharing termbases between Workbench and the Trados plugin on a Mac**
On Windows, both Supervertaler Workbench and the Trados plugin can point to the same shared data folder and work from the same `.db` termbase file simultaneously.
On a Mac with Parallels, this is **not possible** because the two products run on different filesystems:
* **Supervertaler Workbench** runs natively on macOS – its data folder is on the Mac filesystem (e.g., `/Users//Supervertaler/`)
* **Supervertaler for Trados** runs inside Parallels (Windows) – its data folder must be on the Windows filesystem (e.g., `C:\Users\\Supervertaler\`)
The Trados plugin cannot reliably use a Mac-side path (`\\Mac\Home\...`) due to SQLite limitations on virtual network shares. To keep your termbases in sync between the two products on a Mac, copy the `.db` file from one side to the other after making changes. This is a limitation of the Parallels virtualisation layer, not of the termbase format.
***
#### Updating
When a new version is published to the App Store, Supervertaler shows an **Update Available** dialogue on the next Trados startup, with the version difference and an **Install Update** button.
1. Click **Install Update** – the plugin downloads the RWS-signed update from the App Store and writes it back to the same install scope (Roaming, Local, or ProgramData) you originally chose during installation
2. When prompted, click **Restart Trados Studio** – the plugin restarts Trados for you and loads the new version
Your settings, termbases, prompts, memory banks, and licence key are all preserved across updates – no need to uninstall first.
**Manual update from the App Store website**
If you’ve dismissed the in-plugin dialogue (for example, by clicking **Remind Me Later**) and want to update straight away, you can install manually from the App Store website:
1. **Close Trados Studio completely** – the plugin files are locked while Trados is running
2. Open the [App Store page for Supervertaler](https://appstore.rws.com/plugin/432) and click **Download** to save the latest `Supervertaler for Trados.sdlplugin`
3. Double-click the file – the Trados Plugin Installer handles the rest
4. Start Trados Studio – the new version loads automatically
Caution
Trados Studio **must be fully closed** before installing or updating manually. If Trados is still running, the installer may silently fail because the plugin files are locked.
#### Troubleshooting: old version still showing after update
Note
From **v4.19.24** onwards the in-plugin updater is install-scope aware – it writes updates back to the same scope (Roaming, Local, or ProgramData) as the original install, so this scenario does not occur for automatic updates. The steps below remain useful if you have inherited a multi-scope install from an earlier version, or have placed `.sdlplugin` files manually in different locations.
Tip
**Easiest fix:** download the latest `.sdlplugin` from the [App Store page](https://appstore.rws.com/plugin/432), close Trados, double-click the file, and tick the **“Remove this plugin from all installation folders”** checkbox when it appears in the installer. The Trados Plugin Installer will sweep all three install scopes and replace everything with the fresh copy in one step. Manual cleanup steps below are only needed if that path doesn’t work for some reason.
If Trados still loads an older version of the plugin after installing a new one, an old copy may be lingering in a different installation location. Check all three plugin folders and remove any old `Supervertaler for Trados.sdlplugin` (in `Packages`) and `Supervertaler.Trados` folder (in `Unpacked`):
| Folder | Path |
| --------- | ---------------------------------------------------------- |
| Roaming | `%AppData%\Trados\Trados Studio\18\Plugins\Packages\` |
| Local | `%LocalAppData%\Trados\Trados Studio\18\Plugins\Packages\` |
| All users | `%ProgramData%\Trados\Trados Studio\18\Plugins\Packages\` |
Note
**Quick way to check:** paste each path into the Windows Run dialogue (`Win+R`) or File Explorer address bar. If the folder exists and contains an old `Supervertaler for Trados.sdlplugin`, delete it. Also check for an `Unpacked\Supervertaler for Trados` folder at the same level and delete it if present.
After removing the old files, double-click the new `.sdlplugin` to install it fresh, then start Trados.
#### Uninstalling
To remove the plugin:
1. Open Trados Studio
2. Go to **Help > Plugin Management**
3. Find “Supervertaler for Trados” in the list
4. Click **Uninstall**
5. Restart Trados Studio
***
#### Next Steps
* [Getting Started](/trados/getting-started/) – set up your first termbase and API key
# Keyboard Shortcuts
All keyboard shortcuts available in Supervertaler for Trados, with Mac equivalents for users running Trados in Parallels.
Note
**Mac users (Parallels):** Ctrl = Control, Alt = Option on Mac keyboards. Check **Parallels → Preferences → Shortcuts** if your modifier key mapping differs.
## First-time setup: free up Trados shortcuts
Trados Studio ships with its own default bindings on several of the key combinations Supervertaler uses – and the Trados binding wins. If a Supervertaler shortcut does nothing, this is almost always why. Go to **File → Options → Keyboard Shortcuts**, search for the Trados action named below, and delete (or reassign) its binding:
| Shortcut | Trados default action (delete its binding) | Supervertaler action that needs it |
| ------------ | ------------------------------------------ | ------------------------------------ |
| `Ctrl+Alt+T` | Insert TM Symbol (™) | Add term entry (full editor) |
| `Ctrl+Alt+N` | New Cloud Project | Quick-add non-translatable term |
| `Ctrl+Alt+G` | Open GroupShare Project | Auto-tag active segment (AutoTagger) |
| `Alt+Up` | Focus Previous Row | Quick-add term to project termbase |
| `Ctrl+Q` | View Internally Source | Open QuickLauncher |
Note
The same applies to any other Supervertaler shortcut that appears dead: search **File → Options → Keyboard Shortcuts** for that key combination and clear the Trados binding. You only need to do this once per Trados installation – but repeat it after reinstalling or resetting Trados Studio.
## Terminology
| Shortcut (Windows) | Shortcut (Mac) | Action |
| ------------------ | ----------------------- | ----------------------------------------------------------------------------------------------------- |
| `Alt+Down` | `Option+Down` | Quick-add term to write termbases |
| `Alt+Up` | `Option+Up` | Quick-add term to project termbase |
| `Ctrl+Alt+T` | `Control+Option+T` | Add term entry (opens full editor with definition, domain, notes, URL, client, project, and synonyms) |
| `Ctrl+Alt+N` | `Control+Option+N` | Quick-add non-translatable term |
| `Ctrl` (tap) | `Control` (tap) | Toggle the floating **TermLens popup** (open / close) |
| `Ctrl+Shift+P` | `Control+Shift+P` | Open **TermPicker** (list-based) |
| `Alt+1` … `Alt+9` | `Option+1` … `Option+9` | Insert term 1–9 by badge number |
## AI Translation
| Shortcut (Windows) | Shortcut (Mac) | Action |
| ------------------ | -------------- | ------------------------------------------------------------ |
| `Ctrl+Q` | `Control+Q` | Open QuickLauncher prompt menu |
| `Alt+T` | `Option+T` | Translate the active segment (uses Batch Translate settings) |
Note
**Why `Alt+T` and not `Ctrl+T`?** `Ctrl+T` is a Trados factory default (“Apply Translation Result”). Binding *both* to one key made a single press fire both commands, which raced on the same segment and could freeze Studio – so the default moved to the collision-free `Alt+T` (in plugin v18/19.20.119). If you upgraded from an earlier version and still have it on `Ctrl+T`, reassign it to `Alt+T` (or any free key) in **File → Options → Keyboard Shortcuts**; Studio keeps your existing binding across updates.
## Voice Commands
| Shortcut (Windows) | Shortcut (Mac) | Action |
| ------------------ | ------------------ | --------------------------------------------------------------------------------------------------------------- |
| `Ctrl+Alt+V` | `Control+Option+V` | Toggle [voice commands](/trados/voice-commands/) on/off (same as clicking the 🎤 button in the TermLens header) |
## QuickLauncher Shortcuts
| Shortcut (Windows) | Shortcut (Mac) | Action |
| --------------------------- | --------------------------------------- | --------------------------------------------- |
| `Ctrl+Alt+1` … `Ctrl+Alt+9` | `Control+Option+1` … `Control+Option+9` | Run QuickLauncher prompt assigned to slot 1–9 |
| `Ctrl+Alt+0` | `Control+Option+0` | Run QuickLauncher prompt assigned to slot 10 |
Note
Assign prompts to slots in **Settings → Prompts**. Select a QuickLauncher prompt and choose a shortcut from the dropdown in the detail pane. If no slots are assigned, the shortcuts default to menu position order.
## SuperMemory
| Shortcut (Windows) | Shortcut (Mac) | Action |
| ------------------ | ------------------ | -------------------------------------------------------------- |
| `Ctrl+Alt+M` | `Control+Option+M` | Quick Add – add a term or correction to the active memory bank |
## SuperSearch
| Shortcut (Windows) | Shortcut (Mac) | Action |
| ------------------ | -------------- | ---------------------------------------------------------------------------------------- |
| `Alt+S` | `Option+S` | Open SuperSearch — searches for the selected source/target text across all project files |
## AutoTagger
| Shortcut (Windows) | Shortcut (Mac) | Action |
| ------------------ | ------------------ | ----------------------------------------------------------------------------------- |
| `Ctrl+Alt+G` | `Control+Option+G` | Auto-tag the active segment – places the source segment’s inline tags in the target |
## Navigation and Display
| Shortcut (Windows) | Shortcut (Mac) | Action |
| ------------------ | -------------- | ----------------------------------------------------------------------------------------------------------------- |
| `F1` | `F1` | Context-sensitive help |
| `F2` | `F2` | Expand selection to word boundaries |
| `F5` | `F5` | Force-reload Supervertaler termbases from disk and refresh TermLens display (does not reload MultiTerm termbases) |
## Shortcuts for Terms 10+
When a segment has more than 9 matched terms, you can still insert terms by number using Alt+digit. TermLens offers two shortcut styles – choose the one you prefer in **Settings > TermLens > Term shortcuts**.
### Sequential (default)
Type the term number digit by digit. Each badge shows the plain term number (10, 11, 12, …).
| Shortcut (Windows) | Shortcut (Mac) | Inserts |
| ------------------ | -------------- | ------- |
| `Alt+10` | `Option+10` | Term 10 |
| `Alt+23` | `Option+23` | Term 23 |
| `Alt+45` | `Option+45` | Term 45 |
After the first digit, TermLens waits briefly for a possible second (or third) digit. If no further digit is pressed, the single-digit term is inserted.
### Repeated digit
Press the **same digit key** multiple times. Each badge shows the repeated digit (11, 222, 3333, …).
| Presses | Windows | Mac | Badge | Terms |
| ------- | ------------------------- | ------------------------------- | --------------------- | ----- |
| 1x | `Alt+1` … `Alt+9` | `Option+1` … `Option+9` | **1** – **9** | 1–9 |
| 2x | `Alt+11` … `Alt+99` | `Option+11` … `Option+99` | **11** – **99** | 10–18 |
| 3x | `Alt+111` … `Alt+999` | `Option+111` … `Option+999` | **111** – **999** | 19–27 |
| 4x | `Alt+1111` … `Alt+9999` | `Option+1111` … `Option+9999` | **1111** – **9999** | 28–36 |
| 5x | `Alt+11111` … `Alt+99999` | `Option+11111` … `Option+99999` | **11111** – **99999** | 37–45 |
Note
In both modes, when a segment has 9 or fewer matches, pressing Alt+N inserts immediately with no delay.
Note
Terms beyond 45 have no keyboard shortcut. Use the **TermLens popup** (tap `Ctrl`) or **TermPicker** (`Ctrl+Shift+P`) to insert them.
***
## See Also
* [TermLens](/trados/termlens/)
* [Supervertaler](/trados/ai-assistant/)
* [SuperSearch](/trados/supersearch/)
* [AutoTagger](/trados/autotagger/)
* [Batch Translate](/trados/batch-translate/)
* [SuperMemory](/trados/ai-assistant/super-memory/)
# Licensing
Supervertaler for Trados uses a simple subscription model: one product, one price, everything included.
## Free Trial
When you first install Supervertaler for Trados, a **14-day free trial** starts automatically. During the trial, all features are unlocked – TermLens, AI Assistant, SuperSearch, memory banks, Studio Tools, and everything else.
No sign-up or credit card is required to start the trial. The remaining days are shown in the **Licence** tab in Settings and in the About dialogue.
## Pricing
| | Monthly | Annual |
| ---------------------------- | --------- | --------- |
| **Supervertaler for Trados** | €20/month | €200/year |
One plan, all features included: TermLens inline terminology, AI Assistant & Batch Translate, SuperSearch cross-file search & replace, AI-maintained memory banks, Studio Tools, Clipboard Mode, QuickLauncher, Prompt Library, MultiTerm support, Incognito Mode, and all future features.
Note
Annual plans include **2 months free** compared to monthly billing.
## Purchasing a Licence
1. Visit [supervertaler.com/trados](https://supervertaler.com/trados/) and click **Subscribe**
2. Complete the checkout – you will receive a **licence key** by email
3. Open Trados Studio → **Settings → Licence** tab
4. Paste your licence key and click **Activate**
Your licence allows activation on up to **2 machines** (e.g. a desktop and a laptop).
## Activating Your Licence
1. Open Trados Studio
2. Click the **gear icon** (⚙) on the TermLens or Supervertaler Assistant panel
3. Go to the **Licence** tab
4. Enter your licence key in the text field
5. Click **Activate**
A confirmation message appears when activation succeeds. The Licence tab shows your plan name, masked licence key, status, and last verification date.
Tip
You can also reach the Licence tab by clicking the licence status text in the **About** dialogue (accessible via the **?** button on any panel).
## Managing Your Subscription
From the **Licence** tab in Settings, you can:
* **Verify Now** – manually check your licence status with the server
* **Deactivate** – remove the licence from this machine (frees up an activation slot)
* **Manage subscription →** – opens the Lemon Squeezy billing portal where you can update payment details or cancel
## Offline Use
After activation, the plugin caches your licence status locally. You can work offline for up to **30 days** before the plugin needs to verify your licence again. When you reconnect to the internet, verification happens automatically in the background.
## What Happens When the Trial Expires
After the 14-day trial ends:
* **No licence** – all features show a “licence required” overlay. Your termbases, settings, and prompt library are preserved.
* **Active licence** – all features are unlocked.
Activating a licence immediately unlocks all features.
## Changing Machines
If you replace a computer or need to move your licence:
1. On the old machine: open **Settings → Licence** and click **Deactivate**
2. On the new machine: enter your licence key and click **Activate**
If you can no longer access the old machine, the activation slot will be freed automatically when the licence is next validated.
## Privacy & Security
The plugin makes **no network calls** except to:
1. **Your chosen AI provider** (OpenAI, Anthropic, Google Gemini, OpenRouter, or local Ollama) – only when you use AI features
2. **Lemon Squeezy licence API** (`api.lemonsqueezy.com`) – for licence activation and periodic validation
3. **Anonymous usage statistics** (strictly opt-in) – if you consent, a single ping on startup sends only: plugin version, OS version, Trados version, and system locale. See [Usage Statistics](/trados/settings/usage-statistics/) for details.
The licence validation sends only your licence key and a hashed machine fingerprint (a one-way hash of your computer name and Windows user ID). No personal data, no translation content, no termbase information is ever collected.
Your API keys are stored locally in `%LocalAppData%\Supervertaler.Trados\settings.json` and are never transmitted anywhere except to your chosen AI provider.
Note
The full source code is available on [GitHub](https://github.com/Supervertaler/Supervertaler-for-Trados) for security audit. You can verify exactly what the plugin does and does not transmit.
# Supervertaler MCP Server
The Supervertaler MCP Server connects **Claude Desktop** directly to your live Trados Studio session. You chat in Claude’s own window, and it answers from your real project data: the document open in the editor, your translation memories, and your termbases. It can also make changes for you, always under your supervision.
> **Which AI apps work?** Claude Desktop is fully supported and is the recommended app. Other MCP clients that run **local (STDIO) MCP servers on your own machine** – such as Claude Code – also work. **ChatGPT’s desktop app is not supported**: it runs MCP servers in a cloud environment rather than on your computer, so it cannot reach the Supervertaler bridge, which is local to your machine by design (your project never leaves your PC). This is a difference in how the two apps are built, not something the plugin can change.
MCP ([Model Context Protocol](https://modelcontextprotocol.io/)) is the open standard that lets AI applications securely call tools exposed by other programs. The Supervertaler MCP Server is the first MCP server that talks to a **live** Trados Studio editor session – other Trados-related MCP servers work on project files on disk, not the document you are working on.
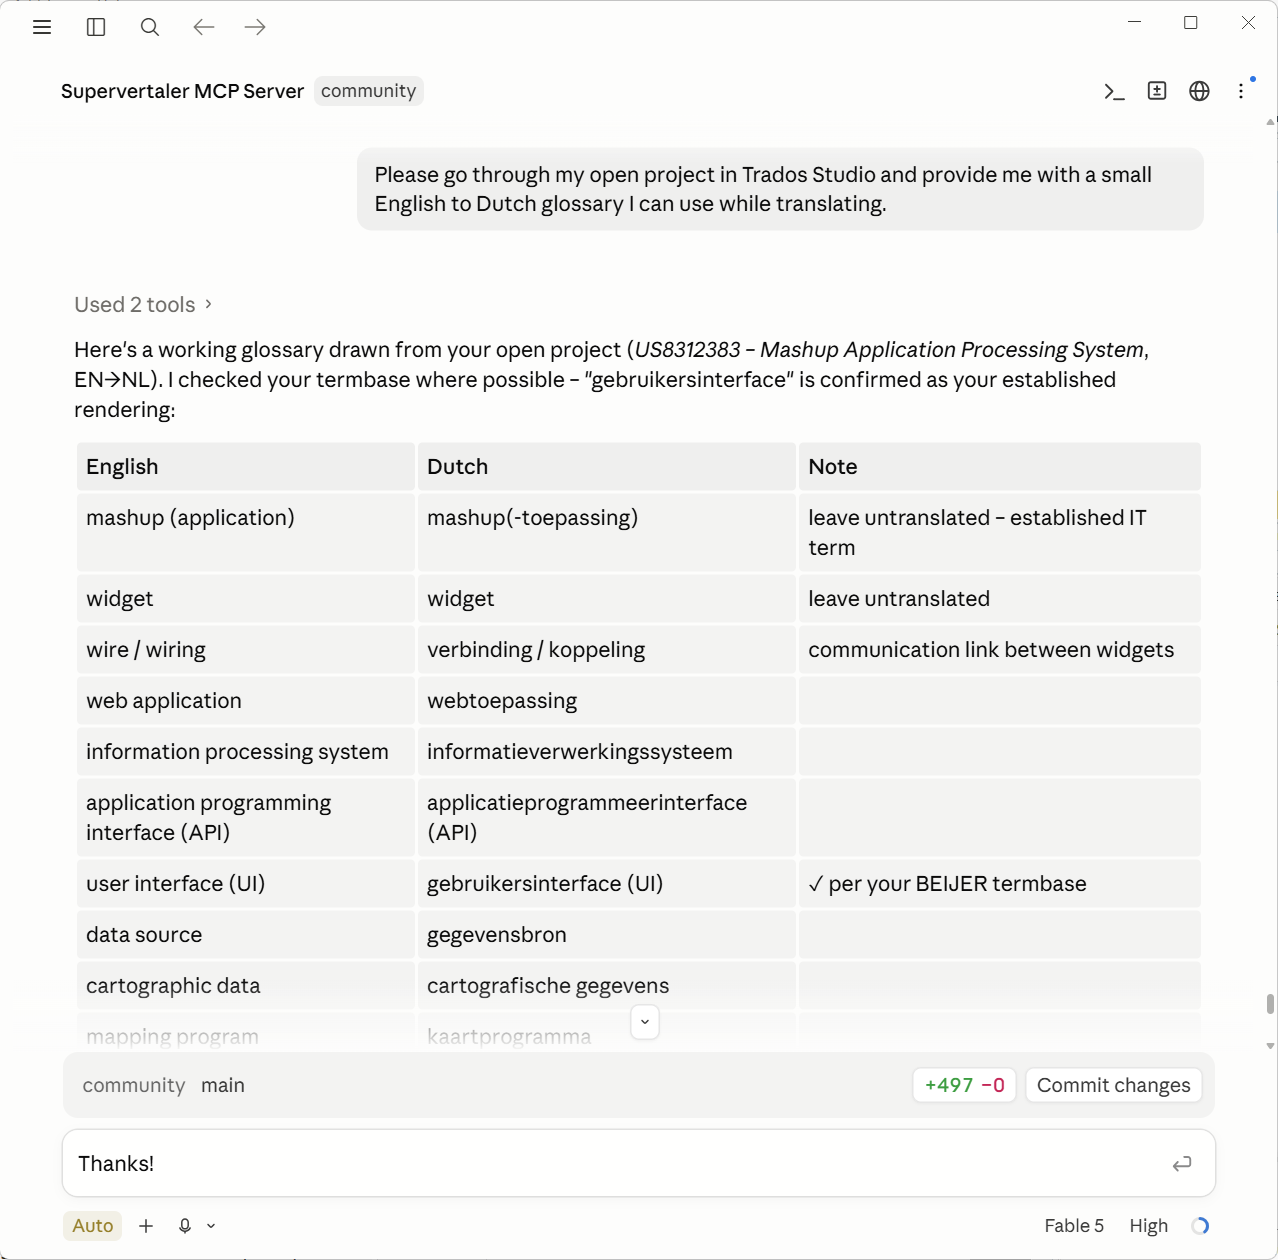
Asking the AI for a glossary drawn from the live Trados Studio project – it reads the open document and checks the user's termbase, then answers in chat.
## What you can ask
With Trados Studio open and a document in the editor, you can ask your AI assistant things like:
* “What’s the status of my Trados project? How many segments are left?”
* “How many times does the word *doekrol* appear in my project, and did I translate it consistently?”
* “Find all Draft segments containing *flange* and show me the translations.”
* “How did I translate this phrase before?” (searches your Supervertaler TMs)
* “What does my termbase say for *sluitkracht*?”
* “Draft translations for the untranslated segments and set them to Draft so I can review them.”
* “We agreed *draagarm* = *support arm* – add it to my termbase.”
Unlike the [AI-friendly bilingual export](/trados/import-export/) workflow, there is no export/re-import cycle: the AI reads the live document on demand, and changes it makes appear in Studio while you chat.
## What the AI can do
The server exposes these tools to the AI app:
| Tool | What it does |
| ---------------------------- | -------------------------------------------------------------------------------------------------------------------------------------------------------------------------------------------- |
| `help` | A curated menu of what you can ask – shown when you say *“what can I do?”* *(v18.20.106)* |
| `get_active_project` | Project name, language pair, active file, segment counts per confirmation status |
| `get_segments` | List segments, with filters (status, contains-text, file) and paging – or fetch exact segments by the grid number(s) you see in Studio (`fromNumber`/`toNumber`) *(grid numbers v18.20.114)* |
| `get_files` | The files of a merged multi-file document, with per-file segment counts *(v18.20.95)* |
| `get_active_segment` | The segment you are editing right now, with TM matches and termbase hits |
| `get_project_statistics` | Analysis bands and per-file confirmation statistics – word counts, progress *(v18.20.95)* |
| `search_studio_tm` | Concordance-search the Trados TMs attached to the project (.sdltm and GroupShare) *(v18.20.95)* |
| `search_tm` | Search your Supervertaler (Workbench-bridged) translation memories |
| `lookup_term` | Look up a term in your termbases (exact first, then substring matching) |
| `find_inconsistencies` | Repeated source segments whose translations differ *(v18.20.95)* |
| `check_numbers` | Translated segments whose numbers differ between source and target *(v18.20.95)* |
| `check_tags` | Translated segments with missing or extra inline tags *(v18.20.95)* |
| `check_terminology` | Translated segments that don’t use the termbase’s expected translation *(v18.20.95)* |
| `list_resources` | The TMs and termbases attached to your project and Supervertaler setup *(v18.20.95)* |
| `list_projects` | Every project registered in Trados Studio – across Studio 2026/2024/2022 – with status and paths *(v18.20.111)* |
| `get_project` | Details of any registered project by name, without opening it *(v18.20.111)* |
| `list_tms` | The file TMs on this machine (Studio folders + project references) *(v18.20.111)* |
| `list_project_templates` | Your Trados project templates *(v18.20.111)* |
| `update_segments` | Write translations and/or set confirmation statuses (see safety rails below) |
| `add_term` | Add a source/target pair to your Write termbases |
| `update_term` | Fix an existing entry in your Write termbases – exact-match, all other fields preserved *(v18.20.113)* |
| `delete_term` | Remove an entry from your Write termbases – destructive, so the AI confirms first *(v18.20.113)* |
| `insert_into_active_segment` | Insert text into the active segment’s target (like Apply-to-target) |
| `save_document` | Save the open document (Ctrl+S) – only when you ask or approve *(v18.20.115)* |
| `go_to_segment` | Move the Studio editor to a specific segment (by grid number or id) |
| `find_and_replace` | Find & replace across the target text – tag-safe, with a preview before applying |
| `get_comments` | Read the Trados comments in the document |
| `add_comment` | Add a Trados comment to a segment (flag a source issue, leave a review note) |
| `update_comment` | Edit an existing Trados comment |
| `run_verification` | Run Studio’s Verify Files (QA Checker) and return the findings per segment |
| `analyze_files` | Run **Analyse Files** – computes the perfect/exact/fuzzy/new/repetition leverage breakdown *(v18.20.106)* |
| `pretranslate` | Run **Pre-translate Files** – fill untranslated segments with their TM matches |
| `update_tm` | Run **Update Main Translation Memories** – write confirmed segments to the project TM |
| `export_target` | Run **Generate Target Translations** – write out the translated target files |
| `get_task_status` | Check a background batch task’s progress (analyse, pre-translate, …) *(v18.20.104)* |
| `list_prompts` | Browse your Supervertaler prompt library, optionally filtered by folder or search term *(v18.20.101)* |
| `get_prompt` | Read the full text of one of your prompts *(v18.20.101)* |
| `save_prompt` | Create a new prompt, or update one of your own – built-in defaults are protected *(v18.20.101)* |
| `get_prompt_context` | Everything the AI needs to write a translation prompt tailored to your open project – source text, domain, terms, TM examples *(v18.20.109)* |
> The four batch tasks (`analyze_files`, `pretranslate`, `update_tm`, `export_target`) run in the **background** and return immediately – the AI polls `get_task_status` and tells you when they finish, so a long analysis never stalls the chat.
>
> This list grows over time. For the current set on your installed version, just ask the AI *“what can I do?”* (the `help` tool).
### Safety rails on write actions
* Translations written by the AI are set to **Draft** status unless it explicitly sets another status – so you can filter for them in Studio and review everything.
* **Locked segments are never touched.**
* Updates are limited to 200 segments per call; larger jobs are processed in reported batches.
* Changes land in the open document but are **not saved automatically** – saving stays your decision. From v18.20.115 the AI can run the save for you (`save_document`, same as Ctrl+S), but only when you ask or approve – *“save and run the analysis”* is one instruction, silent saving is not allowed.
* The AI is instructed to only make changes you asked for, and to report exactly what it changed.
## Prompt cookbook
You talk to the AI in plain language – there are no commands to memorise. The AI decides which tools to call from what you say. This section lists, per task, the kinds of things you can say, so you know the full range of what’s possible. Mix and combine freely (“find X, then fix Y”).
> **Not sure where to start? Just ask *“What can I do?”*** (or *“what can you do?”*) and the assistant shows a grouped menu of everything below – so you don’t have to read this page first.
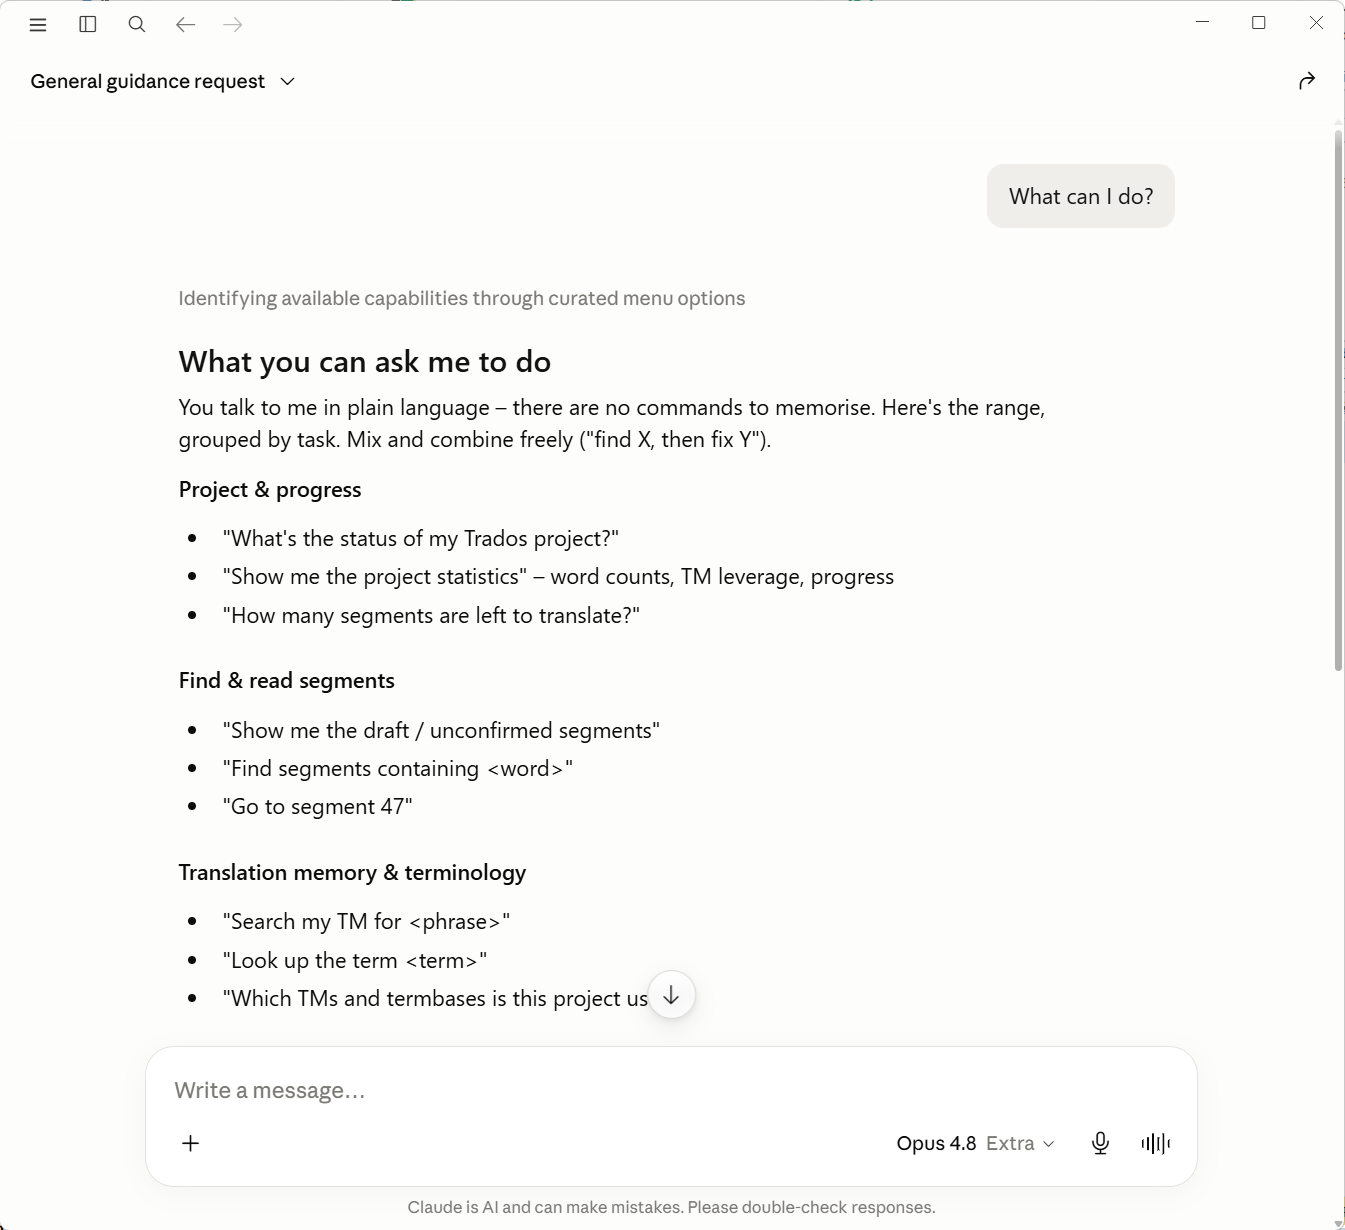
Ask *"What can I do?"* and the assistant lists what you can ask it, grouped by task.
### Project status and progress
* “What’s the status of my Trados project?”
* “How many segments are left to translate?”
* “Which file am I working on, and what’s the language pair?”
* “How many words are still untranslated?” / “Give me the analysis statistics – fuzzies, repetitions, new words.” *(from v18.20.95)*
* “How far along is each file in this project?” *(from v18.20.95)*
* “What projects do I have?” / “When did I create the ACME job, and where is it on disk?” *(all Studio versions’ registries – from v18.20.111)*
* “Which TMs and project templates are on this machine?” *(from v18.20.111)*
### Finding and reading segments
* “Show me all untranslated segments.”
* “Show me the Draft segments so I can see what the AI wrote earlier.”
* “Find all segments containing *flange*.”
* “How many times does *doekrol* appear in this project? Is it translated consistently?”
* “Show me segments 50 to 100.” (paging)
* “List the files in this merged document.” / “Only show me segments from the contract file.” *(from v18.20.95)*
### Terminology
* “What does my termbase say for *sluitkracht*?”
* “Look up *support arm* – do I have an established translation?”
* “Go through the project and make me a glossary of the key terms.”
* “We agreed *draagarm* = *support arm* – add it to my termbase.”
* “Extract the recurring technical terms from this document and add the ones I approve to my termbase.”
* “That pair is outdated – replace it with the official MDR term in both termbases.” *(update, exact-match, audited in chat – from v18.20.113)*
* “Delete that junk entry the QA keeps flagging.” *(Write-enabled termbases only; the AI confirms before deleting – from v18.20.113)*
* “Only consult my **active** termbases for this lookup.” *(restricts to termbases with Read ticked; otherwise inactive hits are flagged – from v18.20.113)*
### Translation memory
* “How did I translate this sentence before?” *(searches the Trados TMs attached to your project – from v18.20.95)*
* “Search my TM for *scherminrichting*.”
* “Search only the target side of my TMs for *roller blind*.” *(from v18.20.95)*
* “Before translating, check my TM and termbase and follow what you find.”
### The segment I’m working on
* “Translate this segment.” / “Explain this sentence.”
* “What do my TM and termbase say about the current segment?”
* “Give me three alternative translations for this segment, then insert the one I pick.”
### Writing translations (always reviewable)
* “Draft translations for all untranslated segments – I’ll review them in Studio.”
* “Translate the segments containing *warranty*, use my termbase, set them to Draft.”
* “Redo segment 14 – too literal, make it flow better, then update it.”
* “Set all my Draft segments to Translated.” (status-only changes work too)
Everything the AI writes lands as **Draft** unless you say otherwise, locked segments are never touched, and nothing is saved until you save in Studio.
### Quality and consistency
* “Find segments where the source and target numbers don’t match.” *(from v18.20.95)*
* “Check my tags – any segments missing formatting?” *(from v18.20.95)*
* “Check my translated segments against the termbase and list violations.” *(from v18.20.95)*
* “Find all repeated sentences that I translated differently.” *(from v18.20.95)*
* “Run all your QA checks and give me a report.”
* “…then align them all to the best version.” (pairs with the write tools)
### Resources
* “Which TMs and termbases is this project using?” *(from v18.20.95)*
### Your prompt library *(from v18.20.101)*
The AI can read and improve the Markdown prompts in your Supervertaler prompt library – the same ones you use in the QuickLauncher and Batch Translate (and shared with the Supervertaler Workbench):
* “List my prompts.” / “Show me the prompts in my Translate folder.”
* “Show me my Default Translation Prompt.”
* “Look at my Default Translation Prompt and suggest improvements for patent work, then save it as a new prompt.”
* “Turn what we just worked out into a prompt and save it as *Client X house style*.”
* “Look at my open project and write me a translation prompt tailored to it.” *(from v18.20.109 – the AI reads the source text, detected domain, relevant terms, and TM examples via `get_prompt_context`, then drafts and saves the prompt. How much source it sees is set under Settings → AI Settings → “Prompt context – source segments”; 0 = the whole document.)*
Built-in default prompts are protected – the AI saves your version under a new name rather than overwriting them.
### Working across sources
Because the AI has all tools in one conversation, the most powerful prompts combine them:
* “Compare how I translated *closing force* in this project vs my TM – if they differ, tell me which is more common and align the project.”
* “Draft the remaining segments, but first build a glossary from the segments I already translated and stick to it.”
* “Review my Draft segments against the source: flag mistranslations, fix typos directly, and list anything you weren’t sure about.”
Version tags like *(from v18.20.111)* show the plugin version a capability first shipped in – if the AI doesn’t offer it, update the plugin. New tools appear in your AI app automatically after a plugin update; no extension reinstall is needed.
## Setting it up
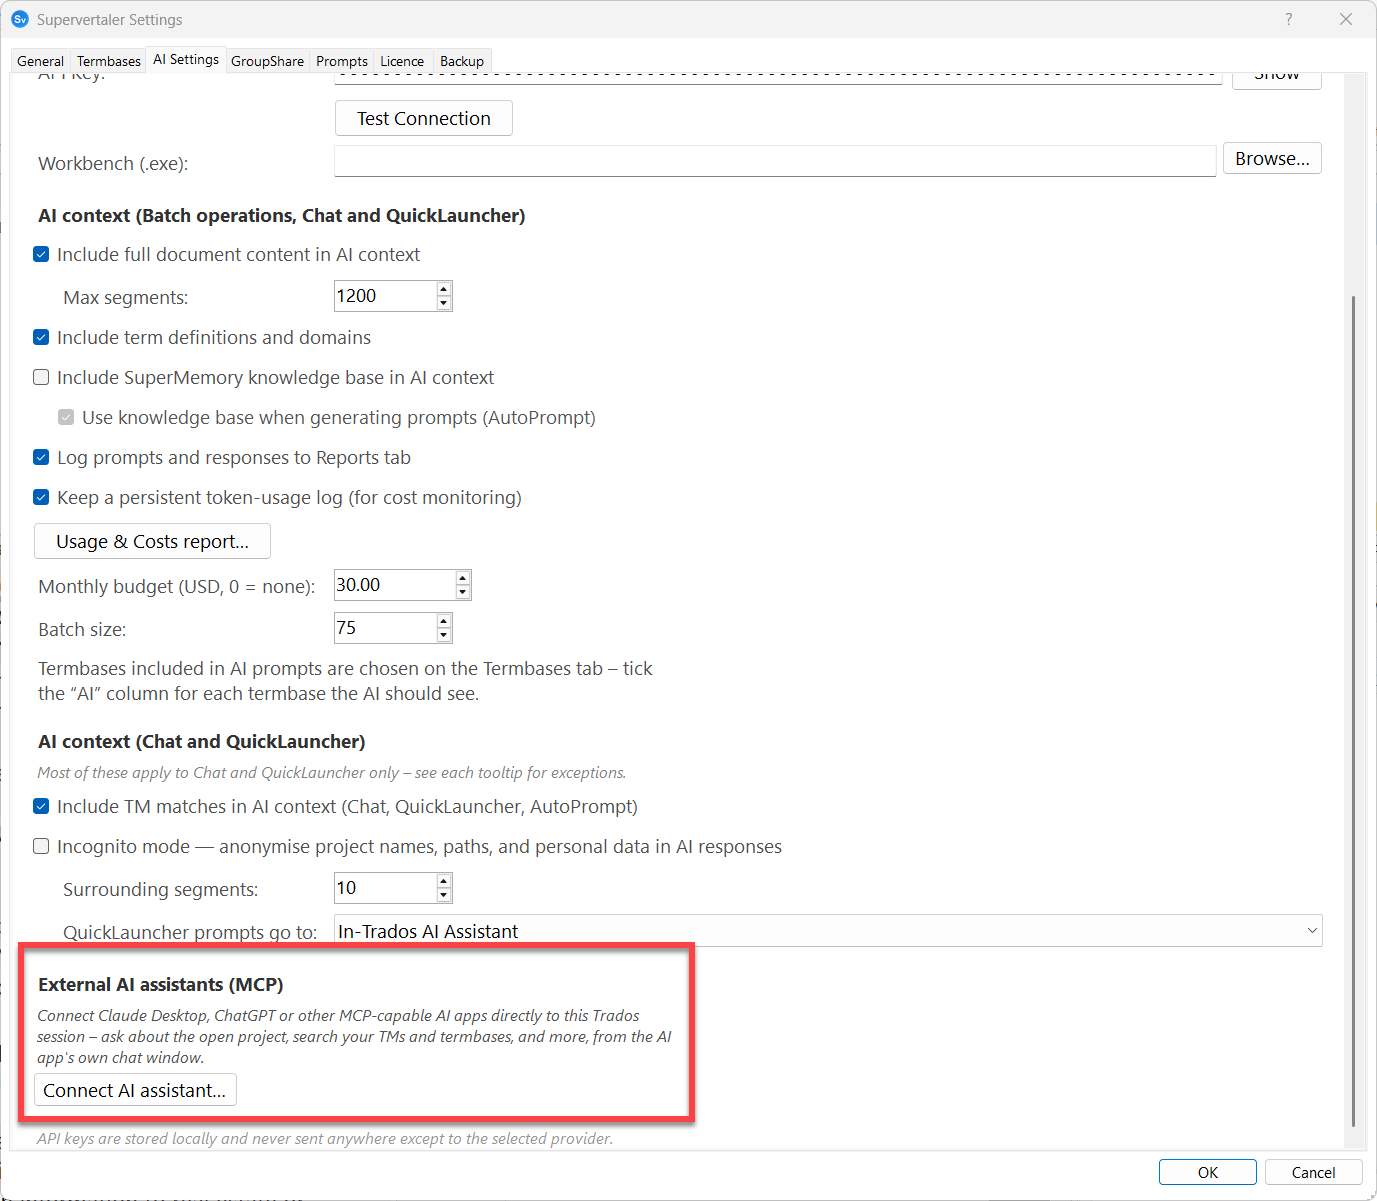
The External AI assistants (MCP) section at the bottom of the AI Settings tab.
1. In Trados Studio, open **Supervertaler Settings → AI Settings** and click **Connect AI assistant…** at the bottom. The dialog shows your current connection status.
2. **Claude Desktop** (easiest): click **Download extension (.mcpb)** to get `Supervertaler-MCP-Server.mcpb`. Then in Claude Desktop open **Settings → Extensions** and **drag the `.mcpb` file onto the page** – it shows a *“Drag .MCPB or .DXT files here to install”* target. (Prefer a file picker? Scroll to **Advanced settings** and use the **Install extension…** button instead.) Confirm the install. Double-clicking the `.mcpb` only works if your system has associated that file type with Claude Desktop; many don’t and will ask which app to use – just cancel and drag-and-drop instead.
3. **Other MCP clients (Claude Code, etc.)**: click **Copy config snippet** and paste it into the app’s MCP configuration, adjusting the path to where you saved `SupervertalerMcpServer.exe`. This works for clients that support local STDIO MCP servers in their normal chat (see the note at the top about ChatGPT).
Then open a project document in the Trados editor, and ask your AI app: *“What’s the status of my Trados project?”*
> **Tip.** The connection starts automatically **as soon as Trados Studio is running** – no document or panel needed, so machine-wide questions (“what projects do I have?”) work straight from the Projects view. (History: on 18.20.99–18.20.111 the connection started when you opened a document in the editor; before 18.20.99 you had to click the Supervertaler Assistant panel once per session.)
Install the extension **or** use a manual config entry – not both, or every tool will appear twice in the AI app. The Connect dialog warns you if it detects this.
## Privacy and security
Everything stays on your computer:
* The connection between the AI app and Trados runs over **localhost only** – nothing is exposed to your network or the internet.
* Every Trados session uses a **fresh access token**; only programs on your own machine that hold the token can connect.
* Your project data goes to an AI model only when *you* ask the AI a question about it, through the AI app you chose – exactly as if you had pasted the text yourself. The MCP server itself sends nothing anywhere.
## Requirements
* Supervertaler for Trados with an active licence or trial (the bridge is part of the AI Assistant).
* Claude Desktop (recommended), or another MCP client that runs local STDIO servers on your own machine. Note that this means a **desktop** app that executes the server locally – the claude.ai *website* and ChatGPT’s desktop app cannot reach a local MCP server (see the note at the top of this page).
* Windows (the MCP server is a self-contained exe; no additional runtimes needed).
## Troubleshooting
* **Double-clicking the `.mcpb` file asks which app to open it with** – your system has no `.mcpb` association. Cancel the dialog and instead either **drag the `.mcpb` onto the Extensions page**, or use Claude Desktop’s **Settings → Extensions → Advanced settings → Install extension…** button. (Drag-and-drop works once the Extensions page has finished loading – if it’s stuck on “Loading extensions…”, see the next point first.)
* **The Extensions page is stuck on “Loading extensions…”** – the page needs to reach Anthropic’s extension directory once before it renders; we’ve seen it hang on the Microsoft Store build of Claude Desktop. Fully quit Claude Desktop (including the system tray icon) and reopen it; check your internet connection. If it keeps hanging, there’s a universal fallback that skips the Extensions page entirely: download `Supervertaler-MCP-Server-exe.zip` instead, unzip it somewhere permanent, and use the **Copy config snippet** button in the plugin’s Connect dialog to add the server manually to `claude_desktop_config.json` (Claude Desktop → Settings → Developer → Edit Config).
* **The AI says it can’t reach Trados** – make sure Trados Studio is running; from v18.20.112 the connection starts with Studio itself (on 18.20.99–18.20.111 you additionally needed a document open in the editor, and before that a click on the Supervertaler Assistant panel – updating the plugin removes those steps). The Connect dialog’s status lines show whether the connection is up. Tools that read the open document still need one open, and will say so.
* **Tools appear twice in Claude Desktop** – you have both the extension and a manual config entry; remove one (see above).
* **Term lookups return nothing** – check that your termbase/database path is set correctly in the Supervertaler settings (the same path TermLens uses).
* The bridge writes a diagnostic log to `\trados\runtime\bridge.log`.
Development of this feature is tracked publicly in [issue #44](https://github.com/Supervertaler/Supervertaler-for-Trados/issues/44) – feedback and use-case ideas are very welcome.
# MultiTerm Support
TermLens automatically detects MultiTerm termbases (`.sdltb` files) attached to your active Trados project and displays their terms alongside your Supervertaler terms.
Note
This page covers **Trados Studio 2024**, which uses MultiTerm `.sdltb` termbases. If you are on **Trados Studio 2026**, terminology comes from the new `.ttb` format instead –see [Trados Studio 2026 & .ttb](/trados/studio-2026/).
### How It Works
When you open a project in Trados Studio that has MultiTerm termbases attached, TermLens reads those `.sdltb` files and loads all term pairs into its matching engine. MultiTerm terms appear as **green chips** in the TermLens panel, right next to the blue, pink, and yellow chips from your Supervertaler termbases.
There is nothing to configure. If your Trados project has MultiTerm termbases attached and **enabled** (via **Project Settings > Language Pairs > Termbases**), TermLens picks them up automatically. Termbases with the **Enabled** checkbox unchecked in Trados are ignored.
#### Colour coding
| Colour | Meaning |
| ------------ | ---------------------------------------------------- |
| **Blue** | Regular Supervertaler termbase match |
| **Pink** | Project termbase match (higher priority) |
| **Yellow** | Non-translatable term (source = target) |
| **Green** | MultiTerm termbase match (`.sdltb`) |
| **Lavender** | Abbreviation match (matched via source abbreviation) |
Green chips behave like any other TermLens chip – click to insert, or use **Alt+1** through **Alt+9** to insert by number.
![]()
### Read-Only
MultiTerm termbases are **read-only** in TermLens. You cannot add, edit, or delete terms in a MultiTerm termbase from the TermLens panel. To manage MultiTerm terms, use Trados Studio’s built-in MultiTerm interface.
When you right-click a green MultiTerm chip, the Edit, Delete, and “Mark as Non-Translatable” options are not shown.
### Auto-Refresh
TermLens monitors your MultiTerm termbases for changes:
* **Term changes** –when you add or edit terms using Trados’s native MultiTerm interface, TermLens detects the file change on the next segment navigation and reloads automatically.
* **Config changes** –when you enable or disable a MultiTerm termbase in **Project Settings > Termbases**, TermLens detects the change within a few seconds and updates the panel automatically – no segment change needed.
### MultiTerm Termbases in Settings
MultiTerm termbases appear at the bottom of the termbase list in the **Supervertaler Settings** dialogue (gear icon > TermLens tab). Each one is labelled with **\[MultiTerm]** and has a light green background to distinguish it from Supervertaler termbases.
| Toggle | Behaviour |
| ----------- | ------------------------------------------------------------------------------ |
| **Read** | Controls whether this termbase’s terms appear in TermLens. Uncheck to hide it. |
| **Write** | Always disabled –MultiTerm termbases are read-only in TermLens |
| **Project** | Always disabled –only Supervertaler termbases can be the project termbase |
To add or remove MultiTerm termbases from your project, use Trados Studio’s **Project Settings > Language Pairs > Termbases**.
### MultiTerm and AI Terminology Injection
Your MultiTerm termbases are loaded and used for **AI terminology injection**. This means the AI Assistant, Batch Translate, and Ctrl+T all receive your MultiTerm terminology in their prompts, helping the AI use the correct approved terms – as long as the termbases are enabled in Trados Project Settings.
### Technical Details
TermLens reads `.sdltb` files directly using the JET 4.0 database driver built into Windows. This is the same driver that MultiTerm itself uses. If the JET driver is not available (uncommon on modern Windows), TermLens falls back to Trados’s terminology provider API for per-segment lookups.
Because the access is read-only, there is no risk of data corruption. TermLens opens the `.sdltb` file in shared read mode, so MultiTerm and Trados can continue to use it simultaneously.
### Troubleshooting
#### MultiTerm terms not appearing
1. **Check the Trados Enabled checkbox** –open **Project Settings > Language Pairs > Termbases** and make sure the termbase’s **Enabled** checkbox is ticked
2. **Check the Read toggle** –open Supervertaler Settings and make sure the MultiTerm termbase’s Read checkbox is enabled
3. **Check languages** –the termbase’s source and target languages must match the current project’s language pair
#### Terms added in MultiTerm not updating
* Navigate to a different segment –this triggers the auto-refresh check
* If terms still do not appear, close and reopen the settings dialogue to force a full termbase reload
***
### See Also
* [TermLens](/trados/termlens/)
* [Termbase Management](/trados/termbase-management/)
* [TermLens Settings](/trados/settings/termlens/)
* [Troubleshooting](/trados/troubleshooting/)
# Privacy
For the full Supervertaler privacy policy, please visit:
**[supervertaler.com/privacy](https://supervertaler.com/privacy/)**
## Summary
* Supervertaler does **not** collect, store, or transmit your translations, termbases, or documents to Supervertaler servers
* Your translations, termbases, and documents stay on your machine
* When you use AI features, data is sent directly to the AI provider **you** selected, using your own API key
* **Optional anonymous usage statistics** – strictly opt-in. If you consent, a single ping on startup sends only: plugin version, OS version, Trados version, and system locale. No personal data, no translation content. You can opt out at any time in Settings. See [Usage Statistics](/trados/settings/usage-statistics/) for full details.
* **Trial registration** (v18/19.20.118+) – trial installs register the trial’s start date with a first-party licence endpoint on startup, so the trial behaves consistently across reinstalls. Only the anonymous machine hash, plugin/Studio version, locale, and the trial’s start date are sent – no content, no personal data. This is part of how the trial functions (like licence validation) and is separate from the opt-in usage statistics. See the [full privacy policy](https://supervertaler.com/privacy/) for details.
* For maximum confidentiality with AI features, use [Ollama](https://ollama.com) – all processing stays local
* Source code is publicly available on [GitHub](https://github.com/Supervertaler/Supervertaler-for-Trados) for independent verification
## Contact
Questions about privacy? Email .
# QuickLauncher
QuickLauncher gives you one-click access to your most-used AI prompts directly from the Trados editor, without switching panels or typing anything.
### How it works
1. **Right-click** anywhere in the editor (or press `Ctrl+Q`)
2. Click **QuickLauncher** in the context menu
3. Select a prompt from the list
4. The prompt is filled in with the current segment context and submitted to the Supervertaler Assistant chat
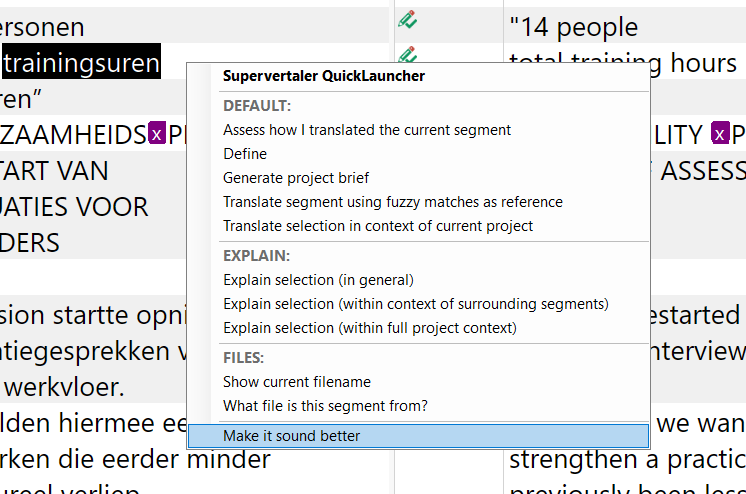
The QuickLauncher context menu with folder sections and keyboard shortcuts.
Note
The menu heading **Supervertaler QuickLauncher** is clickable – click it to open **Settings → Prompts**, where you can view, edit, and organise your QuickLauncher prompts.
The expanded prompt appears as a user message bubble in the **Supervertaler** chat panel, and the AI response follows immediately below it. The conversation continues from there – you can ask follow-up questions in the chat input as normal.
### Keyboard shortcut
| Shortcut (Windows) | Shortcut (Mac) | Action |
| ------------------ | -------------- | ------------------------------ |
| `Ctrl+Q` | `Control+Q` | Open QuickLauncher prompt menu |
Caution
Trados Studio assigns `Ctrl+Q` to **View Internally Source** by default. To use `Ctrl+Q` for QuickLauncher, go to **File → Options → Keyboard Shortcuts**, search for **View Internally Source**, and remove or reassign its shortcut.
### Prompt variables
QuickLauncher prompts have access to the full segment and project context at the moment you trigger them.
#### Language variables
| Variable | Replaced with | Example |
| --------------------- | -------------------------------------- | ------------------------- |
| `{{SOURCE_LANGUAGE}}` | Source language name, including locale | `Dutch (Belgium)` |
| `{{TARGET_LANGUAGE}}` | Target language name, including locale | `English (United States)` |
#### Segment variables
| Variable | Replaced with | Example |
| -------------------- | -------------------------------------------------------------------- | -------------------------------------- |
| `{{SOURCE_SEGMENT}}` | Full text of the **active source segment** | `De uitvinding heeft betrekking op...` |
| `{{TARGET_SEGMENT}}` | Full text of the **active target segment** (your translation so far) | `The invention relates to...` |
| `{{SELECTION}}` | Text currently **selected** in the editor | `werkwijze` |
Note
**Segment vs selection:** `{{SOURCE_SEGMENT}}` and `{{TARGET_SEGMENT}}` always give the **entire active segment**. `{{SELECTION}}` gives only the **highlighted portion** – useful for term lookups or focused questions. If nothing is selected, `{{SELECTION}}` is an empty string.
#### Project variables
| Variable | Replaced with |
| -------------------------- | ---------------------------------------------------------------------------------------------------------------------------------------- |
| `{{PROJECT_NAME}}` | Trados project name (e.g. `Patent_NL_EN_2026`) |
| `{{DOCUMENT_NAME}}` | Active file name (e.g. `source_document.docx`) |
| `{{SURROUNDING_SEGMENTS}}` | N source segments before and after the active segment, with their actual Trados segment numbers and the active segment marked `← ACTIVE` |
| `{{PROJECT}}` | All source segments in the active document, numbered with their actual Trados segment numbers |
| `{{TM_MATCHES}}` | Translation memory fuzzy matches (≥70%) for the active segment, showing match percentage, source, and target text |
**`{{SURROUNDING_SEGMENTS}}` example output** (with N = 2):
```plaintext
[11] Vorige zin hier.
[12] Nog een vorige zin.
[13 ← ACTIVE] De uitvinding heeft betrekking op een nieuwe werkwijze...
[14] Volgende zin hier.
[15] Nog een volgende zin.
```
**`{{PROJECT}}` example output** (single-file project):
```plaintext
[1] De uitvinding heeft betrekking op een nieuwe werkwijze...
[2] De conclusies omvatten de volgende kenmerken...
[3] ...
```
In a **multi-file project**, a file header is inserted at each boundary (because Trados restarts segment numbering per file):
```plaintext
=== File 1 ===
[1] Conclusie 1 omvat...
[2] Conclusie 2 omvat...
=== File 2 ===
[1] De beschrijving begint hier...
```
Caution
`{{PROJECT}}` sends all source segments to the AI. For a typical 10,000-word patent this costs roughly **4–5 cents** per call with a Sonnet-class model – negligible for important work, but avoid using it in high-frequency prompts. The number of surrounding segments for `{{SURROUNDING_SEGMENTS}}` is configured in **Settings → AI Settings → Surrounding segments** (default: 5).
To keep the chat history readable, the chat bubble shows a compact summary (e.g. `[source document – 47 segments]`) instead of the full source text. The complete document is still sent to the AI.
#### Example: explain a selected term
Select a word in the source segment, press `Ctrl+Q`, and choose a prompt like this:
```plaintext
The user is translating from {{SOURCE_LANGUAGE}} to {{TARGET_LANGUAGE}}.
The selected term is: {{SELECTION}}
Explain what this term means and suggest the best {{TARGET_LANGUAGE}} equivalent,
considering the full segment context below:
{{SOURCE_SEGMENT}}
```
#### Example: assess the current translation
```plaintext
Source ({{SOURCE_LANGUAGE}}):
{{SOURCE_SEGMENT}}
My translation ({{TARGET_LANGUAGE}}):
{{TARGET_SEGMENT}}
Assess how I translated the current segment. Point out any inaccuracies,
awkward phrasing, or terminology issues, and suggest improvements.
```
#### Example: translate a selected term using surrounding context
Uses `{{SELECTION}}` together with `{{SURROUNDING_SEGMENTS}}` so the AI sees the passage around the active segment, not just the active segment itself:
```plaintext
I am translating a {{SOURCE_LANGUAGE}} patent into {{TARGET_LANGUAGE}}.
The selected term is: {{SELECTION}}
Here is the passage surrounding the active segment for context:
{{SURROUNDING_SEGMENTS}}
Suggest the best {{TARGET_LANGUAGE}} translation for "{{SELECTION}}" given the
surrounding context. Give a brief explanation of your reasoning.
```
#### Example: full-document term query
Uses `{{PROJECT}}` to give the AI the complete source text. Reserve this for high-stakes queries where full document context matters, such as a key term that appears in multiple places with different nuances:
```plaintext
I am translating a {{SOURCE_LANGUAGE}} patent ({{DOCUMENT_NAME}}) into {{TARGET_LANGUAGE}}.
Project: {{PROJECT_NAME}}
Here is the complete source text, segment by segment:
{{PROJECT}}
Throughout this document, what is the most accurate and consistent {{TARGET_LANGUAGE}}
translation for "{{SELECTION}}"? Consider all occurrences in context and note any
variation in meaning between them.
```
#### Example: check specific segments by number
After using `{{PROJECT}}` the AI knows the segment numbers, so you can follow up in the chat – or build a prompt that asks about specific segments from the start:
```plaintext
I am translating a {{SOURCE_LANGUAGE}} patent into {{TARGET_LANGUAGE}}.
Here is the source document:
{{PROJECT}}
My translations so far:
- Segment 1: [paste your translation here]
- Segment 4: [paste your translation here]
Do you think these translations are accurate and consistent with the terminology
used elsewhere in the document?
```
#### Example: translate using TM fuzzy matches
Uses `{{TM_MATCHES}}` to give the AI any high fuzzy matches from the translation memory, so it can leverage existing translations as a starting point:
```plaintext
Translate the following segment from {{SOURCE_LANGUAGE}} to {{TARGET_LANGUAGE}}.
Source:
{{SOURCE_SEGMENT}}
Here are fuzzy matches from my translation memory:
{{TM_MATCHES}}
Use the fuzzy matches as reference where helpful, but produce an accurate
translation of the source segment – do not simply copy a fuzzy match.
```
Note
`{{TM_MATCHES}}` only includes matches of **70% or higher**. If no matches meet this threshold, the variable is replaced with “(no fuzzy matches above 70%)”. The match data comes from the active segment’s translation origin in Trados – the same match shown in the Translation Results pane.
The plugin fills in all variables and sends the expanded prompt straight to the AI.
### Folder display mode
By default, subfolders in the QuickLauncher menu appear as **expandable submenus** (hover to open). You can change any folder to display as a **flat section** instead – its prompts appear directly in the main menu under a bold header, with separators between sections.
To toggle the display mode:
1. Open **Settings → Prompts**
2. Right-click a QuickLauncher folder in the tree
3. Click **Show as section in menu** (a checkmark indicates the current state)
This setting is per-folder, so you can mix styles – for example, keep a large folder as an expandable submenu while showing a small one as a flat section.
### Setting up QuickLauncher prompts
Set `category: QuickLauncher` in the YAML frontmatter, or place the file in a folder called `QuickLauncher` inside your `prompt_library`. See [Prompts → Marking a prompt as a QuickLauncher shortcut](/trados/settings/prompts/#marking-a-prompt-as-a-quicklauncher-shortcut) for full details.
### Shared with Supervertaler Workbench
QuickLauncher prompts live in the shared `prompt_library` folder used by both Supervertaler for Trados and Supervertaler Workbench. Any prompt you create in one application is immediately available in the other.
### Routing prompts to Workbench Sidekick
By default, a QuickLauncher prompt’s response appears in the in-Trados **Supervertaler** chat panel. You can also have it land in **Supervertaler Workbench’s Sidekick Chat** instead.
Open **Settings → AI Settings** and find the **QuickLauncher prompts go to:** dropdown. Pick:
* **In-Trados AI Assistant** (default) – existing behaviour, prompt and response stay in the Trados Assistant chat.
* **Workbench Sidekick** – the prompt is sent to Supervertaler Workbench over a localhost bridge. The Sidekick window pops forward, maximises to the screen it’s on, switches to the Chat tab, and runs the prompt there.
When to pick which:
* **In-Trados Assistant** keeps everything in one window and is the right choice if you want chat history to stay alongside the segment you’re translating.
* **Workbench Sidekick** gives you a much larger reading area – useful for prompts whose responses are multi-paragraph explanations, full translation comparisons, or anything you want to read without squinting at the narrow Assistant panel.
Note
Workbench must be running for this to work. If it isn’t (or the [Supervertaler Bridge](/trados/ai-assistant/supervertaler-bridge/) is unreachable), the QuickLauncher silently falls back to the in-Trados Assistant – your prompt is never lost.
### Sending prompts to the clipboard (paste into claude.ai, ChatGPT, etc.)
Each QuickLauncher prompt can be configured to offer a **Copy to clipboard** destination alongside the usual **Send to Assistant** behaviour. This is useful when you want to paste the fully-expanded prompt – with all `{{SOURCE_SEGMENT}}`, `{{PROJECT}}`, `{{TM_MATCHES}}` etc. already filled in – into an external chat such as a [claude.ai project](https://claude.ai/), ChatGPT, or Gemini.
A common workflow: keep an ongoing project on claude.ai for the document you’re translating (with your style guide and reference material attached), and use a QuickLauncher prompt to send the active segment, surrounding context, and TM matches to that project with one keystroke.
#### Enabling clipboard mode for a prompt
1. Open **Settings → Prompts** and double-click the QuickLauncher prompt you want to configure (or create a new one)
2. In the Prompt Editor, find the **Mode** row
3. Tick **Copy to clipboard** alongside (or instead of) **Send to Assistant**
4. If both are ticked, pick which one should be the **Default** from the dropdown
5. Click **Save**
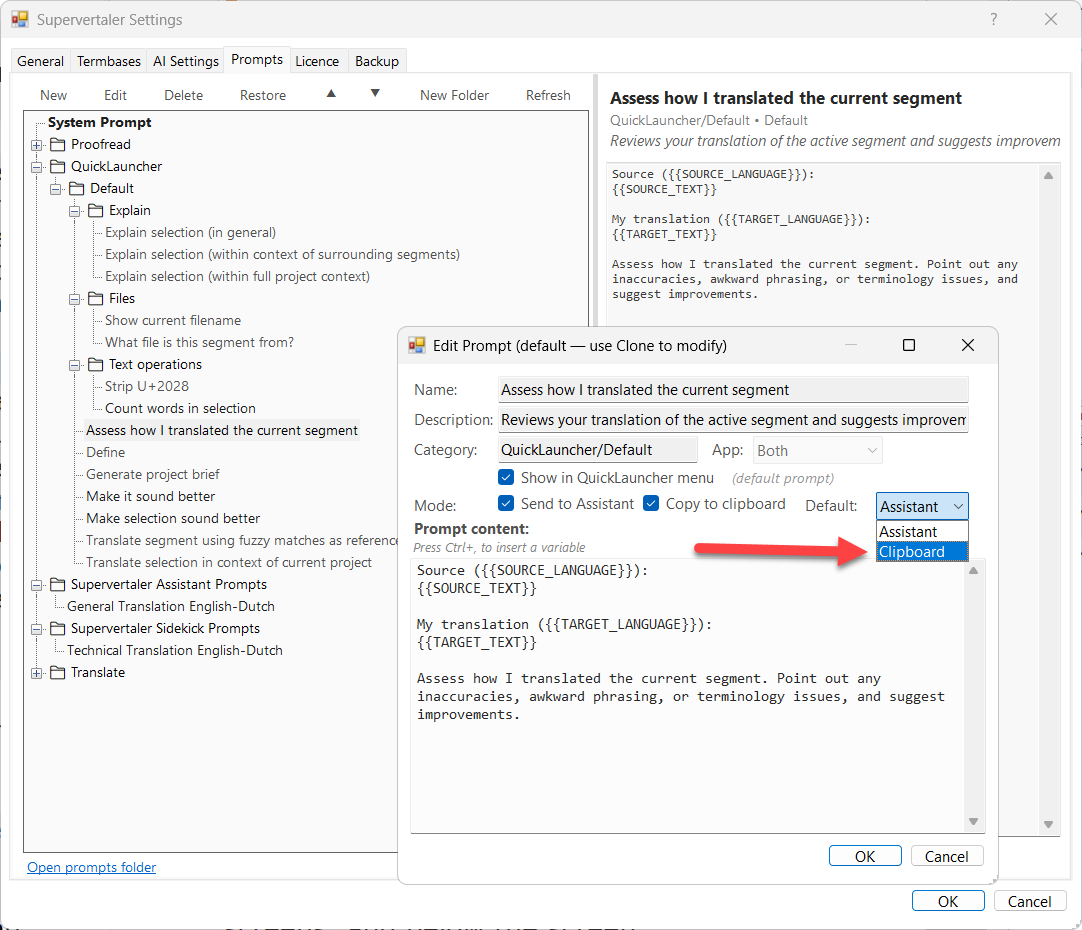
The Mode row in the Prompt Editor.
#### How it appears in the menu
* **One mode ticked** – the prompt appears as a flat menu item, exactly as before. Clicking it fires that single mode.
* **Both modes ticked** – the prompt appears as a **cascading submenu**. The default mode is shown first; hover or press the right arrow to reveal both options.
The submenu items have mnemonic keys, so once a prompt is highlighted you can press:
* `S` – **Send to Supervertaler**
* `C` – **Copy prompt to clipboard**
#### What happens when you pick clipboard
The plugin expands every `{{VARIABLE}}` against the current segment, project, and TM context (exactly as it would for the Assistant), then writes the resulting plain text to the Windows clipboard. The menu closes silently – there’s no confirmation toast. Switch to your browser tab and press `Ctrl+V` to paste.
Note
Clipboard mode and the **QuickLauncher prompts go to:** routing setting (above) are independent. Routing only controls where the **Send to Assistant** mode lands – clipboard mode always copies locally, regardless of whether the global routing is set to In-Trados Assistant or Workbench Sidekick.
#### YAML reference
If you prefer editing prompt files directly, the relevant frontmatter fields are:
```yaml
---
name: Explain selected term
category: QuickLauncher
quicklauncher_modes: [assistant, clipboard]
default_mode: assistant
---
```
* `quicklauncher_modes:` – accepts an inline list `[assistant, clipboard]` or a comma-separated string `assistant, clipboard`. Unknown values are silently dropped. When omitted, defaults to `[assistant]`.
* `default_mode:` – which mode appears first in the submenu when both are configured. Must be one of the values in `quicklauncher_modes`. Defaults to `assistant`.
***
### See Also
* [Text Transforms](/trados/text-transforms/)
* [Prompts](/trados/settings/prompts/)
* [Supervertaler](/trados/ai-assistant/)
* [Keyboard Shortcuts](/trados/keyboard-shortcuts/)
# Reports
The **Reports** tab in the Supervertaler Assistant panel is where the assistant collects structured output from its AI operations. Two kinds of thing land here: **proofreading results** and an optional **log of AI calls**.
## Proofreading results
When you run the **AI Proofreader** (the Proofread mode of [Batch Operations](/trados/batch-operations/)), each issue the AI finds is shown here as a clickable card. See [AI Proofreader](/trados/ai-proofreader/) for the full workflow and what each card contains.
## AI operation log
When **Log prompts and responses to Reports tab** is enabled in [AI Settings](/trados/settings/ai-settings/), AI calls – Chat, Batch Translate, Batch Proofread and AutoPrompt – are recorded here together with the prompt, the response, the model used and the token/cost figures. It is the place to audit exactly what was sent to the AI provider and to review cost after the fact.
# Ai Settings
Configure the AI provider, model, and context options used by the Supervertaler for Trados plugin.
## Accessing AI settings
Open the plugin **Settings** dialogue and switch to the **AI** tab.
## Provider selection
Choose one of the supported AI providers:
| Provider | Description |
| ------------------------------ | -------------------------------------------------------------------------------- |
| **OpenAI** | GPT-5.5, GPT-5.4 Mini |
| **Claude (Anthropic)** | Claude Sonnet 4.6, Claude Haiku 4.5, Claude Opus 4.8 |
| **Gemini (Google)** | Gemini 3.1 Flash-Lite, Gemini 2.5 Pro, Gemini 3.1 Pro (Preview), Gemma 4 26B MoE |
| **Grok (xAI)** | Grok 4.3 |
| **Mistral AI** | Mistral Large, Mistral Small |
| **DeepSeek** | DeepSeek V4 Pro, DeepSeek V4 Flash |
| **[OpenRouter](#openrouter)** | Access 200+ models from all major providers with a single API key |
| **Ollama (Local)** | Run models locally, no API key required |
| **Custom (OpenAI-compatible)** | Any provider with an OpenAI-compatible API |
Note
You only need one provider to get started. See [Setting Up API Keys](https://docs.supervertaler.com/workbench/get-started/api-keys/) for instructions on obtaining a key.
## API key
Enter the API key for your selected provider. The key is stored locally and never sent anywhere except to the provider’s API endpoint.
## Model selection
A dropdown showing a curated list of recommended models for the selected provider.
### Model ID
Below the dropdown is an optional **Model ID** field. To use a model that isn’t in the curated list – a brand-new release, a preview model, or an OpenRouter router such as `openrouter/free` – type its exact model ID here. When filled, it overrides the dropdown selection; leave it blank to use the model picked from the dropdown.
The field is available for every cloud provider. If you reopen Settings and a saved model isn’t in the curated list, it is shown back in the Model ID field.
## Ollama endpoint
When using Ollama as the provider, this field sets the local endpoint URL. Defaults to:
```plaintext
http://localhost:11434
```
Change this only if you are running Ollama on a different port or a remote machine.
## DeepSeek
[DeepSeek](https://platform.deepseek.com) is a Chinese AI lab offering high-quality models with competitive pricing.
To use DeepSeek directly:
1. Create an account at [platform.deepseek.com](https://platform.deepseek.com)
2. Go to **API Keys** and create a key
3. In Supervertaler, select **DeepSeek** as the provider and paste your key
DeepSeek models are also available via [OpenRouter](#openrouter) if you prefer a single-key setup.
## Custom OpenAI-compatible provider
For providers that expose an OpenAI-compatible API (e.g., Azure OpenAI, together.ai, internal LLM gateways, local inference servers), configure these fields:
| Field | Description |
| ------------ | ------------------------------------------------------------- |
| **Endpoint** | The base URL for the API (e.g., `https://your-server.com/v1`) |
| **Model** | The model identifier to use (e.g., `llama-3-70b`) |
| **API Key** | The authentication key for this endpoint |
### Managing multiple endpoints
You can configure more than one custom endpoint and switch between them without re-entering credentials. Each endpoint is stored as a named **profile** in the **Profile** dropdown.
| Button | Action |
| ------ | ----------------------------------------------------------------------- |
| **+** | Add a new endpoint (starts as “New Endpoint 1”, “New Endpoint 2”, etc.) |
| **−** | Remove the currently selected endpoint |
| **✎** | Rename the currently selected endpoint |
Names are free-form labels – use whatever makes sense for your workflow (e.g. `Azure Production`, `Internal gateway – Mistral Large`, `Local Ollama`). Names must be unique within the list. Renaming is a UI-only change: the endpoint URL, model, and API key all stay attached to the same profile.
## OpenRouter
[OpenRouter](https://openrouter.ai) is an API gateway that gives you access to 200+ models from OpenAI, Anthropic, Google, Mistral, Meta, and many others – all through a single API key. Instead of managing separate keys for each provider, you sign up once at OpenRouter and use one key for everything.
### Getting started
1. Create a free account at [openrouter.ai](https://openrouter.ai)
2. Go to **Keys** and create an API key
3. In Supervertaler, select **OpenRouter** as the provider and paste your key
### Curated model list
The model dropdown includes a curated selection of the best models for translation:
| Model | Description |
| ------------------------ | ------------------------------------------------------------ |
| **Claude Sonnet 4.6** | Recommended – best balance of speed, quality, and cost |
| **Claude Opus 4.8** | Highest quality – Anthropic’s most capable model, 1M context |
| **GPT-5.5** | Premium quality – OpenAI’s most advanced model |
| **GPT-5.4 Mini** | Fast, affordable, and high quality for everyday translation |
| **Gemini 3.1 Pro** | Google’s most advanced model, large context |
| **Gemini 3 Flash** | Fast and affordable – great for large batch jobs |
| **Gemma 4 31B** | Open-source – strong multilingual quality, 256K context |
| **Gemma 4 26B MoE** | Open-source – near-31B quality at a fraction of the cost |
| **Mistral Small 4** | Very fast and cheap – good multilingual support |
| **Qwen 3.6 Plus (Free)** | Free – no API costs, good general-purpose quality |
| **DeepSeek V4 Pro** | DeepSeek flagship – strong multilingual, competitive pricing |
| **DeepSeek V4 Flash** | DeepSeek fast – great for high-volume translation |
### Using any OpenRouter model
OpenRouter exposes far more models than the curated list above. To use one that isn’t listed, type its exact model ID into the **Model ID** field (see [Model selection](#model-selection)) – for example, `meta-llama/llama-3.1-70b-instruct`, `deepseek/deepseek-r1`, or a router such as `openrouter/free`. Browse all available models at [openrouter.ai/models](https://openrouter.ai/models).
### Pricing
OpenRouter adds a **5.5% platform fee** on top of the underlying provider’s token price. For example, if Claude Sonnet 4.6 costs $3/$15 per million tokens at Anthropic, it costs approximately $3.17/$15.83 through OpenRouter. For a typical 5,000-word translation costing $0.50, the OpenRouter fee adds less than 3 cents.
Note
OpenRouter also offers some **free models** (marked with “Free” in the dropdown). These have no API cost at all – they are rate-limited but perfectly usable for testing or light workloads.
## AI context options
These options control what additional context is included in AI prompts. The settings are split into two groups depending on which features they apply to.
### Which settings apply where
| Setting | Chat & QuickLauncher | Batch Operations |
| ------------------------------------ | :------------------: | :--------------: |
| Termbases in AI prompts | Yes | Yes |
| Include full document content | Yes | Yes |
| Max segments | Yes | Yes |
| Include term definitions and domains | Yes | Yes |
| Log prompts to Reports | Yes | Yes |
| Include TM matches | Yes | AutoPrompt only |
| Surrounding segments | Yes | No |
### AI context (Batch operations, Chat and QuickLauncher)
These settings apply to **all** AI features – Chat, QuickLauncher, Batch Translate, and Batch Proofread.
#### Include full document content
When enabled, all source segments in the current document are sent to the AI so it can determine the document type (legal, medical, technical, marketing, etc.) and provide context-appropriate assistance. This uses more tokens but greatly improves response quality – the AI can tailor its terminology and style to the specific type of document you are translating.
For very large documents, the content is automatically truncated to the configured maximum. The truncation preserves the beginning and end of the document (first 80% + last 20%).
For Batch Operations, the document content is included once in the system prompt (shared across all batches), so the AI knows what kind of document it is translating even when processing individual batches of segments.
#### Max segments
The maximum number of source segments to include in the AI prompt when document content is enabled. Default: **500**. Range: 100–2000.
Increase this for very large documents where you want the AI to see more content. Decrease it if you want to reduce token usage.
Note
This setting is only available when **Include full document content** is enabled.
#### Include term definitions and domains
When enabled, term definitions, domains, and usage notes from your termbases are included alongside matched terminology in the AI prompt. This gives the AI deeper understanding of your terminology – for example, knowing that a term belongs to the legal domain or has a specific definition helps the AI use it correctly in both chat responses and batch translations.
#### Include termbases in AI prompt
Select which termbases are included in AI prompts. Terminology matches from enabled termbases are injected into the prompt to help the AI use the correct, approved terminology.
For [AutoPrompt](/trados/generate-prompt/), **TermScan** automatically filters the termbase to only terms that appear in the document’s source text, keeping the prompt focused and within token limits.
Caution
**Only enable termbases you trust.** The AI will follow your termbase entries even when they are wrong. If a termbase contains inaccurate, outdated, or low-quality translations, the AI will be forced to use them – producing worse results than if no termbase were enabled at all. Modern LLMs are remarkably good at choosing correct terminology on their own. When in doubt, disable termbases and add terms incrementally as you review the AI’s output.
### AI context (mostly Chat and QuickLauncher)
These settings apply primarily to the **Supervertaler** chat window and **QuickLauncher** prompts. The exception is **Include TM matches**, which also feeds AutoPrompt – see the per-setting notes below.
#### Include TM matches
The behaviour of this checkbox depends on which feature is asking for context:
* **Chat and QuickLauncher (live TM lookups).** When enabled, the AI gets translation memory matches – fuzzy and exact – for the active segment. This gives the AI reference translations from your project TMs to improve consistency.
* **AutoPrompt (Batch Operations).** When enabled, [AutoPrompt](/trados/generate-prompt/) samples up to 50 already-translated, human-confirmed segment pairs evenly from the active document and includes them in the meta-prompt as in-project reference translations. This includes 100% / exact matches that have been applied and confirmed, fuzzy-and-edited segments, and segments translated from scratch – any segment with a Translated, Approved, or Signed-off confirmation level qualifies. AutoPrompt does **not** do live TM lookups; it samples confirmed segments straight from the document.
* **Other Batch Operations (Translate, Proofread).** Unaffected by this checkbox – they always work segment-by-segment without TM reference pairs, regardless of how it’s set.
Tip
**Tip for AutoPrompt users:** confirm a handful of segments you are happy with before clicking AutoPrompt. Even 10–20 confirmed segments give the AI meaningful style anchors to work from. Without any confirmed segments to sample, the generated prompt won’t have in-project reference translations.
#### Surrounding segments
The number of segments before and after the active segment to include as context. Default: **5** (five segments on each side). Range: 1–20.
This provides the AI with local context around the segment you are working on. It is also used for the `{{SURROUNDING_SEGMENTS}}` variable in [QuickLauncher prompts](/trados/settings/prompts/prompt-variables/).
Note
Batch Operations do not use this setting because each batch already contains a group of segments that provide context for each other.
Tip
**Tip:** For the best results, enable all context options. The more information the AI has about your project, document, terminology, and previous translations, the more accurate and consistent its suggestions will be.
#### QuickLauncher prompts go to
Picks where Ctrl+Q [QuickLauncher](/trados/quicklauncher/) prompts run.
| Option | Where the prompt and response appear |
| ------------------------------------ | ----------------------------------------------------------------------------------------------------------------------------------------------------------------------------------------------------------------- |
| **In-Trados AI Assistant** (default) | The Supervertaler Assistant panel in Trados Studio. Same behaviour as before this setting existed. |
| **Workbench Sidekick** | Supervertaler Workbench’s floating Sidekick Chat. The window pops to the front and maximises to the screen it’s on, the prompt is echoed into the chat, and the AI’s response appears there instead of in Trados. |
The Workbench-Sidekick option is for users who want the bigger reading area Sidekick provides for long explanations, or who prefer to keep all their AI chat history in one product rather than split between Trados and Workbench.
If the option is set to **Workbench Sidekick** but Workbench isn’t running (or the [Supervertaler Bridge](/trados/ai-assistant/supervertaler-bridge/) isn’t reachable for any reason), the QuickLauncher silently falls back to the in-Trados Assistant – a missing Workbench never blocks a prompt.
Note
This setting only affects QuickLauncher. The in-Trados Assistant chat, Batch Translate, AI Proofreader, and other AI features keep using their own panels regardless.
### SuperMemory context
These two toggles control whether [SuperMemory](/trados/ai-assistant/super-memory/) knowledge base articles are included in the AI context.
#### Include memory bank in AI context
When enabled, the AI loads client profiles, domain knowledge, style guides, and terminology reasoning from the active memory bank before every translation and chat message. This gives the AI the *reasoning* behind your terminology decisions, not just the terms themselves.
Caution
**Off by default.** SuperMemory is a power-user feature that most translators should opt into deliberately. The simpler workflow – TermLens termbases + the AI context options above – covers the majority of needs. Enable this toggle once you have a populated memory bank and want the AI to consult it.
#### Use memory bank when generating prompts (AutoPrompt)
When enabled, SuperMemory articles are included in the [AutoPrompt](/trados/generate-prompt/) meta-prompt so that generated translation prompts reflect your established client conventions, terminology reasoning, and style guides. Only effective when “Include memory bank in AI context” is also enabled.
## Prompt logging
### Log prompts and responses to Reports tab
When enabled, AI operations are logged to the **Reports** tab in the Supervertaler Assistant panel. Each log entry shows:
* The **feature and prompt name** (e.g. “QuickLauncher · Explain in Context”)
* The **model used**, estimated **token counts**, **cost**, and **duration**
* Expandable sections for the **system prompt**, **messages**, and **response**
Note
**Batch Translate** operations appear as a single consolidated entry showing the combined token count, cost, and total duration for the entire operation – regardless of how many sub-batches were processed.
Click “Show system prompt…”, “Show messages…”, or “Show response…” to expand a section. Press **Escape** to collapse it. Use **Copy** to copy a single section, or **Copy all** to copy the full prompt details to your clipboard.
This is useful for:
* **Monitoring costs** – see exactly how many tokens each operation uses
* **Debugging prompts** – inspect the full text sent to the AI to understand its behaviour
* **Comparing models** – run the same prompt with different models and compare token usage
Note
Prompt logging is off by default to keep the Reports tab clean. Enable it when you want to inspect or audit your AI usage. Log entries are stored in memory only and cleared when Trados restarts.
## Batch settings
Configure the **batch size** for the [Batch Translate](/trados/batch-translate/) feature. This determines how many segments are sent to the AI provider in a single request.
* A larger batch size is faster but uses more tokens per request
* A smaller batch size is more granular and easier to review
***
## See Also
* [Prompts](/trados/settings/prompts/)
* [AI Cost Guide](/trados/ai-cost-guide/)
* [TermLens Settings](/trados/settings/termlens/)
* [Supported LLM Providers (Workbench)](https://docs.supervertaler.com/workbench/ai-translation/providers/)
# Backup
Use the **Export Settings** and **Import Settings** buttons in the **Backup** tab of the Settings dialogue to back up and restore your Supervertaler configuration.
## Export
Click **Export Settings…** to save a copy of your current settings to a JSON file. Choose a location and filename – the default is `supervertaler-settings.json`. This file contains all your plugin settings: termbase paths, toggle states, font size, shortcut preferences, AI provider keys, model selections, and prompt configuration.
Note
**Tip:** Export your settings before upgrading the plugin or switching machines, so you can quickly restore your setup.
## Import
Click **Import Settings…** to restore settings from a previously exported JSON file. The import process:
1. Validates that the selected file is a valid Supervertaler settings file
2. Creates an automatic backup of your current settings (`settings.backup.json`)
3. Replaces your current settings with the imported ones
4. Closes the Settings dialogue and applies the new settings immediately
Caution
Importing settings replaces **all** current settings. Your previous settings are automatically backed up in case you need to revert.
## Settings file location
Your settings are stored at:
```plaintext
%LocalAppData%\Supervertaler.Trados\settings.json
```
You can also manually back up or edit this file. After an import, the previous settings are saved as `settings.backup.json` in the same folder.
# Project Settings
Supervertaler for Trados automatically saves and restores your termbase configuration when you switch between Trados projects. This means each project can use its own Supervertaler database, write targets, and termbase settings without manual reconfiguration.
## How it works
When you open a different Trados project (or switch to a document from another project), the plugin:
1. **Saves** the current project’s settings to a project-specific file
2. **Loads** the new project’s settings (if they exist)
3. **Reloads** the termbase with the new configuration
If no project-specific settings exist yet (first time opening a project), the current global settings are used. Once you make any changes and click OK in Settings, those settings are saved for that project.
Note
**No action needed:** Per-project settings work automatically in the background. Just configure your termbases as usual – the plugin remembers your choices per project.
## What’s saved per project
| Setting | Saved per project? | Notes |
| ---------------------------------------- | ------------------ | ------------------------------------------------------------------------------------------------------------------------------ |
| Supervertaler database path | Yes | Each project can use a different `.db` file |
| Enabled/disabled termbases (Read toggle) | Yes | Different termbases active per project |
| Write targets | Yes | Different write targets per project |
| Project termbase (pink highlighting) | Yes | Different project termbase per project |
| MultiTerm visibility | Yes | Different MultiTerm termbases enabled per project |
| AI context termbase filters | Yes | Different termbases in AI prompts per project |
| Active prompt | Yes | Each project remembers its [active prompt](/trados/ai-assistant/super-memory/active-prompt/) for Quick Add and Batch Translate |
| API keys and provider settings | No | Shared across all projects |
| Panel font size | No | UI preference, shared |
| Term shortcut style | No | UI preference, shared |
| Dialogue sizes | No | UI layout, shared |
## Storage location
Per-project settings are stored as individual JSON files inside your [user data folder](/trados/data-folder/):
```plaintext
C:\Users\{you}\Supervertaler\trados\projects\
```
Each file is named with a hash and the project name (e.g., `a1b2c3d4 - MyProject.json`). The JSON file also contains the original project path for reference.
Caution
**Moving a Trados project** to a different folder creates a new project key. The plugin will treat it as a new project and use global defaults until you reconfigure. The old project settings file remains in the `projects` folder and can be safely deleted.
## Interaction with global settings
Global settings (`settings.json`) serve as the defaults for projects that don’t have their own settings file yet. When you open a project for the first time, the global termbase configuration is used. Once you change settings and click OK, those settings are saved for that specific project.
Settings that are always global (API keys, font size, shortcut preferences) are never overridden by project settings.
***
## See Also
* [TermLens Settings](/trados/settings/termlens/)
* [AI Settings](/trados/settings/ai-settings/)
* [Backup & Restore](/trados/settings/backup/)
# Prompts
Prompts tell the AI how to behave. The Prompt Manager lets you browse built-in domain prompts, create your own, and mark prompts as QuickLauncher shortcuts.
#### Accessing the Prompt Manager
Open the plugin **Settings** dialogueue and switch to the **Prompts** tab.
![]()
#### Active prompt
Right-click any translation prompt in the tree and choose **Set as active prompt for this project** to designate it as the active prompt. The active prompt is shown with a pin icon and bold blue text. It is used by [memory bank Quick Add](/trados/ai-assistant/super-memory/quick-add/) when appending terminology, and is auto-selected in the [Batch Translate](/trados/batch-translate/) dropdown. The active prompt is saved [per project](/trados/settings/project-settings/).
#### What’s in this section
* [**Built-in Prompts**](/trados/settings/prompts/built-in-prompts/) – the prompts that ship with the plugin, organised by category
* [**Prompt Variables**](/trados/settings/prompts/prompt-variables/) – placeholders you can use to make prompts context-aware (language, segment, project)
* [**Writing Custom Prompts**](/trados/settings/prompts/writing-custom-prompts/) – anatomy of a good prompt, worked examples, and tips
* [**QuickLauncher Shortcuts**](/trados/settings/prompts/quicklauncher-shortcuts/) – marking prompts as QuickLauncher items, keyboard shortcuts (Ctrl+Alt+1-0), and reordering
* [**Organising Prompts**](/trados/settings/prompts/organising-prompts/) – folders, drag-and-drop, and the prompt library structure
* [**Prompt File Format**](/trados/settings/prompts/prompt-file-format/) – the `.svprompt` format, YAML fields, and creating/editing/deleting prompts
#### See Also
* [AutoPrompt](/trados/generate-prompt/)
* [QuickLauncher](/trados/quicklauncher/)
* [AI Settings](/trados/settings/ai-settings/)
* [Batch Translate](/trados/batch-translate/)
* [AI Proofreader](/trados/ai-proofreader/)
* [SuperMemory](/trados/ai-assistant/super-memory/)
* [Keyboard Shortcuts](/trados/keyboard-shortcuts/)
# Built In Prompts
The plugin ships with default prompts organised into three categories:
| Category | Prompts | Used in |
| ----------------- | ---------------------------------------------------------------------------------------------------------------------------------------------------------------------------- | -------------------- |
| **Translate** | Default Translation Prompt | Batch Translate mode |
| **Proofread** | Default Proofreading Prompt | Batch Proofread mode |
| **QuickLauncher** | Assess translation, Define, Explain (in general), Explain (within project context), Translate segment using fuzzy matches, Translate selection in context of current project | QuickLauncher menu |
Note
The Default Translation Prompt is a general-purpose starting point. For domain-specific projects, use **[AutoPrompt](/trados/generate-prompt/)** to automatically create a comprehensive prompt tailored to your document – or duplicate the default prompt in the Prompt Manager and customise it manually.
### About the Default Proofreading Prompt
The Default Proofreading Prompt is intentionally short. Most of the structure proofreading needs – persona, the five quality categories (accuracy / completeness / terminology / grammar / number formatting), the output format, the “no full corrected translations” rule, language-specific checks for Dutch / German / French – is **already in the hardcoded base** that every Batch Proofread uses, so the prompt itself only adds what the base doesn’t have:
* **Default to OK** – raise an issue only when there’s a specific, demonstrable problem in the translation, never speculative concerns.
* **Citation discipline** – terminology consistency claims must cite specific source segment numbers in the **Evidence:** field, against the full bilingual document context that’s auto-included.
* **Source query distinction** – source-side errors (typos, duplications, internal inconsistencies) get prefixed with “Source query:” rather than triggering target changes.
* **Explicit boundaries** – the AI doesn’t re-engineer the source, propose alternative terminology without a citation, flag stylistic preferences, or flag empty target lines.
These behaviours target the false-positive patterns most users encounter: the AI fabricating “term X used elsewhere” claims, second-guessing the source’s substantive claims, and treating stylistic preferences as errors. See [AI Proofreader](/trados/ai-proofreader/) for the full picture, including the Evidence field on issue cards.
Note
**To customise:** clone the default in the Prompt Manager and edit your copy. Defaults are read-only and get refreshed when the plugin updates – your clone keeps all your changes regardless. When the Prompt Library writes the default to disk, it includes a `default: true` flag in the YAML frontmatter; clones get `default: false` and are never touched by future updates.
# Organising Prompts
The Prompt Manager tree mirrors the folder structure inside your `prompt_library` directory. You can:
* **Create folders** – click **New Folder** in the toolbar
* **Move prompts** – drag and drop a prompt onto a folder to move it
* **Clone prompts** – right-click any prompt and select **Clone** to create a copy with “(2)” appended to the name, in the same folder as the original
* **Delete prompts** – right-click a prompt or folder and select **Delete**
* **Browse prompts** – click any prompt to preview its content in the detail pane
# Prompt File Format
Prompts are stored as `.md` files (Markdown with YAML frontmatter). This is the same format used by Supervertaler Workbench, so prompts are automatically shared between both applications via the shared `prompt_library` folder. Legacy `.svprompt` files are still loaded for backward compatibility.
```yaml
---
type: prompt
description: Patent and IP translation with strict terminology rules
category: Translate
---
You are an expert {{SOURCE_LANGUAGE}} to {{TARGET_LANGUAGE}} patent translator...
```
The example file above would be saved as e.g. `My Patent Prompt.md` and would appear in the prompt tree as **My Patent Prompt**.
### Naming: filename is authoritative
The **on-disk filename** (without the `.md` extension) is the display name shown in the prompt selector. Renaming `My Patent Prompt.md` to `Client X – Patent EN.md` in Windows Explorer is all you need to do to change how the prompt appears in the tree – click **Refresh** in the Prompts tab to pick up the change.
Note
**The YAML `name:` field is ignored on read.** It used to be the authoritative display name, but that created a confusing split: renaming the file in Explorer didn’t update the tree unless you also edited the YAML inside. Filename is now the single source of truth. Old prompts with a `name:` field in their YAML continue to load fine – the field is silently ignored, and is dropped from the file the next time the prompt is saved through the UI. No action required for existing prompts.
| YAML field | Description |
| --------------------- | -------------------------------------------------------------------------------------------------- |
| `type` | Document type – always `prompt` for prompt files |
| `description` | Optional summary shown under the prompt name in the detail pane |
| `category` | `Translate`, `Proofread`, or `QuickLauncher` – controls where the prompt appears |
| `quicklauncher_label` | Short label for the QuickLauncher menu (optional, falls back to the filename) |
| `default` | `true` for shipped prompts (managed by the plugin) |
| `sort_order` | Numeric order within folder (lower values first). Set automatically by the ▲/▼ buttons. |
| `name` | Ignored on read (legacy field, kept for backward compatibility). The filename is the display name. |
Note
Older prompts using the `domain` key instead of `category` are still supported for backward compatibility.
### System prompt
The plugin automatically prepends a system prompt to every AI call. This system prompt includes language pair information, termbase terms (based on your [AI Context settings](/trados/settings/ai-settings/)), and TM matches when enabled. The content you write in a prompt `.md` file is the **user prompt** – it is sent after the system prompt.
### Creating and editing prompts
#### New prompt
1. Optionally select a target folder (e.g. `Translate` or `Proofread`) in the tree before clicking **New** – the new prompt’s **Category** will be pre-filled from the selected folder.
2. Click **New** in the Prompts tab.
3. Fill in Name, Description, Category, and Content.
4. Click **Save**.
Note
**Category matters for Batch Translate.** The Batch Translate dropdown filters by category: Translate mode only shows prompts whose Category is `Translate`, and Proofread mode only shows `Proofread` prompts. If you click **New** without first selecting a folder, the category defaults to `Translate` so the new prompt is immediately visible in the Batch Translate dropdown. Prompts with an empty or unrelated category will not appear in either Batch mode – move them into a `Translate` or `Proofread` folder (or edit the Category field) to make them selectable.
#### Edit a prompt
1. Select a prompt in the list
2. Click **Edit**
3. Modify as needed and click **Save**
#### Inserting variables
While editing prompt content, press **Ctrl+,** to open the variable picker menu. This lists all available variables with a short description. Select a variable to insert it at the cursor position. If text is selected in the editor, it is replaced by the inserted variable.
Note
**Ctrl+,** mirrors the variable insertion shortcut used in the Trados Studio editor.
#### Delete a prompt
1. Select a custom prompt
2. Click **Delete** and confirm
Built-in prompts cannot be deleted. Click **Restore** to recreate any built-in prompts you have removed.
# Prompt Variables
Variables are placeholders in your prompt text that are automatically filled in at runtime. Use them to make prompts context-aware without rewriting them for every project or language pair.
### Language variables – all contexts
These work in Batch Translate, Batch Proofread, and QuickLauncher prompts:
| Variable | Replaced with | Example |
| --------------------- | -------------------------------------------------- | ------------------------- |
| `{{SOURCE_LANGUAGE}}` | Full name of the source language, including locale | `Dutch (Belgium)` |
| `{{TARGET_LANGUAGE}}` | Full name of the target language, including locale | `English (United States)` |
### Segment variables – QuickLauncher only
These are only available in QuickLauncher prompts, because they refer to the specific segment active at the moment you trigger the menu:
| Variable | Replaced with | Example |
| -------------------- | ---------------------------------------------------------------------------------------------- | ----------------------------------------------------------- |
| `{{SOURCE_SEGMENT}}` | Full source text of the **active segment** | `De uitvinding heeft betrekking op een nieuwe werkwijze...` |
| `{{TARGET_SEGMENT}}` | Full target text of the **active segment** (your translation so far – may be empty or partial) | `The invention relates to a novel method...` |
| `{{SELECTION}}` | Text currently **selected** in the editor (source side preferred; falls back to target side) | `werkwijze` |
Note
**Segment vs selection:** `{{SOURCE_SEGMENT}}` and `{{TARGET_SEGMENT}}` always give you the **entire active segment**. `{{SELECTION}}` gives you only the **highlighted portion** – useful for looking up or explaining a specific word or phrase within the segment. If nothing is selected, `{{SELECTION}}` is replaced with an empty string.
### Project variables – QuickLauncher only
| Variable | Replaced with |
| -------------------------- | ---------------------------------------------------------------------------------------------------------------------------------------------------------------------------------------------------------------- |
| `{{PROJECT_NAME}}` | Trados project name (e.g. `Patent_NL_EN_2026`) |
| `{{DOCUMENT_NAME}}` | Active file name (e.g. `source_document.docx`) |
| `{{SURROUNDING_SEGMENTS}}` | N source segments before and after the active segment, with actual Trados segment numbers and the active segment marked `← ACTIVE`. N is set in **Settings → AI Settings → Surrounding segments** (default: 5). |
| `{{PROJECT}}` | All source segments in the document, numbered with their actual Trados segment numbers. In multi-file projects a `=== File N ===` header separates each file (Trados restarts segment numbering per file). |
| `{{TM_MATCHES}}` | Translation memory fuzzy matches (≥70%) for the active segment, showing match percentage, TM name, source text, and target text. If no matches meet the threshold, replaced with “(no fuzzy matches above 70%)”. |
Caution
`{{PROJECT}}` sends the entire document to the AI and uses significantly more tokens than other variables. For a 10,000-word document, this costs roughly 4–5 cents per call with a Sonnet-class model. Reserve it for prompts where full document context genuinely matters.
To keep the chat history readable, the chat bubble shows a compact summary (e.g. `[source document – 47 segments]`) instead of the full source text. The complete document is still sent to the AI.
### Scope: which prompts see which variables
The variables above are **only substituted in QuickLauncher prompts**. In Batch Translate and Batch Proofread custom prompts, only the two **language variables** (`{{SOURCE_LANGUAGE}}` and `{{TARGET_LANGUAGE}}`) get filled in – any other variable left in the prompt body will be replaced with an empty string.
This isn’t a limitation in practice. The batch flows assemble a richer system prompt automatically, with no variables required:
* **Batch Translate** automatically includes source-only document context (when **Include document context** is on in [AI Settings](/trados/settings/ai-settings/)), termbase entries, and language-specific checks.
* **Batch Proofread** automatically includes the **full bilingual document context** (source + target, untruncated), termbase entries, and language-specific checks.
So the right place for your custom prompt content in batch mode is to **complement** what’s already there – domain-specific guidance, citation discipline, project-specific terminology preferences – rather than try to re-inject document context with `{{PROJECT}}`.
If you want to see exactly what gets sent to the AI for a batch run – fully assembled, including the auto-injected context – click the **👁 Preview prompt** link next to the Translate / Proofread button on the Batch Operations tab. See [Batch Operations](/trados/batch-operations/) for details.
# Quicklauncher Shortcuts
### Marking a prompt as a QuickLauncher shortcut
To make a custom prompt appear in the QuickLauncher right-click menu (`Ctrl+Q`), set `category: QuickLauncher` in the YAML frontmatter:
```yaml
---
name: Explain selected term
description: Explains the selected term in translation context
category: QuickLauncher
quicklauncher_label: Explain term
---
Your prompt content here...
```
| Field | Description |
| ------------------------- | ------------------------------------------------------------------------ |
| `category: QuickLauncher` | Marks this prompt as a QuickLauncher item |
| `quicklauncher_label` | Optional short label shown in the menu – falls back to `name` if omitted |
You can also organise QuickLauncher prompts by placing them in a folder called `QuickLauncher` inside your `prompt_library` folder. Any prompt in that folder is automatically treated as a QuickLauncher prompt.
Note
QuickLauncher prompts are shared with Supervertaler Workbench via the shared prompt library folder.
### Keyboard shortcuts for QuickLauncher prompts
You can assign keyboard shortcuts (Ctrl+Alt+1 through Ctrl+Alt+0) to individual QuickLauncher prompts for instant access without opening the Ctrl+Q menu.
1. Open **Settings → Prompts**
2. Select a QuickLauncher prompt in the tree
3. In the detail pane on the right, use the **Shortcut** dropdown to assign a slot
4. Click **OK** to save
Each shortcut can only be assigned to one prompt. If you assign a shortcut that is already in use, it is automatically cleared from the other prompt.
Assigned shortcuts are shown next to prompt names in the Ctrl+Q menu and in the Trados keyboard shortcuts settings (File → Options → Keyboard Shortcuts → Supervertaler for Trados).
### Reordering prompts
Use the **▲** and **▼** buttons in the toolbar to change the order of prompts within a folder. This is especially useful for QuickLauncher prompts, as the order in the tree determines the order in the Ctrl+Q menu.
The order is saved in each prompt’s YAML frontmatter as a `sort_order` field.
# Writing Custom Prompts
### Anatomy of a prompt
A good prompt has three parts:
1. **Role** – tells the AI who it is
2. **Task** – tells the AI what to do
3. **Constraints** – tells the AI what to avoid or preserve
Here is an annotated example for a Batch Translate prompt:
```plaintext
You are an expert {{SOURCE_LANGUAGE}} to {{TARGET_LANGUAGE}} patent translator. ← Role + language variables
Translate the source segment provided. Return only the translated text – ← Task
no commentary, no explanations, no repetition of the source.
Preserve all tag placeholders exactly as they appear (e.g. , ). ← Constraints
Preserve numbers, units, and chemical formulas without conversion.
Use formal, technical register throughout.
```
### Example QuickLauncher prompt – explain a selected term
This prompt uses `{{SELECTION}}` to ask the AI to explain a selected term in context:
```plaintext
The user is translating a patent from {{SOURCE_LANGUAGE}} to {{TARGET_LANGUAGE}}.
The selected term is: {{SELECTION}}
Please explain what this term means in the context of patent translation,
suggest the standard {{TARGET_LANGUAGE}} equivalent, and note any regional
or register variations the translator should be aware of.
```
When the translator selects “werkwijze” in the source segment and triggers this prompt via QuickLauncher, the AI receives:
```plaintext
The user is translating a patent from Dutch (Belgium) to English (United States).
The selected term is: werkwijze
Please explain what this term means...
```
### Example QuickLauncher prompt – assess the current translation
This prompt uses `{{SOURCE_SEGMENT}}` and `{{TARGET_SEGMENT}}` to ask the AI to review the translation of the active segment:
```plaintext
Source ({{SOURCE_LANGUAGE}}):
{{SOURCE_SEGMENT}}
My translation ({{TARGET_LANGUAGE}}):
{{TARGET_SEGMENT}}
Assess how I translated the current segment. Point out any inaccuracies,
awkward phrasing, or terminology issues, and suggest improvements.
```
### Example QuickLauncher prompt – translate a selected term in context
```plaintext
Source segment ({{SOURCE_LANGUAGE}}):
{{SOURCE_SEGMENT}}
Current translation ({{TARGET_LANGUAGE}}):
{{TARGET_SEGMENT}}
The translator has selected this word or phrase: {{SELECTION}}
Suggest the best {{TARGET_LANGUAGE}} translation for "{{SELECTION}}"
given the full segment context above. Give a short explanation of your reasoning.
```
### Example QuickLauncher prompt – translate a term using surrounding passage
Uses `{{SURROUNDING_SEGMENTS}}` for a wider context window than just the active segment:
```plaintext
I am translating a {{SOURCE_LANGUAGE}} patent into {{TARGET_LANGUAGE}}.
The selected term is: {{SELECTION}}
Here is the passage surrounding the active segment:
{{SURROUNDING_SEGMENTS}}
Suggest the best {{TARGET_LANGUAGE}} translation for "{{SELECTION}}" given the
surrounding context. Briefly explain your reasoning.
```
### Example QuickLauncher prompt – full-document term consistency check
Uses `{{PROJECT}}` to give the AI the entire source document. Useful for checking whether a key term is used consistently, or for understanding a term’s meaning across all its occurrences. Reserve this for important queries – see the token cost note in [Prompt Variables](/trados/settings/prompts/prompt-variables/).
```plaintext
I am translating a {{SOURCE_LANGUAGE}} patent ({{DOCUMENT_NAME}}) into {{TARGET_LANGUAGE}}.
Project: {{PROJECT_NAME}}
Here is the complete source text:
{{PROJECT}}
The selected term is: {{SELECTION}}
What is the most accurate and consistent {{TARGET_LANGUAGE}} translation for
"{{SELECTION}}" throughout this document? Note any variation in meaning between
occurrences and recommend which translation to use where.
```
### Example QuickLauncher prompt – check a segment against the full document
After sending `{{PROJECT}}`, the AI knows the segment numbers shown in Trados, so you can ask about specific segments by number in follow-up messages – or ask in the prompt itself:
```plaintext
I am translating a {{SOURCE_LANGUAGE}} patent into {{TARGET_LANGUAGE}}.
Here is the source document:
{{PROJECT}}
I am currently working on segment {{SOURCE_SEGMENT}} (shown as [{{SOURCE_SEGMENT}}]
above). My translation is:
{{TARGET_SEGMENT}}
Does this translation accurately reflect the source and maintain consistency with the
terminology used elsewhere in the document? Point out any issues.
```
### Tips for effective prompts
* **Be explicit about output format.** If you only want the translation, say “Return only the translated text.” If you want an explanation, describe the expected structure.
* **Use language variables.** Hardcoding “Dutch to English” breaks the prompt when you switch projects. Always use `{{SOURCE_LANGUAGE}}` and `{{TARGET_LANGUAGE}}`.
* **Keep QuickLauncher prompts focused.** A narrow, specific task works better than a broad one – except when you deliberately need the full document context via `{{PROJECT}}`.
* **Use `{{SURROUNDING_SEGMENTS}}` instead of `{{SOURCE_SEGMENT}}` when context matters.** The surrounding passage often gives the AI enough context for a better answer at a fraction of the cost of `{{PROJECT}}`.
* **Use `{{PROJECT}}` sparingly.** It is best suited for high-stakes queries on short-to-medium documents – terminology consistency checks, key term decisions, or reviewing a handful of specific segments. Avoid it in prompts you run on every segment.
* **Segment numbers in `{{PROJECT}}` match the Trados editor.** After sending `{{PROJECT}}`, you can ask the AI about “segment 4” or “segment 12” and it will know exactly which segment you mean – the same number shown in the Trados grid.
* **Use `{{TM_MATCHES}}` to leverage existing translations.** When a segment has a high fuzzy match, the AI can use it as a starting point – especially useful for repetitive or formulaic content like patents and legal texts.
* **Batch Translate prompts receive one segment at a time.** You do not need to handle lists of segments or loop logic.
* **Proofread prompts receive multiple segment pairs.** The built-in proofreading prompt shows the expected input/output format – follow that structure if you write a custom one.
# Termlens
Configure how TermLens loads and displays terminology in Trados Studio.
## Accessing TermLens settings
Click the **gear icon** in the TermLens panel, or open the plugin **Settings** dialogue and switch to the **TermLens** tab.
## Database path
The path to your Supervertaler termbase `.db` file. Click **Browse** to select a database, or **Create New** to start with an empty one.
Note
**Auto-detect:** If Supervertaler Workbench is installed on the same machine, the plugin can automatically detect its default database location. Click **Auto-detect** to find and use it.
## Termbase toggles
Each Supervertaler termbase in the database has three toggles. See [Termbase Management](/trados/termbase-management/) for full details.
| Toggle | Purpose |
| ----------- | ------------------------------------------------------------------------------------- |
| **Read** | Load terms for matching –only termbases with Read enabled appear in TermLens |
| **Write** | Receive new terms added via the [quick-add shortcuts](/trados/termlens/adding-terms/) |
| **Project** | Mark as the project termbase (shown in pink, prioritised) |
### Confirm dialog for non-matching termbases
When you tick **Write** or **Project** on a termbase whose declared language pair does not match the active project (for example, ticking an EN→NL termbase as Write while you have a DE→FR project open), a confirmation dialog appears:
> *“\” is a EN → NL termbase, but the active project’s source language is German. Setting it as a Write termbase means new terms added during this project will be written into a termbase whose language pair doesn’t match.*
>
> *This is occasionally intentional (multilingual or global termbases, bootstrapping a new direction) – tick “Yes” to continue. The plugin will remember this choice for this termbase and won’t ask again until you untick the box.*
Click **Yes** to keep the tick, or **No** to revert it.
The plugin remembers each “Yes” answer per termbase, so once you have explicitly confirmed a non-matching termbase you are not asked again on subsequent ticks. **Unticking the box clears that confirmation** – a future re-tick will re-ask. This is intentional: an untick is taken as a clear signal that you are reconsidering, so the next tick deserves a fresh look.
The header **tick-all** on the Write column also respects this guard – non-matching termbases that haven’t been individually confirmed are skipped during a bulk tick, so a quick “tick everything” can’t accidentally enable unrelated termbases for write.
The **Read** column is intentionally exempt from the dialog – there is no harm in *reading* a non-matching termbase (its terms simply won’t match anything in your segments), only in writing into it.
Note
**No project loaded.** If you open the Settings dialog without an active project (for example by clicking the gear from the QuickLauncher header), the plugin has no source language to compare against, so the confirmation is suppressed and ticks behave normally.
## MultiTerm termbases
If your Trados project has MultiTerm termbases (`.sdltb` files) attached, they appear at the bottom of the termbase list with a **\[MultiTerm]** label and a light green row background. The **Read** toggle controls visibility in TermLens; **Write** and **Project** are always disabled because MultiTerm termbases are read-only.
To add or remove MultiTerm termbases, use Trados Studio’s **Project Settings > Language Pairs > Termbases**. See [MultiTerm Support](/trados/multiterm-support/) for full details.
## Auto-load on startup
When enabled, the plugin automatically loads the termbase database when Trados Studio opens. This means terms are available immediately when you start translating, without needing to open the settings first.
If disabled, the termbase loads the first time you open the TermLens settings or click the TermLens panel.
## Case-sensitive matching
By default, TermLens matches terms regardless of letter case – “polymer”, “Polymer”, and “POLYMER” all match the same term entry. Enable **“Enable case-sensitive matching globally”** to require exact case matching across all termbases.
You can also control case sensitivity per termbase using the **CS** checkbox in the termbase grid. When the CS checkbox is ticked for a termbase, that termbase always matches case-sensitively; when unticked, it matches case-insensitively.
Note
**Tip:** The CS checkbox is useful when you have one termbase with abbreviations that must match exactly (e.g., “GC” should not match “gc”) while other termbases should remain case-insensitive.
## Adapt term capitalisation
**Adapt term capitalisation to the segment** (on by default) makes TermLens display and insert target terms with the capitalisation of the source occurrence in the segment rather than the capitalisation stored in the termbase:
* A term stored as “More preferably” shows and inserts as **“more preferably”** when the segment contains it lower-case mid-sentence
* A term stored lower-case is **capitalised** when the occurrence starts the sentence
* An **ALL-CAPS** occurrence (e.g. in a heading) upper-cases the whole inserted term
The adaptation applies everywhere a term is displayed or inserted: the TermLens chips, Alt+digit shortcuts, the TermLens popup and TermPicker.
Note
The rules are deliberately conservative. Acronyms and mixed-case terms (MRI, pH, MultiTerm) are never altered, abbreviation matches keep their stored casing, and suffix-tolerant Korean/Japanese matches are left untouched. Untick the option to always show and insert terms exactly as stored.
## Panel font size
Adjust the font size used in the TermLens display panel. Valid range: **7 pt** to **16 pt**.
Increase the font size if TermLens text is hard to read; decrease it to fit more terms on screen.
## Term shortcuts
Choose how Alt+digit shortcuts work when a segment has more than 9 matched terms:
* **Sequential** (default) – type the term number digit by digit. Alt+45 inserts term 45. Badges show clean sequential numbers (10, 11, 12, …). There is a brief delay after each digit while the system waits for a possible next digit.
* **Repeated digit** – press the same digit key multiple times. Alt+55 inserts term 14 (the 5th term in the second tier). Badges show repeated digits (11, 22, 333, …). No delay, but the badges are less intuitive.
Both modes behave identically when a segment has 9 or fewer matches – pressing Alt+N inserts immediately with no delay.
## Shortcut delay
Controls how long the system waits for the next digit in **Sequential** mode (in milliseconds). Default: **1100 ms**. Valid range: **300 ms** to **3000 ms**.
Increase the delay if you need more time between keystrokes. Decrease it if you find the pause too long when inserting single-digit terms in segments with 10+ matches. This setting has no effect in Repeated digit mode.
See [Keyboard Shortcuts](/trados/keyboard-shortcuts/) for the full reference.
***
## See Also
* [Termbase Management](/trados/termbase-management/)
* [MultiTerm Support](/trados/multiterm-support/)
* [AI Settings](/trados/settings/ai-settings/)
* [TermLens (Workbench)](https://docs.supervertaler.com/workbench/termbases/termlens/)
# Usage Statistics
Supervertaler for Trados sends one anonymous, lightweight ping to the developer at startup so he can see how many people are using the plugin and what environments they are running it on. The dialogue below appears once after install or update, and the feature can be switched off at any time.
#### How it works
* **Default-on, opt-out** – on first launch after install or update, an informational dialogue (shown above) tells you exactly what is collected and gives you a one-click **Turn it off** button. You don’t have to do anything to keep it enabled – the dialogue’s default action (the bold **Keep it on** button, Enter, Esc, or the X-close) all keep it enabled. Your choice is remembered, and the dialogue isn’t shown again.
* **Minimal data** – a single lightweight ping is sent once per session on plugin startup. The only data included is:
* A random anonymous ID (a UUID generated locally on your machine – not tied to any account, machine, or identity)
* Plugin version (e.g. 4.19.108)
* OS version (e.g. Windows 11)
* Trados Studio version
* System locale (e.g. en-GB)
* **Country detection** – the hosting provider (Cloudflare) determines your country from the network connection. No IP addresses are stored.
* **Silent failure** – if the ping fails (no internet, firewall, etc.), nothing happens. No retries, no queuing, no error messages.
* **First-party only** – data is sent to a Supervertaler-operated Cloudflare Worker endpoint. No third-party trackers, no Google Analytics, no advertising platforms.
#### What is NOT collected
* No translation content
* No termbase data
* No file names or project names
* No personal information (name, email, etc.)
* No information about which features you use or how often
* No API keys or credentials
#### Changing your preference
You can change your choice at any time:
1. Open **Settings** (click the gear icon in the Supervertaler Assistant panel)
2. In the **TermLens** tab, scroll to the **Privacy** section
3. Check or uncheck **“Share anonymous usage statistics (no personal data)”**
4. Click **OK**
The change takes effect on the next Trados Studio session.
#### Why this exists
As a solo developer, usage statistics provide invaluable insight into:
* How many people are actually using the plugin
* Which Trados Studio versions to prioritise for testing and compatibility
* Which OS versions and locales are most common
* Whether users run Trados on a Mac (via Parallels) or natively on Windows
This information directly informs development priorities and compatibility testing.
#### Transparency
The full source code for both the plugin-side statistics and the server-side endpoint is publicly available:
* **Plugin code**: [`Core/UsageStatistics.cs`](https://github.com/Supervertaler/Supervertaler-for-Trados/blob/main/src/Supervertaler.Trados/Core/UsageStatistics.cs) on GitHub
* **Server code**: The Cloudflare Worker that receives the pings is also open source
You can verify exactly what data is sent by inspecting the code yourself.
# Shared TM Bridge with Workbench
The Shared TM Bridge attaches your Supervertaler Workbench translation memories directly inside Trados Studio as a translation provider. No TMX export, no scheduled sync – Trados reads from the same `supervertaler.db` SQLite file Workbench writes, so a TU you confirmed in Workbench five minutes ago shows up in Trados the next time it queries the TM.
It’s the same feature on both sides. This page covers the Trados half; the Workbench half lives at [Shared TM Bridge with Trados](/workbench/translation-memory/shared-tm-bridge/).
## Prerequisites
* **Supervertaler for Trados** `v4.20.32` or newer installed.
* **Supervertaler Workbench** `v1.10.212` or newer (introduces the per-TM Bridge flag).
* Both products writing to the same data folder. Default is `D:\Supervertaler\` (or wherever you’ve configured the Workbench data path).
* At least one TM ticked as **Bridge** in Workbench’s TMs tab.
## Attaching a bridged TM
1. Open the project in Trados Studio.
2. **Project Settings** → **Language Pairs** → **All Language Pairs** → **Translation Memory and Automated Translation**.
3. Click **Add** → **Supervertaler TM**.
4. The picker dialogue lists every TM you’ve ticked as Bridge in Workbench, filtered to those whose language pair matches your project. Loose matching applies – a TM stored as bare `nl → en` will show up for an `nl-NL → en-GB` project.
5. Tick the TM(s) you want and click **OK**.
Multiple bridged TMs can be attached to the same project. Each will show up as a separate row in the Translation Memory list, named e.g. *Supervertaler TM: BRANTS (URSU-008-BE-EP)*.
## What you get
* **Exact (100%) matches** in the Translation Results pane, alongside any SDLTMs you have attached.
* **Concordance search** – source-side AND target-side – through both Trados’s built-in Concordance window and the SuperSearch tab. Backed by the FTS5 index Workbench maintains.
* **Per-hit TM attribution.** With several bridges attached, each match’s origin strip identifies the specific TM it came from – *Supervertaler: BRANTS (URSU-008-BE-EP)* vs *Supervertaler: PATENTS* – so you can tell at a glance which memory contributed which hit.
* **Live updates from Workbench.** Confirming a segment in Workbench writes to the same DB Trados reads, so the new TU appears on the next lookup. No sync step.
## What’s NOT in this release
* **Write-back from Trados.** The bridge is read-only. When you confirm a segment in Trados, the update goes to your normal SDLTM, not back to the bridged Workbench TM. Round-trip write support will land in a later phase.
* **Fuzzy matching.** Only 100% matches are returned from bridged TMs. Sub-100 fuzzies need to come from another provider attached to the project (e.g. your main SDLTM). Bridge-side fuzzy matching will also land later.
## Diagnostics
If the bridge isn’t behaving as expected, the plugin writes a verbose diagnostic log to:
```plaintext
%TEMP%\supervertaler-tm-bridge.log
```
Every search, every method call from Trados, every error – it’s all in there with timestamps. If you file a bug, attaching that log makes it much easier to diagnose.
Common issues:
* **Bridged TM doesn’t show up in the picker.** Check that the TM is still ticked as Bridge in Workbench’s TMs tab, and that its language pair matches the project. The picker filters to compatible pairs only.
* **Bridge attached but matches don’t appear.** Make sure the TM actually contains TUs for your source segments. Workbench’s own match panel is a good sanity check – if Workbench doesn’t find the TU there, Trados won’t either.
* **“This TM is offline” pill.** The TM is still referenced in `.sdlproj` but the Bridge flag has been un-ticked in Workbench. Re-tick it, restart Trados, and the project will pick it back up.
## See also
* The matching Workbench-side help page lives at [Shared TM Bridge with Trados](/workbench/translation-memory/shared-tm-bridge/).
# Trados Studio 2026 & .ttb Termbases
Trados Studio 2026 introduces a new termbase format –the SQLite-based **`.ttb`** file –and drops the legacy MultiTerm engine that earlier versions relied on. Supervertaler for Trados supports Studio 2026 through a dedicated build that reads `.ttb` termbases directly.
## Two builds, one product
Supervertaler for Trados ships as two separate plugin builds from the same codebase:
| Build | For | Termbase format |
| ------------------------------------------ | ------------------ | ------------------ |
| **Supervertaler for Trados** | Trados Studio 2024 | MultiTerm `.sdltb` |
| **Supervertaler for Trados (Studio 2026)** | Trados Studio 2026 | `.ttb` |
Install the build that matches your Studio version. The 2024 build will not load in Studio 2026, and vice versa, because the two Studio releases use different plugin frameworks and termbase engines.
## Version numbering
Each build’s **major version tracks the Trados Studio major it targets**, so the two builds always carry distinct, non-colliding version numbers that share the same tail:
| Build | Example version |
| ------------------ | --------------- |
| Trados Studio 2024 | `18.20.86` |
| Trados Studio 2026 | `19.20.86` |
So you can tell at a glance which Studio a build is for: a `18.x` plugin is for Studio 2024, a `19.x` plugin is for Studio 2026. (Releases up to and including `4.20.85` used a single shared number for both builds.)
## TermLens and `.ttb` termbases
In Studio 2026, TermLens reads the new `.ttb` termbases attached to your project automatically –there is nothing to configure. Terms appear as **green chips** in the TermLens panel, exactly as MultiTerm terms do in the 2024 build, and behave the same way (click to insert, or **Alt+1**–**Alt+9** to insert by number).
`.ttb` termbases are **read-only** in TermLens, just like MultiTerm termbases. To add or edit terms, use Studio 2026’s built-in Termbases view.
Everything else – Supervertaler, Batch Translate, SuperSearch, TermPicker, AI terminology injection – works identically across both builds.
## What about my existing `.sdltb` termbases?
Studio 2026 cannot open `.sdltb` files directly; the MultiTerm engine that read them is no longer part of the base install. Instead, **RWS provides conversion to the new `.ttb` format**:
* The **Termbases view** in Studio 2026 has a wizard to migrate `.sdltb` → `.ttb`.
* Opening a project package that contains an `.sdltb` termbase converts it to `.ttb` on the fly.
* When a 2026 user sends a package back to someone still on Studio 2024, Studio can create a “compatible” package that the older version converts back to `.sdltb` automatically.
Once your termbase is in `.ttb` form, TermLens picks it up automatically. There is no separate step in Supervertaler –convert in Studio, and the terms appear.
Note
If you work in both Studio 2024 and Studio 2026, keep using the MultiTerm `.sdltb` build for your 2024 projects. The 2026 build is only for Studio 2026 and its `.ttb` termbases. See [MultiTerm Support](/trados/multiterm-support/) for the 2024 workflow.
## Technical notes
* `.ttb` is a SQLite 3 database with full-text search. TermLens opens it in read-only mode, so Studio can keep using it at the same time with no risk of corruption.
* Studio 2026 is a 64-bit application. The 2026 build is 64-bit to match; the 2024 build remains 32-bit/AnyCPU for the MultiTerm JET driver it depends on.
## See also
* [MultiTerm Support](/trados/multiterm-support/) –the equivalent `.sdltb` workflow in Studio 2024
* [TermLens](/trados/termlens/)
* [Installation (Trados)](/trados/installation/)
* [Troubleshooting](/trados/troubleshooting/)
# SuperSearch
SuperSearch is a cross-file search and replace tool that lets you find text across **all SDLXLIFF files** in your Trados project — not just the file you currently have open — and, optionally, across the project’s **translation memories** as well. It lives in its own dockable panel, so you can keep it visible while you translate.
Matching text is highlighted in yellow in the results grid, making it easy to spot exactly where the search term appears in each segment.
[SuperSearch in action – cross-file search across a Trados project](https://www.youtube.com/embed/549Ulc92FiU)
## Opening the Panel
There are three ways to open SuperSearch:
| Method | Description |
| --------------- | -------------------------------------------------------------------------- |
| **View menu** | Go to **View > SuperSearch** |
| **Right-click** | Right-click in the editor and choose **SuperSearch** from the context menu |
| **Keyboard** | Press **Alt+S** |
The panel docks at the bottom of the editor by default, but you can drag it anywhere — left, right, floating, or even to a second monitor. Trados remembers the position between sessions.
Note
**Prefer fewer panels?** You can host SuperSearch as a tab inside the Supervertaler Assistant panel instead of its own dockable panel. Go to **Settings > General > Panels** and tick **Show SuperSearch as a tab in the Supervertaler Assistant panel**, then restart Trados Studio. This requires a Supervertaler licence; without one, SuperSearch stays in its own panel.
Note
**Quick search from the editor:** Select a word or phrase in the source or target segment, then press **Alt+S** (or right-click > **SuperSearch**). The selected text is automatically entered in the search box and the search runs immediately.
![]()
## Searching
Type your search query in the text box and press **Enter** (or click **Search**).
### Search Modes
The **mode** dropdown in the search bar controls where SuperSearch looks:
| Mode | Searches |
| ----------------- | -------------------------------------------------------------------------------------------------- |
| **Project files** | The project’s SDLXLIFF files (the default — original SuperSearch behaviour) |
| **Files + TMs** | The project files *and* the project’s translation memories, merged into one result list |
| **TMs only** | Only the project’s translation memories — a concordance search, like Studio’s built-in Concordance |
The mode is remembered across sessions until you change it.
Translation-memory results are found via the project’s attached file-based TMs (`.sdltm`) — read from the project settings and the project’s `Tm` folder. Server-based (GroupShare) TMs are not searched. TM hits obey the same **Aa**, **.\***, and **Word** options as file results, and the **Scope** dropdown maps to source-side / target-side concordance.
The TM list is re-checked every time you search, so a TM you attach to the project mid-session is picked up without reopening the project. SuperSearch searches every attached TM regardless of its **Enabled** / **Concordance** state in the project’s TM settings — use the **TMs** button (see below) to narrow the list.
Note
TM results can be read and copied (via the preview pane) but cannot be navigated to or replaced — they are reference material, not document segments. In **TMs only** mode the Replace bar is therefore disabled.
### Search Options
| Option | Description |
| ------------------ | ------------------------------------------------------------------------------------------------- |
| **Scope** dropdown | Choose *Source & Target* (default), *Source only*, or *Target only* |
| **Aa** checkbox | Case-sensitive search — when unchecked, “Hello” matches “hello”, “HELLO”, etc. |
| **.\*** checkbox | Treat the query as a regular expression (see [Regex tips](/trados/supersearch/#regex-tips) below) |
| **Word** checkbox | Match whole words only — “cat” won’t match “category” or “scatter”. Ignored when **.\*** is on |
SuperSearch displays all matching segments in the results grid. The status bar shows the number of results, what was searched (files and/or TMs), and how long the search took.
### Results Grid
Each row shows one matching segment (or, in a TM mode, one TM entry):
| Column | Description |
| ----------- | ---------------------------------------------------------------------------------------------------------------- |
| **File/TM** | The project-file name, or — for TM results — the translation-memory name, shown in blue. Hover for the full path |
| **#** | Segment number within the file; for TM results, the concordance match score |
| **Source** | Source text — matching text is highlighted in yellow |
| **Target** | Target text — matching text is highlighted in yellow |
| **Status** | Confirmation status (Not Translated, Draft, Translated, etc.), or “TM” for TM results |
### Preview Pane
Below the results grid is a preview pane showing the **full source and target text** of the selected result, side by side, with the match highlighted in yellow. This is handy when a segment is too long to read in its grid row. Click any result row to update the preview, and drag the splitter bar between the grid and the preview pane to resize it.
The text in both preview boxes is **selectable**: drag to select, press **Ctrl+C** to copy, or right-click for a menu with **Copy**, **Select All**, **Copy source**, and **Copy target**. This makes it easy to reuse a previous translation verbatim — select the target phrase and paste it straight into your active segment.
## File and TM Selection
Two buttons in the search bar let you narrow what SuperSearch looks at — **Files** for the project’s SDLXLIFF files, and **TMs** for the project’s translation memories. Each button shows how many items are included:
* **Files (16)** — all 16 files in the project are included
* **Files (12/16)** — 12 out of 16 files are included (4 excluded)
* **TMs (3)** — all 3 project TMs are included
* **TMs (1/3)** — 1 of 3 TMs is included (2 excluded)
Click either button to open its selection dialog:
1. A list shows all the files (or TMs) found in the project, with checkboxes
2. **Check** the items you want to include in the search
3. **Uncheck** the items you want to exclude
4. Use **Select All** or **Select None** to quickly toggle everything
5. Click **OK** to apply
The **Files** filter applies in **Project files** and **Files + TMs** modes; the **TMs** filter applies in **Files + TMs** and **TMs only** modes.
Note
Both selections persist for the current session. When you switch to a different project, all files and all TMs are included again by default.
## Navigating to a Segment
**Double-click** a row (or select it and press **Enter**) to jump to that segment in the editor.
* If the segment is in the **currently active file**, Trados navigates to it directly.
* If the segment is in a **different file**, SuperSearch attempts to switch to that file and navigate to the segment. If the file is not loaded in the editor, you may need to open it first.
* **TM results** can’t be navigated to — they aren’t document segments. Double-clicking a TM row just reminds you to use the preview pane to copy the text.
## Find & Replace
Tick the **Replace** checkbox to reveal the replace bar. Replace always operates on **target text only** — source text is never modified.
| Action | Description |
| --------------- | -------------------------------------------------------------------------------------------------------------------------------------- |
| **Replace** | Replaces the match in the currently selected result. The segment must be in the active file — double-click it first to navigate there. |
| **Replace All** | Replaces all target matches across all files. A confirmation dialog shows how many segments in how many files will be affected. |
### How Replace All works
* For the **active file**: changes go through the Trados API, so they appear immediately and are tracked in Trados’s undo history.
* For **other files**: the SDLXLIFF XML is modified directly on disk. You need to reopen those files to see the changes.
Caution
**Replace All cannot be undone** for files modified on disk. Always review the search results carefully before replacing. Consider saving your project first.
Note
Replace respects the same **Aa** (case sensitivity) and **.\*** (regex) settings as search. When using regex, you can use capture groups in the replacement (e.g., `$1`, `$2`).
### Matches that span inline tags are skipped
Trados segments often contain inline tags – formatting marks, placeholders, field codes – that interrupt a run of plain text. If your search string would only match across one of these tag boundaries (for example, searching for `important thing` when the segment renders as `importantthing`), Replace and Replace All will **skip that segment** rather than apply a destructive flatten-and-rewrite that would lose the tag.
You’ll see this in the status bar after a Replace All as `…, skipped N (match spans inline tags)`. The skipped segments are left untouched so the formatting survives; you can edit them manually if you want the replacement to happen.
This applies to both the active-file path (Trados API replacements) and the on-disk path (SDLXLIFF XML rewrites). It only kicks in when the match genuinely straddles a tag – ordinary matches inside a single text run are replaced normally and tags are preserved.
## Regex Tips
When the **.\*** checkbox is enabled, the search query is treated as a .NET regular expression. Some useful patterns:
| Pattern | Matches |
| ---------------- | --------------------------------------------------- |
| `\bword\b` | ”word” as a whole word (not “keyword” or “wording”) |
| `(word1\|word2)` | Either “word1” or “word2” |
| `\d+` | One or more digits |
| `"[^"]*"` | Anything inside double quotes |
| `\s{2,}` | Two or more consecutive whitespace characters |
Note
Regex replace supports capture groups. For example, search for `(\w+)\s+(\w+)` and replace with `$2 $1` to swap two words.
## Keyboard Shortcuts
| Shortcut | Action |
| ----------------------------- | --------------------------------------------- |
| **Alt+S** | Open SuperSearch (with selected text, if any) |
| **Enter** (in search box) | Start search |
| **Enter** (in results grid) | Navigate to selected segment |
| **Double-click** (result row) | Navigate to selected segment |
## Tips
* Select a term in the editor and press **Alt+S** to instantly search for it across the entire project.
* Use **Source only** scope to find segments where a particular term appears, then check how it was translated across files.
* Use **Target only** scope with Replace to fix a consistent mistranslation across the entire project.
* Use the **Files** and **TMs** buttons to limit the search to specific files or translation memories — useful in large projects where you only want to search a subset.
* Switch the mode dropdown to **TMs only** to use SuperSearch as a concordance tool, or **Files + TMs** to see project and TM hits side by side.
* The status bar shows the number of results, what was searched, and the search time in milliseconds.
* You can resize columns by dragging the column header borders.
## See Also
* [Supervertaler](/trados/ai-assistant/) — AI-powered chat and context
* [Batch Operations](/trados/batch-operations/) — Batch translate and proofread
* [Keyboard Shortcuts](/trados/keyboard-shortcuts/) — All shortcuts in one place
# Support
There are several ways to get help with Supervertaler for Trados.
***
## GitHub Discussions
[GitHub Discussions](https://github.com/orgs/Supervertaler/discussions) is the main community hub for both Supervertaler for Trados and Supervertaler Workbench. It is the best place to:
* Ask questions and get help from other users
* Share tips, workflows, and best practices
* Suggest features and improvements
* Discuss anything related to Supervertaler
Tip
**[Visit Supervertaler Discussions →](https://github.com/orgs/Supervertaler/discussions)**
***
## Bugs & Feature Requests
Use [GitHub Issues](https://github.com/Supervertaler/Supervertaler-for-Trados/issues) to report bugs or request new features. When reporting a bug, please include:
* Your Trados Studio version
* The Supervertaler plugin version
* Steps to reproduce the problem
* Any error messages or screenshots
***
## Email
For private enquiries, contact .
# Termbase Management
Supervertaler for Trados uses the same SQLite termbase format as Supervertaler Workbench. You manage your termbases through the Settings dialogue.
## Accessing termbase settings
1. Click the **gear icon** in the TermLens panel, or go to **Settings** in the plugin ribbon
2. Switch to the **TermLens** tab
## Database file
The plugin stores all termbases in a single `.db` file (SQLite database).
* Click **Browse** to select an existing database file
* Click **Create New** to create a fresh, empty database
Note
The `.db` file uses the same Supervertaler SQLite format as the standalone application. On Windows, you can share the same termbase file between both tools by pointing them to the same data folder. On a Mac with Parallels, see the note below.
## MultiTerm termbases
If your Trados project has MultiTerm termbases (`.sdltb` files) attached, they appear automatically at the bottom of the termbase list with a **\[MultiTerm]** label and green background. These termbases are read-only in TermLens –to manage their terms, use Trados’s built-in MultiTerm interface. See [MultiTerm Support](/trados/multiterm-support/) for full details.
## Termbase list
Once a database is loaded, the termbase list shows all Supervertaler termbases it contains, plus any detected MultiTerm termbases. Each Supervertaler termbase has three toggles:
| Toggle | Purpose |
| ----------- | ----------------------------------------------------------------------------------------------- |
| **Read** | Load terms from this termbase for matching in TermLens |
| **Write** | New terms added via [quick-add shortcuts](/trados/termlens/adding-terms/) go into this termbase |
| **Project** | Designate as the project termbase (terms shown in pink, prioritised in matching) |
Caution
Only one termbase can be marked as **Project** at a time. Setting a new project termbase clears the flag from the previous one.
## Creating a new termbase
1. Click **Add Termbase**
2. Enter a **name** for the termbase
3. Select the **source language** and **target language**
4. Click **OK**
The new termbase appears in the list, ready for use.
## Import from TSV
You can import terminology from a tab-separated values file:
1. Select the target termbase in the list
2. Click **Import from TSV**
3. Select your `.tsv` file
4. A confirmation dialog shows the filename, row count, termbase name, and language pair — check that you are importing into the right termbase
5. A progress bar tracks the import (useful for large termbases with thousands of terms)
**File format:**
The first row must be a header row. Recognised column headers (case-insensitive):
| Column | Required | Recognised headers |
| ---------- | -------- | -------------------------------------------------------------------- |
| **Source** | Yes | `Source`, `Source Term`, `Src`, or a language name (e.g., `English`) |
| **Target** | Yes | `Target`, `Target Term`, `Tgt`, or a language name (e.g., `Dutch`) |
| Term UUID | No | `Term UUID`, `UUID`, `Term ID`, `ID` |
| Priority | No | `Priority`, `Prio`, `Rank` |
| Domain | No | `Domain`, `Subject`, `Field`, `Category` |
| Notes | No | `Notes`, `Note`, `Definition`, `Comment` |
| Project | No | `Project` |
| Client | No | `Client`, `Customer` |
| Forbidden | No | `Forbidden`, `Do not use` |
For terms with multiple synonyms, use pipe-delimited values: `main|synonym1|synonym2`. Forbidden synonyms are wrapped as `[!term]`.
**Example:**
```plaintext
Source Target Domain Notes
database databank|gegevensbank
software software Non-translatable
user interface gebruikersinterface|gebruikersomgeving IT
```
Note
TSV files exported from Supervertaler (both the Trados plugin and Workbench) can always be reimported without any changes. Files from other tools are also supported as long as they have recognisable column headers.
## Export to TSV
To export all terms from a termbase:
1. Select the termbase in the list
2. Click **Export to TSV**
3. Choose a save location
The exported file uses tab-separated columns with a header row: `Term UUID`, `Source`, `Target`, `Priority`, `Domain`, `Notes`, `Project`, `Client`, `Forbidden`. Synonyms are pipe-delimited and forbidden synonyms are marked with `[!term]`. The file is UTF-8 encoded with BOM for Excel compatibility.
## Termbase Editor
For full editing capabilities, double-click a termbase in the list to open the **Termbase Editor**. From here you can:
* **Search** for terms by source or target text
* **Edit** individual term entries
* **Delete** terms
* Perform **bulk operations** (e.g. bulk delete, bulk reverse)
### Right-click menu
Right-clicking any row in the grid opens a context menu with the following actions:
* **Copy cell** – copies the content of the clicked cell to the clipboard.
* **Edit term…** – opens the full term entry editor for the clicked row.
* **Reverse source/target** – swaps the source and target for the selected rows (see below).
* **Delete term** – deletes the selected rows after confirmation.
Multi-row selection is preserved: if you select several rows first and then right-click on one of them, the selection stays intact so actions apply to all selected entries. If you right-click on a row that wasn’t already selected, the selection collapses to just that row.
### Reversing source/target
If you have term entries that ended up in the wrong direction – for example, English text in the Dutch column when the termbase is declared English → Dutch – you can correct them with **Reverse source/target**:
1. Select one or more rows in the grid (Shift-click or Ctrl-click for multi-select).
2. Right-click → **Reverse source/target (N entries)**.
3. Confirm.
The operation swaps the source and target text, language tags, abbreviations, and flips the direction of every linked synonym. It runs in a single database transaction, so a partial failure leaves the termbase untouched.
This action is mostly for repairing legacy entries created or edited under v4.19.24 or earlier, when the term entry editor could write values into the wrong DB columns in projects whose direction was the inverse of the termbase’s. From v4.19.25 onwards the editor guards against that, so new entries should not need this repair.
Note
**Add and Edit dialog fields are always in termbase direction.** The dialog labels and values both reflect the termbase’s declared direction – English on the left when the termbase is declared EN→NL, regardless of the current Trados project’s direction. From v4.19.25 the values are guaranteed to align with the labels: the Edit dialog re-reads the entry from the database, and the Add dialog swaps the pre-fills internally when the project direction is the inverse of the termbase. Earlier versions could silently write reversed entries in inverse-direction projects – use **Reverse source/target** above to repair any pre-v4.19.25 damage.
## Sharing termbases
Tip
**Tip:** Keep the `.db` file on a network drive or cloud-synced folder (OneDrive, Dropbox, Google Drive) to share termbases across machines and with colleagues. Since both the Trados plugin and Supervertaler Workbench use the same format, everyone can work from the same terminology.
Caution
**Mac users (Parallels):** On a Mac, Supervertaler Workbench runs natively on macOS while the Trados plugin runs inside Parallels (Windows). The two products cannot share the same `.db` file directly because the Trados plugin must store its data on the Windows side (`C:\Users\...`) – not on the Mac-side shared folder (`\\Mac\Home\...`). To keep your termbases in sync, export from one side and import on the other after making changes. This is a limitation of Parallels’ virtual network filesystem, not of the termbase format itself.
## Distill into a memory bank
You can extract knowledge from any termbase and add it to a [memory bank](/trados/ai-assistant/super-memory/) using the **Distill** feature:
1. Right-click a termbase in the list
2. Select **⚗ Distill into memory bank**
The AI analyses all terms in the termbase and creates structured articles (terminology decisions, domain knowledge) in the active memory bank’s inbox. See [Distill](/trados/ai-assistant/super-memory/distill/) for full details.
***
## See Also
* [MultiTerm Support](/trados/multiterm-support/)
* [TermLens Settings](/trados/settings/termlens/)
* [Adding & Editing Terms](/trados/termlens/adding-terms/)
* [Distill](/trados/ai-assistant/super-memory/distill/)
* [Termbase Basics (Workbench)](https://docs.supervertaler.com/workbench/termbases/basics/)
# TermLens
TermLens is an inline terminology display that shows the source text of the current segment word by word, with termbase translations directly underneath each matched term. It updates automatically when you navigate to a new segment.
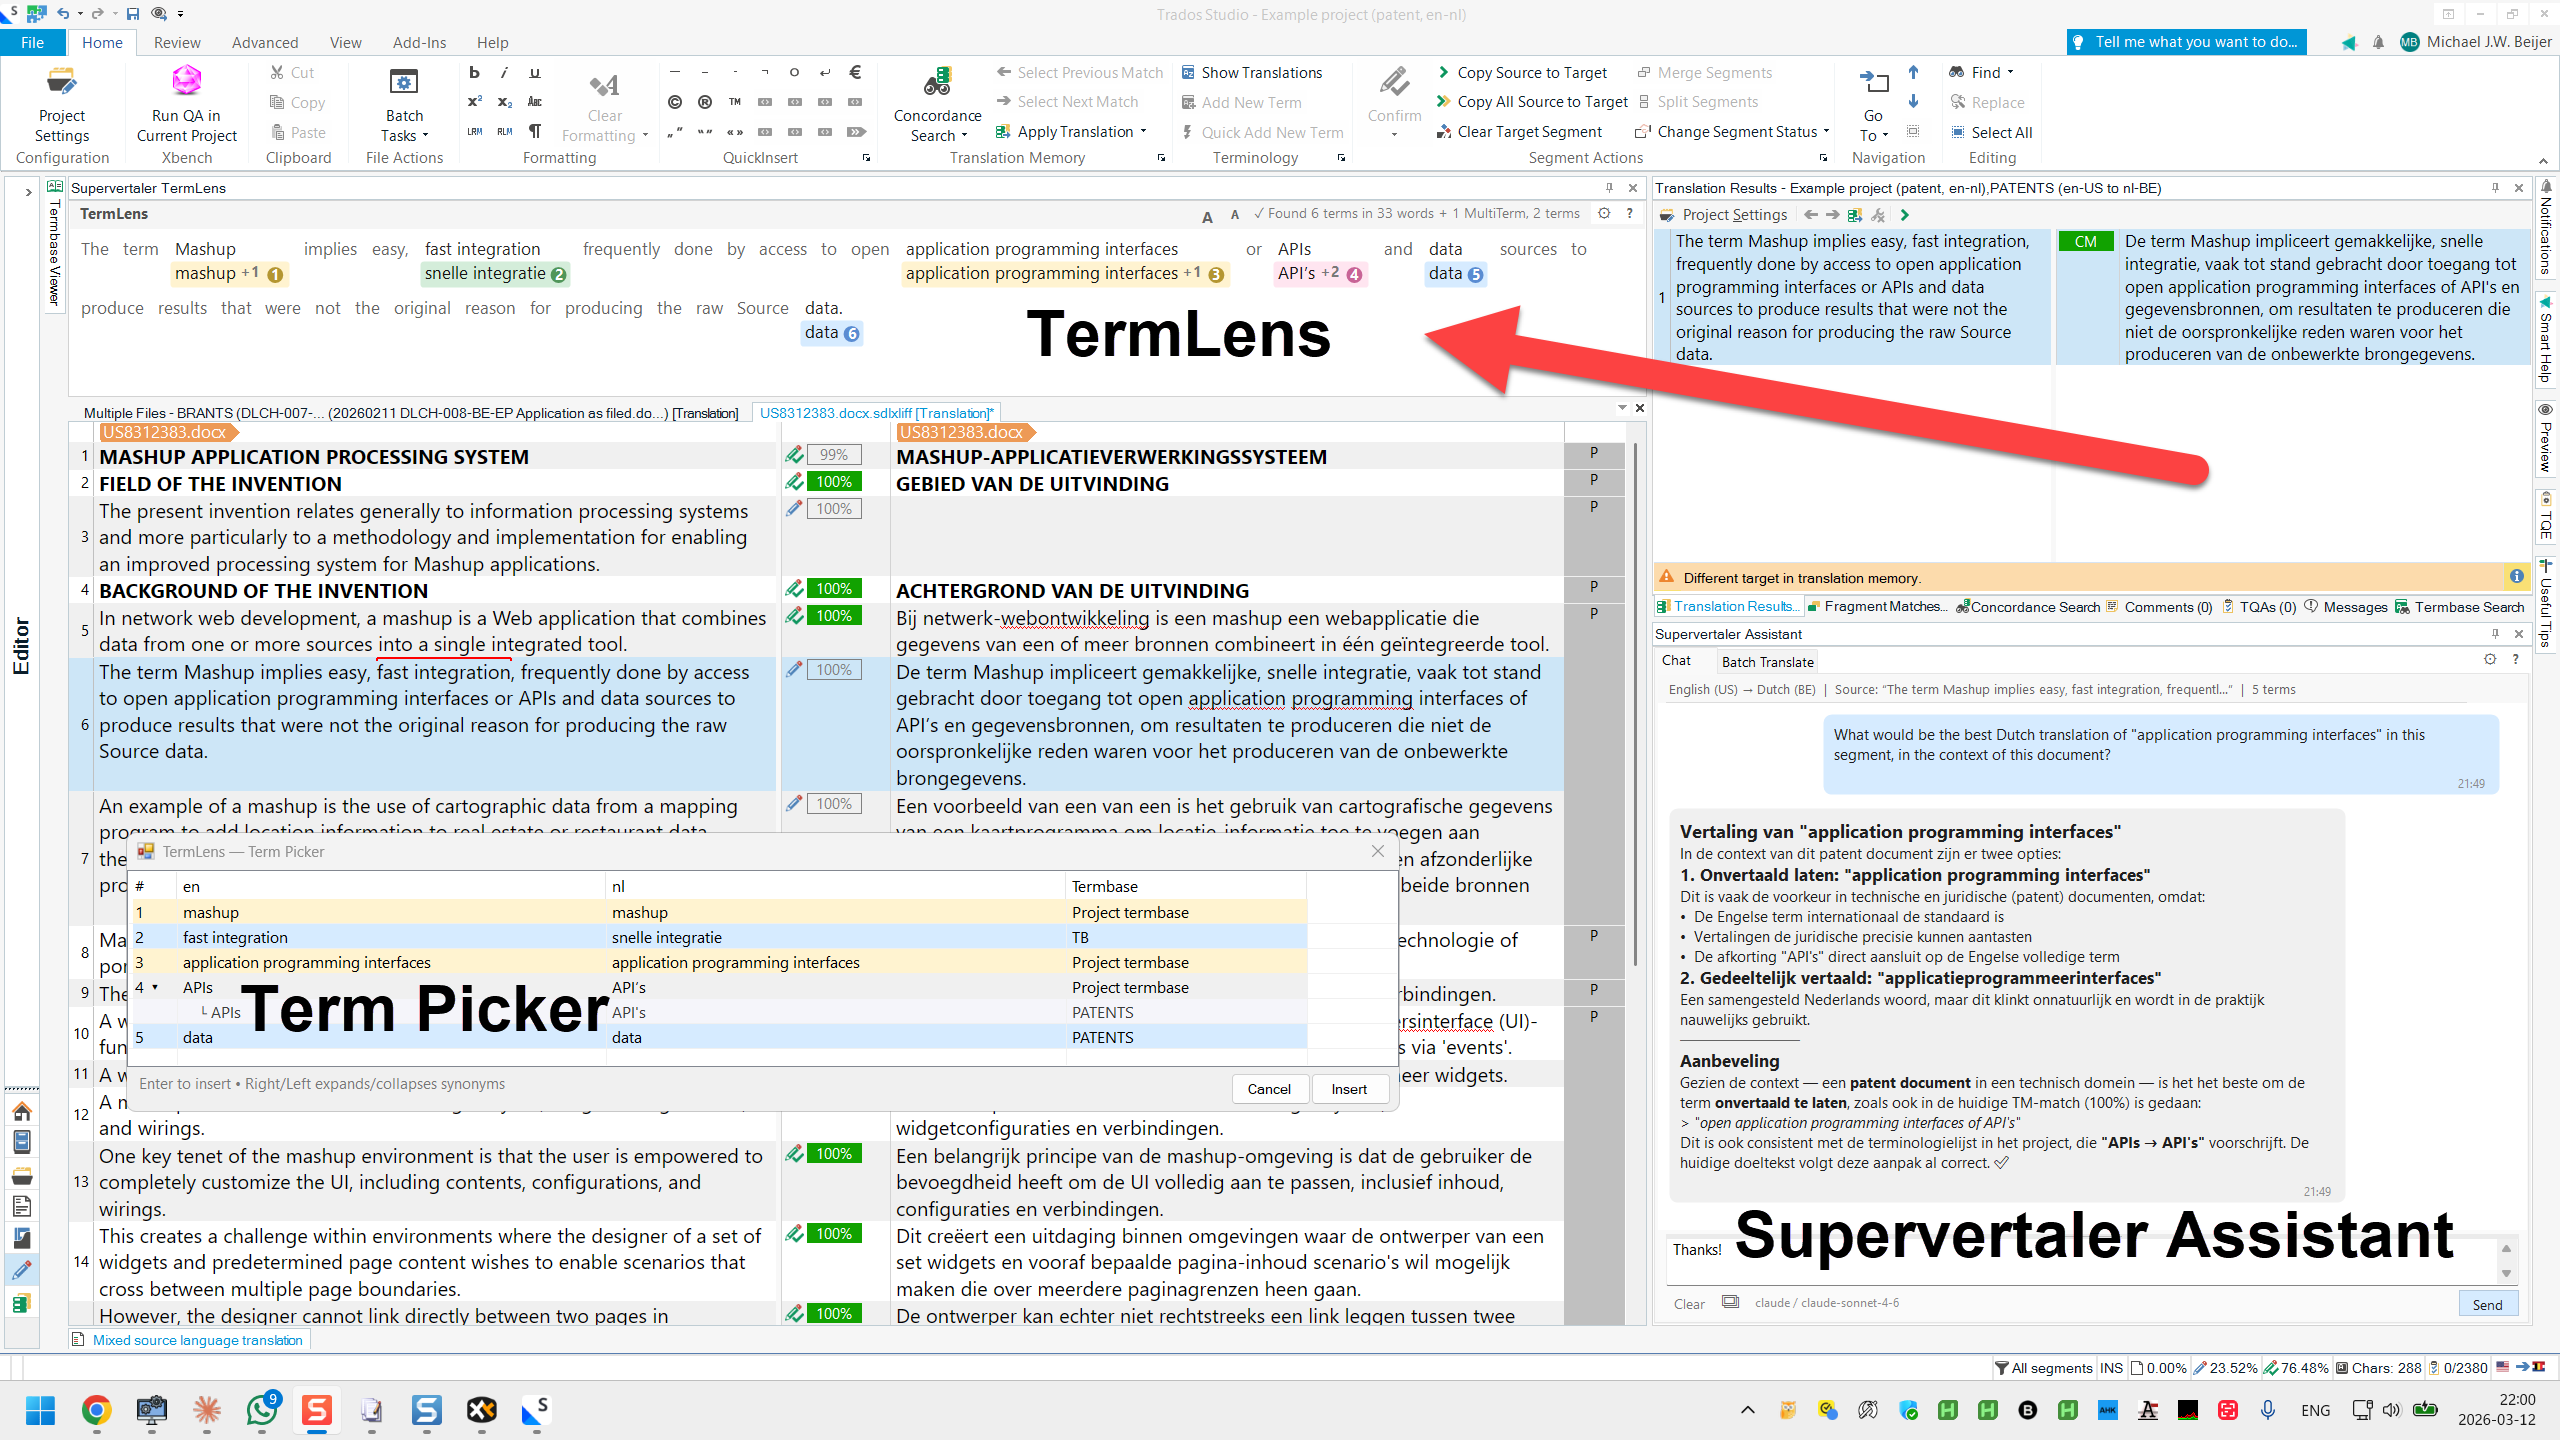
### How It Works
When you select a segment in the Trados editor, TermLens analyses the source text against all active termbases and displays the result in a visual layout:
* **Matched words** appear with their termbase translation underneath, on a coloured background
* **Unmatched words** are shown in light grey text so you can read the full source sentence in context
This gives you an at-a-glance overview of every term in the segment that has a termbase entry – without hovering or clicking anything.
![]()
### Colour Coding
TermLens uses five background colours to distinguish term types:
| Colour | Meaning |
| ---------- | ----------------------------------------------------------------------- |
| **Blue** | Regular Supervertaler termbase match |
| **Purple** | Abbreviation match (matched via source abbreviation, not the full term) |
| **Pink** | Project termbase match (higher priority) |
| **Yellow** | Non-translatable term (source = target) |
| **Green** | MultiTerm termbase match (`.sdltb`) |
Note
Designate one termbase as the **Project termbase** in settings to make its terms appear in pink. Project terms take visual priority over regular terms, making it easy to spot client-specific terminology.
Tip
**MultiTerm termbases** attached to your Trados project appear automatically as green chips. They are read-only – to edit MultiTerm terms, use Trados’s built-in MultiTerm interface. See [MultiTerm Support](/trados/multiterm-support/) for details.
### Chip Indicators
In addition to colour coding, TermLens shows small indicators in the top-right corner of term chips:
| Indicator | Meaning |
| -------------- | ----------------------------------------------------------------------------------- |
| **≡** (indigo) | The entry has synonyms (source-side, target-side, or both). Hover to see them. |
| **●** (amber) | The entry has metadata – a definition, domain, notes, or URL. Hover to see details. |
Both indicators can appear simultaneously. Hover over any term chip to see an interactive popup with full details, including source synonyms (prefixed with “Also:”), target synonyms (shown as bullet points), definitions, domain, notes, and clickable URLs. The popup stays open when you move the mouse into it, so you can click on links.
#### Markdown Rendering
The **Notes** and **Definition** fields in the term popup support Markdown formatting. If the content contains Markdown syntax (tables, bold, italic, headings, bullet lists, code blocks), it is rendered with proper formatting instead of plain text. This is especially useful when AI-generated term notes include structured data like translation tables.
![]()
Markdown formatting rendered in TermLens term popup
#### Resizable Popup
You can resize the term popup by dragging the grip in the bottom-right corner. The width is remembered for the rest of the session, so subsequent popups open at your preferred size.
### Inserting Terms
#### Click to Insert
Click any translation shown under a source word. The translation is inserted at the cursor position in the target field.
#### Automatic capitalisation
Displayed and inserted terms follow the capitalisation of the source occurrence in the segment, not the capitalisation stored in the termbase. A term stored as “More preferably” shows and inserts as “more preferably” when the segment contains it lower-case mid-sentence; a lower-case stored term is capitalised when the occurrence starts the sentence; and an ALL-CAPS occurrence (a heading, say) upper-cases the whole term. This applies to every insertion path – chip clicks, Alt+digit shortcuts, the TermLens popup and TermPicker.
The rules are deliberately conservative: acronyms and mixed-case terms (MRI, pH) are never altered, and abbreviation matches keep their stored casing. You can switch the behaviour off with **Adapt term capitalisation to the segment** in [TermLens settings](/trados/settings/termlens/#adapt-term-capitalisation).
#### Keyboard Shortcuts (Alt+1 through Alt+9)
Each matched term in TermLens is assigned a **numbered badge**. Press **Alt+1** to insert the first match, **Alt+2** for the second, and so on up to **Alt+9**.
#### Shortcuts for Terms 10+
For terms numbered 10 and above, TermLens supports two shortcut styles (configurable in Settings):
* **Sequential** (default) – type the term number digit by digit: `Alt+14` inserts term 14
* **Repeated digit** – press the same digit key multiple times: `Alt+55` inserts term 14 (5th term in the second tier: 9+5)
The badge on each term chip shows exactly which key combination to use. See [Keyboard Shortcuts](/trados/keyboard-shortcuts/) for details on both modes.
Note
Terms beyond 45 have no keyboard shortcut. Use the **TermLens popup** or **TermPicker** to insert them.
#### TermLens popup (Ctrl tap)
Tap **Ctrl** (press and release without any other key) to open the [**TermLens popup**](/trados/termlens/termlens-popup/) – a borderless floating version of this panel for the active segment. Designed for keyboard-only term selection on small screens where keeping the docked panel always-visible costs too much vertical space. Tap **Ctrl** again to close. Inside, **Right / Down / Tab** cycle the highlighted match, **Enter** inserts and closes, **Escape** dismisses without inserting.
#### TermPicker (Ctrl+Shift+P)
For segments with many matches and when a sortable list view is preferable, press **Ctrl+Shift+P** to open [**TermPicker**](/trados/termlens/termpicker/). It shows all matched terms in a searchable list and lets you insert any term with a double-click or Enter. TermPicker is a sibling surface to TermLens – same termbase data, different ergonomics (flat list vs in-context chips).
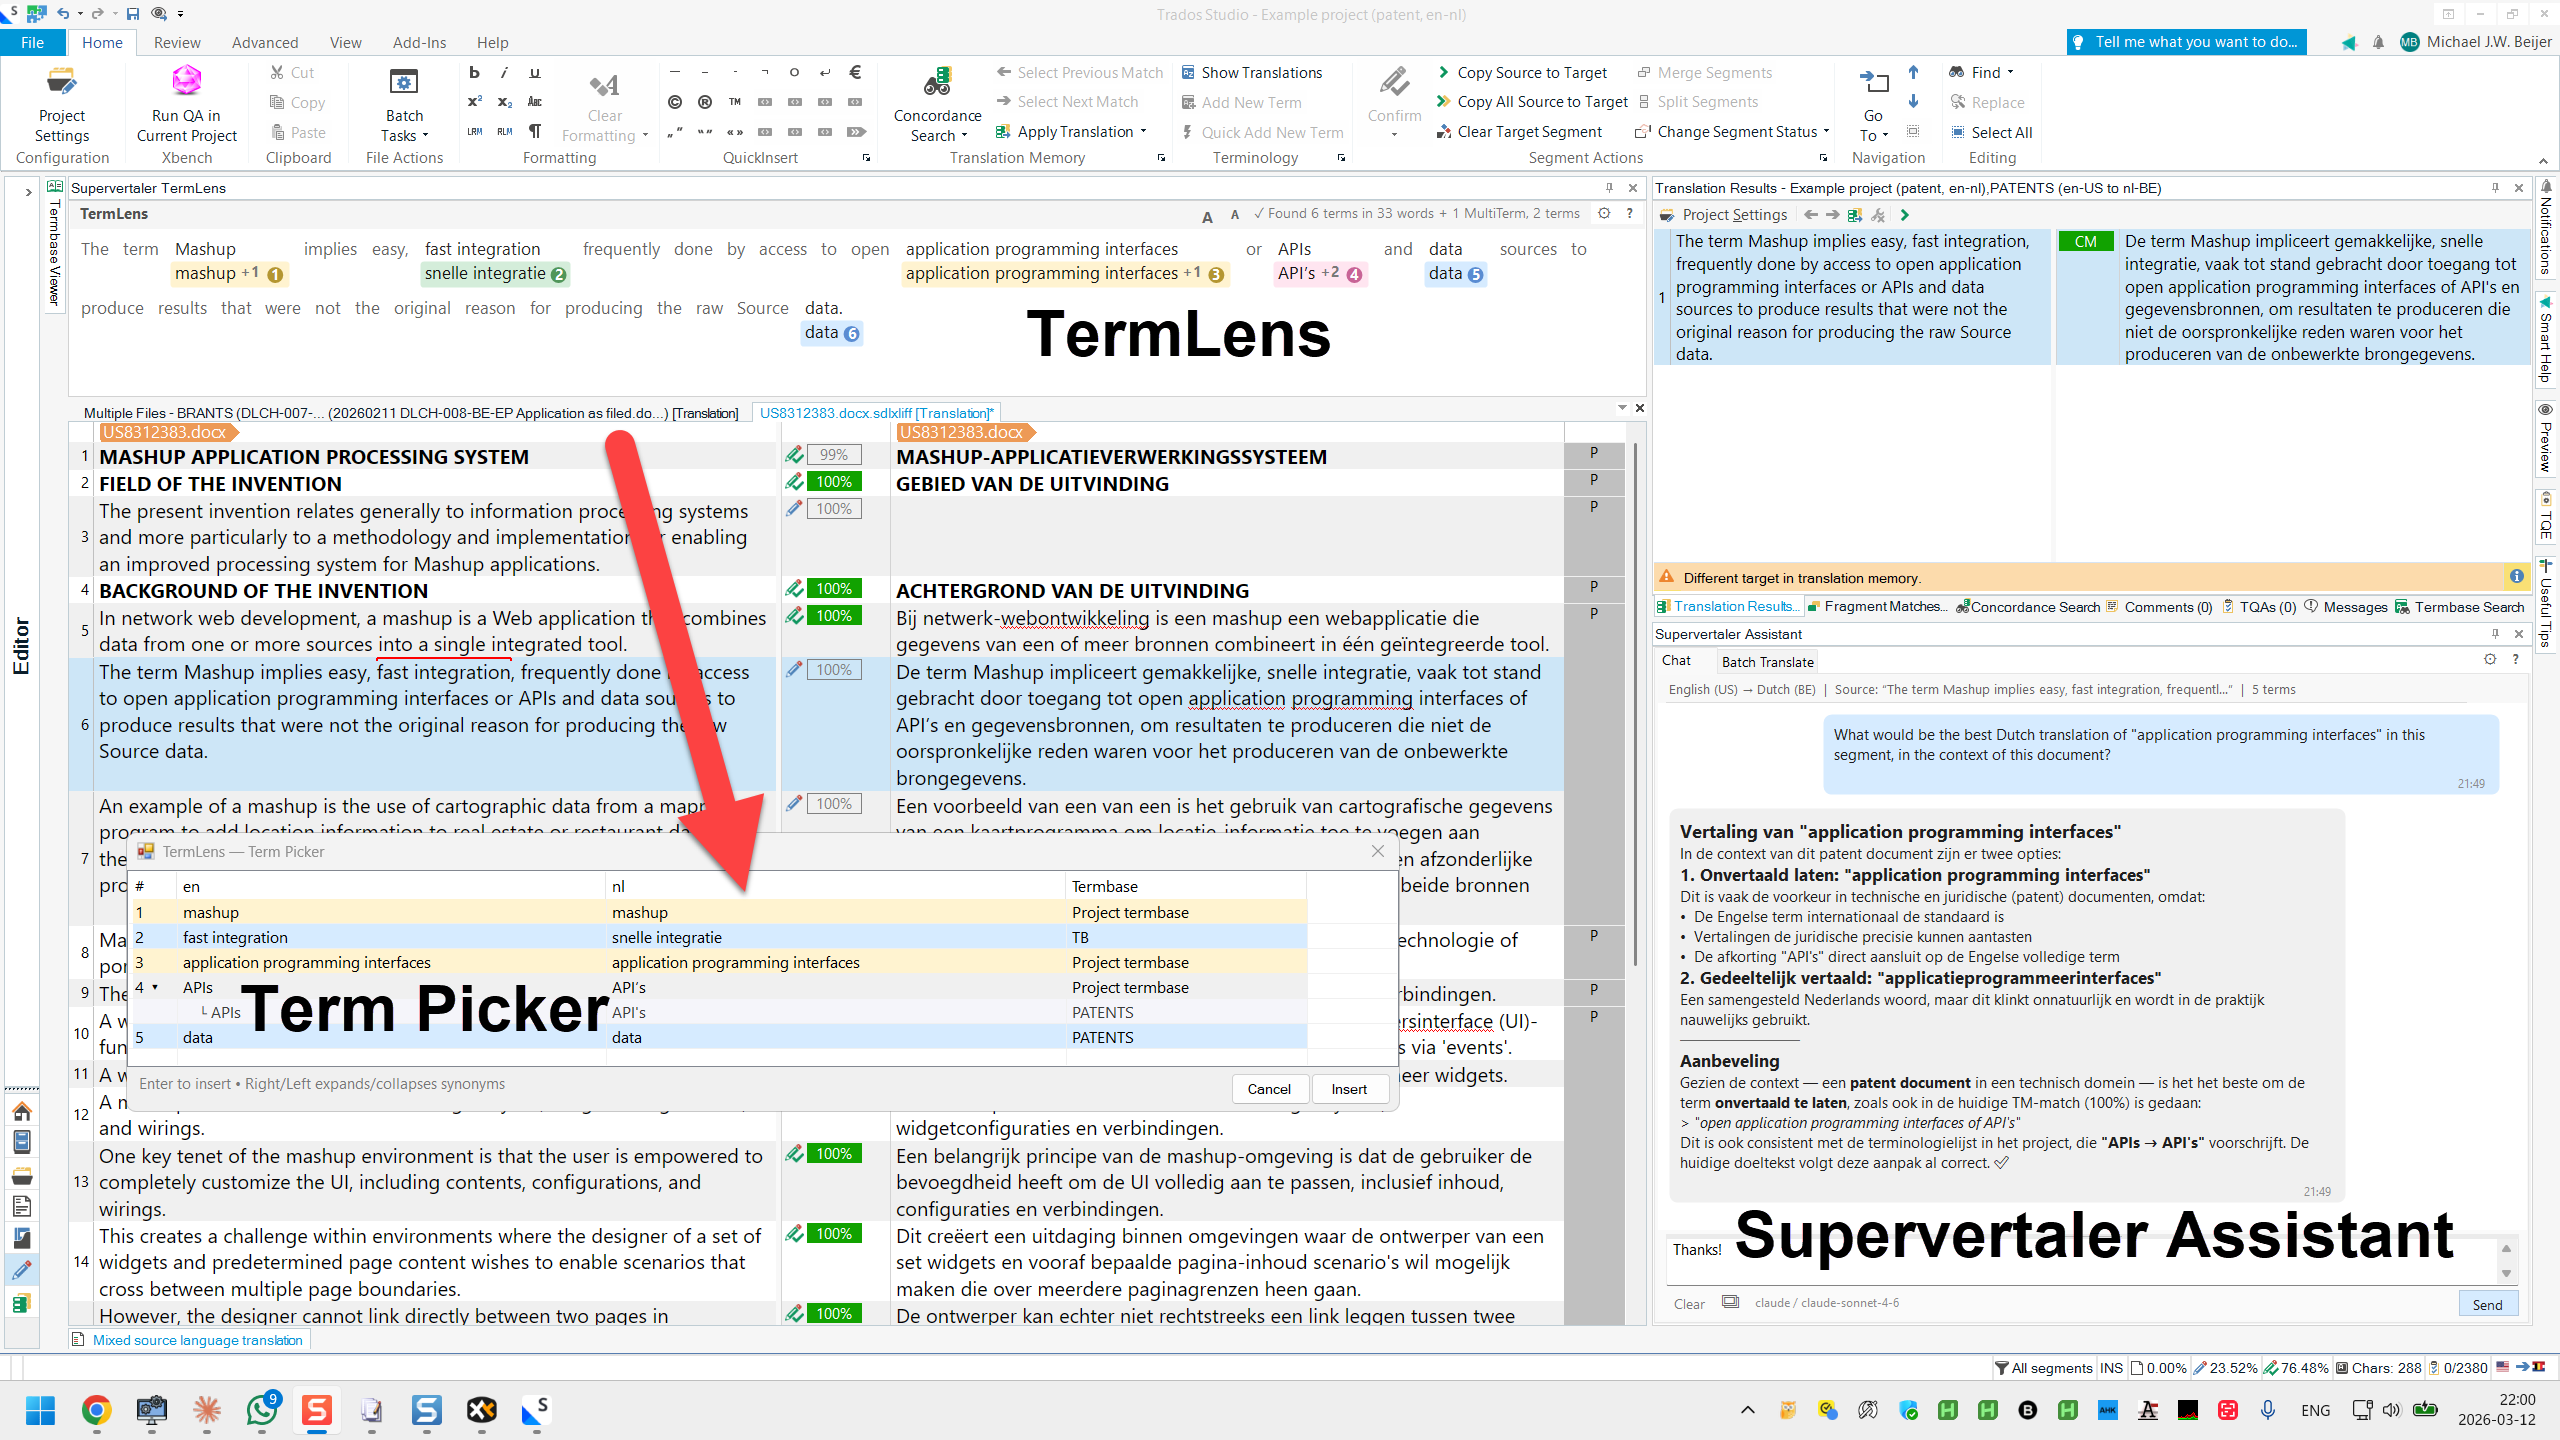
### Right-Click Context Menu
Right-click any term in TermLens to access:
| Action | Description |
| ---------------------------- | ---------------------------------------------------------------------------------- |
| **Edit Term** | Open the term editor to modify source, target, or metadata |
| **Delete Term** | Remove the term from the termbase |
| **Mark as Non-Translatable** | Flag the term so it appears in yellow (source = target) |
| **Mark as Translatable** | Remove the non-translatable flag (shown when the term is already non-translatable) |
### Quick-Add Terms
You can add terms without opening a dialogueue:
| Shortcut | Action |
| -------------- | ---------------------------------------------------------------------------------------- |
| **Alt+Down** | Quick-add the selected text to all write termbases |
| **Alt+Up** | Quick-add the selected text to the project termbase |
| **Ctrl+Alt+T** | Open the Add Term Entry dialogue (full editor: definition, domain, notes, URL, synonyms) |
| **Ctrl+Alt+N** | Quick-add the selected text as a non-translatable term |
Tip
Quick-add shortcuts use the currently selected source text and the corresponding selected or clipboard target text. The term is added instantly without opening a dialogue.
### Font Size
Use the **A+** and **A-** buttons in the TermLens panel header to increase or decrease the font size. Changes apply immediately.
### Tips
* TermLens respects termbase activation –only terms from activated termbases are shown.
* If you have many termbases, designate one as the **Project termbase** (shown in pink) to make its terms stand out.
* Hover over a term to see an interactive popup with all translations, synonyms, abbreviation pairs, definitions, URLs, and the termbase name. The popup stays open when you move the mouse into it, allowing you to click on URLs.
* A small **indigo ≡ indicator** appears in the top-right corner of a term chip when the entry has synonyms. An **amber dot** appears when the entry has metadata (definition, domain, notes, or URL). Both indicators can appear together.
* If a term has an **abbreviation** (e.g., “GC” for “gaschromatografie”), both the full term and the abbreviation are highlighted when they appear in the same segment. The abbreviation chip shows the abbreviated translation; the full-term chip shows the full translation.
***
### See Also
* [Adding & Editing Terms](/trados/termlens/adding-terms/)
* [TermPicker](/trados/termlens/termpicker/)
* [MultiTerm Support](/trados/multiterm-support/)
* [Keyboard Shortcuts](/trados/keyboard-shortcuts/)
* [Getting Started](/trados/getting-started/)
# Adding Terms
Supervertaler for Trados provides several ways to add, edit, and manage terminology without leaving the Trados editor.
## Quick-add (Alt+Down)
The fastest way to add a term while translating:
1. Select the **source text** you want to add as a term
2. Select the **target text** (the translation)
3. Press **Alt+Down**
The term is added instantly to all **write-enabled** termbases. No dialogue, no interruption.
Note
Quick-add writes to every termbase that has **Write** enabled in your [TermLens Settings](/trados/settings/termlens/). If you want to target a specific termbase, use the Add Term Entry dialogue (Ctrl+Alt+T) instead.
## Quick-add to project termbase (Alt+Up)
Works the same as Alt+Down, but adds the term specifically to the **project termbase** (the termbase marked as “Project” in settings). Use this when you want to keep client-specific terminology separate and prioritised.
1. Select the **source text**
2. Select the **target text**
3. Press **Alt+Up**
## Quick-add non-translatable (Ctrl+Alt+N)
For terms that should remain identical in source and target (brand names, product codes, abbreviations):
1. Select the text in the **source** field
2. Press **Ctrl+Alt+N**
This creates a term entry where source and target are the same. Non-translatable terms appear with a distinct yellow highlight in [TermLens (Workbench)](https://docs.supervertaler.com/workbench/termbases/termlens/).
## Add term entry (Ctrl+Alt+T)
For full control over a new term, press **Ctrl+Alt+T** (or right-click in the editor and choose **Add Term…**). This opens the **Add term entry** dialogue, which lets you fill in all fields before saving:
| Field | Description |
| ----------------------- | --------------------------------------------------------------------------------------------------------------------------------------------------------------------------------------------------------------------------------- |
| **Source** | The source-language term |
| **Target** | The target-language translation |
| **Source Abbreviation** | Optional abbreviated form (e.g. “GC” for “gaschromatografie”). Separate multiple variants with `\|`. |
| **Target Abbreviation** | Optional abbreviated form of the target term |
| **Source synonyms** | Alternative source-language forms for the same concept |
| **Target synonyms** | Alternative target-language translations |
| **Definition** | Optional definition or usage note. Supports multiple lines – click the **▼** button to expand the field for longer content. |
| **Domain** | Subject area (e.g. “Legal”, “Patents”, “Medical”) |
| **Notes** | Any additional notes for translators. Supports multiple lines with an expand button, like Definition. |
| **URL** | Optional reference URL (shown as a clickable link in the term popup) |
| **Client** | Optional client code (e.g. “ACME”, “GLOBEX”). Used to filter the SuperMemory knowledge base context to that client’s profile when this term is in scope. |
| **Project** | Optional project name (e.g. a job code or client-side project ID). Bookkeeping field for the user’s own organisation – not sent to the AI in translation prompts. The Termbase Editor’s grid lets you sort and filter by Project. |
| **Non-translatable** | Check this to mark the term as non-translatable |
The term is added to the **project termbase** if one is configured, or the first write-enabled termbase otherwise.
Caution
**Trados conflict:** Trados Studio assigns **Ctrl+Alt+T** to “Insert TM Symbol” by default. If pressing Ctrl+Alt+T does nothing, you need to remove Trados’s binding first. Go to **File → Options → Keyboard Shortcuts**, search for “Insert TM Symbol”, and delete or reassign its shortcut. Then Ctrl+Alt+T will work as expected in Supervertaler.
Tip
**Tip:** Use the project termbase for client-specific terminology that should be prioritised over background termbases. Project termbase terms appear in pink in TermLens.
## Smart selection
You don’t need to precisely select entire words when adding terms. All quick-add shortcuts (**Alt+Down**, **Alt+Up**, **Ctrl+Alt+N**, **Ctrl+Alt+T**) automatically expand your selection to the nearest word boundaries.
For example, to add **standalone version** = **zelfstandige versie** to your termbase, it’s enough to select **alone ver** in the source and **andige ver** in the target. Supervertaler expands both selections to the full words automatically.
This means you can work fast and loose with your mouse or keyboard selections – no need for the precise click-and-drag that normally slows you down. Just grab roughly the right area and Supervertaler takes care of the rest.
### How it works
When you make a selection, Supervertaler scans the full segment text for every occurrence of your selected text and applies these rules, in order:
1. **Exact word match wins** – if the selection matches a complete word somewhere in the segment (i.e. it sits between spaces or punctuation), that word is used as-is. For example, if the segment contains both *hechtingsbevorderaars* and *hechting*, selecting **hechting** returns **hechting** – the exact word – not the longer compound.
2. **Shortest word wins** – if the selection is embedded inside multiple words, the shortest enclosing word is preferred. For example, if the segment contains *hechtingsbevorderaars* and *hechting*, selecting **echt** returns **hechting** (8 characters) rather than *hechtingsbevorderaars* (21 characters), because the user most likely intended the simpler word.
3. **Single match expands** – if the selection appears inside only one word, it expands to that word’s boundaries.
### Tips for reliable results
* **Select at least 3–4 characters** – very short selections (1–2 characters) may match common short words elsewhere in the segment (e.g., selecting **he** could match the word *the*)
* **Select the whole word when in doubt** – if a segment contains similar-looking words and you want a specific one, a complete-word selection is always matched correctly
* **Use Ctrl+Alt+T for tricky cases** – the Add Term Entry dialogue lets you review and edit the expanded term before saving, so you can catch any unexpected expansion
Note
Press **F2** to manually expand your current selection to word boundaries without adding a term. This lets you preview exactly what Supervertaler would capture before pressing a quick-add shortcut.
## Merge prompt
When you add a term and the **source** or **target** already exists in the termbase (but with a different translation), Supervertaler shows a prompt asking what you want to do:
* **Add as Synonym** – merges the new translation into the existing entry as a synonym, keeping your termbase tidy
* **Add & Edit…** – adds the synonym and opens the Term Entry Editor so you can review the metadata before saving
* **Keep Both** – creates a separate entry alongside the existing one
* **Cancel** – aborts the operation
The merge prompt always displays terms in your **project’s language direction**, regardless of how the termbase stores them internally. For example, in a Dutch → English project using an English → Dutch termbase, the dialogue shows the Dutch source term first and the English target term second.
**Example:** Your termbase already has **adhesion → hechting**. You select **adhesion → aanhechting** and press Alt+Down. The merge prompt appears because the source term “adhesion” already exists. Clicking “Add as Synonym” adds *aanhechting* as a target synonym of the existing entry, so both translations are grouped together.
Note
The merge prompt only appears when the source or target matches exactly (case-insensitive). It does **not** apply to non-translatable quick-add (**Ctrl+Alt+N**).
## Editing existing terms
To edit a term that already exists in your termbase:
1. Right-click the term in the **TermLens** panel
2. Select **Edit Term…**
3. The **Term Entry Editor** opens, where you can:
* Modify the source or target text
* Add or remove **synonyms** (multiple translations for one source term)
* Update the definition
* Toggle the non-translatable flag
Click **Save** when done.
## Abbreviations
Term entries can have optional **source and target abbreviation** fields. When a source abbreviation appears in a segment, TermLens highlights it and shows the target abbreviation underneath – just like a regular term match.
### Adding abbreviations
1. Open the **Term Entry Editor** (right-click a term → Edit Term)
2. Fill in the **Source Abbreviation** and **Target Abbreviation** fields
3. Click **Save**
### Multiple abbreviation variants
You can specify multiple variants of the same abbreviation by separating them with a **pipe character** (`|`):
```plaintext
GC|G.C.|gc|g.c.
```
Each variant is indexed and matched independently, so all common forms of the abbreviation are recognised in the source text. The **first variant** is used as the display text and for insertion.
### How abbreviation matching works
When both the full term and its abbreviation appear in the same segment (e.g., “gaschromatografie (GC)”), TermLens shows **both** as highlighted chips:
* The **full term** chip shows the full target translation (e.g., “gas chromatography”) – displayed in the regular **blue** colour
* The **abbreviation** chip shows the target abbreviation (e.g., “GC”) – displayed in **lavender** so it is instantly distinguishable from a full-term match
Clicking or Alt+digit-inserting an abbreviation chip inserts the **target abbreviation** (first variant), not the full target term.
Note
Abbreviations are also included in AI translation prompts, so the AI knows both the full term and its abbreviated form.
## Deleting terms
1. Right-click the term in the **TermLens** panel
2. Select **Delete Term**
3. Confirm the deletion in the dialogue
Caution
Deletion is permanent. The term is removed from the termbase database file.
## Bulk Add Non-Translatable
For adding many non-translatable terms at once (e.g., a list of brand names or product codes):
1. Open **Settings** (gear icon in the TermLens panel)
2. Find the **Bulk Add Non-Translatable** option
3. Paste your terms, **one per line**
4. Click **Add** to save them all at once
***
## See Also
* [TermPicker](/trados/termlens/termpicker/)
* [Termbase Management](/trados/termbase-management/)
* [TermLens Settings](/trados/settings/termlens/)
# TermLens popup
The **TermLens popup** is a borderless floating version of the docked TermLens panel for the active segment. Designed for keyboard-only term selection on small screens – and for translators who want to insert terms without ever reaching for the mouse.
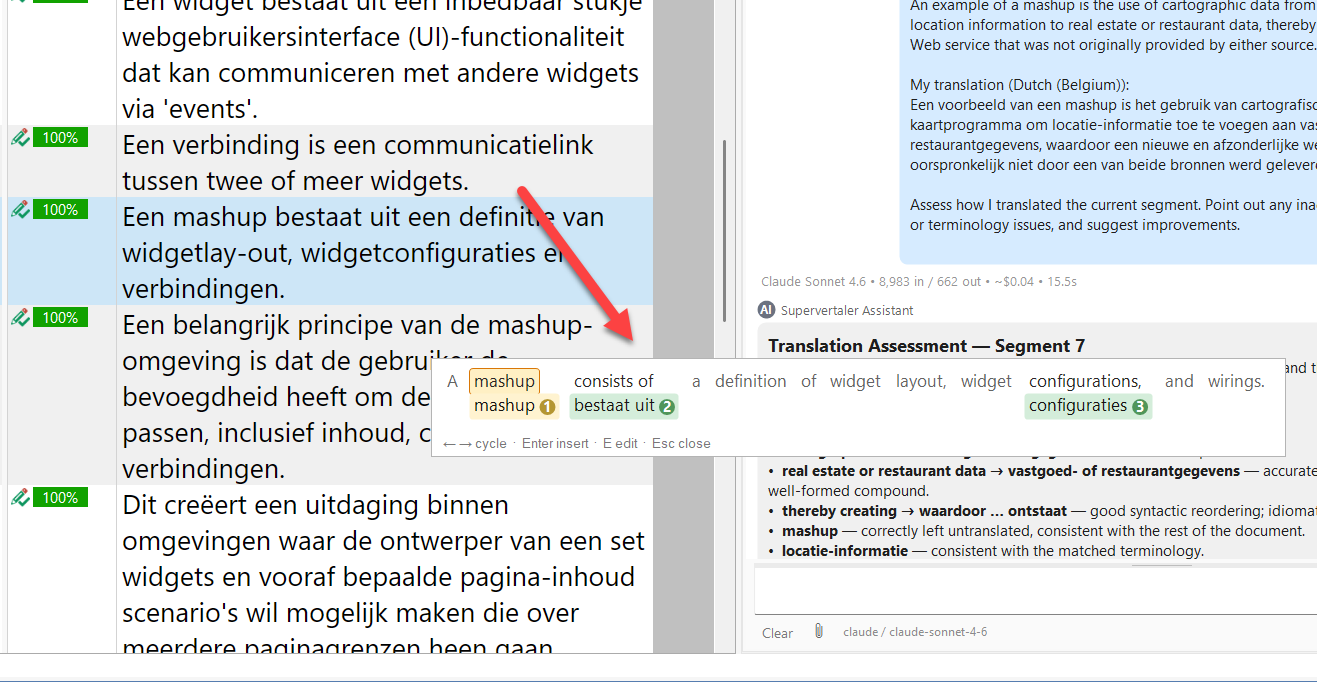
The TermLens popup with the current match highlighted (amber ring on the source word)
### When to use it
* **Small screens / laptops** – keeping the docked TermLens panel always-visible can cost too much vertical space, especially for longer source sentences. The popup gives you the same view on demand and disappears when you’re done.
* **Pure-keyboard workflows** – Ctrl-tap, cycle, Enter, back to typing. No mouse, no menu hunting.
### Opening and closing
| Key | Action |
| ----------------------- | ------------------------------------------------ |
| **Ctrl** (tap) | Toggle the popup (open if closed, close if open) |
| **Escape** | Close without inserting |
| Click outside the popup | Close without inserting |
The popup has no second default shortcut – the Ctrl-tap is its trigger. (Earlier versions listed **Ctrl+Alt+G** as an alternative; that key now belongs to [AutoTagger](/trados/autotagger/). You can assign your own key to the popup in **File → Options → Keyboard Shortcuts** if you’d like one.)
A “Ctrl tap” is a press-and-release of the Ctrl key on its own – no other key in between, and held for less than 400 ms. The same memoQ-style trigger that older versions of Supervertaler used to open TermPicker.
### Cycling between matches
When the popup opens, the first match has an amber ring around its source word – that is the **current match** that Enter will insert.
| Key | Action |
| --------------------------------- | -------------------------------------------------- |
| **Right** / **Down** / **Tab** | Move the current-match highlight to the next match |
| **Left** / **Up** / **Shift+Tab** | Move it to the previous match |
Cycling wraps: from the last match, Right takes you back to the first.
### Inserting
| Key / action | Result |
| ------------------ | -------------------------------------------------------------------------------------------------- |
| **Enter** | Insert the current match into the target segment, close the popup, return focus to the target cell |
| **Click any chip** | Insert that match into the target segment, close the popup, return focus to the target cell |
Both paths share the same insertion logic – there is no difference between picking by keyboard and picking by mouse.
### Editing a match
Press **E** while a match is highlighted to open the term-entry editor for that entry. The popup closes first so the editor opens with clean focus. The editor is the same dialogue the docked panel’s right-click “Edit Term…” menu uses, including the multi-termbase editing case for entries that exist in more than one termbase.
Note
**MultiTerm matches are read-only** in TermLens. Pressing E on a green MultiTerm chip flashes a hint instead – edit those entries in **Trados → Termbase Viewer**.
### Visuals
The popup uses the same chip rendering, colour scheme, and metadata indicators as the docked TermLens panel – pink for project termbase terms, blue for regular Supervertaler terms, yellow for non-translatable, green for MultiTerm. See the [TermLens overview](/trados/termlens/) for the full colour key.
### TermLens popup vs TermPicker
Both show the same matches for the active segment. Pick whichever fits your style:
| | TermLens popup (Ctrl tap) | [TermPicker](/trados/termlens/termpicker/) (Ctrl+Shift+P) |
| -------- | ------------------------------------------------------ | --------------------------------------------------------- |
| Layout | Source segment with chips underneath each matched word | Sortable, scrollable table |
| Best for | Skimming matches in segment context | Many matches that benefit from sorting / typing-to-jump |
| Keyboard | Arrow / Tab cycles a highlighted match | 0–9 jumps directly; Up / Down navigate |
| Modality | Modeless – click outside to dismiss | Modal – Escape or Cancel to close |
***
### See Also
* [TermLens overview](/trados/termlens/)
* [TermPicker](/trados/termlens/termpicker/)
* [Keyboard shortcuts](/trados/keyboard-shortcuts/)
# TermPicker
**TermPicker** is a compact overlay that shows all matched terms for the current segment in a sortable, keyboard-navigable list. It is useful when [TermLens](/trados/termlens/) shows many matches and you want a quick overview without scrolling.
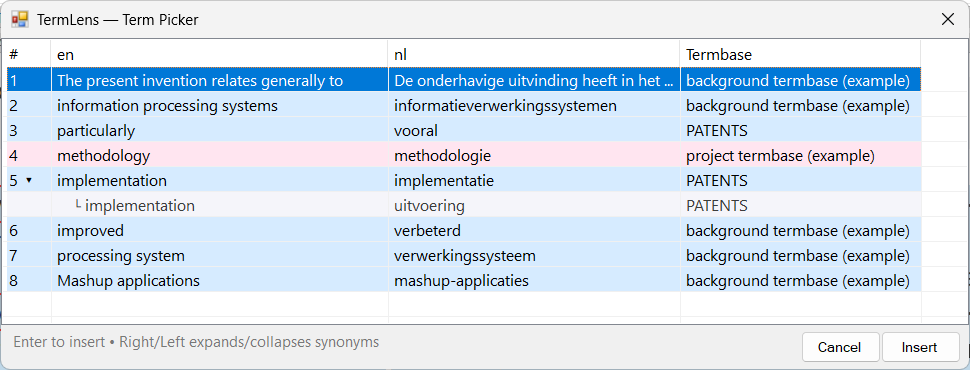
TermPicker dialogue with all matched terms for the current segment
Note
**TermLens and TermPicker are sibling surfaces.** Both consume termbase matches for the current segment, but present them differently:
* **TermLens** shows matches *in context* – the source sentence with terms highlighted in place. Best for reading and scanning.
* **TermPicker** shows the same matches as a flat sortable list with keyboard-driven Enter-to-insert. Best for quick insertion.
Underneath both: your termbases.
### Opening TermPicker
Press **Ctrl+Shift+P** to open TermPicker. It appears as a floating window above the editor.
Note
Looking for the memoQ-style Ctrl-tap behaviour? That now opens the [TermLens popup](/trados/termlens/termlens-popup/) – a more compact in-context view of the same matches. TermPicker described on this page is the list-based alternative for users who prefer a tabular UI.
### Colour-coded rows
Each row in TermPicker is colour-coded by termbase type:
| Colour | Meaning |
| ---------- | ----------------------------------- |
| **Pink** | Project termbase term |
| **Blue** | Regular Supervertaler termbase term |
| **Yellow** | Non-translatable term |
| **Green** | MultiTerm termbase term (`.sdltb`) |
This lets you instantly see where each term comes from and how it should be handled.
### Expandable synonyms
Terms with multiple translations display a right-arrow indicator (**▸**) next to the term. To expand and see all synonym sub-rows:
* Select the row and press the **Right arrow** key
* The sub-rows appear below the parent term, showing each available translation
Press **Left arrow** to collapse the synonyms again.
### Keyboard navigation
TermPicker is designed for fast keyboard use:
| Key | Action |
| ------------- | --------------------------------------------- |
| **0-9** | Type a number to jump directly to that term |
| **Enter** | Insert the selected term and close the picker |
| **Escape** | Close the picker without inserting |
| **Up / Down** | Navigate between terms (wraps around) |
| **Right** | Expand synonyms for the selected term |
| **Left** | Collapse synonyms |
Navigation wraps around: pressing **Down** on the last term jumps to the first, and **Up** on the first jumps to the last.
### Inserting a term
You can insert a term in two ways:
* **Click** any row to insert that term at the cursor position in the target field
* **Press Enter** on the selected row to insert and close
The selected translation is placed at the current cursor position in the target segment.
Like the TermLens chips, the picker displays and inserts terms with the capitalisation of the segment occurrence (first occurrence when a term appears more than once) rather than the stored capitalisation – see [Adapt term capitalisation](/trados/settings/termlens/#adapt-term-capitalisation).
Note
TermPicker shows the same matches as TermLens, but in a flat list format that is easier to scan when there are many results.
***
### See Also
* [Adding & Editing Terms](/trados/termlens/adding-terms/)
* [TermLens (Workbench)](https://docs.supervertaler.com/workbench/termbases/termlens/)
* [Termbase Management](/trados/termbase-management/)
# Replace curly quotes with straight quotes
Text transforms are a special type of QuickLauncher prompt that performs local find-and-replace operations on the active target segment – instantly, without calling an AI provider.
## When to use text transforms
Text transforms are useful for cleaning up invisible or problematic characters in your translations. For example:
* **InDesign (IDML) forced line breaks** – InDesign uses invisible Unicode LINE SEPARATOR (U+2028) characters as forced line breaks (Shift+Enter). These are invisible in Trados but can cause problems in your translations.
* **Zero-width spaces and joiners** – invisible characters from PDF or web sources
* **Normalising quotes or dashes** – replacing curly quotes with straight quotes, or em dashes with en dashes
## How it works
1. Navigate to the segment you want to clean
2. Press **Ctrl+Q** (or right-click → QuickLauncher)
3. Open the **Text operations** folder
4. Click **Strip U+2028** (or another transform)
The transform runs instantly. A dialogue confirms how many replacements were made, and the cleaned text is copied to your clipboard.
Note
Text transforms modify the **target segment** only. The source segment is never changed.
## Built-in transforms
Supervertaler ships with one built-in text transform:
### Strip U+2028
Removes invisible Unicode LINE SEPARATOR (U+2028) and PARAGRAPH SEPARATOR (U+2029) characters from the target segment, replacing them with spaces. Consecutive spaces are collapsed to a single space.
These characters are commonly inserted by InDesign (IDML) as forced line breaks (Shift+Enter). They are invisible in the Trados editor but can corrupt translations – the AI may produce spurious line breaks, or the characters may cause formatting issues in the final document.
## Creating your own transforms
Text transforms are stored as `.md` files in your prompt library, just like regular prompts. The only difference is the YAML frontmatter has `type: transform` instead of `type: prompt`, and the content body contains find/replace rules instead of a prompt.
### Step by step
1. Open **Settings → Prompts**
2. Click **New**
3. Set the **Category** to `QuickLauncher/Text operations` (or any QuickLauncher subfolder)
4. In the YAML frontmatter, change `type: prompt` to `type: transform`
5. In the content body, write your find/replace rules
### Rule format
Each rule is a `find:` / `replace:` pair. Blank lines between rules are optional but improve readability. Lines starting with `#` are comments.
```plaintext
find: "\u201C"
replace: "\u0022"
find: "\u201D"
replace: "\u0022"
```
### Unicode escapes
Use `\uXXXX` to specify Unicode characters by their code point. This is essential for invisible characters that cannot be typed or seen in a text editor.
| Escape | Character | Description |
| -------- | ----------- | ------------------------------------------- |
| `\u2028` | (invisible) | LINE SEPARATOR – InDesign forced line break |
| `\u2029` | (invisible) | PARAGRAPH SEPARATOR |
| `\u200B` | (invisible) | ZERO WIDTH SPACE |
| `\u200C` | (invisible) | ZERO WIDTH NON-JOINER |
| `\u200D` | (invisible) | ZERO WIDTH JOINER |
| `\uFEFF` | (invisible) | BYTE ORDER MARK (BOM) |
| `\u00A0` | (invisible) | NON-BREAKING SPACE |
| `\u201C` | ” | LEFT DOUBLE QUOTATION MARK |
| `\u201D` | ” | RIGHT DOUBLE QUOTATION MARK |
### Example: Strip U+2028 (built-in)
```yaml
---
type: transform
name: "Strip U+2028"
description: "Removes invisible Unicode LINE SEPARATOR and PARAGRAPH SEPARATOR"
category: "QuickLauncher/Text operations"
default: true
---
# Strip invisible Unicode line/paragraph separators.
# These are commonly inserted by InDesign (IDML) as forced line breaks.
find: "\u2028"
replace: " "
find: "\u2029"
replace: " "
```
### Example: Normalise non-breaking spaces
```yaml
---
type: transform
name: "Fix non-breaking spaces"
description: "Replaces non-breaking spaces with regular spaces"
category: "QuickLauncher/Text operations"
---
# Replace non-breaking spaces (U+00A0) with regular spaces
find: "\u00A0"
replace: " "
```
## Keyboard shortcuts
Text transforms appear in the QuickLauncher menu alongside regular prompts. You can assign them to keyboard slots (Ctrl+Alt+1 through Ctrl+Alt+0) for instant access:
1. Open **Settings → Prompts**
2. Select the transform in the tree
3. Choose a **Shortcut** slot from the dropdown at the bottom
## Clipboard
After a transform runs, the cleaned target text is automatically copied to your clipboard. This is useful if you need to paste the cleaned text elsewhere – for example, into a text editor or a QA tool.
## Technical notes
* Transforms use Trados’s `ProcessSegmentPair` API to commit changes, the same mechanism used by Batch Translate. This ensures all formatting tags (bold, italic, etc.) are preserved.
* After replacements, consecutive spaces are collapsed to a single space to prevent double spaces where an invisible character sat next to an existing space.
* Transforms do not appear in the AI Assistant chat – they run locally and show a brief confirmation dialogue.
***
## See Also
* [QuickLauncher](/trados/quicklauncher/)
* [Prompts](/trados/settings/prompts/)
* [Keyboard Shortcuts](/trados/keyboard-shortcuts/)
# Troubleshooting
Solutions to common issues with the Supervertaler for Trados plugin.
***
## Plugin not loading
**Symptoms:** The TermLens panel does not appear in Trados Studio, or the plugin ribbon tab is missing.
**Solutions:**
1. **Check Trados version** –the plugin requires **Trados Studio 2024** or later
2. **Verify .NET Framework** –ensure **.NET Framework 4.8** is installed on your system
3. **Reinstall the plugin** –remove the plugin via **Trados Plugin Management**, restart Trados, then install it again
4. **Check for errors** –open **Trados Plugin Management** and look for error messages next to the Supervertaler plugin entry
Note
After installing or updating the plugin, always restart Trados Studio completely (close all windows, not just the project).
***
## A keyboard shortcut does nothing
**Symptoms:** A Supervertaler shortcut – e.g. `Alt+T` (translate segment), `Ctrl+Alt+T` (add term), `Ctrl+Alt+N` (non-translatable), `Ctrl+Alt+G` (AutoTagger), `Alt+Up` (quick-add to project termbase) or `Ctrl+Q` (QuickLauncher) – has no effect in the editor.
**Solutions:**
1. **Clear the conflicting Trados default** – Trados Studio ships with its own actions bound to these key combinations, and the Trados binding wins. Go to **File → Options → Keyboard Shortcuts**, search for the conflicting Trados action, and delete its binding. The full table of what to delete is in [Keyboard Shortcuts](/trados/keyboard-shortcuts/#first-time-setup-free-up-trados-shortcuts)
2. **Repeat after a reinstall** – reinstalling or resetting Trados Studio restores its default bindings, so the shortcuts stop working again until you clear them once more
***
## ”Could not load SQLite” or DLL errors
**Symptoms:** Error messages about missing DLLs or SQLite when opening settings or loading a termbase.
**Solutions:**
* **Restart Trados Studio** after the first install. The plugin pre-loads its own SQLite DLL to avoid conflicts with other plugins, but this requires a clean startup
* If the error persists, reinstall the plugin to restore any missing DLL files
***
## Database locked / “cannot open database”
**Symptoms:** Error when trying to load or write to the termbase database.
**Solutions:**
* **Close Supervertaler Workbench** if it has the same `.db` file open. Two applications writing to the same SQLite file simultaneously can cause lock conflicts
* The plugin uses **read-only mode** where possible to minimise conflicts, but write operations (adding terms) require exclusive access
* Verify the `.db` file is not on a drive that has gone offline (e.g., a disconnected network share)
Caution
If you share the database via a cloud-sync folder, ensure the file is fully synced before opening it in the plugin. Partially synced files can appear locked or corrupt.
***
## Terms not appearing
**Symptoms:** TermLens shows no matches even though you know the segment contains terms that exist in your termbase.
**Solutions:**
1. **Check the Read toggle** –open [TermLens Settings](/trados/settings/termlens/) and verify the termbase has **Read** enabled
2. **Verify the database path** –ensure the path points to the correct `.db` file
3. **Press F5** to force a full reload of your Supervertaler termbases from disk (note: F5 does not reload MultiTerm termbases)
4. **Reload the database** –click the **gear icon** in the TermLens panel to open settings, then close the dialogue. This forces a reload of the termbase data
5. **Check language pair** –the termbase source and target languages must match the current Trados project languages. Either direction works (the matcher handles inverted-direction termbases automatically), but the language pair itself must match.
6. **Check for reversed entries** –if a single specific term you know exists is silently not matching while other terms in the same segment do, the entry may be stored in the wrong direction in the database (e.g. Dutch text in the English column). This typically affects entries created or edited under v4.19.24 or earlier in projects whose direction was the inverse of the termbase’s. Open the **Termbase Editor** (double-click the termbase in TermLens Settings), find the term, check whether the source and target columns contain text in the expected languages, and use **Reverse source/target** to fix it. See [Termbase Management](/trados/termbase-management/) for details.
***
## MultiTerm terms not appearing
**Symptoms:** Green chips from your MultiTerm termbases (`.sdltb` files) are not showing in TermLens, even though the termbases are attached to your Trados project.
**Solutions:**
1. **Check your Trados project** –verify that MultiTerm termbases are attached via **Project Settings > Language Pairs > Termbases**
2. **Check the Read toggle** –open Supervertaler Settings (gear icon) and make sure the MultiTerm termbase’s Read checkbox is enabled
3. **Check languages** –the termbase’s source and target languages must match the current project’s language pair
4. **Navigate to another segment and back** to trigger a MultiTerm auto-refresh (F5 does not reload MultiTerm termbases – only segment navigation does)
Note
When you add terms in MultiTerm, navigate to a different segment in Trados to trigger the auto-refresh. TermLens checks for file changes on each segment change.
See [MultiTerm Support](/trados/multiterm-support/) for full details.
***
## AI features not working
**Symptoms:** Batch Translate produces no output, or single-segment translation returns an error.
**Solutions:**
1. **Verify the API key** –open [AI Settings](/trados/settings/ai-settings/) and confirm the key is entered correctly with no extra spaces
2. **Check provider endpoint** –ensure the provider’s API endpoint is reachable from your network (no firewall or proxy blocking it)
3. **Ollama users** –make sure the Ollama service is running locally:
```bash
ollama serve
```
Then verify the endpoint in AI Settings (default: `http://localhost:11434`)
4. **Custom provider** –double-check the endpoint URL and model name in the Custom OpenAI-compatible settings
5. **Check your API credits** –some providers return errors when your account balance is zero
***
## Database errors on Mac (Parallels)
**Symptoms:** Database locked errors, “cannot open database”, or corrupt termbase data when running Trados Studio inside Parallels Desktop on a Mac.
**Cause:** Your Supervertaler data folder is on a Mac-side shared path (e.g., `\\Mac\Home\Supervertaler`). Parallels mounts Mac folders as virtual network shares, and SQLite databases do not work reliably on network filesystems – WAL mode (used by Supervertaler termbases) requires a local filesystem for correct locking.
**Solution:**
1. Move your data folder to the Windows side (e.g., `C:\Users\\Supervertaler`)
2. Copy your `.db` termbase files from the Mac-side location into the new Windows-side folder
3. Update the data folder path in Supervertaler settings, or delete `%AppData%\Supervertaler\config.json` and restart Trados to trigger the first-run setup again
Note
See [Installation – Running on a Mac (Parallels)](/trados/installation/#running-on-a-mac-parallels) for the recommended setup.
***
## Performance issues
**Symptoms:** The editor feels sluggish, or TermLens takes a long time to display matches.
**Solutions:**
* **Large termbases** (50,000+ terms) may take a moment to index when the database is first loaded on startup. This is a one-time cost per session
* **Close and reopen the editor** if the plugin feels unresponsive after a long session
* **Disable unused termbases** –uncheck **Read** for termbases you do not need for the current project to reduce the matching workload
* **Reduce batch size** in [AI Settings](/trados/settings/ai-settings/) if Batch Translate is slow or timing out
***
## Still having issues?
1. Ask a question in [GitHub Discussions](https://github.com/orgs/Supervertaler/discussions) – the community hub for both Supervertaler Workbench and Supervertaler for Trados
2. Check the [GitHub Issues](https://github.com/Supervertaler/Supervertaler-for-Trados/issues) for known bugs, feature requests, and workarounds
3. Open a new issue to report a bug or request a feature, including:
* Your Trados Studio version
* The Supervertaler plugin version
* Steps to reproduce the problem
* Any error messages or screenshots
See [Support & Community](/trados/support/) for all the ways to get help.
***
## See Also
* [Support & Community](/trados/support/)
* [MultiTerm Support](/trados/multiterm-support/)
* [TermLens Settings](/trados/settings/termlens/)
* [AI Settings](/trados/settings/ai-settings/)
* [Termbase Management](/trados/termbase-management/)
* [Common Issues (Workbench)](https://docs.supervertaler.com/workbench/troubleshooting/common-issues/)
# Token Usage & Costs
Supervertaler keeps a **persistent log of the AI tokens and cost** of every operation, and a built-in **Usage & Costs report** to total and export it. This is the place to answer questions like *“how much did this project cost me?”*, *“how many tokens did we use this month?”*, or *“what should I bill this client for AI?”* — and it works for every provider, including custom and self-hosted models.
It complements the **[Reports](/trados/reports/)** tab (which shows each call live, as you work) and the **[AI Cost Guide](/trados/ai-cost-guide/)** (which explains how costs work). The usage log is the durable, after-the-fact record.
Note
The usage log records **metadata only** — model, token counts, cost, project, file and language pair — and **never the prompt or response text**. That keeps the file small and safe to open in a spreadsheet or hand to an institution’s monitoring team.
*Added in v4.20.56.*
### The usage log file
Every AI call appends one line to a monthly file in your [Supervertaler data folder](/trados/data-folder/):
```plaintext
…\Supervertaler\trados\usage\usage-2026-06.jsonl
```
The file is **JSONL** (one JSON object per line), so you can open it directly in Excel, parse it with a script, or load it into a notebook. A single line looks like this:
```json
{"ts":"2026-06-18T16:07:03Z","product":"trados","task":"BatchTranslate",
"provider":"claude","model":"claude-sonnet-4-6","project":"Example project (patent, en-nl)",
"file":"US8312383.docx.sdlxliff","client":"","src_lang":"English (United States)",
"tgt_lang":"Dutch (Belgium)","in_regular":654,"in_cache_read":0,"in_cache_write":27843,
"out":808,"source":"actual","cost_usd":0.11849325,"cost_known":true,"duration_s":24.9,"ok":true}
```
A few things worth knowing:
* **Every flow is covered** — Translate, Batch Translate, Quick Launcher, AutoPrompt, Proofread and Chat. A batch run is recorded as **one** line (the whole job), not one line per segment.
* **`source`** is `actual` when the figures are the real token counts reported by the provider’s API, or `estimated` when they fall back to the chars/4 heuristic (see [Estimates vs actual cost](/trados/ai-cost-guide/#estimates-vs-actual-cost)). Cache reads/writes are broken out (`in_cache_read` / `in_cache_write`).
* **`cost_known`** is `false` when the model isn’t in the price list — the **tokens are still logged**, the cost just shows as unknown until you add a rate (see [Custom and self-hosted models](#custom-and-self-hosted-models)).
* It’s **on by default**. Turn it off any time in **Settings → AI Settings → “Keep a persistent token-usage log”**.
### The Usage & Costs report
Open **Settings → AI Settings → “Usage & Costs report…”**. The window totals your logged usage and lets you slice it:
* **Range** — This month, Last 3 months, This year, or All time.
* **Group by** — **Project**, **Client**, **Model**, **Provider**, **Task** (Translate / Batch / Quick Launcher / …), **Day** or **Month**.
Each row shows the number of calls, input and output tokens, total tokens, cost, and a **% actual** column — the share of that group backed by provider-reported figures rather than estimates. The footer shows the **range total** and your **month-to-date spend** (against your budget, if set).
Note
**Per-client billing.** Grouping by **Client** is only useful once each project has a client name. There is currently no in-app field for this — set it by adding a `"client": "Acme Ltd"` line to the project’s file under `…\Supervertaler\trados\projects\`. Projects without one are grouped under `(none)`.
### Exporting
The report’s **Export CSV…** and **Export Excel…** buttons write the **detailed ledger** (one row per call, every column) for the selected range — ready for invoicing or analysis in any spreadsheet. CSV is written as UTF-8 (with a BOM, so Excel detects it correctly); Excel export produces a native `.xlsx`.
Because both Supervertaler products write the **same columns**, an LSP can concatenate the CSV/JSONL from several translators — and from both Trados and Workbench — into one analysis.
### Monthly budget
Set a soft monthly limit in **Settings → AI Settings → “Monthly budget (USD)”** (cents are allowed, e.g. `25.50`; `0` disables it).
It is **advisory and never blocks**: once this month’s logged spend reaches the budget, starting a **Batch Translate** shows a *“Monthly budget reached — start anyway?”* prompt, so a large run can’t slip past unnoticed. Your month-to-date spend versus the budget is also shown in the Usage & Costs report.
### Custom and self-hosted models
Costs are computed from a single price list, **`pricing.json`**, shared with Supervertaler Workbench. The bundled copy covers the built-in models. To price a **custom or self-hosted model** (or to override any rate for **both** Supervertaler products at once):
1. Copy the bundled `pricing.json` to `…\Supervertaler\pricing.json` (the shared data root), or create it there.
2. Add an entry under `models` keyed by the **exact model id** you use, with the input/output price per 1,000,000 tokens:
```json
{
"models": {
"my-university-llama": { "input": 0.0, "output": 0.0 }
}
}
```
3. Restart Supervertaler. Its cost now appears in the log and report; until then, its **tokens are still logged** with the cost marked unknown.
Local models (Ollama) are priced at `0` — their token counts are still recorded, which is useful for capacity planning.
### See also
* [AI Cost Guide](/trados/ai-cost-guide/) — how AI costs work, estimates vs. actual, provider dashboards
* [Reports](/trados/reports/) — live, per-call token counts and cost as you work
* [AI Settings](/trados/settings/ai-settings/) — where the toggle, budget and report button live
* [Batch Translate](/trados/batch-translate/) — the main driver of token usage
* [Data folder](/trados/data-folder/) — where the usage log and project files live
# Voice Commands
Control Trados Studio hands-free with spoken commands: confirm segments, navigate, insert TermLens matches, apply translation results, add terms and more – without touching your keyboard. Designed to pair with dictation tools such as Wispr Flow or Dragon: they type your translation, Supervertaler handles the commands.
### Starting and stopping
Two ways to toggle voice commands:
* Click the **🎤 microphone button** in the TermLens panel header (next to the ↻ refresh button)
* Press **Ctrl+Alt+V** (also available in the editor right-click menu)
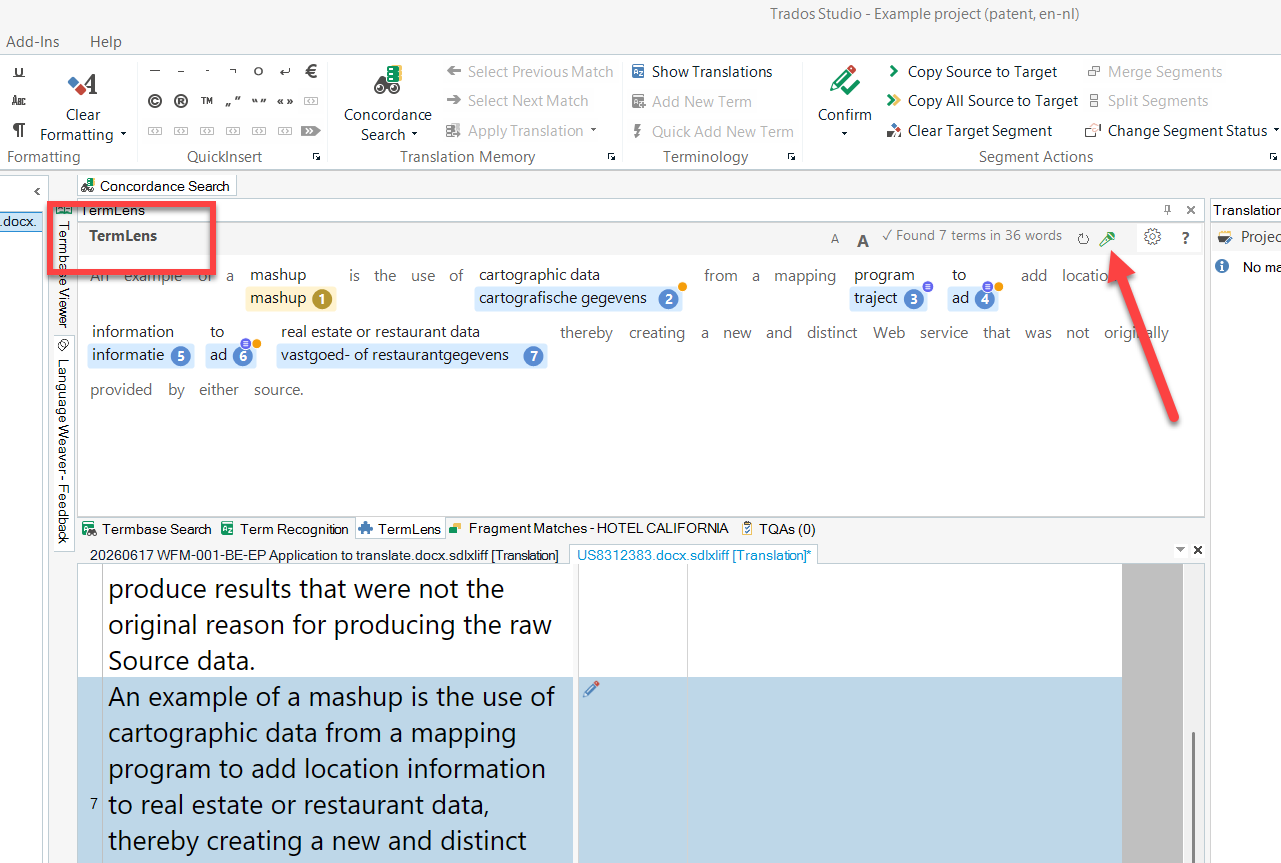
The 🎤 button in the TermLens header – green while listening
The microphone button shows the state at a glance:
| Colour | Meaning |
| ---------- | -------------------------------------------------------- |
| **Grey** | Off – click to start |
| **Orange** | Starting (or downloading the voice runtime on first use) |
| **Green** | Listening |
Each command you speak flashes briefly in the TermLens status label (e.g. `🎤 "confirm"`), so you always know what was heard.
Note
**First activation** downloads the offline voice engine and a small English model (\~50 MB, one-time) – progress is shown in the status label. Every later activation is instant.
If the TermLens panel isn’t open, a small floating status strip appears instead (bottom-right). You can drag it anywhere – the position is remembered.
### Default commands
Everything works out of the box – no configuration needed. Most commands also respond to an alias, so you can use whichever phrasing comes naturally:
| Say | Or | Action |
| -------------------------- | ------------------- | -------------------------------------------------------------------------------------------------------- |
| ”confirm" | "confirm segment” | Confirm segment and move to next unconfirmed |
| ”next segment" | "go down” | Move to the next segment (without confirming) |
| “previous segment" | "go up” | Move to the previous segment |
| ”go to the top" | "go to top” | Jump to the first segment (Ctrl+Home) |
| “go to the bottom" | "go to bottom” | Jump to the last segment (Ctrl+End) |
| “copy source" | "copy from source” | Copy source to target |
| ”clear target” | | Clear the target segment |
| ”term one” … “term nine” | | Insert TermLens match 1–9 (with [capitalisation adaptation](/trados/termlens/#automatic-capitalisation)) |
| “match one” … “match nine” | | Apply Translation Results match 1–9 (Ctrl+1–9) |
| “term picker" | "pick term” | Open [TermPicker](/trados/termlens/termpicker/) |
| ”term popup" | "show terms” | Open the [TermLens popup](/trados/termlens/termlens-popup/) |
| ”add term" | "new term” | Quick-add the selection to your write termbases (Alt+Down) |
| “add project term" | "project term” | Quick-add the selection to the project termbase (Alt+Up) |
| “translate" | "translate segment” | AI-translate the active segment |
| ”concordance" | "search memory” | Concordance search on the selection (F3) |
| “zoom in" | "bigger font” | Increase the editor font size (see setup below) |
| “zoom out" | "smaller font” | Decrease the editor font size (see setup below) |
| “escape" | "close window” | Close the focused popup or dialog |
| ”stop listening" | "voice off” | Turn voice commands off |
### One-time setup for “zoom in” / “zoom out”
Trados Studio’s font-size actions ship **without a default keyboard shortcut**, so these two commands need a one-time binding:
1. Go to **File > Options > Keyboard Shortcuts > Editor**
2. Scroll down to the actions named simply **Increase** and **Decrease** (note: the Keyboard Shortcuts page has no search box – you have to scroll)
3. Set **Increase** to `Ctrl+Alt+PgUp` and **Decrease** to `Ctrl+Alt+PgDn`
4. Click **OK**
From then on, “zoom in” and “zoom out” control the editor font size hands-free. (Make sure **Adapt font sizes** is enabled under File > Options > Editor > Font Adaptation.)
### Safety and privacy
* **Fully offline** – recognition runs locally on your machine (Vosk engine); no audio is ever sent anywhere.
* **Grammar-constrained** – the recogniser listens *only* for your command phrases, which is what makes commands fast and reliable. Normal speech and dictation are ignored.
* **Foreground guard** – commands only execute while Trados Studio is the active window. Speaking in another app can’t trigger anything (“stop listening” is the one exception – it always works).
### Customising commands
Right-click the 🎤 button (or click ⚙ on the floating strip) to open the **Voice command settings** dialog (also reachable via the **?** in its title bar and **F1** for this help page):
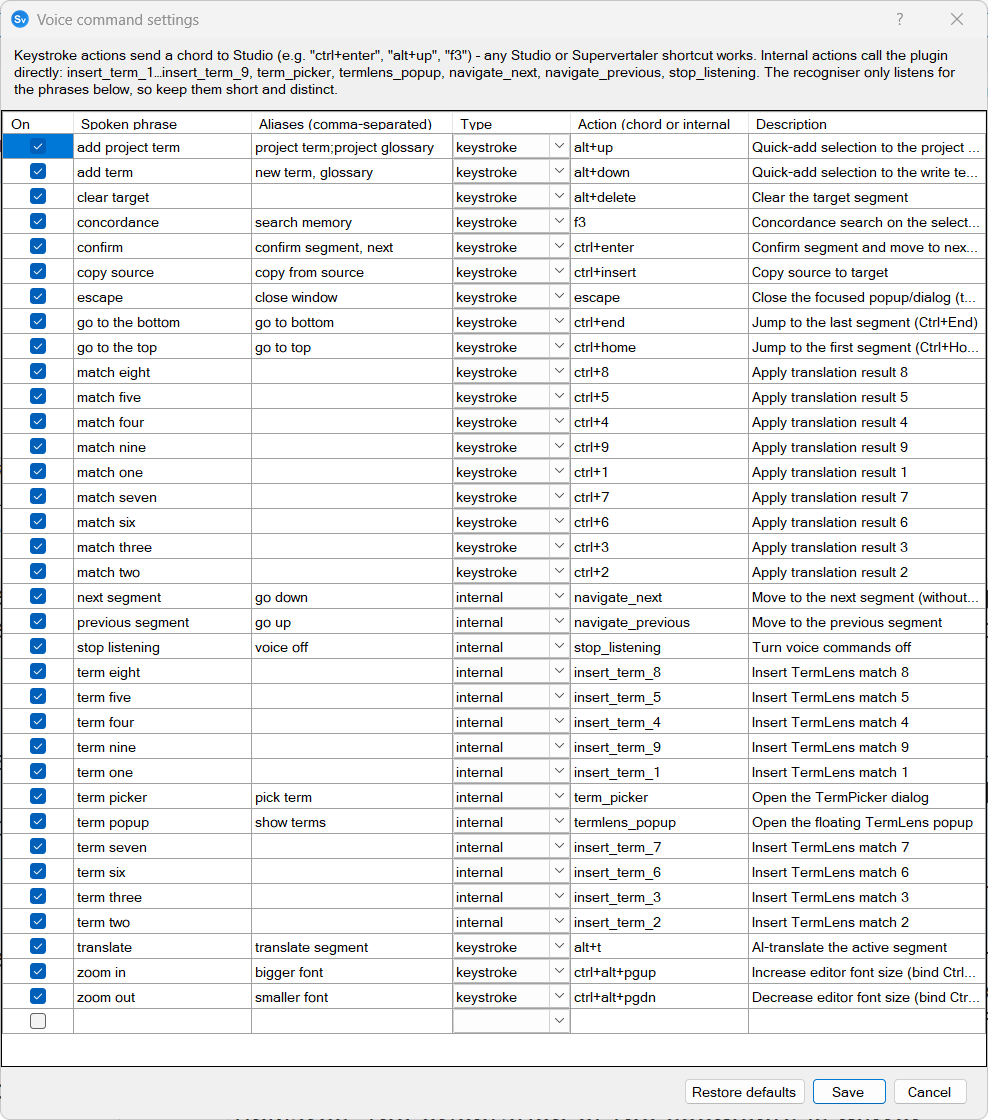
Voice command settings – every phrase, alias and action is editable
* Enable/disable individual commands
* Edit spoken phrases and add aliases
* Add your own commands, mapped to either:
* a **keystroke** chord sent to Studio (e.g. `ctrl+enter`, `alt+up`, `f3`) – any Studio or Supervertaler shortcut works
* an **internal** plugin action: `insert_term_1`…`insert_term_9`, `term_picker`, `termlens_popup`, `navigate_next`, `navigate_previous`, `stop_listening`
Note
The recogniser only listens for the phrases in your command list, so keep phrases short and distinct from each other. After saving, the recogniser updates immediately – no restart needed.
Commands are stored in `trados/settings/voice_commands.json` in your Supervertaler data folder, in the same format as Supervertaler Workbench’s voice commands – so you can exchange command sets between the two products.
Default commands added in plugin updates are **merged into your saved set automatically** – your customisations are never touched. Because of this, if you want to get rid of a default command, **untick it rather than delete it** (a deleted phrase would come back if a later update re-ships it). **Restore defaults** replaces everything with the built-in set, discarding your customisations.
### Troubleshooting
* **“Voice commands could not start”** – check that a microphone is available in Windows sound settings, and that the first-run download completed (an interrupted download can be retried by simply starting voice commands again).
* **A command isn’t recognised** – speak the phrase on its own, at normal pace. If a phrase never triggers, give it a more distinctive alias in Voice command settings.
* **Corrupt model** – delete the `trados/voice/models` folder in your Supervertaler data folder; the next activation re-downloads it.
### See Also
* [Keyboard Shortcuts](/trados/keyboard-shortcuts/)
* [TermLens](/trados/termlens/)
* [TermPicker](/trados/termlens/termpicker/)
# Supervertaler Workbench
Welcome to the help center for 🖥️ **Supervertaler Workbench** – a free, open-source translation application built by translators, for translators.
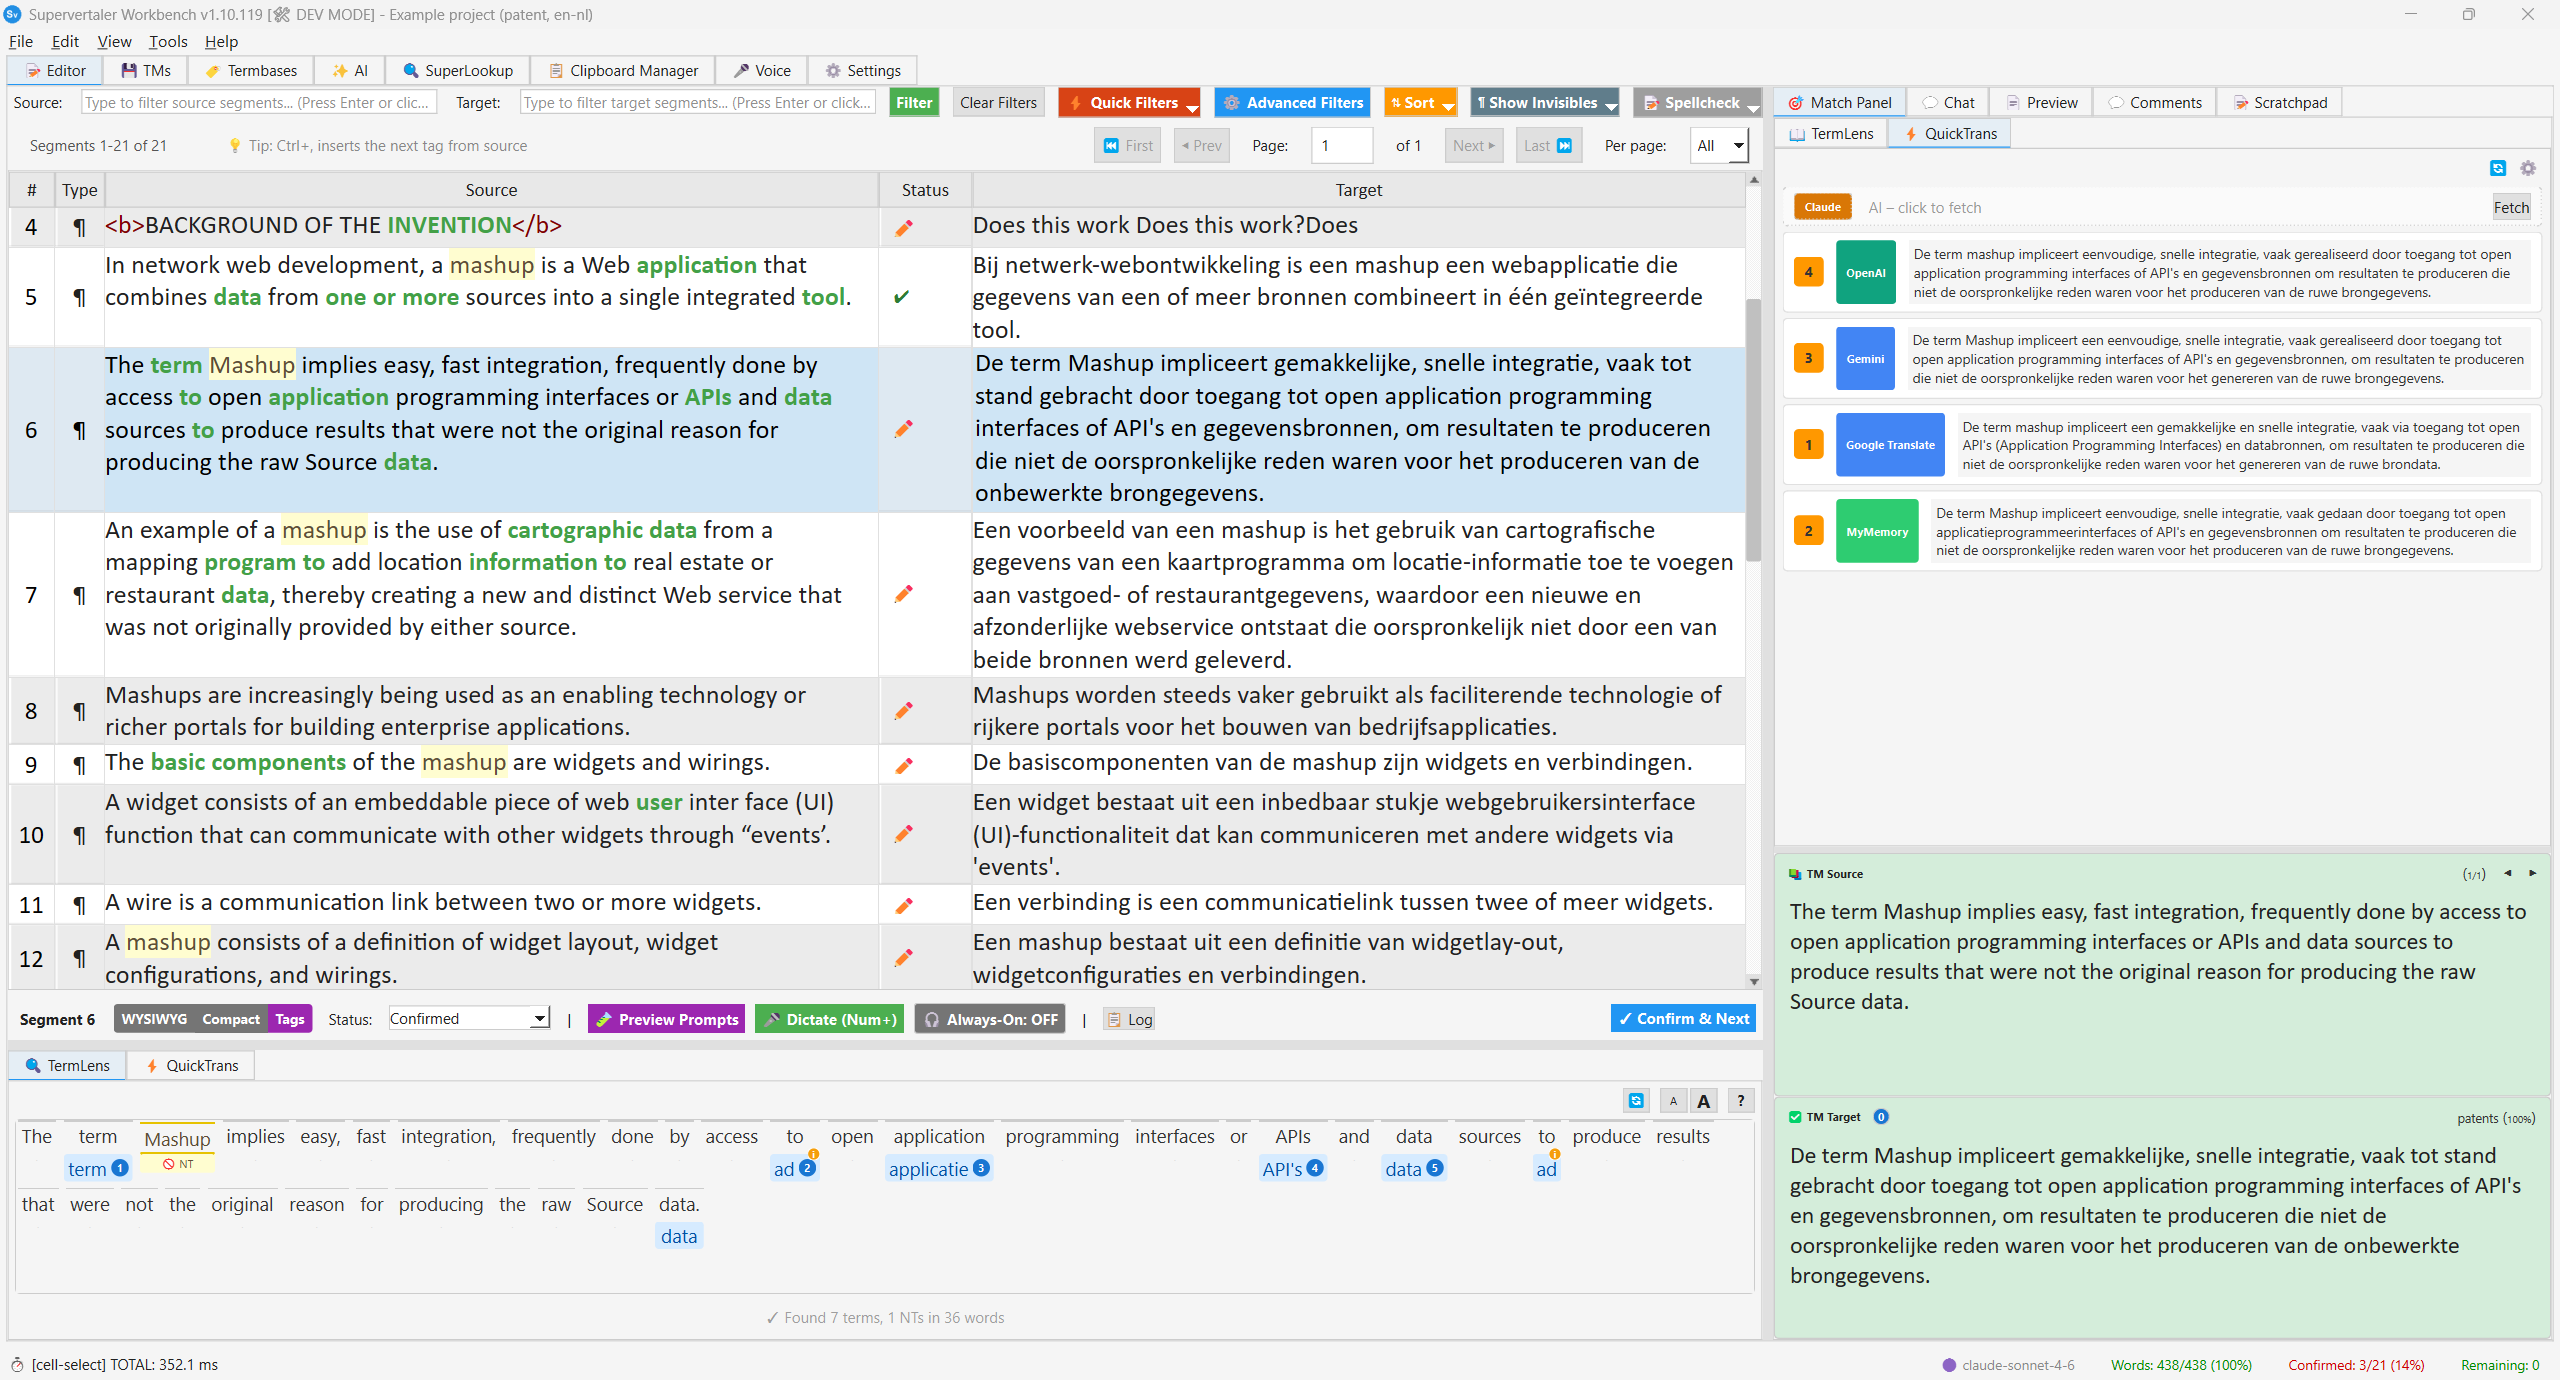
**Supervertaler Workbench** integrates AI-powered translation with traditional CAT tool workflows. It runs on Windows, macOS, and Linux.
* **Translate with AI** – GPT-4, Claude, Gemini, or local models via Ollama
* **Work with CAT tools** – import/export files from memoQ, Trados, Phrase, CafeTran
* **Translation Memory** – fuzzy matching, TMX import, concordance search
* **Terminology** – termbases, automatic term highlighting, TermLens
* **Companion tabs** – Chat (AI conversation), SuperLookup, Clipboard manager, Voice
* **Voice** – always-on voice commands and push-to-talk dictation for any application
* **SuperLookup** – system-wide translation lookup (TM, termbase, MT, web)
* **QuickTrans Popup** – always-on-top popup with simultaneous translations from every enabled provider
* **Quality Assurance** – spellcheck, tag validation, non-translatables
| Requirement | Details |
| ----------- | ------------------------------------------------------------------------------------------------------------ |
| **OS** | Windows 10/11, macOS, Linux |
| **Python** | 3.10 or higher |
| **License** | Free and open source (MIT) |
| **Source** | [github.com/Supervertaler/Supervertaler-Workbench](https://github.com/Supervertaler/Supervertaler-Workbench) |
Start here: [Quick Start Guide](/workbench/get-started/quick-start/)
***
## Supervertaler for Trados
Looking for the **Trados Studio plugin**? It has its own help center:
[**Supervertaler for Trados Help →**](https://docs.supervertaler.com/trados/)
Both tools share the same SQLite-based termbase format (`.db`) – termbases created in one work in the other.
***
## Getting Help
* Browse this help center using the sidebar
* Report issues on [GitHub](https://github.com/Supervertaler/Supervertaler-Workbench/issues)
* Ask in [GitHub Discussions](https://github.com/orgs/Supervertaler/discussions)
* Visit [supervertaler.com](https://supervertaler.com)
# Autoprompt
AutoPrompt uses an LLM to analyse your current project and generate a comprehensive, project-specific translation prompt. The generated prompt embeds the document’s domain, language pair, termbase, confirmed translations, detected source defects, terminology collisions, and preference cascades – ready to use as the **Custom Prompt** for AI translation.
## When to use it
AutoPrompt is most useful when:
* You are starting a new project and want a strong starting prompt instead of writing one from scratch.
* You are translating in an unfamiliar domain and want the LLM to identify the EPO / IFRS / Terminologia Anatomica / domain conventions for you.
* You want the prompt to reflect terminology decisions already made elsewhere in the project (confirmed segment translations, attached termbase) without having to retype them.
If you already have a hand-tuned prompt that works for your client, you do not need AutoPrompt – just keep using it.
## Launching it
1. Open the **✨ AI** tab.
2. In the **Prompt Manager** sub-tab, find Section 2 (**Custom Prompt**) on the left side of the panel. The right column of that section is labelled “Generate one automatically” and contains a single **✨ AutoPrompt** button. Click it.
3. Supervertaler briefly reads a sample of the document with the AI to detect its context, then an **“AutoPrompt – confirm context”** dialog appears. It shows the detected domain (e.g. *Marketing – creative marketing copy, playful tone*) with:
* a **Domain** dropdown you can leave as-is or correct, and
* an optional **Context briefing** box where you can type a short note (e.g. “creative copy, playful tone, keep product names untranslated”).
Click **Generate** to proceed (this is the normal case — just press Enter), or **Cancel** to abort. Anything you type in the briefing is treated as authoritative and overrides the detected domain where they conflict.
4. A **“Generating AutoPrompt”** progress dialog appears with an indeterminate busy bar. Reasoning-capable models (Opus, GPT-5, etc.) take 1–3 minutes; the rest of Supervertaler stays responsive while you wait. The dialog has a working Cancel button — cancelling stops the response being processed, though it can’t actually abort the HTTP request in-flight on the provider’s side.
5. When generation finishes, a **“Save AutoPrompt”** dialog opens. It shows a read-only preview of the generated content, plus a **Name** field (pre-filled with your project name) and a **Folder** dropdown (defaulting to **Translate** but listing every other top-level folder in your library — editable, so you can type a brand-new folder name and it’ll be created on save).
6. Click **Save** to write the prompt to the library and set it as the **Custom Prompt ⭐** for this project. Click **Cancel** to discard — the generated content stays in the chat log above so you can copy it out manually if you want it as text but not as a file.
## What gets analysed
AutoPrompt gathers the following from your project and sends it to your configured AI provider:
| Data | Purpose |
| -------------------------------------------------- | ---------------------------------------------------------------------------------------------------------------------------------------------------- |
| **Full source document** (up to 50,000 characters) | Context classification, terminology extraction, defect detection, cascade detection, project-context summary |
| **All termbase entries** | Locked termbase embedded in the generated prompt |
| **Confirmed segment translations** | Used as TM anchors – the highest-authority style and terminology reference, because they are decisions you have already made for this exact document |
| **Translation Memory entries** (if attached) | Style anchors – the LLM matches the register and lexical choices of validated TM pairs |
| **Language pair** | Embedded in the generated prompt |
Note
For a typical 30,000-word document, AutoPrompt costs roughly $0.20–$0.25 with a Sonnet-class model, or $1.00–$1.15 with an Opus-class model. The full document is sent so the LLM can actually read it and detect real patterns rather than guessing from metadata.
## Source-aware pre-generation passes
Before the meta-prompt is sent to the LLM, Workbench runs several lightweight passes against the source content and injects the findings into the meta-prompt. The findings tell the LLM what to look for and give it concrete document-specific anchors instead of generic scaffolding.
### Context detection (AI-based)
When you click AutoPrompt, Supervertaler sends a sample of the source to the AI and asks it to classify the document into one of:
* **Patent** – claims, embodiments, prior art, figures, patent conventions
* **Legal** – contracts, clauses, statutory references, notarial titles
* **Medical** – clinical terms, dosages, anatomical terminology
* **Technical** – specifications, software terms, standards
* **Financial** – figures, IFRS / GAAP, regulatory language
* **Marketing** – brand, audience, campaign language
* **General** – fallback for mixed or unclassified content
The AI reads the actual text rather than counting keywords, so classification is reliable across languages and doesn’t get fooled by superficial cues (for example a creative text that happens to mention a “Fig. 1” is no longer mistaken for a patent). The detected domain is shown in the **confirm-context** dialog before generation, where you can override it or add a briefing (see [Launching it](#launching-it) above).
Note
Earlier versions used an editable keyword list under **Settings → Domain Detection** to drive this. That panel has been removed: the AI classifier makes it unnecessary, and if the classifier ever gets it wrong you simply correct the domain (or add a one-line briefing) in the confirm-context dialog.
### Terminology-collision detection
A built-in helper scans for known cross-term collisions in the source – groups of source-language terms whose natural English candidates would all map to the same target. Currently the helper covers Dutch mechanical / patent vocabulary (the highest-traffic source-language case): the `mantel` / `huls` / `mantelbuis` / `beschermhuls` cluster, the `pijp` / `buis` / `flexibele buis` cluster, the `voorzijde` / `voorvlak` / `achterzijde` distinction, and the `as` (axle vs geometrical axis) homograph. Each detected collision is presented with the EPO-conventional resolution so the LLM-generated prompt locks the correct mapping rather than picking arbitrarily.
For any other source language or any other domain, the meta-prompt instructs the LLM to **perform its own collision scan** using patterns appropriate to the actual source language and detected domain – with explicit examples for medical (`arteria vs vena`, ligament vs tendon), legal (`agreement vs contract vs covenant`, liability vs responsibility), and financial (`revenue vs turnover vs sales`) collisions. The LLM-driven scan works for every language pair Workbench supports.
### Defect-detection pass
A built-in helper extracts up to five verbatim defect examples from the source – hanging mid-sentence breaks ending in subordinating conjunctions, doubled spaces, plausible verb-ending typos (Dutch `-d` / `-t` confusion), and broken-compound double-space patterns. The Dutch-specific conjunction list catches the highest-traffic case; for other languages the meta-prompt instructs the LLM to perform the scan itself using equivalents in the actual source language (`weil` in German, `parce que` in French, `porque` in Spanish, `perché` in Italian, etc.).
Quoting real defects in the generated prompt is far more effective than abstract “preserve defects faithfully” rules – the translator AI sees the actual surface forms it will encounter, not hypothetical examples.
### Preference-cascade extraction
A built-in helper extracts up to three real `bij voorkeur ... bij nog meer voorkeur` cascades from Dutch sources (and `preferably ... more preferably ... even more preferably` from English). For other languages the meta-prompt instructs the LLM to look for source-language equivalents – `vorzugsweise / besonders bevorzugt` in German, `de préférence / plus préférablement` in French, `preferiblemente / más preferiblemente` in Spanish, `preferibilmente / più preferibilmente` in Italian, and `preferencialmente / mais preferencialmente` in Portuguese.
Quoting one real cascade from the source anchors the generated prompt’s anti-truncation rule in a concrete example: “preserve THIS pattern, here is one from your own document”.
### TM-anchor wiring
Confirmed source → target pairs from the project’s own segments are surfaced as TM anchors of the highest authority – they are locked decisions for this exact document. Pairs from any separately-attached `.tm` file are added with lower priority. If neither source has any pairs, the generated prompt’s “Previous Correct Translations” section is omitted entirely (rather than padded with “No TM data available”, which used to give the false impression that AutoPrompt had not even looked).
### Legal-entity scaffolding gate
If the source contains no legal-entity markers (BV, NV, GmbH, Ltd., Meester, notaris, etc.), the generated prompt omits the BV/NV/Meester legal-entity-handling and statutory-reference sections. They are noise for a mechanical patent body where no entity names appear in running text, and they used to waste prompt-token budget that could have been spent on real document-specific anchors.
## Output format
Generated prompts are formatted as proper Markdown – `##` headings for each major section, `-` bullet lists, `**bold**` for emphasised terms, a Markdown table for the project-specific termbase, and `---` horizontal rules between major sections. Open one in Obsidian, VS Code, GitHub, or any Markdown-aware viewer and it renders cleanly with a navigable outline.
The Markdown markup is structural – it does not change what the translator AI does at translation time. The generated prompt’s inner OUTPUT FORMAT rule still says “translation only, no markdown formatting in the translation output”, so per-segment AI translations remain plain target text.
## Translator’s Comment methodology (always-on)
Since v1.10.46, every AutoPrompt-generated prompt embeds the **Translator’s Comment** (TC) methodology by default, regardless of source language or domain. The methodology asks the translator AI to silently correct obvious mechanical defects in the source (typos, broken words, hanging mid-sentence breaks, doubled spaces, stray punctuation, reference-numeral mismatches that are unambiguous in context, missing diacritics, etc.) and append a single concise comment at the end of the segment in this exact format:
```plaintext
⟦TC: short factual description of the fix(es)⟧
```
* The brackets are the mathematical white square brackets **U+27E6** (⟦) and **U+27E7** (⟧). These characters do not occur in source documents, so they are safe as out-of-band markers that can be extracted reliably in post-processing.
* One marker per segment maximum; multiple fixes are joined with semicolons inside one marker.
* Segments with no defects emit no marker.
* When the translator AI inserts a word or short phrase to fill a clear gap, that supplied text is wrapped in standard ASCII square brackets `[like this]` inside the running translation, and the trailing marker references it (e.g. `⟦TC: [bracketed text] supplied to close hanging sentence⟧`).
* Numerical values, dates, dosages, legal scope language, headings, identifiers, and proper names are never silently “corrected” – defects in those zones are preserved verbatim, with an optional `⟦TC: source ambiguous – ...⟧` marker if doubt exists.
The defect categories that count as “obvious” are adapted to the actual source language by the LLM (Dutch -d/-t verb typos, German missing umlauts, French accent slips, Spanish/Italian conjugation typos, etc.).
Note
**The markers appear inline in the target text** – they are not yet auto-extracted into Workbench segment comments. Extraction into a dedicated comments pane is a separate follow-up. For now, you can copy or strip the markers manually, or run a downstream script that finds `⟦TC: ...⟧` regions and moves them into a structured comment field.
Caution
**Want a generated prompt without the TC methodology?** Edit the generated prompt after creation and remove the TRANSLATOR COMMENT FORMAT section plus any TRANSLATION MANDATE language about silent correction. A per-project opt-out via a UI toggle may be added in a future version – open an issue if you’d like to see it.
## Reviewing and refining the result
The generated prompt appears in the prompt library tree and is loaded into the **Prompt Editor** automatically. You can:
* **Read through the prompt** to verify it matches your project’s actual needs.
* **Edit any section** directly in the editor – the generated prompt is just a regular `.md` file in your prompt library.
* **Use AutoPrompt as a starting point** – the goal is to give you a high-quality first draft, not the final word. Adjust termbase entries, add client-specific quirks, tighten the register guidance.
* **Re-run AutoPrompt later** if the project grows (more confirmed segments, more termbase entries) – each run is independent, so a later run produces a fresh prompt that reflects the project’s current state.
## Tips and limitations
* **AutoPrompt cost scales with document size.** For very large projects (hundreds of thousands of words) the per-run cost can become significant. Consider running AutoPrompt against a representative subset rather than the full project for very large jobs.
* **Termbase quality matters.** If you have an attached termbase that contains generic technical words (“system”, “board”, “installation”) that match almost any document, AutoPrompt will include those entries in the locked termbase and force the AI to follow them. Disable irrelevant termbases before running AutoPrompt.
* **AutoPrompt does not guess.** If a pre-generation pass finds nothing in the source (no collisions for this domain / language combination, no defects, no cascades), the corresponding section is omitted from the generated prompt rather than padded with hypothetical examples. Hypothetical examples are worse than nothing.
* **AutoPrompt and Supervertaler for Trados share the same prompt library folder.** A prompt generated in Workbench is immediately visible in the Trados plugin and vice versa.
* **Vision-aware AutoPrompt is opt-in (since v1.10.178).** By default, AutoPrompt sends a text-only meta-prompt — figure *references* in the source are counted but the actual image files are not transmitted. Tick the **“🖼️ Include loaded figure images”** checkbox under the **✨ AutoPrompt** button in Section 2 to ship the figure images loaded in Section 4 alongside the meta-prompt. The LLM can then visually ground its terminology decisions — labelled parts, reference numerals, captions, visible components — directly into the generated terminology table. Three pre-flight gates apply: images must already be loaded in Section 4, the active model must support vision (Claude Sonnet/Opus 4.x, GPT-4o or newer, Gemini), and a confirmation dialog shows the estimated extra cost before the request goes out. Typical extra spend: roughly $0.05–$0.30 for 10–20 figures with a Sonnet-class model, or $0.25–$1.50 with Opus. For a high-value project (patent, technical spec), this is usually a worthwhile trade for a noticeably better-anchored generated prompt.
## See also
* [Prompt Manager](/workbench/ai-translation/prompt-library/) – manage and organise generated prompts
* [Creating Prompts](/workbench/ai-translation/prompts/) – write prompts from scratch
* [AI Translation Overview](/workbench/ai-translation/overview/) – how the Custom Prompt is used during translation
# AutoTagger
AutoTagger looks at where the inline tags sit in the **source** segment and inserts that same set of tags into your **existing translation** at the right places – without changing any of the translated words.
It is for the common case where a target has the correct translation but is **missing its tags or has them in the wrong spots** – typically after machine translation, pasting from another tool, or typing the target by hand. Those segments otherwise trip tag-validation checks even though the wording is fine.
## How it works
1. AutoTagger strips whatever tags are currently in the target.
2. It asks the AI to re-place the **full set of tags from the source** at the correct positions in your translation.
3. It **validates** the result before writing it: the tag set must match the source, the words must be unchanged, and the tags must be well-formed.
4. If the AI’s output doesn’t validate, it **retries once**. If it still fails, AutoTagger leaves the target **untouched** – so it never writes broken tags.
Because the words are preserved exactly, AutoTagger is safe to run on a translation you have already reviewed.
## Running it on a single segment
Run AutoTagger on the active segment one of three ways:
* Click the **🏷️ AutoTagger** button on the editor toolbar.
* Choose **Translate → 🏷️ Auto-tag Current Segment**.
* Press **Ctrl+Alt+G**.
Undo (`Ctrl+Z`) reverts it.
## Running it on many segments
Use **Bulk Operations → 🏷️ Auto-tag Segments** to re-tag segments that are **already translated**. It runs over the selected segments (or all segments if none are selected) and the whole run is a single Undo.
> **Note:** Ordinary AI translation (single-segment or Batch Translate) already places inline tags as part of the translation, so you do **not** need to run AutoTagger after translating. AutoTagger is for fixing tags on text that was translated some **other** way (MT, paste, hand-typed). The older “Fix tags with AutoTagger after translating” toggle in the Batch Translate dialog was removed in v1.10.319 for this reason.
## Configuring it
Settings → **System Prompts** → **AutoTagger Instruction**. This editable template tells the AI how to place the tags. It supports these placeholders:
| Placeholder | Meaning |
| ----------------- | ---------------------------------------- |
| `{{SOURCE_TEXT}}` | The source segment, with its inline tags |
| `{{TARGET_TEXT}}` | Your current translation (tags stripped) |
| `{{TAG_LIST}}` | The list of tags that must be placed |
## Tracking cost
AutoTagger’s AI calls are logged under their own **“AutoTagger”** task in [Token Usage & Costs](/workbench/ai-translation/usage-costs/) (a bulk pass logs the tag-placement step as AutoTagger). Group the usage table by Task to see them broken out.
***
## See Also
* [FuzzyFixer](/workbench/ai-translation/fuzzyfixer/)
* [Tag Validation](/workbench/qa/tag-validation/)
* [Batch Translation](/workbench/ai-translation/batch-translation/)
* [Prompts](/workbench/ai-translation/prompts/)
* [Token Usage & Costs](/workbench/ai-translation/usage-costs/)
# Batch Translation
Translate multiple segments at once with AI.
## Starting Batch Translation
1. **Select segments** to translate:
* Click first segment, Shift+click last for a range
* Or use **Edit → Select All** (`Ctrl+A`)
2. **Start batch**:
* Press `Ctrl+Shift+T`
* Or go to **Translate → Batch Translate**
## Batch Dialog Options
### Provider Selection
Choose your LLM provider:
* OpenAI (GPT-5.5, GPT-5.4 Mini)
* Anthropic (Claude Sonnet 4.6, Claude Haiku 4.5, Claude Opus 4.8)
* Google (Gemini 3.1 Flash-Lite, Gemini 2.5 Pro, Gemini 3.1 Pro)
* Mistral, DeepSeek
* Ollama (local models)
### Translation Mode
| Mode | Description |
| ---------------- | ------------------------------------------- |
| **LLM Only** | Use AI for all segments |
| **TM First** | Use TM matches above threshold, AI for rest |
| **TM + Context** | Include TM matches as context for AI |
### Options
* **Skip confirmed segments**: Don’t re-translate ✅ segments
* **Include context**: Send surrounding segments for better quality
* **Retry until complete**: Auto-retry segments that return empty
## Progress Tracking
During translation:
* Progress bar shows completion
* Per-segment status updates
* Can cancel anytime
## Retry Feature
Enable **”🔄 Retry until all segments are translated”** to:
* Automatically detect empty translations
* Retry failed segments (up to 5 passes)
* Ensure all segments get translated
## Tips
### Optimal Batch Size
* 50-100 segments per batch works well
* Very large batches may timeout
* Split by page if needed
### Quality vs Speed
* Claude Sonnet 4.6: Good all-round balance of speed and quality
* GPT-5.5 / Claude Opus 4.8: Highest quality, slower and more expensive
* GPT-5.4 Mini / Gemini 3.1 Flash-Lite: Fastest, lower cost
### Post-Edit Strategy
After batch translation:
1. Review each segment
2. Fix any obvious errors
3. Confirm with `Ctrl+Enter`
***
## See Also
* [AI Translation Overview](/workbench/ai-translation/overview/)
* [Creating Prompts](/workbench/ai-translation/prompts/)
* [Single Segment Translation](/workbench/ai-translation/single-segment/)
# Chat
The **💬 Chat** panel is a full AI assistant that supports OpenAI, Claude, Gemini, Ollama, and any OpenAI-compatible custom provider. It’s available in two places: as the **Chat** sub-tab of the **✦ AI** top tab, and as a **💬 Chat** tab in the editor’s right panel so you can keep a conversation visible while you translate.
When you have **Supervertaler for Trados** running with its Assistant panel active, Chat automatically picks up the project context from Trados – active segment, surrounding segments, TM matches, termbase hits, project metadata – and answers questions about your real translation work without you having to switch out of Trados.
This is especially useful on small laptop screens where there’s not enough room to keep the in-Trados Assistant panel visible alongside the editor. Summon Workbench, click the **💬 Chat** tab, and ask away while Trados stays in front for the actual editing.
## How it works
Supervertaler for Trados runs a tiny localhost-only HTTP service called the **Supervertaler Bridge** while the AI Assistant panel is active. (The name is historical – it predates the Sidekick retirement in Workbench v1.10.4 and is kept stable because the Trados-side C# class looks up the bridge by that name.) Workbench’s Chat panel detects the bridge automatically and uses it to fetch the current Trados project state on every message you send.
Nothing leaves your computer – the bridge listens only on `127.0.0.1`, requires a per-session authentication token, and is never reachable from outside the machine.
## The 🔗 Trados chip
Above the chat input you’ll see a row of context chips (Document, TMs, Termbases, Files). When the Trados plugin is detected, a fifth chip appears:
* **Hidden** until the bridge is detected for the first time. Users without the Trados plugin never see this chip.
* **Lit green** – bridge is reachable; Trados context is included in chat messages.
* **Greyed** – the bridge was previously available but is now unreachable (e.g. you closed Trados mid-session). The chip recovers automatically when Trados restarts.
Click the chip to toggle it off if you want to ask a non-Trados-related question without the project context being included. The chip pref is shared across all chat views – toggling it in one place affects every send path.
## What the chat sees
When the chip is on, every message you send to Chat is preceded by a context block that contains:
| Field | What it is |
| ------------------------------ | --------------------------------------------------------------------------------------------------------------------------------------------------------- |
| **Project name and file name** | So the AI knows what document you’re working on |
| **Source and target language** | The language pair from Trados, used as a sanity-check against the chat’s reasoning |
| **Active segment** | The source segment you’re currently editing in Trados, plus your current target draft (if any) |
| **Surrounding segments** | A few segments before and after the active one – gives the AI enough context to know what kind of document this is (legal, technical, marketing, patent…) |
| **TM matches** | Fuzzy and exact matches Trados has found for the active segment, with their match percentages and TM names |
| **Termbase hits** | Term entries from your enabled termbases that match the active segment, including definitions, domains, and notes |
This is the same context the in-Trados Supervertaler Assistant chat already uses, so answer quality is comparable.
## QuickLauncher prompts from Trados
When **Supervertaler for Trados** is running, you can also send a Trados QuickLauncher prompt (Ctrl+Q from inside Trados Studio) over the bridge to be processed by Workbench’s Chat panel instead of the in-Trados Assistant. The Trados plugin builds a redacted *display* version (e.g. `[source document — N segments]` instead of the full project text) for the chat transcript and sends the fully-expanded prompt to the LLM. Workbench pops to the foreground on the Chat tab, the prompt and response render there, and the user can carry on the conversation as a normal Chat session.
This is opt-in on the Trados side – a dropdown in Trados → **Settings → AI Settings → “QuickLauncher prompts go to:”** picks between the in-Trados Assistant (default) and Workbench Chat. Workbench is always ready to receive; nothing in Workbench needs to be configured.
If Workbench isn’t running when Trados tries to send a prompt, Trados silently falls back to its own Assistant – the prompt is never lost.
→ [Supervertaler Bridge (Trados help)](https://docs.supervertaler.com/trados/ai-assistant/supervertaler-bridge/) – wire format and troubleshooting
## Example questions
The Trados-aware chat shines when you ask questions that depend on what you’re actually translating right now:
> *Which termbase entries apply to this segment?*
The chat will list the termbase hits and explain how to apply them.
> *What’s a more natural English translation for the segment I’m currently editing?*
The chat will read the source, your draft target (if any), and any surrounding segments, and propose a polished translation.
> *Are there any TM matches I should reuse for this segment?*
The chat will summarise the TM matches and tell you which ones are close enough to confirm as-is.
> *What domain is this document about?*
The chat will infer the domain from the surrounding segments and reply.
## Privacy
* The bridge listens **only on `127.0.0.1`** (loopback). Other devices on your network can never reach it.
* Each Trados session gets a **fresh authentication token** – stale tokens from old sessions are useless.
* The bridge **only starts when you have Assistant access** (paid subscription or trial). Without Assistant access, no bridge is started.
* You can disable the bridge entirely on the Trados side by editing the plugin’s `settings.json` and setting `"sidekickBridgeEnabled": false`. See [Supervertaler Bridge](/trados/ai-assistant/supervertaler-bridge/) for details.
## Troubleshooting
**The 🔗 Trados chip never appears.** The bridge isn’t being detected. Check:
1. Trados Studio is running with **Supervertaler for Trados v4.19.52 or later**
2. You have a paid subscription or active trial (the bridge is gated behind Assistant access)
3. You’ve **opened the Supervertaler Assistant panel** at least once in this Trados session – the bridge starts lazily when the panel is first activated
4. The handshake file `~/Supervertaler/trados/runtime/bridge.json` exists. If it doesn’t, check the bridge log at `%TEMP%\Supervertaler-bridge.log` for diagnostic information.
**The chip appears but the answers don’t seem to use the project context.**
Send a question that explicitly references your segment, like *“Which termbase entries apply to this segment?”*. If the answer cites specific terms from your termbases, the bridge is working. If the answer is generic, the chip may have been toggled off, or the bridge may have lost reachability – check the chip’s tooltip.
**The chip is greyed out.**
The bridge was reachable earlier but is no longer responding. Make sure Trados Studio is still running and the Supervertaler Assistant panel hasn’t been closed. The chip recovers automatically (within \~3 seconds) when Trados is reachable again.
***
## Related pages
* [AI Translation Overview](/workbench/ai-translation/overview/)
* [Supervertaler Bridge (Trados side)](/trados/ai-assistant/supervertaler-bridge/)
* [Supervertaler (Trados)](/trados/ai-assistant/)
# FuzzyFixer
FuzzyFixer adapts an existing fuzzy TM match to the current source segment instead of translating it from scratch. When an 80–95% match is sitting right next to a segment, FuzzyFixer feeds that match into the AI prompt and asks the model to make only the edits the source change requires – keeping the existing wording, terminology, and tags wherever the source is unchanged.
This is useful for repetitive, lightly-revised content (updated manuals, contract variants, new product revisions) where translating cold throws away a near-perfect human translation that is already in your TM.
> Inspired by a suggestion from David Turnbull.
## Why use it
By default the AI never sees a segment’s fuzzy TM match – it translates from the source alone, even when a high match is available. FuzzyFixer closes that gap: the model starts from the TM target and revises it minimally, so the result stays closer to your approved style and terminology than a fresh translation would.
## Running it on a single segment
1. Move to a segment that has a fuzzy match in range (see **Match range** below).
2. Run FuzzyFixer one of three ways:
* Click the **🔧 FuzzyFixer** button on the Match Panel’s **TM Source** box (it is enabled only when the shown match is in range).
* Choose **Translate → 🔧 Fuzzy Fix Current Segment**.
* Press **Ctrl+Alt+F**.
After it runs, the **TM Target** box shows a **track-changes view** of what the AI changed: the original TM target with the AI’s insertions underlined and removed words struck through, so you can see the edit at a glance before confirming.
## Using it in batch translation
In the **Batch Translate** dialog, tick **🔧 Use FuzzyFixer**. When enabled:
* The AI pass runs **per segment** (no batching), so each segment gets its own in-range fuzzy match injected into the prompt.
* Segments **without** an in-range match are translated normally.
* The toggle is remembered between sessions.
Because it disables batching, FuzzyFixer batch mode is slower and costs more per segment than ordinary batch translation – use it on jobs that are genuinely revision-heavy.
## Configuring it
### Match range
Settings → **AI Settings** → **🔧 FuzzyFixer**. FuzzyFixer only acts on matches inside a percentage range (default **75%–99%**). 100% exact matches are **never** altered. Lower the floor to catch looser matches, or raise it to limit FuzzyFixer to very close matches only.
### Instruction template
Settings → **System Prompts** → **FuzzyFixer Instruction**. This editable template tells the model how aggressively to revise. In addition to the usual `{{SOURCE_TEXT}}`, it supports these placeholders:
| Placeholder | Meaning |
| ----------------- | ------------------------------------------------------------------ |
| `{{TM_SOURCE}}` | The matched TM entry’s source text |
| `{{TM_TARGET}}` | The matched TM entry’s target text (the translation being adapted) |
| `{{MATCH_PCT}}` | The match percentage |
| `{{TM_NAME}}` | The name of the TM the match came from |
| `{{SOURCE_TEXT}}` | The current segment’s source text |
## Tracking cost
FuzzyFixer’s AI calls are logged under their own **“FuzzyFixer”** task in [Token Usage & Costs](/workbench/ai-translation/usage-costs/). Group the usage table by Task to see them broken out from ordinary translation.
***
## See Also
* [Fuzzy Matching](/workbench/translation-memory/fuzzy-matching/)
* [AutoTagger](/workbench/ai-translation/autotagger/)
* [Batch Translation](/workbench/ai-translation/batch-translation/)
* [Prompts](/workbench/ai-translation/prompts/)
* [Token Usage & Costs](/workbench/ai-translation/usage-costs/)
# Image Context
The **Image Context** viewer lets Supervertaler attach figure images to AI translation requests so the model can see the document’s drawings, photos, schematics or labelled parts in addition to the text. When a segment contains `Figure 1`, `Fig. 2A`, `Table 3`, etc., the matching image is shipped with the request so the AI’s translation is anchored in what the figure actually depicts — not just the words around it.
The same viewer doubles as Supervertaler’s **DOCX image extractor**: point it at a Word document and it pulls every embedded image out into a numbered folder of PNG files, ready to load straight back as AI context. So the most common flow is one button-press: extract from a DOCX → context is auto-loaded → start translating.
## Where to find it
The viewer is folded into the **Prompt Manager** (since v1.10.176; it used to be a standalone AI sub-tab):
1. Switch to the **✨ AI** tab → **Prompt Manager** sub-tab.
2. On the left of the panel, find **Section 4 — Image Context**.
3. Click the green **`Open ▸`** button. The right-hand panel swaps from the Prompt Editor to the Image Context viewer.
4. The viewer’s **`← Back to Prompt Editor`** button (or clicking any prompt in Section 5) returns you to the Prompt Editor.
## Extract images from a DOCX
The viewer is a single toolbar at the top, with a results list + image preview below.
1. Add input files to the extraction queue:
* **📄 Add DOCX** — pick one DOCX file
* **📁 Add Folder** — add every DOCX file in a folder (batch input)
2. Choose an output strategy:
* Enable **Auto-folder** to create an `Images` folder next to each DOCX
* Or set a single output directory in the **Output directory** field
3. Set **Prefix** (default `Fig.`).
4. Click **🖼️ Extract Images**.
5. The freshly-extracted folder is automatically loaded as AI context for figure-aware translation — no second click required.
6. Use **📂 Extracted Files (click to preview)** below to preview images.
### Filename detection
Since v1.10.190, extracted files are named after the **caption visible in the document** rather than sequential `Fig. N.png` numbers. So if your document labels figures as `FIG. 7`, the extracted file is `FIG. 7.png` — matching what the reader sees.
The detector recognises the following label vocabularies (case-insensitive):
| Pattern | Example filename |
| -------------------------- | ----------------------------------- |
| `FIG. N` / `FIGS. N` | `FIG. 7.png` (patent figures) |
| `Figure N` / `Figs N` | `Figure 7.png` (academic / general) |
| `Fig. N` | `Fig. 7.png` |
| `Table N` | `Table 3.png` |
| `Diagram N` | `Diagram 4.png` |
| `Chart N` | `Chart 2.png` |
| `Photo N` / `Photograph N` | `Photograph 12.png` |
| `Scheme N` (chemistry) | `Scheme 1.png` |
| `Plate N` / `Plate IV` | `Plate IV.png` (Roman numerals OK) |
| `Exhibit A` (legal) | `Exhibit A.png` |
The ID portion accepts `N`, `Na`, `NB` shapes (e.g. `FIG. 6a`, `Table 3B`). Documents that use Word’s built-in **Caption** paragraph style are detected even when no pattern matches — the leading sentence of the caption becomes the filename (capped at 80 chars). Images for which no caption can be detected fall back to the sequential `Fig. N.png` form.
### 🤖 AI label detection (opt-in)
For documents that don’t follow the standard label vocabularies — marketing copy, blog posts, cookbooks, photo essays, foreign-language documents — tick **”🤖 AI label”** in the toolbar before clicking Extract Images. Each image that the text-pattern detector couldn’t label is sent to the active vision AI alongside surrounding text from the document, with a request to identify the figure’s label.
**Requirements:**
* A vision-capable model configured in Settings (Claude Sonnet/Opus 4.x, GPT-4o or newer, Gemini)
* Internet connection
**Cost:** roughly $0.005–$0.02 per AI-labelled image depending on provider — only spent on images the free text-pattern detector missed. A confirmation dialog showing the estimated extra cost appears before any API call is made; click Cancel to abort or run text-pattern only.
**Pre-flight gates** that may interrupt the run:
* No chat backend / API keys configured → friendly message, AI step skipped
* Active model doesn’t support vision → choose between proceeding text-only or cancelling
* Zero images need AI (all already pattern-detected) → silently skipped, no dialog, no cost
If the AI replies `unlabelled` for a given image, that image falls back to the sequential `Fig. N.png` form. So the AI step is purely additive — it can only improve filenames, never make them worse.
Note
Documents with conventional captions (patents, academic papers, technical specifications) don’t need this feature — the free text-pattern detector handles them perfectly. The AI fallback is for documents where captions follow no recognisable pattern.
## Load a pre-existing folder of images
If you already have a folder of images ready (e.g. one you extracted in an earlier session, or one you assembled by hand):
1. Click **📁 Load Folder** (the green button, to the right of Extract Images).
2. Pick the folder.
3. The images load into the AI context **and** populate the preview list below — just like a fresh extraction.
Note
**“Add Folder” vs “Load Folder”** — these are the two confusing buttons. **Add Folder** queues a folder of *Word documents* to extract images from. **Load Folder** loads a folder that already contains *image files* directly for AI context. The on-button tooltips spell out the distinction.
## Filename → figure-reference matching
Supervertaler infers the figure reference from each image’s filename. Recognised patterns:
| Filename example | Matched reference |
| ---------------- | ----------------- |
| `Figure 1.png` | `1` |
| `Fig. 2A.jpg` | `2a` |
| `figure3-b.png` | `3b` |
| `Fig 10.tif` | `10` |
When the AI later sees `Figure 1` or `Fig. 2A` in a segment’s source text, the matching image (case-insensitive, whitespace-/dash-/dot-normalised) is attached to the request. References that don’t match any loaded image are simply ignored — no error, no warning, the segment translates text-only.
## How loaded images reach the AI
When AI translation runs (single-segment or batch), Supervertaler scans each segment’s source text for figure references. If a match is found AND a corresponding image file is loaded AND the active model supports vision (Claude Sonnet/Opus 4.x, GPT-4o or newer, Gemini), the image is base64-encoded (or passed as PIL data for Gemini) and attached to the request. Segments without figure references are translated text-only.
A line appears in the log for every match, e.g.
```plaintext
🖼️ Detected figure references in segment #42: 1, 2a
✅ Including 2 figure images: 1, 2a
```
If the model is text-only (older GPT, Ollama models without vision, etc.), the figures are silently skipped and a warning goes to the log so you know why visual grounding didn’t fire.
## Using images with AutoPrompt (opt-in)
Since v1.10.178, the loaded figures can ALSO be sent to the **AutoPrompt** generator — not just to the per-segment translator. Section 2 of the Prompt Manager has a companion checkbox under the **✨ AutoPrompt** button labelled **“🖼️ Include loaded figure images”**.
Tick it before clicking AutoPrompt to ship the loaded figures alongside the meta-prompt. The LLM then uses the drawings to lock terminology decisions directly into the generated translation prompt — *“part 7 in Figure 1 is labelled ‘cylindrical sleeve’ → lock ‘mantelbuis’ → ‘cylindrical sleeve’ in the termbase”* — instead of having to guess from textual references alone.
* **Off by default** — opting in is a deliberate per-project choice.
* **Adds a small extra cost** — roughly $0.05–$0.30 for 10–20 figures with a Sonnet-class model, more with Opus. Negligible vs. the value of a typical project (a €1000 patent will spend less than 0.1% on visual grounding).
* **Cost-confirmation dialog** pops up before the request so you can back out.
See [AutoPrompt](/workbench/ai-translation/autoprompt/) for the full flow and pre-flight gates (vision-model check, missing-figures friendly message, etc.).
## Project persistence
The currently-loaded folder path is saved into the `.svproj` file, so reopening a project automatically re-loads its image context. If the folder has moved or been deleted, you get a warning in the log and the project opens with no images loaded — re-pick the folder via **Load Folder** to restore.
## See also
* [Prompt Manager](/workbench/ai-translation/prompt-library/) — where Section 4 (Image Context) lives
* [AutoPrompt](/workbench/ai-translation/autoprompt/) — opt-in to ship figures with the meta-prompt
* [AI Translation Overview](/workbench/ai-translation/overview/) — how images flow into per-segment translations
# Using Local LLMs (Ollama)
Ollama lets you run LLMs locally for privacy and offline translation.
## Install Ollama
1. Download and install from
2. Start Ollama
3. Pull a model (example):
```bash
ollama pull llama3
```
## Use in Supervertaler
Once Ollama is installed and running, Supervertaler can use it as a provider.
Note
Local models vary a lot in quality. For best results, test a few models on your typical content.
# Overview
Supervertaler integrates with leading AI language models for high-quality translation.
## Supported Providers
| Provider | Models |
| -------------- | -------------------------------------------------------------------------------- |
| **OpenAI** | GPT-5.5, GPT-5.4 Mini |
| **Anthropic** | Claude Sonnet 4.6, Claude Haiku 4.5, Claude Opus 4.8 |
| **Google** | Gemini 3.1 Flash-Lite, Gemini 2.5 Pro, Gemini 3.1 Pro (Preview), Gemma 4 26B MoE |
| **Mistral** | Mistral Large, Mistral Small |
| **DeepSeek** | DeepSeek V4 Pro, DeepSeek V4 Flash |
| **OpenRouter** | 200+ models via a single API key |
| **Ollama** | TranslateGemma, Qwen 3, Aya Expanse (local, free) |
| **Custom** | Any OpenAI-compatible endpoint |
See [Supported LLM Providers](/workbench/ai-translation/providers/) for setup instructions for each provider.
## Quick Start
1. [Set up API keys](/workbench/get-started/api-keys/)
2. Open a project with segments to translate
3. Select a segment
4. Press `Ctrl+T` to translate
## Translation Methods
### Single Segment
Translate one segment at a time:
* Select a segment
* Press `Ctrl+T` or click **Translate** button
* AI translation appears in the target cell
* Review, edit, and confirm
### Batch Translation
Translate multiple segments at once:
* Select segments (Shift+click for range)
* Press `Ctrl+Shift+T` or use **Translate → Batch Translate**
* Configure options in the dialog
* All selected segments are translated
Note
Supervertaler has multiple batch scopes (selected / not-started / etc.). Start with **Translate → Batch Translate → Translate all not-started & pre-translated**.
### TM + AI Hybrid
Combine Translation Memory with AI:
1. TM matches are checked first
2. High matches (e.g., >90%) are used directly
3. Lower matches are AI-translated with TM context
4. No matches use pure AI translation
## Prompts
Prompts control how the AI translates. A good prompt includes:
* Translation direction (source → target language)
* Domain/subject matter
* Style guidelines
* Terminology rules
* Special instructions
### Example Prompt
```plaintext
You are a professional Dutch-to-English translator specializing
in technical documentation.
Maintain formal register. Use American English spelling.
Keep all formatting tags like {1}, , in place.
Translate naturally while preserving the original meaning.
```
See [Creating Prompts](/workbench/ai-translation/prompts/) and [Prompt Manager](/workbench/ai-translation/prompt-library/) for more.
## Provider Selection
### In Settings
1. Go to **Settings** tab
2. Find **LLM Settings**
3. Choose your preferred **Provider** and **Model**
4. Save settings
### Per-Translation
When batch translating, you can choose the provider in the dialog.
## Quality Tips
### Get Better Results
1. **Use specific prompts** - Include domain, style, and rules
2. **Provide context** - Enable “include context” for surrounding segments
3. **Add termbase terms** - Attach terminology for consistent translations (see [Sending Terms to the AI](/workbench/termbases/ai-injection/))
4. **Post-edit** - AI is great but not perfect; always review
### Common Issues
| Issue | Solution |
| ------------------ | ---------------------------------------- |
| Wrong terminology | Add terms to termbase, include in prompt |
| Inconsistent style | Be more specific in your prompt |
| Tags removed/moved | Explicitly tell AI to preserve tags |
| Too literal | Ask for “natural, fluent” translation |
## Cost Management
### API costs
Cloud providers typically charge by usage (tokens). Pricing and free tiers change over time, so treat each provider dashboard as the source of truth.
### Reducing Costs
1. **Use Ollama** (local) when appropriate
2. **Translate only what you need** (for example not-started segments)
3. **Pre-translate with TM** when you have good matches
4. **Use smaller/faster models** for drafts, larger models for final passes
***
## Learn More
| | |
| --------------------- | ---------------------------------------------- |
| **Single Segment** | [Translate one at a time →](single-segment.md) |
| **Batch Translation** | [Translate in bulk →](batch-translation.md) |
| **Creating Prompts** | [Write effective prompts →](prompts.md) |
| **Local AI (Ollama)** | [Free, private AI →](ollama.md) |
# Prompt Manager
Supervertaler includes a Prompt Manager so you can create, organise, and reuse prompts across projects. It lives in the **✨ AI** tab → **Prompt Manager** sub-tab.
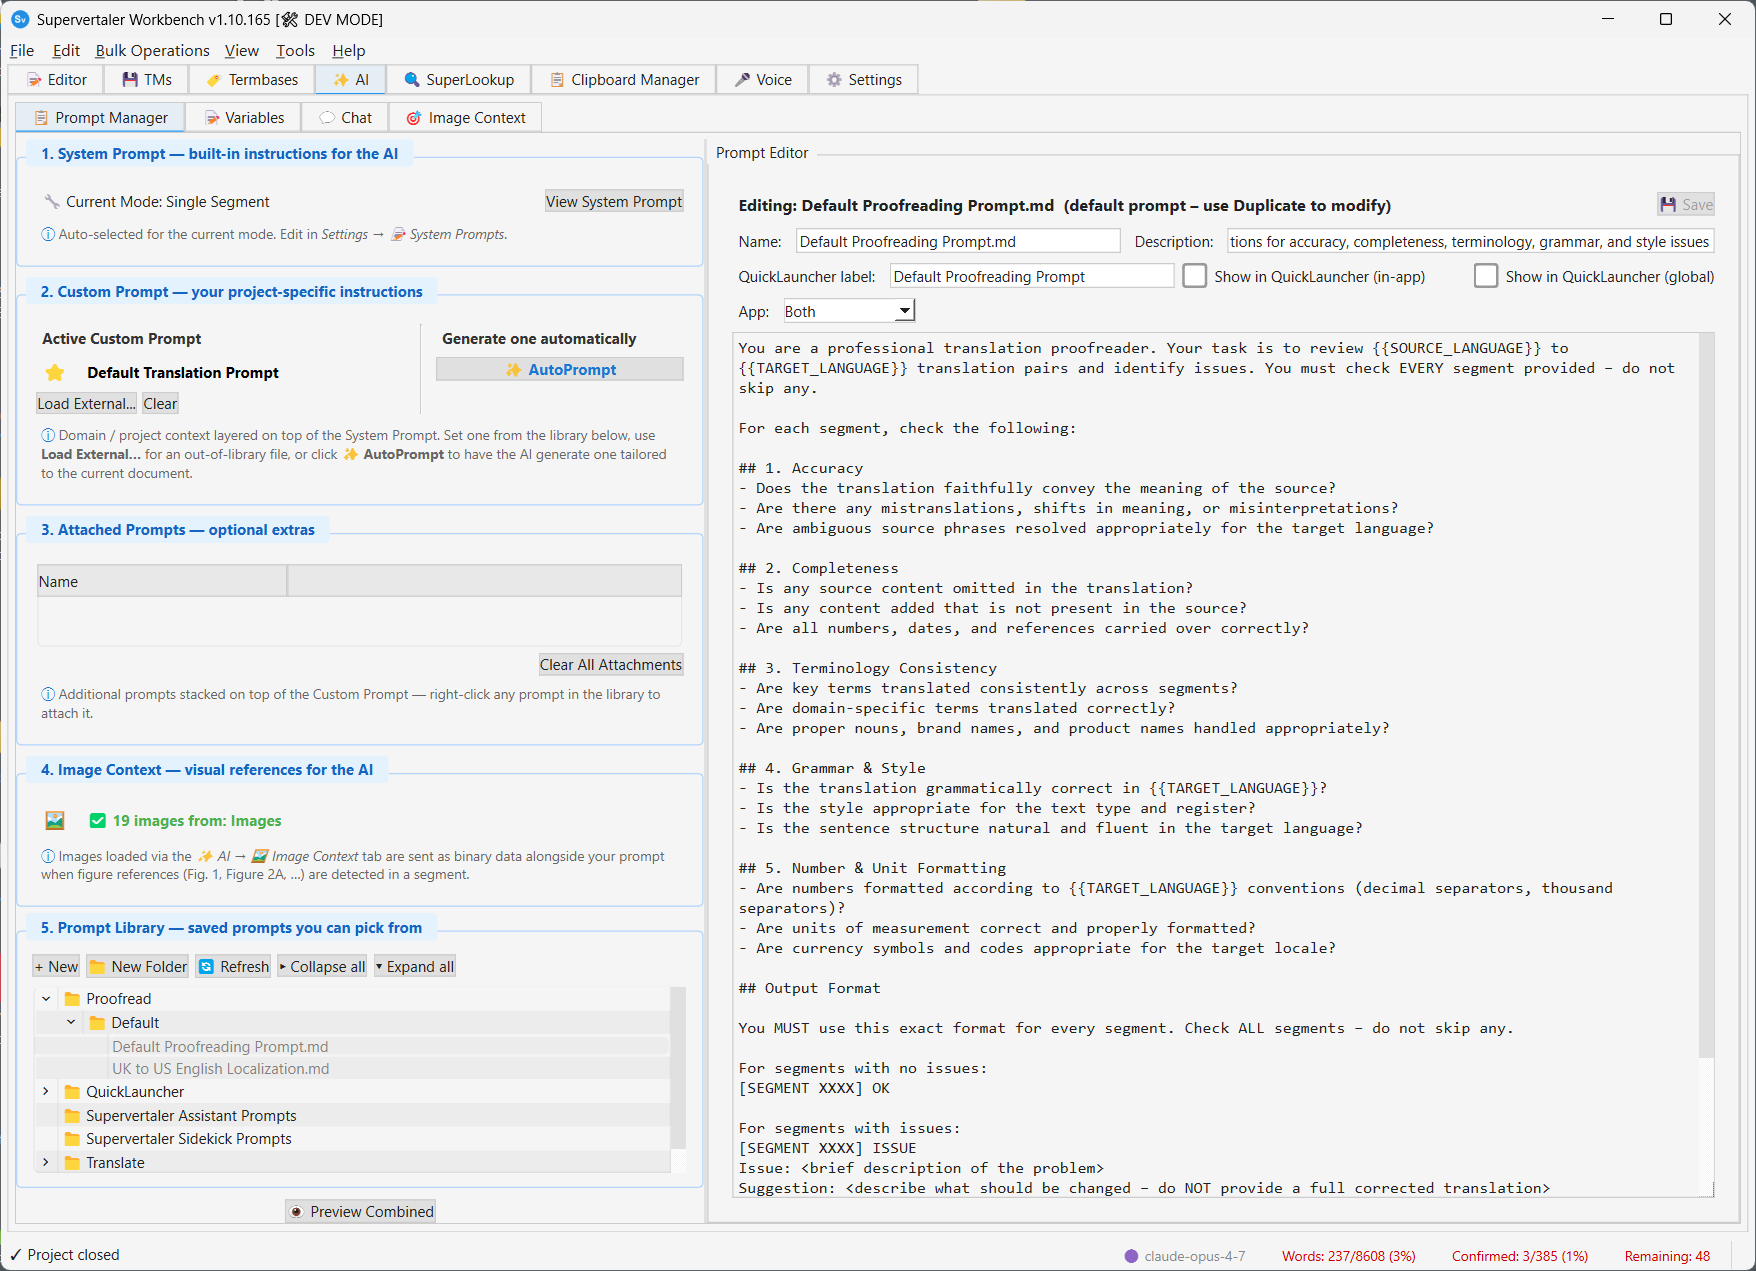
## Layout
The left side of the Prompt Manager is organised into **five numbered sections**, each with a coloured title strip. Read top to bottom, they are the four context layers that go into every AI request, followed by the library you pick prompts from:
| # | Section | What lives there |
| - | -------------------- | ----------------------------------------------------------------------------------------------------------------------------------------------------------------------------------------------------------------------------------------------------------------------------------------------------------------------------------------------------------------------------------------------------------------------------------------------------------------------------------------------------------------------- |
| 1 | **System Prompt** | The built-in instructions for the AI. Auto-selected based on the current mode (Single Segment, Batch DOCX, Batch Bilingual). Click **View System Prompt** to see what it looks like and to jump to **Settings → 📝 System Prompts** if you want to edit it. |
| 2 | **Custom Prompt** | Your project-specific instructions, in two columns: the active prompt on the left (with **Load External…** and **Clear**), and the **✨ AutoPrompt** button on the right. Set one from the library below, load an out-of-library file, or have the AI generate one. |
| 3 | **Attached Prompts** | Optional extras stacked on top of the Custom Prompt. Right-click any prompt in the library and choose **📎 Attach to Active** to add it here. **Clear All Attachments** removes them all. |
| 4 | **Image Context** | Visual references for the AI. Click the green **`Open ▸`** button to swap the right-hand panel from the Prompt Editor to the Image Context viewer, where you can extract images from a DOCX or load a pre-existing folder of figure images. Once loaded, images are sent as binary data alongside your prompt when figure references (Fig. 1, Figure 2A, …) are detected in a segment. The viewer’s **`← Back to Prompt Editor`** button (or simply clicking any prompt in Section 5) returns you to the Prompt Editor. |
| 5 | **Prompt Library** | All your saved prompts. The button row below the heading lets you create new entries (**+ New**, **📁 New Folder**), refresh from disk, and collapse / expand every folder. |
At the very bottom of the panel sits a single **👁 Preview Combined** button that opens a window showing exactly what will be sent to the AI for the current segment — the System Prompt, your Custom Prompt, every Attached Prompt, plus the segment text itself, all assembled in order.
## Setting the Custom Prompt
Three ways to populate Section 2:
* **From the library** — right-click any prompt in Section 5 and choose **⭐ Set as Custom Prompt**, or double-click it. The prompt name shows up next to the ⭐ icon in Section 2.
* **From an external file** — click **Load External…** in Section 2 and pick any `.md` or `.txt` file from anywhere on your computer. The file stays where it is on disk; Supervertaler just references it.
* **Have the AI generate one** — click **✨ AutoPrompt** in Section 2. The AI analyses your current document (domain, tone, terminology, confirmed translations) and produces a tailored prompt. See [AutoPrompt](/workbench/ai-translation/autoprompt/) for details.
Whichever way you pick, the choice is saved into the `.svproj` immediately, so it survives a restart.
## Common uses
* Maintain different prompts per client
* Maintain different prompts per domain
* Switch between “draft” and “final” translation styles
* Pair a domain-specific Custom Prompt with one or two client-specific Attached Prompts (e.g. a “patents” Custom Prompt plus a “Client X house style” attachment)
## Tips
* **Start simple** and evolve prompts as you learn what works for your language pair.
* **AutoPrompt is a good starting point** for new projects, especially in unfamiliar domains — use the auto-generated prompt as a draft and edit it from there.
* **Preview Combined is honest** — it shows you the actual final prompt that will be sent. If something looks wrong, it’s because something *is* wrong.
* **External prompts can be edited in place** — if you load a prompt from an external file, Supervertaler can show it in the editor on the right and save changes back to the same file.
## See also
* [AutoPrompt](/workbench/ai-translation/autoprompt/) — auto-generate a tailored translation prompt from the current document
* [Creating Prompts](/workbench/ai-translation/prompts/) — what makes a good translation prompt when writing one by hand
* [AI Translation Overview](/workbench/ai-translation/overview/) — how the assembled prompt is used during translation
# Creating Prompts
Prompts control how the AI translates (tone, domain, rules, formatting).
## What makes a good translation prompt
* Target audience and tone (formal/informal)
* Domain constraints (legal, medical, technical)
* Rules for numbers, punctuation, terminology
* Instructions to preserve tags and placeholders
Caution
If your text contains formatting or CAT tool tags, instruct the model to preserve them exactly.
## Quick checklist
* Specify the language direction (source → target)
* Specify style and audience (formal/informal, US/UK spelling, etc.)
* Tell the model what to do with **tags/placeholders** (keep, don’t reorder, don’t delete)
* Tell the model what to do with terminology (use termbase terms when provided)
## Next
* [Prompt Manager](/workbench/ai-translation/prompt-library/)
# Providers
Supervertaler supports multiple AI providers so you can choose what fits your workflow and budget. You only need one to get started.
## Cloud providers
### OpenAI
Models: **GPT-5.5**, **GPT-5.4 Mini**
Get an API key at [platform.openai.com/api-keys](https://platform.openai.com/api-keys). GPT-5.4 Mini is a good starting point – fast, affordable, and high quality for most translation tasks. GPT-5.5 is the flagship for the most demanding work.
### Anthropic (Claude)
Models: **Claude Sonnet 4.6**, **Claude Haiku 4.5**, **Claude Opus 4.8**
Get an API key at [console.anthropic.com](https://console.anthropic.com). Claude Sonnet 4.6 is the recommended default. Haiku 4.5 is the fastest and cheapest option; Opus 4.8 is the most capable.
### Google (Gemini)
Models: **Gemini 3.1 Flash-Lite**, **Gemini 2.5 Pro**, **Gemini 3.1 Pro (Preview)**, **Gemma 4 26B MoE**
Get an API key at [aistudio.google.com/apikey](https://aistudio.google.com/apikey). Gemini 3.1 Flash-Lite offers a generous free tier and is a strong choice for high-volume work.
### Mistral AI
Models: **Mistral Large**, **Mistral Small**
Get an API key at [console.mistral.ai](https://console.mistral.ai). Particularly strong on European languages.
### DeepSeek
Models: **DeepSeek V4 Pro**, **DeepSeek V4 Flash**
Get an API key at [platform.deepseek.com](https://platform.deepseek.com). DeepSeek offers competitive pricing and strong multilingual quality. V4 Flash is the fast, cost-effective option for high-volume work.
## Gateway providers
### OpenRouter
[OpenRouter](https://openrouter.ai) is an API gateway that gives you access to 200+ models from OpenAI, Anthropic, Google, DeepSeek, Mistral, Meta, and many others – all through a **single API key**.
The model dropdown includes a curated selection for translation, and you can also type any OpenRouter model ID directly. Browse all models at [openrouter.ai/models](https://openrouter.ai/models).
Get an API key at [openrouter.ai/keys](https://openrouter.ai/keys).
Note
OpenRouter adds a 5.5% platform fee on top of the underlying provider’s price. For most translation jobs this adds only a few cents.
## Local providers
### Ollama
Run models entirely on your own machine – no API key and no internet required.
See [Ollama Setup](/workbench/ai-translation/ollama/) for download and configuration instructions.
## Custom (OpenAI-compatible)
For any provider that exposes an OpenAI-compatible API (Azure OpenAI, together.ai, local inference servers, etc.), select **Custom (OpenAI-compatible)** and enter the endpoint URL, model name, and API key.
***
## Related pages
* [Setting Up API Keys](/workbench/get-started/api-keys/)
* [Ollama Setup](/workbench/ai-translation/ollama/)
* [AI Translation Overview](/workbench/ai-translation/overview/)
# Single Segment Translation
Use single-segment translation when you want maximum control: translate one segment, review, then confirm.
## Typical workflow
1. Select a segment
2. Run **Translate Segment** (shortcut: `Ctrl+T`)
3. Review the result
4. Edit if needed
5. Confirm the segment
You can also trigger this from the menu: **Translate → Translate Current Segment**.
## Tips
* Single-segment mode is great for tricky sentences and high-stakes text.
* Use [SuperLookup](/workbench/superlookup/overview/) for research before confirming.
# Token Usage & Costs
Supervertaler Workbench keeps a persistent log of the AI tokens and cost of every operation, plus a built-in **Usage & Costs** report to total and export it. Use it to answer *“how much did this project cost?”*, *“how many tokens did we use this month?”*, or *“what should I bill this client for AI?”* — across every provider, including local and custom models.
The log uses the **same format as the Supervertaler for Trados plugin**, so if you use both, their logs merge into a single analysis.
Note
The log records **metadata only** — model, token counts, cost, project, file and language pair — and **never the prompt or response text**. That keeps the file small and safe to share.
### The usage log file
Every AI call appends one line to a monthly file:
```plaintext
…\Supervertaler\workbench\usage\usage-2026-06.jsonl
```
It is **JSONL** (one JSON object per line) — open it in Excel, or parse it with a script. A line looks like:
```json
{"ts":"2026-06-18T16:07:03Z","product":"workbench","task":"BatchTranslate",
"provider":"claude","model":"claude-sonnet-4-6","project":"My Patent Job",
"file":"","src_lang":"English","tgt_lang":"Dutch","in_regular":654,
"in_cache_read":0,"in_cache_write":27843,"out":808,"source":"actual",
"cost_usd":0.11849325,"cost_known":true,"duration_s":24.9,"ok":true}
```
It is **on by default**. Turn it off in **Settings → AI Settings → AI Cost Monitoring**.
### The Usage & Costs report
Open **Tools → 💰 Token Usage & Costs…**. The window totals your usage and lets you slice it:
* **Range** — This month, Last 3 months, This year, or All time.
* **Group by** — Project, Client, Model, Provider, Task, Day or Month.
Each row shows calls, input/output tokens, cost, and a **% actual** column (the share backed by provider-reported figures rather than estimates). The footer shows the range total and your month-to-date spend against your budget.
### Exporting
**Export CSV…** and **Export Excel…** write the detailed ledger (one row per call) for the selected range — ready for invoicing or analysis.
### Settings & budget
**Settings → AI Settings → AI Cost Monitoring** has:
* **Keep a persistent token-usage log** — the on/off switch.
* **Monthly budget (USD)** — a soft monthly limit (cents allowed; `0` disables). Once this month’s logged spend reaches it, starting a batch translation shows a warn-and-continue prompt. It is advisory and **never blocks**.
### Pricing custom / self-hosted models
Costs come from a single price list, `pricing.json`, shared with the Trados plugin. To price a custom or self-hosted model — or override any rate for both products at once — copy the bundled `modules/pricing.json` to `…\Supervertaler\pricing.json` and add an entry keyed by the exact model id:
```json
{ "models": { "my-university-llama": { "input": 0.0, "output": 0.0 } } }
```
Until a rate is set, a custom model’s **tokens are still logged**, with the cost marked unknown rather than guessed. Local models ([Ollama](/workbench/ai-translation/ollama/)) are priced at `0`.
### How accurate are the figures?
Every record is flagged **`actual`** or **`estimated`** in its `source` field — and the difference matters.
* **`actual`** (the usual case): the token counts are the **exact numbers the provider’s API reported** for that call — the same numbers it bills you against. These are as accurate as it gets. This covers OpenAI, Claude, Gemini, Mistral, DeepSeek and OpenRouter, including the cached-token breakdown.
* **`estimated`**: a fallback used only when the provider returned no usage data — currently **local models (Ollama)** and the occasional unparseable response. The estimate is a simple **characters ÷ 4** heuristic. It’s reasonable for English but can be well off for other content: scripts such as Chinese, Japanese, Korean, Arabic and Cyrillic pack a different number of characters per token, so the estimate often *under*-counts them. Ollama is free, so for local models only the token *count* is approximate — there is no cost involved.
For **cost**, an `actual` record’s figure is the exact token count × the per-model rate from `pricing.json`, with **cached tokens priced at each provider’s cache discount** (e.g. Claude cache reads at 10% of the input rate and cache writes at 125%, OpenAI cache reads at 50%, Gemini 2.5+/3 at 25%). This matches how the Supervertaler for Trados plugin computes cost, so the two products agree. The one thing that can make it differ slightly from your provider’s bill:
* The price list can **lag** a provider’s recent rate change. The model id and the token counts are still exact — only the unit price might be a little behind.
For the definitive bill, your **provider’s own usage dashboard** is authoritative. The ledger is built for tracking trends, attributing usage to projects and clients, and capacity planning — where the exact, provider-reported token counts are precisely what you want.
### See also
* [Batch Translation](/workbench/ai-translation/batch-translation/) — the main driver of token usage
* [Supported LLM Providers](/workbench/ai-translation/providers/) — which providers report usage
* [Using Local LLMs (Ollama)](/workbench/ai-translation/ollama/) — free, locally-run models
* [General Settings](/workbench/settings/general/) — where AI Cost Monitoring lives
# CafeTran Workflow
Supervertaler supports CafeTran bilingual table DOCX workflows.
## Export from CafeTran
1. Open your project in CafeTran
2. Go to **Project → Export → Bilingual Table**
3. Choose **DOCX** format
## Import to Supervertaler
1. In Supervertaler: **Project → Import → CafeTran → Bilingual Table (DOCX)…** and select the exported DOCX
2. Translate and review in the grid
3. Confirm segments when ready (`Ctrl+Enter`)
## Export back to CafeTran
1. In Supervertaler: **Project → Export → CafeTran → Bilingual Table - Translated (DOCX)…**
2. Save the file
## Reimport to CafeTran
1. In CafeTran: **Project → Import** and select the bilingual table
2. Choose merge options as needed
## Notes
* Preserve pipe-style markers and any CAT tags.
* Don’t change the bilingual table structure in Word.
# memoQ Workflow
This guide covers working with memoQ bilingual files in Supervertaler.
## Export from memoQ
### Bilingual DOCX (Recommended)
1. In memoQ, open your project
2. Go to **Documents** view
3. Right-click your document → **Export Bilingual…**
4. Choose **Bilingual DOC/RTF/DOCX**
5. Select **Table format** (two columns)
6. Export the file
Note
The table format with source and target columns works best with Supervertaler.
### XLIFF Export
1. In memoQ, go to **Documents** view
2. Right-click → **Export Bilingual…**
3. Choose **memoQ XLIFF bilingual**
4. Save the `.mqxliff` file
## Import to Supervertaler
1. Go to **Project → Import → memoQ → Bilingual Table (DOCX)…**
* Or **Project → Import → memoQ → XLIFF (.mqxliff)…**
2. Select your exported file
3. The segments appear in the translation grid
### What Gets Imported
* ✅ Source text
* ✅ Target text (if any)
* ✅ Inline formatting tags (`{1}`, `[2}`, etc.)
* ✅ Segment status
### memoQ Tag Handling
memoQ uses special tag formats:
| Tag Style | Example | Purpose |
| --------- | ----------------- | --------------- |
| Curly | `{1}` | Inline tag |
| Mixed | `[2}` or `{3]` | Start/end tags |
| Named | `{MQ}`, `{tspan}` | Formatting tags |
These tags are highlighted in dark red in the grid (matching memoQ’s color).
## Translate in Supervertaler
1. Navigate through segments
2. Use AI translation (`Ctrl+T`) or translate manually
3. Confirm each segment (`Ctrl+Enter`)
4. Save your project regularly (`Ctrl+S`)
### Tips for memoQ Projects
* **Preserve tags**: Keep all `{1}`, `[2}` tags in your translation
* **Use SuperLookup**: Press `Ctrl+K` for TM and termbase searches
* **Batch translate**: Select multiple segments and press `Ctrl+Shift+T`
## Export from Supervertaler
1. Go to **Project → Export → memoQ → Bilingual Table - Translated (DOCX)…**
2. Choose a filename
3. The bilingual table is recreated with your translations
## Import Back to memoQ
1. In memoQ, go to **Documents** view
2. Right-click your original document
3. Select **Import/Update Translation…**
4. Choose **From bilingual DOC/RTF/DOCX file**
5. Select the file exported from Supervertaler
6. Click **Import**
### Verify the Import
* Check that translations appear in memoQ
* Confirm status shows as “Translated” or “Edited”
* Run memoQ’s QA to check for issues
## Complete Workflow
```plaintext
memoQ: Export Bilingual DOCX
↓
Supervertaler: Import memoQ Bilingual
↓
Supervertaler: Translate (AI + manual)
↓
Supervertaler: Export memoQ Bilingual
↓
memoQ: Import/Update Translation
↓
memoQ: QA + Delivery
```
## Troubleshooting
### Tags appear as plain text
Make sure you exported as **Bilingual DOCX** (not “Export without tags”).
### Formatting lost on re-import
This can happen if:
* Tags were deleted or modified during translation
* The bilingual table structure was changed
**Solution**: Always keep tags exactly as they appear.
### Status not updating in memoQ
memoQ’s import may not change segment status. You can:
* Use memoQ’s filtering to find imported segments
* Manually confirm segments in memoQ if needed
***
## See Also
* [CAT Tool Overview](/workbench/cat-tools/overview/)
* [Voice (commands and dictation in memoQ)](/workbench/voice/overview/)
# CAT Tool Integration Overview
Supervertaler is designed to work alongside professional CAT (Computer-Assisted Translation) tools, not replace them. Use it as a **companion tool** for AI-powered translation within your existing workflow.
## Supported CAT Tools
| CAT Tool | Import Format | Export Format |
| ---------------------- | --------------------- | ---------------------- |
| **memoQ** | Bilingual DOCX, XLIFF | Bilingual DOCX |
| **Trados Studio** | SDLPPX packages | SDLRPX return packages |
| **Phrase (Memsource)** | Bilingual DOCX | Bilingual DOCX |
| **CafeTran Espresso** | Bilingual table DOCX | Bilingual table DOCX |
## Why Use Supervertaler with CAT Tools?
### AI Translation Power
CAT tools have limited AI integration. Supervertaler lets you:
* Use multiple LLM providers (GPT-4, Claude, Gemini)
* Create custom translation prompts
* Batch translate with context awareness
### Workflow Flexibility
* Translate offline with Ollama
* Work on files while others are locked in the CAT tool
* Quick review and post-editing without heavy software
## Typical Workflow
```plaintext
┌─────────────────────────────────────────────────────────────┐
│ YOUR CAT TOOL │
│ (memoQ, Trados, Phrase, CafeTran) │
│ │
│ 1. Receive project from client │
│ 2. Set up TM, termbases in CAT tool │
│ 3. Export bilingual file or package │
└─────────────────────────────────────────────────────────────┘
↓
┌─────────────────────────────────────────────────────────────┐
│ SUPERVERTALER │
│ │
│ 4. Import bilingual file │
│ 5. AI translate + post-edit │
│ 6. Use SuperLookup for research │
│ 7. Export bilingual file │
└─────────────────────────────────────────────────────────────┘
↓
┌─────────────────────────────────────────────────────────────┐
│ YOUR CAT TOOL │
│ │
│ 8. Import translations back │
│ 9. Run QA checks │
│ 10. Deliver to client │
└─────────────────────────────────────────────────────────────┘
```
## Key Concepts
### Preserving Formatting
Supervertaler preserves CAT tool formatting tags:
* memoQ: `{1}`, `[2}`, `{MQ}` inline tags
* Trados: `<1>`, `` numbered tags
* Tags are highlighted in the grid for visibility
### Segment Status
Segment statuses map between tools:
* **Draft** → Trados *Draft* / memoQ *Edited*
* **Confirmed** → Trados *Translated* ✓ / memoQ *Confirmed*
* **Approved** → Trados *Sign-off Approved* / memoQ *Reviewer 2 confirmed*
See [Segment Statuses](/workbench/editor/segment-statuses/) for the full reference.
### Round-Trip Compatibility
Files exported from Supervertaler can be imported back into the CAT tool with:
* All translations preserved
* Status information maintained
* Formatting intact
## Choosing the Right Workflow
| Scenario | Recommended Workflow |
| ---------------------------- | ----------------------------------------------------- |
| **Full project in memoQ** | [memoQ Bilingual DOCX](/workbench/cat-tools/memoq/) |
| **Trados Studio package** | [SDLPPX/SDLRPX](/workbench/cat-tools/trados/) |
| **Phrase/Memsource project** | [Phrase Bilingual DOCX](/workbench/cat-tools/phrase/) |
| **CafeTran external view** | [CafeTran DOCX](/workbench/cat-tools/cafetran/) |
| **Standalone DOCX** | Direct import, no CAT tool needed |
***
## Tool-Specific Guides
| | |
| ----------------- | ---------------------------------------- |
| **memoQ** | [memoQ workflow guide →](memoq.md) |
| **Trados Studio** | [Trados workflow guide →](trados.md) |
| **Phrase** | [Phrase workflow guide →](phrase.md) |
| **CafeTran** | [CafeTran workflow guide →](cafetran.md) |
# Phrase (Memsource) Workflow
Supervertaler supports Phrase (Memsource) bilingual DOCX round-trips.
## Export from Phrase
1. In Phrase Editor, go to **Document → Export → Bilingual DOCX**
2. Save the file
Note
Supervertaler works best with two-column bilingual files (Source/Target).
## Import to Supervertaler
1. In Supervertaler: **Project → Import → Phrase (Memsource) → Bilingual (DOCX)…** and select the bilingual DOCX
2. Translate (AI or manual) and review in the grid
3. Confirm segments when ready (`Ctrl+Enter`)
## Export back to Phrase
1. In Supervertaler: **Project → Export → Phrase (Memsource) → Bilingual - Translated (DOCX)…**
2. Save the file
## Reimport to Phrase
Import the bilingual DOCX back into Phrase to update the document.
## Notes
* Keep any tags/placeholders exactly as-is.
* Don’t change the table structure in Word.
Caution
Don’t merge or split segments if you plan to reimport.
# Trados Studio Workflow
Note
**Using Supervertaler for Trados (plugin)?** For documentation on the Trados Studio plugin (TermLens, AI Assistant, Batch Translate), see [Supervertaler for Trados](https://docs.supervertaler.com/trados/). This page covers the SDLPPX round-trip workflow using Supervertaler as a **standalone application**.
This guide covers working with Trados Studio packages in Supervertaler.
Tip
**Just want to consult a Trados TM?** If you don’t need to round-trip a project – you only want to query a Trados `.sdltm` file from Supervertaler while it stays in use in Trados – you don’t need an SDLPPX package at all. See [Attaching a Trados TM (.sdltm)](/workbench/translation-memory/trados-sdltm/).
## Recommended: SDLPPX Packages
The best way to work with Trados Studio is using **project packages** (SDLPPX files).
### Export from Trados
1. In Trados Studio, open your project
2. Go to **Project** → **Package** → **Create Project Package**
3. Configure package options (include all files)
4. Save as `.sdlppx` file
### Import to Supervertaler
1. Go to **Project → Import → Trados Studio → Package (SDLPPX)…**
2. Select your `.sdlppx` file
3. Supervertaler extracts and loads all segments
Tip
**Tip**: Package paths are saved in your `.svproj` file, so you can re-export to the same package later.
## Translate in Supervertaler
1. Navigate through segments
2. Use AI translation (`Ctrl+T`) or translate manually
3. Confirm each segment (`Ctrl+Enter`)
4. Tags appear as `<1>`, `` - keep them in your translation
### Trados Tag Format
Trados uses numbered XML-style tags:
| Tag | Purpose |
| ------ | -------------------- |
| `<1>` | Opening tag |
| `` | Closing tag |
| `<2/>` | Standalone/empty tag |
These are highlighted in the grid for visibility.
## Export as Return Package
1. Go to **Project → Export → Trados Studio → Return Package (SDLRPX)…**
2. The return package is created with your translations
3. Segment status is updated to “Translated”
Note
The SDLRPX is created from your original SDLPPX with translations inserted.
## Import Back to Trados
1. In Trados Studio, go to **Project** → **Open Package**
2. Select the `.sdlrpx` file from Supervertaler
3. Trados imports the return package
4. Your translations appear in the target segments
***
## Alternative: Bilingual Review DOCX
⚠️ **Use SDLPPX instead if possible.** The Bilingual Review format has limitations.
### The Problem
Trados Bilingual Review DOCX is designed for **review only**, not translation:
* Empty target segments are not exported
* You cannot translate from scratch using this format
### Workaround (if you must use it)
1. **In Trados**: Copy all source to target first
* Edit → Task → Copy source to target (batch task)
2. **Export**: Project → Export → Trados Studio → Bilingual Review - Translated (DOCX)
3. **In Word**: Delete all target text (cells remain, but empty)
4. **Import to Supervertaler**: Project → Import → Trados Studio → Bilingual Review (DOCX)
5. **Translate** and export
6. **Re-import to Trados**: Merge into project
Caution
This workaround is tedious. Use SDLPPX packages whenever your client provides them.
***
## Complete SDLPPX Workflow
```plaintext
Trados: Create Project Package (.sdlppx)
↓
Supervertaler: Import Trados Package
↓
Supervertaler: Translate (AI + manual)
↓
Supervertaler: Export Return Package (.sdlrpx)
↓
Trados: Open Return Package
↓
Trados: QA + Delivery
```
## Troubleshooting
### ”Cannot find SDLXLIFF files”
The SDLPPX might be corrupted or use an unsupported format.
* Try re-exporting from Trados Studio
* Ensure all files are included in the package
### Status shows “Draft” instead of “Translated”
Fixed in **v1.10.259**. Earlier versions exported every segment as **Draft** regardless of its status in the grid, so even a fully-confirmed project arrived unconfirmed in Trados. Now a confirmed project exports with each segment marked **Translated** (Approved/Proofread map to *ApprovedTranslation*). Update to v1.10.259 or later and re-export the return package.
### Tags not matching
Ensure you keep all `<1>`, `` tags in exactly the same positions.
### Source files not found on re-export
If you moved your project, use **Project → Export → 🔗 Relocate Source Folder** to point to the new location of the SDLPPX.
***
## See Also
* [CAT Tool Overview](/workbench/cat-tools/overview/)
* [Import/Export Formats](/workbench/import-export/formats/)
# Clipboard Manager
The Clipboard Manager in Supervertaler Workbench captures everything you copy and keeps a persistent history that survives application restarts. Click any item to paste it; trigger a snippet or text conversion to paste the transformed result back to whichever app you came from.
| How | Shortcut |
| ------------------------------------------- | ------------------------------------------------------- |
| Open Clipboard Manager from any application | **Ctrl+Alt+C** (⌘⌥C on macOS) |
| Open Clipboard Manager tab manually | Click **📋 Clipboard Manager** in the Workbench tab bar |
When you summon the Clipboard Manager via **Ctrl+Alt+C** from another app (e.g. Trados), Workbench automatically sends Ctrl+C in the source app *before* opening the tab. So you don’t need a separate “copy first” keystroke – the current selection lands at the top of the clipboard history the moment the tab opens.
Note
The tab was renamed from ”📋 Clipboard” to ”📋 Clipboard Manager” in v1.10.47 to match what the widget actually does – it has been more than a clipboard history for several versions (Snippets, Text Conversions, QuickLauncher Prompts, plus the clipboard history columns).
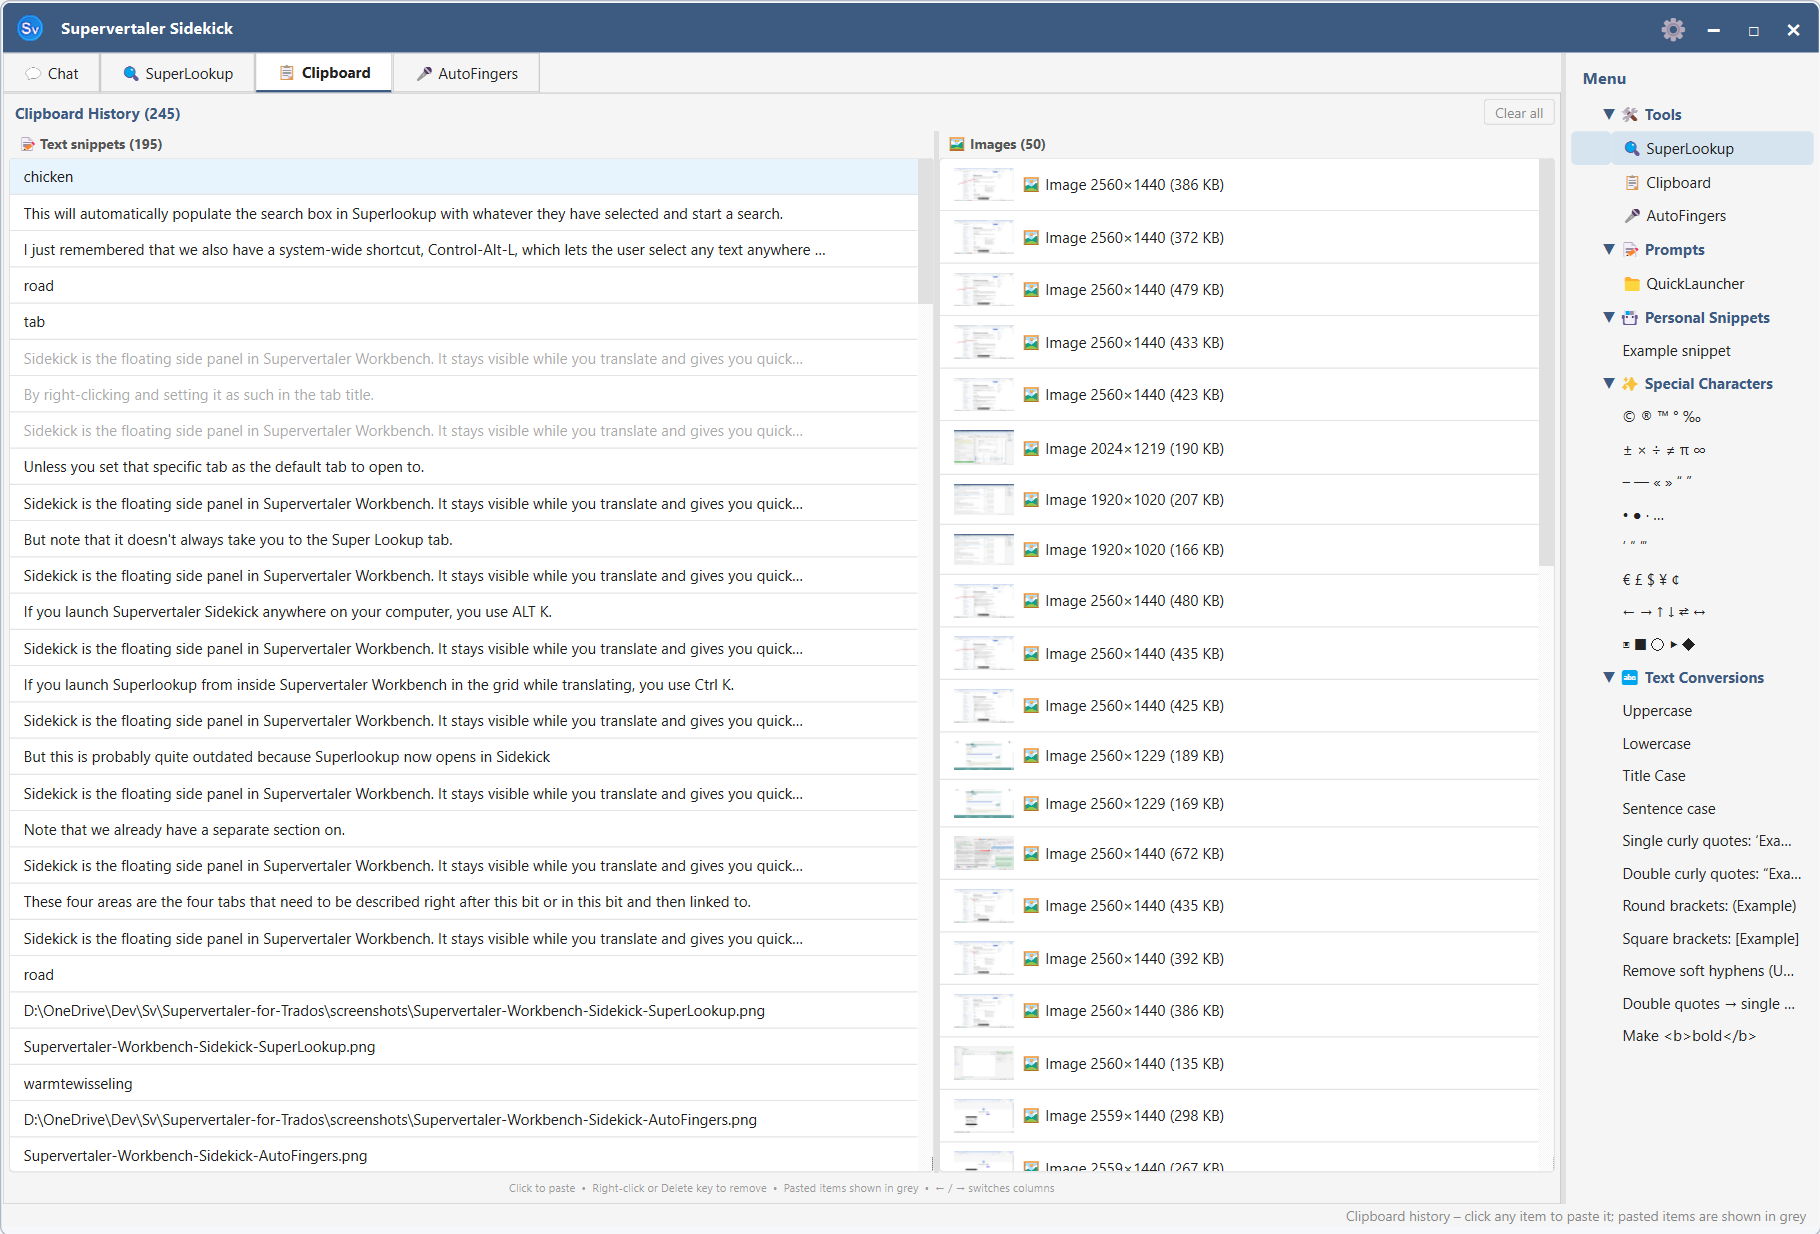
***
## Three columns
The tab is split into three side-by-side panels:
* **📝 Text (left)** – plain text, rich text, and any other text copied from any application
* **🖼 Images (middle)** – raster images (screenshots, copied graphics, etc.)
* **📑 Menu (right)** – a tree of actions to apply to whatever’s currently on the clipboard: Personal Snippets, Special Characters, Text Conversions, and your QuickLauncher Prompts
Each column has its own count in its header (e.g. *Text (37)*, *Images (8)*). A draggable splitter lets you resize the three panels.
The column header whose widget currently holds keyboard focus is **highlighted in blue with an underline**, so it’s always obvious which column the arrow keys are steering.
***
## How clips are captured
The Clipboard Manager monitors the system clipboard in the background. Every time you copy something in any application – a word in Trados, a URL, a code snippet, a screenshot – it is added to the top of the relevant list automatically.
Duplicate copies of identical content are deduplicated (the existing item moves to the top instead of a new entry appearing).
**Capacity limits:**
| Kind | Maximum items |
| ------ | ------------- |
| Text | 200 |
| Images | 50 |
When a list is full, the oldest item is removed to make room.
***
## Pasting a clip
Click any item in the Text or Images list to paste it. What happens:
1. The item is placed on the system clipboard.
2. Workbench is hidden to the system tray.
3. `Ctrl+V` is sent to whichever window was active before the Clipboard tab opened.
After pasting, the item is marked as used and appears greyed out. This makes it easy to track which clips you have already inserted in a session.
Note
**Latest clip is highlighted on open.** Every time you switch to the Clipboard tab, the most recent text clip (top of the list) is selected automatically – press **Enter** to paste it without touching the mouse. If you’d rather paste an older clip, arrow up/down to it first.
## The Menu column
The third column gives you actions to apply to whatever’s on the clipboard. Expand a category by clicking its arrow or pressing **Right** with the category focused.
### 🔄 Refresh button
The Menu column header has a small **🔄 Refresh** button on the right. Click it after editing any snippet `.md` file under `/snippet_library/` (rename a snippet, change a snippet body, add a new snippet, delete one) or any QuickLauncher prompt `.md` file in the shared prompt library. Refresh rebuilds the entire Menu tree from disk in one click – before v1.10.47 there was no way to pick up external file edits short of restarting Workbench.
Refresh reloads three sources: the unified prompt library (via `UnifiedPromptLibrary.load_all_prompts()`), the snippet library (re-scans `/snippet_library/` with a fresh `SnippetLibrary` instance), and the Text Conversions table (in-code, but rebuilt for symmetry).
### 📌 Personal Snippets
Your own text snippets (e.g. phone numbers, email signatures, boilerplate paragraphs). Snippets are loaded from `.md` files inside your user-data folder – see [Personal Snippets](/trados/text-transforms/) for the file format.
Activating a snippet (click or Enter) copies its body to the clipboard and pastes it into the source app via the same hide-and-paste flow used for clipboard clips.
### ✨ Special Characters
Quick-insert symbols, arrows, primes, dashes, quotes, currency signs, legal symbols, mathematical operators, and bullet characters. Activate one to paste the character into the source app.
### 🔁 Text Conversions
Transform whatever text is on the clipboard. The conversions are computed against the *current* clipboard contents – so the typical flow is: select text in another app → **Ctrl+Alt+C** to open the Clipboard Manager (current selection auto-copies) → navigate to a conversion → Enter to paste the converted text back over your selection.
#### The shipped defaults
Eleven conversions ship out of the box: **Uppercase**, **Lowercase**, **Title Case**, **Sentence case**, **Single curly quotes**, **Double curly quotes**, **Round brackets**, **Square brackets**, **Remove soft hyphens (U+00AD)**, **Double quotes → single quotes**, **Make `bold`**.
#### Adding your own
Since v1.10.48, every text conversion is a `.md` file under `/text_conversion_library/`. The folder structure on disk is organisational – move files between folders to re-organise; the parent folder name becomes the conversion’s category.
Drop a new `.md` file in the right folder, click **🔄 Refresh** on the Menu column, and the new conversion appears. Each file declares one conversion via YAML frontmatter at the top, with an optional human-readable notes section below:
```yaml
---
type: wrap
label: Mark as translator's comment ⟦TC: …⟧
prefix: " ⟦TC: "
suffix: "⟧"
---
Optional notes here. Workbench ignores everything below the closing ---.
```
The four supported `type` values cover most needs without arbitrary-code execution:
| `type` | What it does | Required fields | Optional fields |
| --------------- | ----------------------------------------------- | ---------------------------------------------------------------------------------------- | ----------------------------------------------------------- |
| `case` | Change case of the whole text | `mode` (one of `upper`, `lower`, `title`, `sentence`, `swap`, `camel`, `snake`, `kebab`) | – |
| `wrap` | Glue a prefix and suffix around the text | `prefix`, `suffix` | – |
| `regex_replace` | Find/replace, literal or regex | `find`, `replace` | `regex` (default `true`), `case_sensitive` (default `true`) |
| `strip_chars` | Remove every occurrence of any listed character | `chars` | – |
Common optional metadata:
* `label` – the display label shown in the Menu. Defaults to the filename stem if omitted (useful when the label contains characters that can’t be in filenames, like `:` or `"`).
* `category` – overrides the folder-derived category. Set to an empty string to surface the conversion at the top level.
* `enabled` – defaults to `true`. Set to `false` to hide without deleting (useful for project-specific conversions you might want back later).
#### Concrete examples
A wrap conversion for HTML emphasis:
```yaml
---
type: wrap
label: HTML
prefix:
suffix:
---
```
A strip-chars conversion that removes several invisible characters in one go (uses YAML’s `\u` escape inside double quotes):
```yaml
---
type: strip_chars
label: Strip invisible spaces (NBSP + figure space + narrow NBSP)
chars: " "
---
```
A regex find/replace for em-dash-to-en-dash:
```yaml
---
type: regex_replace
label: "Em dash (—) → en dash (–)"
find: "—"
replace: "–"
regex: false
---
```
A regex find/replace using capture groups for UK → US “-our” → “-or” endings:
```yaml
---
type: regex_replace
label: "UK → US: drop the 'u' from -our endings"
find: "([Cc]olo|[Ff]avo|[Hh]ono|[Ll]abo|[Nn]eighbo|[Bb]ehavio|[Ff]lavo|[Oo]do|[Rr]umo)u(r)"
replace: "\\1\\2"
regex: true
---
```
(Note the doubled backslashes in `replace` – `\\1` in YAML is needed to produce `\1` in the actual regex replacement string.)
#### Things that DON’T work (and why)
The four `type` values are deliberately limited – no arbitrary Python execution from user-data files, no shell commands, no network calls. If you have a transformation that genuinely needs Python (multi-step pipelines that produce intermediate state, calls to an external library, etc.), open a GitHub issue describing the use case and we’ll consider adding a `python_file` type with appropriate safeguards.
Broken conversions (invalid `type`, bad regex, missing required field) are silently skipped on load and logged to the Workbench log – the clipboard flow never breaks on a typo. Fix the file, click 🔄 Refresh, and the conversion comes back.
### 💬 QuickLauncher Prompts
Your custom AI prompts from the Prompt Manager, grouped by folder. Activating a prompt copies its body to the clipboard.
## Deleting clips
**Single item** – right-click any entry in the Text or Images list and choose **🗑 Delete**, or select it and press the **Delete** key.
**All clips** – click **Clear all** in the top-right corner of the Clipboard tab, or right-click any entry and choose **Clear all**. This removes the entire history from both the Text and Images lists and cannot be undone. (The Menu column is unaffected – it’s not history.)
***
## Keyboard navigation
| Key | Action |
| ------------------------------------- | -------------------------------------------------------------------- |
| **Up / Down** | Move through items in the focused column |
| **Right** | Move focus rightwards (Text → Images → Menu) |
| **Left** | Move focus leftwards (Menu → Images → Text) |
| **Right** on a Menu category | Expand the category |
| **Left** on an expanded Menu category | Collapse it |
| **Enter** | Paste the selected item / activate the selected action |
| **Delete** | Remove the selected clip from history (Text / Images lists only) |
| **Esc** | Hide Workbench to the system tray (when focus isn’t in a text input) |
***
## Empty state
When a column contains no clips, a centred placeholder message is shown:
* Text column: *No text yet – copy any text to start*
* Image column: *No images yet – copy any image to start*
***
## Persistence
The full clip history is stored in your user data folder in a shared SQLite database. Items are available the next time you open Supervertaler Workbench.
***
## Related pages
* [Voice Commands & Dictation](/workbench/voice/overview/)
* [Chat (AI conversation panel)](/workbench/ai-translation/chat/)
* [Keyboard Shortcuts](/workbench/settings/shortcuts/)
# Comments
The **💬 Comments** tab in Workbench’s right panel is where per-segment annotations live. There are two sub-tabs:
* **📝 Segment** — comments you author while translating: context notes, queries for the client, reminders to yourself, anchored highlights on specific words.
* **✅ Proofreading** — AI-generated proofreading feedback, listed across the whole project and colour-coded by the LLM that produced it (read-only text; delete individually or all at once).
Both are stored on the segment itself and persist in the `.svproj` file. Segment comments are **exported to the final document as Word comments** (yellow comment bubbles in the right margin of the exported `.docx`), with the range highlight covering exactly the words you anchored the comment to. Proofreading comments are review-only and don’t export.
## Segment comments
### Two kinds: segment-level and range-anchored
There are two kinds of segment comment:
* **Segment-level (no anchor)** — a general note about the whole segment. In the exported `.docx` the Word comment anchors to the entire paragraph.
* **Range-anchored** — attached to a specific word or phrase you selected. In the exported `.docx` the Word comment highlights exactly those characters, the same way Trados and memoQ comments do.
Both kinds coexist and you can have many of each on the same segment.
### Adding a range-anchored comment (Ctrl+M)
1. Click into the source or target cell of a segment.
2. Select the text the comment is about (e.g. `schroef`, `aangebracht`, or a multi-word phrase).
3. Press **Ctrl+M**.
4. A dialog opens showing which segment + which field (source or target) you’re anchoring to, plus a snippet of your selection for confirmation. Type the comment, click **OK**.
The anchored text immediately gets a soft amber background in the editor cell so you can see at a glance which words have comments attached. The new comment also appears in the all-comments list (see below).
Tip
**Ctrl+M** matches memoQ’s “Add comment” shortcut. (Trados Studio uses **Ctrl+Shift+N** for the same action.) You can also add a comment without the keyboard: **right-click in the source or target cell → 💬 Add comment**.
### Adding a segment-level (unanchored) comment
Place the cursor in the source or target cell **without selecting any text**, then press **Ctrl+M** (or right-click → **💬 Add segment comment**). The comment is attached to the whole segment rather than to a specific range. Useful for a general note, or for adding another comment to a segment without disturbing an existing one.
### The all-comments list
The Segment sub-tab shows **one entry per Comment** — not per segment. A segment with three comments shows three entries, in document order. Each entry has:
* A clickable **Segment #N** header. For anchored comments, the header reads `Segment #N ⚓ source` or `Segment #N ⚓ target` to tell you what kind of anchor it has.
* For anchored comments: a quoted snippet of the anchored text, so you can see what the comment is *about* without jumping to the segment.
* The full comment body.
* A small footer line with the author and timestamp, plus a `(right-click for edit/delete)` hint.
Clicking the **Segment #N** header jumps the grid to that segment (cross-page-aware — switches pagination first if needed). Conversely, **selecting a segment in the grid scrolls the list to — and highlights — that segment’s comment(s)**, so the active segment’s notes are always in view without hunting for them.
**Right-click** on a Segment header (or anywhere on the entry) opens a context menu with **✏️ Edit comment…** and **🗑️ Delete comment**. Edit opens a small dialog pre-populated with the existing text; saving with an empty text field deletes the comment. Delete prompts for confirmation.
The list rebuilds itself in real time as you add, edit, or remove comments.
Note
Earlier versions had a separate “Comment on current segment” box at the bottom of the tab. It only handled a single, unanchored note and overwrote the whole comment list when edited, so it was removed in v1.10.142. All comments — anchored and segment-level — now live in the one list, and you add them with **Ctrl+M** or **right-click → 💬 Add comment** in the editor.
### Editor visual cue: amber background
Anchored comment ranges show a soft amber background in the source or target cell editors. This coexists with the existing syntax highlighting (tag pink, spellcheck underlines, etc.) — the amber is applied as a background colour on the anchored characters only.
If you edit the target text after creating an anchored comment, the amber highlight stays at its original character offsets. If your edit shifts the anchor’s intended target, the highlight may end up on slightly-different wording. The simplest workaround is to edit the text first, then create the anchored comment.
### Reaching a comment from the grid
You don’t have to open the Comments tab first to find a comment — you can get to it straight from the segment in the grid:
* **Hover** the amber-highlighted range in a source or target cell to see the comment as a tooltip.
* **Right-click** the highlighted range and choose **💬 Open comment**. Workbench switches the right panel to the **💬 Comments → 📝 Segment** sub-tab and briefly flashes the matching entry — handy when the Match Panel (or another tab) was showing.
Segment-level comments have no highlighted range to aim at, so they’re reachable two other ways:
* **Right-click anywhere** in a commented segment’s source or target cell → **💬 Open comment(s)** (opens the segment’s first comment).
* **Hover or right-click the Status cell** of a commented segment: the tooltip lists the segment’s comments, and right-clicking offers **💬 Open comment(s)**.
The Status cell is also **colour-coded** so you can tell comment types apart at a glance: a segment with a **segment comment** shows an **amber** background, one with a **proofreading comment** shows **purple**, and a segment that has **both** shows a **split amber|purple** background.
### Comments in exported documents
When you export your project back to a Word document (**Project → Export → Export Translated Document…**), every segment comment becomes a Word comment in the output `.docx`. Behaviour per comment kind:
* **Range-anchored to target text**: the Word comment’s range highlight covers exactly the anchored characters. If the anchor boundaries cut mid-run (e.g. inside a bold word), Workbench splits the run cleanly and preserves the formatting on both halves. Visually identical to a Trados or memoQ comment.
* **Range-anchored to source text**: the source text isn’t in the exported (target-only) DOCX, so Workbench falls back to anchoring the comment to the whole paragraph, with the source snippet prefixed in the comment body. Example: `[Re: "schroef" (source)] translated as 'screw' based on context`. The reviewer reading the file sees the comment with the relevant source quote inline.
* **Segment-level (unanchored)**: anchors to the whole paragraph, like a paragraph-wide annotation.
The comment author defaults to the **Translator Name** field in **Settings → User Identity** — set that if you want comments attributed to your real name rather than your system username. Initials are derived automatically (multi-word names take the first letter of each word, e.g. `Michael Beijer` → `MB`; single-word names take the first two characters uppercased, e.g. `mbeijer` → `MB`).
After export, Workbench logs how many comments were attached:
```plaintext
✓ Attached 4 segment comment(s) as Word comments (2 range-anchored)
```
If any comments couldn’t be matched to a paragraph (rare — usually because the target text was heavily reformatted by the Okapi merge step), the log says so and the export still completes — the comment-attach step is purely additive.
### Comments and bilingual table exports
For bilingual-table export formats (Supervertaler Bilingual Table, memoQ, CafeTran, etc.), segment comments are written to a dedicated **Notes** column rather than as Word comments. Anchored and segment-level comments are concatenated into a single string in that column; the anchor metadata is **not** carried over (these formats don’t have a native concept of in-cell anchoring). Re-importing the bilingual table later preserves the comments as a single segment-level comment per segment.
If you need range-anchored comments to survive a round-trip, export as DOCX rather than as a bilingual table.
## Proofreading comments
The **✅ Proofreading** sub-tab lists AI-generated review feedback across the **whole project** — mirroring the Segment sub-tab’s all-comments list, so the two tabs now behave the same way. Generate the feedback with **QA ▸ Proofreading ▸ Proofread Translation…** (proofreading moved into the new [QA menu](#the-qa-menu) in v1.10.327).
Each entry is one **(segment, model)** result:
* A clickable **Segment #N · model** header that jumps the grid to that segment (cross-page-aware).
* The proofreader’s findings, shown verbatim. The text is **read-only** — you read it and decide whether to act on it.
* A **🗑️ delete** button that removes just that one comment.
**Each LLM engine gets its own colour**, so if you ran the project through more than one model (e.g. GPT *and* Claude), you can tell at a glance which model flagged what. Selecting a segment in the grid scrolls the list to — and highlights — that segment’s proofreading comment(s), exactly like the Segment sub-tab.
To clear everything at once, use **QA ▸ Proofreading ▸ Delete All Proofreading Comments**. Deletion is safe: re-running **Proofread Translation** regenerates the comments.
Proofreading comments are **not** exported to the final document. They’re a translator-side review tool.
### The QA menu
AI proofreading lives under the top-level **QA** menu (**QA ▸ Proofreading**), which also hosts **Delete All Proofreading Comments**. See **[AI Proofreading](/workbench/qa/proofreading/)** for how to run a pass. QA is Workbench’s home for quality-assurance features — see also [Spellcheck](/workbench/qa/spellcheck/), [Tag Validation](/workbench/qa/tag-validation/) and [Non-Translatables](/workbench/qa/non-translatables/).
## Quick reference
| Action | Shortcut / How |
| ----------------------------------------------- | ------------------------------------------------------------------------------------------------------------------- |
| Add a range-anchored comment to selected text | **Ctrl+M** with text selected, or right-click → **💬 Add comment** |
| Add a segment-level comment | **Ctrl+M** with no selection (cursor only), or right-click → **💬 Add segment comment** |
| Jump to a commented segment | Click its **Segment #N** header in the all-comments list |
| Open a comment from the grid | Hover the highlight for a tooltip; right-click the highlight, the cell, or the Status cell → **💬 Open comment(s)** |
| Edit a specific comment | Right-click its header → **✏️ Edit comment…** |
| Delete a specific comment | Right-click its header → **🗑️ Delete comment** |
| Generate proofreading comments | **QA ▸ Proofreading ▸ Proofread Translation…** |
| Delete one proofreading comment | **🗑️** button on its entry in the **✅ Proofreading** list |
| Delete all proofreading comments | **QA ▸ Proofreading ▸ Delete All Proofreading Comments** |
| Configure the author name for exported comments | **Settings → User Identity → Translator Name** |
## Related
* [Editing & Confirming](/workbench/editor/editing-confirming/)
* [Keyboard Shortcuts (Workbench)](/workbench/editor/keyboard-shortcuts/)
* [Segment Statuses](/workbench/editor/segment-statuses/)
# Editing & Confirming
Translate by editing the **Target** column in the grid.
## Editing
* Double-click a Target cell and type your translation.
* Use standard editing shortcuts (undo/redo, copy/paste, find/replace).
### Multi-line target text
* Use **Shift+Enter** to insert a line break inside the cell.
## Confirming segments
Confirming matters for many workflows, especially when exporting back to a CAT tool.
Typical workflow:
1. Translate (manual or AI)
2. Review the target text
3. Confirm the segment
### Confirm shortcuts
* **Ctrl+Enter**: confirm the current segment (or all selected segments) and move to the next unconfirmed segment.
* **Ctrl+Shift+Enter**: confirm all selected segments.
You can also confirm by setting the segment **Status** dropdown to a confirmed status.
## Splitting and merging segments
You can re-segment a document the way Trados Studio and memoQ allow — right from the grid:
* **Split a segment:** click in the **Source** cell at the exact spot you want to divide, then right-click → **✂ Split segment here**. The existing translation stays with the first part; the second part starts empty, ready to translate.
* **Merge two segments:** right-click in the **Source** cell → **🔗 Merge with next segment**. The two sources (and targets) are joined with sensible spacing, and the merged segment takes the less-complete of the two statuses.
Both actions are fully **undoable** with **Ctrl+Z** (and redoable with **Ctrl+Y**).
**When it’s available:**
* Merge is only offered when the next segment is in the **same paragraph, table cell, file, and text unit** — so you can’t accidentally fuse separate paragraphs. If it isn’t allowed, the menu item is greyed out with the reason.
* Split needs the cursor to land *inside* the source text, and is disabled while tags are shown in **compact** form or with **outer wrapping tags hidden** (switch to full tag view first, so the split lands in the right place).
Note
Split and merge are available for documents Supervertaler segments itself — **DOCX, IDML, HTML, PPTX, XLSX (via Okapi), and TXT/Markdown**. They are intentionally **hidden for bilingual CAT files** (Trados sdlxliff, memoQ/Trados/Phrase/Déjà Vu bilingual tables, PO), because those files have fixed segment slots owned by the other tool — adding or removing segments would break the round-trip back to that tool. (Trados and memoQ work the same way: you re-segment in their editor, which owns the segmentation.)
## Related pages
* [Segment Statuses](/workbench/editor/segment-statuses/) – full reference for workflow statuses, match origins, and how they map to Trados and memoQ
* [The Translation Grid](/workbench/editor/translation-grid/)
* [Find & Replace](/workbench/editor/find-replace/)
* [Tag Validation](/workbench/qa/tag-validation/)
# Filtering Segments
Filtering helps you focus on the segments you need right now.
## Common uses
* Show only segments that contain a specific term
* Focus on segments that need review
* Quickly find repeated strings and fix consistency
## Tip: filter on selection
A fast workflow is to select a word/phrase in the grid and use **Filter on selection**.
### Shortcut
* **Ctrl+Shift+F** toggles filtering:
* If a filter is not active, it filters on the current selection.
* If a filter is active, it clears the filter.
Note
Filtering is designed to be fast even in large projects.
# Find & Replace
Supervertaler’s Find & Replace feature helps you quickly find text and make consistent changes across your translation.
## Opening Find & Replace
* Press `Ctrl+F` or `Ctrl+H`
* Or go to **Edit → Find & Replace**
## Dialog layout
The action buttons are grouped to make destructive actions visually distinct from non-destructive ones. Reading left to right:
* **Find next | Find all | Highlight all | Clear highlights** – non-destructive: searching and highlighting only, no edits made.
* A vertical separator marks the boundary.
* **Replace this | Replace all** – destructive: these modify your translation. They appear with an **amber background** as a visual cue that clicking them changes the document.
The Close button sits at the far right.
### Keyboard shortcuts inside the dialog
| Key | Where | Action |
| ---------- | -------------------- | ------------------------------------------------------------------------------- |
| **Enter** | in the Find field | Triggers **Find next** |
| **Enter** | in the Replace field | Triggers **Replace all** (the existing confirmation prompt still appears first) |
| **Escape** | anywhere | Closes the dialog |
The Enter-in-Replace shortcut is intentional: the Replace all confirmation dialog catches accidental presses, so pressing Enter never silently overwrites your translation.
## Basic Usage
### Finding Text
1. Type your search term in the **Find** field
2. Click **Find all** to see all matches, or press **Enter** for Find next
3. Matches are highlighted in yellow in the grid
4. The results counter shows how many matches were found
### Replacing Text
1. Type your search term in the **Find** field
2. Type your replacement in the **Replace** field
3. Click the amber **Replace all** button, or press **Enter** while the Replace field has focus
4. Confirm the replacement count when the dialog asks
5. A confirmation shows how many replacements were made
## Search Options
### Match
Three mutually exclusive modes (radio buttons):
| Mode | Description |
| ------------------ | ---------------------------------------------------------- |
| **Anything** | Matches the search term anywhere in the text (the default) |
| **Whole words** | Matches the search term only as a complete word |
| **Entire segment** | Matches only when the whole segment equals the search term |
### Case sensitive
* ✅ **On**: “Hello” won’t match “hello”
* ❌ **Off** (default): “Hello” matches “hello”, “HELLO”, etc.
### Auto-adjust case
When replacing, adjusts the replacement to match the case pattern of each match — ALL CAPS → uppercased, all lower → lowercased, Title Case → title-cased. It has no effect when **Case sensitive** is on, and is ignored in **Regex** mode.
### Search in
| Scope | Description |
| -------------------- | ------------------------------------------- |
| **Source** | Search the source column |
| **Target** (default) | Search the translations |
| Both | Tick both boxes to search source and target |
### Reset edited to Draft
When a replacement changes a target segment that was **Confirmed**, **Proofread** or **Approved**, that segment is reset to **Draft**, so the segments Find & Replace touched are easy to spot and re-check afterwards.
* ✅ **On** (default): edited finished segments drop back to Draft.
* ❌ **Off**: segments keep their existing status.
This applies to **Replace this**, **Replace all** and **F\&R Sets** batch runs. Only segments whose text actually changes are affected, and replacing in the source column never changes a status. The setting is remembered between sessions, and `Ctrl+Z` restores the original text and status together.
## Regular expressions
Tick **Regex** to treat the Find field as a regular expression (Python `re` syntax).
* **Backreferences in Replace:** capture groups in the pattern can be reused in the Replace field as `\1`, `\2`, … (or `\g` for named groups). For example, Find `"([^"]+)"` and Replace `«\1»` turns `"events"` into `«events»`.
* **Case sensitive** still applies (off = the whole pattern matches case-insensitively).
* While Regex is on, the **Match** modes and **Auto-adjust case** don’t apply and are greyed out.
* **Invalid patterns are caught:** an unbalanced pattern (e.g. `(`) or a bad backreference (e.g. `\9` with no matching group) shows a clear error and changes nothing — it never crashes or partially replaces.
Tip
A few handy patterns: `\s+` (runs of whitespace), `{2,}` (two or more spaces), `\b(\w+)\s+\1\b` (doubled words like “the the”), `+$` (trailing spaces).
## History Dropdowns
Both the Find and Replace fields remember your recent searches:
* Click the dropdown arrow to see your last 20 entries
* Start typing to filter the history
* History persists between sessions
## F\&R Sets (Batch Operations)
Save and reuse multiple find/replace operations as a set.
### Creating a Set
1. Expand the **📁 F\&R Sets** panel
2. Click **➕ New Set**
3. Give your set a name (e.g., “Client Style Guide”)
4. The set appears in the dropdown
### Adding Operations to a Set
1. Enter your Find and Replace terms
2. Set your options (Match mode, Case sensitive, Regex, Search in) — these are all saved with the operation
3. Click **➕ Add Current to Set**
4. The operation is saved to the active set
### Managing Operations
In the F\&R Sets panel:
* **✓ (Enabled) column** – tick to include an operation when you click **Run All**; untick to skip it. (Hover for a reminder.)
* **Edit** – double-click an operation to load it back into the Find/Replace fields.
* **🗑 Delete Operation** – removes the selected operation from the set.
* **🗑 Delete Set** – removes the selected set entirely.
The **Match** column shows each operation’s mode, or **Regex** when the operation is a regular expression.
### Running a Batch
1. Select your set
2. Click **▶ Run All**
3. Each enabled operation runs in turn; regex operations (shown as “Regex” in the Match column) run with backreferences
4. See how many replacements were made
Caution
**An empty “Replace with” deletes matches.** An operation with a blank Replace field replaces every match with nothing — i.e. it deletes the matched text. If a set contains any such operation, Run All lists them and defaults the confirmation button to **No**, so you don’t wipe text by accident.
### Importing & exporting sets
Share sets with colleagues:
* **📤 Export** – save the selected set as a `.svfr` file
* **📥 Import** – load a shared `.svfr` file
## Use Cases
### Terminology Consistency
Create a set for client-specific terms:
* “colour” → “color” (US spelling)
* “organisation” → “organization”
* “programme” → “program”
### Style Guide Rules
Enforce style guidelines:
* Double spaces → Single space
* “e.g.” → “for example”
* Straight quotes → Curly quotes
### Post-Translation Cleanup
Clean up common MT artifacts:
* Remove unwanted spaces before punctuation
* Fix capitalization issues
* Normalize formatting
## Tips
Tip
**Pro Tip:** Use regex mode for complex patterns. For example, `\s+` matches any whitespace to clean up extra spaces.
Note
**Undo Support:** All replacements can be undone with `Ctrl+Z` (within the same session).
# Keyboard Shortcuts
Master these shortcuts to work faster in Supervertaler. The exact keys are configurable in **Settings → Keyboard Shortcuts**; the tables below list the defaults.
## Navigation
| Shortcut | Action |
| ----------------------------------- | ----------------------------------------------------------------------- |
| `↑/↓` | Previous/next segment when cursor is at the first/last line of the cell |
| `Ctrl+Up` | Previous segment (always) |
| `Ctrl+Down` | Next segment (always) |
| `Ctrl+G` | Go to segment number |
| `Page Up` / `Page Down` | Previous / next page (when paginated) |
| `Shift+Page Up` / `Shift+Page Down` | Extend selection up / down by a screenful |
| `Ctrl+Home` | First segment |
| `Ctrl+End` | Last segment |
## Editing
| Shortcut | Action |
| ------------------------------ | ---------------------------------------------------------------------------------------------------- |
| `Ctrl+Enter` | Confirm current (or selected) segment(s) and go to the next |
| `Ctrl+Shift+Enter` | Confirm selected segments |
| `Ctrl+Z` | Undo |
| `Ctrl+Y` | Redo |
| `Ctrl+C` / `Ctrl+V` / `Ctrl+X` | Copy / paste / cut |
| `Ctrl+A` | Select all (in cell) |
| `Shift+Enter` | Insert line break inside a cell |
| `Tab` | Cycle between the source and target cells |
| `Ctrl+Tab` | Insert a literal tab character |
| `Ctrl+,` | Insert next tag / wrap selection with a tag pair (when available) |
| `Ctrl+Shift+S` | Copy source text to target |
| `Ctrl+M` | Add a comment to the selected source/target text (or a segment-level comment if nothing is selected) |
| `Alt+D` | Add the word at the cursor to the custom dictionary |
## Translation
| Shortcut | Action |
| -------------- | -------------------------------------------------------- |
| `Ctrl+T` | Translate current segment with AI |
| `Ctrl+Shift+T` | Translate multiple segments |
| `Ctrl+Space` | Insert the currently selected match from the grid |
| `Alt+1…9` | Insert TermLens term #1…#9 (double-tap for #11…#99) |
| `Ctrl+Alt+Q` | QuickTrans instant-translation popup (works system-wide) |
| `Ctrl+Q` | Open QuickLauncher (AI prompt actions) |
## Find & Replace
| Shortcut | Action |
| ------------------------- | -------------------------------------- |
| `Ctrl+F` | Open Find & Replace dialog |
| `Ctrl+H` | Open Find & Replace on the Replace tab |
| `Enter` (in the Find box) | Find next match |
## Filtering
| Shortcut | Action |
| -------------- | -------------------------------- |
| `Ctrl+Shift+F` | Filter on selected text (toggle) |
## Lookup
| Shortcut | Action |
| ------------ | ---------------------------------------------------------------- |
| `Ctrl+K` | Open SuperLookup (concordance) for the selection |
| `Ctrl+Alt+L` | SuperLookup as a system-wide hotkey (works from any application) |
## View
| Shortcut | Action |
| ------------------------------- | ---------------------------------------------------------------------------------------------- |
| `Ctrl+Plus` | Increase grid font size |
| `Ctrl+Minus` | Decrease grid font size |
| `Ctrl+Shift+=` / `Ctrl+Shift+-` | Increase / decrease results-pane font size |
| `Ctrl+Shift+H` | Toggle tag view |
| `Ctrl+Alt+P` | Toggle the [Document Preview](/workbench/editor/preview/) panel (and back to the previous tab) |
## Resources & Tools
| Shortcut | Action |
| -------------- | ---------------------------------------- |
| `Ctrl+Shift+M` | TM Manager (separate window) |
| `F5` | Force-refresh matches (clear cache) |
| `Ctrl+Alt+C` | Open the Clipboard manager (system-wide) |
## File Operations
| Shortcut | Action |
| -------- | -------------------- |
| `Ctrl+S` | Save project |
| `Ctrl+O` | Open project |
| `Alt+F4` | Quit the application |
## Termbase / Glossary
| Shortcut | Action |
| ------------------------------ | ----------------------------------------------------------------- |
| `Ctrl+Alt+T` | Add the selected term pair to a termbase (opens the entry dialog) |
| `Alt+Up` (or `Ctrl+Shift+1`) | Quick-add the selected term pair to the project termbase |
| `Alt+Down` (or `Ctrl+Shift+2`) | Quick-add the selected term pair to the background termbase |
| `Ctrl+Alt+N` | Add the selection to Non-Translatables |
## Voice (if enabled)
| Shortcut | Action |
| ------------------ | ------------------------------------------------------- |
| `Ctrl+Shift+Space` | Voice dictation / push-to-talk (default — configurable) |
| `Ctrl+Alt+A` | Toggle Always-On listening |
***
## Customising shortcuts
You can view and customise every shortcut in **Settings → Keyboard Shortcuts**, and export a printable cheatsheet (HTML) or the raw definitions (JSON) from there.
Note
Some shortcuts match memoQ and Trados conventions (like `Ctrl+Enter` to confirm) to help translators who switch between tools.
## Tips
### memoQ-style navigation
The arrow keys work like memoQ:
* Press `↓` at the **last line** of a cell to move to the next segment
* Press `↑` at the **first line** of a cell to move to the previous segment
* Cursor column position is preserved when moving between segments
### Quick filtering
1. Select text in any segment
2. Press `Ctrl+Shift+F` to filter
3. Only segments containing that text are shown
4. Press `Ctrl+Shift+F` again to clear the filter
# Navigating Segments
Supervertaler is designed for fast, memoQ-style navigation in the translation grid.
## Moving between segments
* Use the arrow keys to move within a cell.
* When your cursor is at the **top** or **bottom** line of a cell, **Up/Down** can jump to the previous/next segment.
### Always move up/down
If you want to move between segments regardless of where the cursor is inside the cell:
* **Ctrl+Up** → previous segment
* **Ctrl+Down** → next segment
### Jump to a segment
* **Ctrl+G** opens **Go to Segment**.
* Type a segment number and press Enter.
### Jump to start/end
* **Ctrl+Home** → first segment
* **Ctrl+End** → last segment
### Tab between Source/Target
* **Tab** cycles between the Source and Target cell on the same row.
* **Ctrl+Tab** inserts a literal tab character inside the text.
## Pagination
By default all segments are shown on one page. You can split the project into fixed-size pages with the **Per page** selector (very large projects open paginated automatically).
* See: [Pagination](/workbench/editor/pagination/)
## Tips
* Keep one hand on the keyboard for speed: navigate, edit, confirm, repeat.
* If you work in a CAT tool daily, customize shortcuts to match your muscle memory.
See also: [Keyboard Shortcuts](/workbench/editor/keyboard-shortcuts/)
# Pagination
By default Workbench shows **all** segments on a single page. You can split a project into pages of a fixed size using the **Per page** selector above the grid (5, 10, 25, 50, 100, 200, 500, or All).
## The default: All
New projects open with every segment shown. With recent performance work this is comfortable well into the thousands of segments.
The one exception is very large projects: a document with **more than 2000 segments** opens paginated at **500 per page** so the initial layout stays snappy. You can switch it back to **All** (or any other size) at any time with the **Per page** selector — your choice sticks for the rest of the session.
## Why you might still page
* Work through a long project in smaller review batches
* Keep the grid light on a low-spec machine or an enormous file
## Navigation
Use the pagination controls to move between pages.
### Shortcuts
* **Page Up** → previous page
* **Page Down** → next page
Note
Go to Segment is pagination-aware: jumping to a segment on another page will switch pages automatically.
# Document Preview
The **Document Preview** is a reading view of your translation as a finished document, shown in the right-hand panel under the **📄 Preview** tab. As you translate, it rebuilds the document the way it will actually read — so you can sanity-check flow, paragraphing and formatting without exporting.
## What it shows
* **Real document structure.** Sentences are reassembled into their original **paragraphs** (rather than one block per segment), and headings and lists are laid out accordingly — so the preview follows the source document’s structure, not the segmentation.
* **Live translation.** Each segment shows its **target** text as soon as you translate it (falling back to the source until then), so the preview fills in as you work.
* **Status at a glance.** Confirmed segments read clean; unconfirmed ones carry a faint amber tint.
* **The current segment** is highlighted in light blue over its exact text, and the preview follows along as you move through the grid.
## Click to navigate
Click any sentence in the preview to jump the grid straight to that segment — a quick way to move around a long document by reading rather than scrolling.
## Pop out into its own window
Click **⧉ Pop out** at the top of the Preview tab to open the preview in a separate, resizable window — ideal for a second monitor. The pop-out window stays fully live: it tracks your edits, follows the current segment, and click-to-navigate still works. Close it to return to just the docked panel.
## Toggle with a keyboard shortcut
Press **`Ctrl+Alt+P`** from the grid to switch the right panel to the Document Preview, then press it again to jump straight back to whatever tab you had open before (usually the Match Panel).
Note
The shortcut is configurable under **Settings → Keyboard Shortcuts** (View → “Toggle Document Preview panel”).
See also: [Keyboard Shortcuts](/workbench/editor/keyboard-shortcuts/)
# Segment Statuses
Every segment in Supervertaler carries two independent pieces of information:
1. **Match origin** – how the translation got there (TM match, machine translation, manual typing)
2. **Workflow status** – where the segment is in the review cycle (draft, confirmed, approved)
These are two separate dimensions. A segment can be a 100% TM match *and* confirmed – the match tells you where the translation came from, and the workflow status tells you whether a human has signed off on it.
***
## Workflow Statuses
These track a segment’s progress through the translation and review cycle.
| Status | Icon | Meaning |
| --------------- | ---- | ------------------------------------------------------------------------------------------------------------------------------------------------------------------------------------- |
| **Not started** | ❌ | No translation yet. The target is empty. |
| **Draft** | ✏️ | Has a translation, but it has not been confirmed yet. This includes segments filled by AI, TM pre-translation, or manual typing that the translator has not yet explicitly confirmed. |
| **Confirmed** | ✔ | The translator has explicitly confirmed the translation (Ctrl+Enter). The segment is saved to TM at this point. |
| **Proofread** | 🟪 | A reviewer has checked and approved the translation. |
| **Approved** | ⭐ | Final sign-off. The translation has passed all review stages. |
| **Rejected** | 🚫 | A reviewer has rejected the translation. It needs to be revised. |
| **Locked** | 🔒 | The segment cannot be edited. Typically used for non-translatable content or segments that must not be changed. |
### How confirmation works
When you press **Ctrl+Enter**, the current segment is marked as **Confirmed** and the cursor moves to the next unconfirmed segment. Only confirmed segments are saved to Translation Memory.
If you go back and edit a confirmed segment, it automatically drops back to **Draft** until you re-confirm it. This prevents accidental TM entries from half-finished edits.
Note
You can also change a segment’s status manually via the right-click context menu, or by selecting segments and using the **Status** menu in the menu bar.
***
## Match Origins
Match origins tell you how the translation was initially obtained, before anyone reviewed it. They appear as the segment status when the segment has been pre-translated but not yet confirmed.
| Status | Icon | Meaning |
| ------------------ | ---- | ------------------------------------------------------------------------------------------------------------------------------------ |
| **PM (102%)** | PM | **Perfect Match.** The segment matches a TM entry with identical context (surrounding segments). The highest level of TM confidence. |
| **CM (101%)** | CM | **Context Match.** A 100% TM match where the preceding segment context also matches. |
| **TM 100%** | ✅ | **Exact Match.** The source text matches a TM entry exactly, without additional context confirmation. |
| **TM Fuzzy** | 🔶 | **Fuzzy Match.** The source partially matches a TM entry (typically 75-99%). The translation will need editing. |
| **MT** | 🤖 | **Machine Translation.** Generated by an MT engine or AI model. |
| **Repetition** | 🔁 | **Internal Repetition.** The same source text appears elsewhere in the project and the translation was auto-propagated. |
| **Pre-translated** | ⚡ | Generic pre-translation from an unspecified source. |
Perfect Match and Context Match are shown as small coloured **PM** and **CM** text badges in the status column, mirroring the way Trados Studio labels them, rather than as emoji icons.
### What happens when you confirm a match
When you confirm a segment, its status changes from its match origin (e.g. “CM 101%”) to **Confirmed**. The match percentage is preserved internally, but the status icon now reflects the workflow state rather than the match type. This is the same behavior as in Trados Studio and memoQ.
***
## Mapping to Other CAT Tools
Supervertaler’s statuses map cleanly to Trados Studio and memoQ. When you import a file from either tool, both the match origin and the workflow status are preserved. When you export back, statuses are mapped to the correct values for each tool.
### Workflow statuses
| Supervertaler | Trados Studio | memoQ |
| ------------- | -------------------- | -------------------- |
| Not started | *(no translation)* | Not started |
| Draft | Draft | Edited |
| Confirmed | Translated ✓ | Confirmed |
| Proofread | Translation Approved | Reviewer 1 confirmed |
| Approved | Sign-off Approved | Reviewer 2 confirmed |
| Rejected | Translation Rejected | Rejected |
| Locked | Locked | Locked |
Caution
**Trados naming quirk:** In Trados Studio, “Translated” (green checkmark) actually means *confirmed by the translator*. This is equivalent to Supervertaler’s **Confirmed**. Trados “Draft” is equivalent to Supervertaler’s **Draft**.
Note
**A note on localised (translated) UIs.** When Supervertaler’s interface is shown in another language, the status *names* you see in the status column are **display labels only** — the underlying status is an internal value, and import/export mapping to Trados Studio and memoQ is keyed on that internal value, **not** on the visible text. So a confirmed segment shown as “Bevestigd” in Dutch, “Confirmed” in English, or any other localisation still maps to Trados “Translated” / memoQ “Confirmed” on export. Localising the labels never changes the data or the round-trip.
If you’re translating the interface, two tips for the status labels:
* **Mirror what the user’s other CAT tools call these states in the same language.** Trados Studio and memoQ ship localised UIs; aligning your status terms with theirs means the user sees consistent vocabulary everywhere. Inventing new terms is what causes confusion, not localising itself.
* **Leave the match-origin shorthand untranslated** — `PM`, `CM`, `TM 100%`, `TM Fuzzy`, `MT`, and the percentages are industry-universal across tools and languages (and the PM/CM badges deliberately mirror Trados).
### Match origins
| Supervertaler | Trados Studio | memoQ |
| ------------- | ---------------------------- | --------------------- |
| PM (102%) | Perfect Match | 102% (double context) |
| CM (101%) | Context Match | 101% (context match) |
| TM 100% | Exact Match (100%) | 100% |
| TM Fuzzy | Fuzzy Match | Fuzzy (75-99%) |
| MT | Machine Translation (NMT/AT) | MT |
| Repetition | Repetition (auto-propagated) | Repetition |
***
## Related pages
* [Editing & Confirming](/workbench/editor/editing-confirming/)
* [The Translation Grid](/workbench/editor/translation-grid/)
* [CAT Tool Integration](/workbench/cat-tools/overview/)
* [Trados Studio Workflow](/workbench/cat-tools/trados/)
* [memoQ Workflow](/workbench/cat-tools/memoq/)
# The Translation Grid
The translation grid is where you spend most of your time: each row is a **segment** (usually a sentence or paragraph) with source and target text.
## Columns
The grid has five columns:
| Column | What it is |
| ---------- | -------------------------------------------------- |
| **#** | Segment number (row index) |
| **Type** | Segment type (depends on the file format/importer) |
| **Source** | Original text (typically read-only) |
| **Target** | Your translation (editable) |
| **Status** | Segment status (dropdown) |
## Editing behavior
* The grid is optimized for speed, but edits are intentionally lightweight.
* **Double-click** a cell to edit.
* Use **Shift+Enter** for a line break inside a cell (multi-line target).
## Confirming & status
* Use the **Status** dropdown to set the segment state.
* Keyboard confirm is supported (see [Editing & Confirming](/workbench/editor/editing-confirming/)).
Common statuses include:
* Not started
* Translated
* Confirmed
* Proofread
* Approved
Note
If you plan to reimport into a CAT tool, do not merge/split content across segments. Segment boundaries must stay compatible.
## Visual cues
* **Tags** (CAT tool placeholders and formatting markers) are highlighted to make them hard to miss.
* **Spellcheck** (if enabled) underlines misspelled target words.
* **Termbase matches** can be highlighted in the source.
## TermLens panel placement
You can dock the TermLens panel directly above or below the grid from the **View** menu:
* **Show TermLens above grid** –places the panel between the filter bar and the grid.
* **Show TermLens below grid** –places it under the grid.
The change applies immediately, no need to reopen the project. Clicking the option that is already active hides the panel again.
## Splitting and merging segments
Right-click in a **Source** cell to **✂ Split segment here** (at the clicked position) or **🔗 Merge with next segment** — Trados/memoQ-style re-segmentation, fully undoable. See [Editing & Confirming](/workbench/editor/editing-confirming/#splitting-and-merging-segments) for details and when it’s available.
## See also
* [Navigation](/workbench/editor/navigation/)
* [Editing & Confirming](/workbench/editor/editing-confirming/)
* [Keyboard Shortcuts](/workbench/editor/keyboard-shortcuts/)
* [Filtering](/workbench/editor/filtering/)
# Api Keys
To use AI translation you need an API key from at least one provider. Enter your key in **Settings → AI Settings**.
## Supported providers
| Provider | Where to get a key |
| ------------------------------------- | -------------------------------------------------------------------- |
| **OpenAI** | [platform.openai.com/api-keys](https://platform.openai.com/api-keys) |
| **Anthropic (Claude)** | [console.anthropic.com](https://console.anthropic.com) |
| **Google (Gemini)** | [aistudio.google.com/apikey](https://aistudio.google.com/apikey) |
| **Grok (xAI)** | [console.x.ai](https://console.x.ai) |
| **Mistral AI** | [console.mistral.ai](https://console.mistral.ai) |
| **DeepSeek** | [platform.deepseek.com](https://platform.deepseek.com) |
| **OpenRouter** (200+ models, one key) | [openrouter.ai/keys](https://openrouter.ai/keys) |
| **Ollama** | No key needed – runs locally |
## Entering a key
1. Open **Settings → AI Settings**
2. Select your provider from the **Provider** dropdown
3. Paste your API key into the **API Key** field
4. Click **Test Connection** to verify
5. Save settings
Keys are stored locally and are only sent to the provider’s own API endpoint.
## Switching providers
You can configure keys for multiple providers in the same settings panel. Switch between them without re-entering credentials – the key for each provider is remembered independently.
## Using Ollama (no key required)
Ollama runs models entirely on your machine. No API key or internet connection is needed.
See [Ollama Setup](/workbench/ai-translation/ollama/) for download and configuration instructions.
## Using OpenRouter (one key for everything)
If you prefer not to manage multiple accounts, OpenRouter lets you access 200+ models from all major providers with a single API key. Create an account at [openrouter.ai](https://openrouter.ai) and paste your key into the **OpenRouter** provider slot.
## Troubleshooting
| Problem | Solution |
| --------------------- | -------------------------------------------------------------------- |
| ”Invalid API key” | Double-check the key; ensure no leading or trailing spaces |
| ”Rate limit exceeded” | Wait a moment, or upgrade your API plan |
| ”Model not found” | Check the model name in settings; it may have been updated |
| No response | Check your internet connection and that the provider’s service is up |
***
## Next steps
* [Create your first project](/workbench/get-started/first-project/)
* [Supported LLM Providers](/workbench/ai-translation/providers/)
* [AI Translation Overview](/workbench/ai-translation/overview/)
# Your First Translation Project
Let’s walk through creating a complete translation project from start to finish.
## Creating a New Project
### Option 1: Import a Document
1. Go to **Project → Import → Import Document…** (`Ctrl+O`)
2. Select your Word document
3. Choose the source language (e.g., “English”)
4. Choose the target language (e.g., “Dutch”)
5. Click **Import**
Your document is now segmented and ready for translation.
### Option 2: Import a Text File
1. Go to **Project → Import → Text / Markdown File (TXT, MD)…**
2. Select your `.txt` file
3. Each line becomes a separate segment
### Option 3: Multi-File Project
1. Go to **Project → Import → Folder (Multiple Files)…**
2. Select a folder containing DOCX or TXT files
3. Choose which files to include
4. All files are imported as one project
## Understanding the Interface
After import, you’ll see the main window. Along the top are the workspace tabs (**Editor**, **TMs**, **Termbases**, **AI**, **SuperLookup**, **Clipboard Manager**, **Voice**, **Settings**). The **Editor** tab holds the translation grid:
```plaintext
┌──────────────────────────────────────────────────────────────────────┐
│ Editor │ TMs │ Termbases │ AI │ SuperLookup │ Clipboard │ Voice │ ⚙ │
├──────────────────────────────────────────────────────────────────────┤
│ # │ Type │ Source │ Target │ Status │
├────┼──────┼───────────────────────┼───────────────────────┼───────────┤
│ 1 │ ¶ │ Hello, world! │ │ ❌ │
│ 2 │ ¶ │ This is a test. │ │ ❌ │
│ 3 │ ¶ │ Translate me! │ │ ❌ │
└────┴──────┴───────────────────────┴───────────────────────┴───────────┘
```
**TMs** and **Termbases** are their own top tabs for managing translation memories and terminology.
### Status Icons
| Icon | Meaning |
| ---- | -------------------------------- |
| ❌ | Not started |
| ⚡ | Pre-translated |
| ✏️ | Draft (edited but not confirmed) |
| ✔ | Confirmed |
| 🔒 | Locked |
See [Segment Statuses](/workbench/editor/segment-statuses/) for the full list.
## Translating Your First Segment
1. Click on segment 1’s Target cell
2. Type your translation
3. Press `Ctrl+Enter` to confirm
4. The status changes to ✅
### Using AI Translation
1. Click on segment 2
2. Press `Ctrl+T` to translate it with AI
3. The AI translation appears in the Target cell
4. Review, edit if needed, and confirm with `Ctrl+Enter`
## Setting Up Resources
### Add a Translation Memory
1. Go to the **TMs** tab
2. Click **+ Create TM** or **Import TMX**
3. Your TM will automatically provide matches
### Add a Termbase
1. Go to the **Termbases** tab
2. Click **+ Create Termbase**
3. Add terms manually or import from TSV
## Saving Your Project
1. Press `Ctrl+S`
2. Choose a name and location
3. Your project is saved as a folder containing the `.svproj` file, a `source/` folder (your original document), and — once you export — a `target/` folder. See [The Project Folder](/workbench/import-export/project-folder/).
Tip
**Tip:** Supervertaler auto-saves your work periodically, but it’s good practice to save manually before closing. To move a project, move the **whole folder**, not just the `.svproj`.
## Exporting the Translation
When you’re finished:
1. Go to **Project → Export**
2. Choose your format:
* **DOCX** - Standard Word document with translations
* **Bilingual Table** - Source and target side by side
* **Text File** - Plain text output
3. Select destination and click **Export**
## Project Workflow Summary
```plaintext
Import Document
↓
Set Up TMs & Termbases (optional)
↓
Translate Segments (manual or AI)
↓
Review & Confirm (Ctrl+Enter)
↓
Save Project (.svproj)
↓
Export Translation
```
***
## What’s Next?
Now that you’ve completed your first project:
* [Learn keyboard shortcuts](/workbench/editor/keyboard-shortcuts/) for faster work
* [Set up batch translation](/workbench/ai-translation/batch-translation/) for larger documents
* [Explore CAT tool workflows](/workbench/cat-tools/overview/) if you use professional tools
# Installation
## Windows (Recommended)
### Option 1: Download Release (Easiest)
1. Go to [GitHub Releases](https://github.com/Supervertaler/Supervertaler-Workbench/releases)
2. Download the latest `.zip` file
3. Extract to a folder of your choice
4. Run `Supervertaler.exe`
5. *Optional:* double-click **`Add Supervertaler to Start Menu.cmd`** once to add a Start Menu shortcut, so you can launch the app from the Start Menu (or pin it to the taskbar) like any installed program. This is just a friendly wrapper around `create_start_menu_shortcut.ps1` that bypasses Windows’ default PowerShell ExecutionPolicy without changing any system-wide settings.
### Option 2: Run from Source
If you want the latest development version or want to contribute:
```bash
# Clone the repository
git clone https://github.com/Supervertaler/Supervertaler-Workbench.git
cd Supervertaler
# Create virtual environment
python -m venv venv
venv\Scripts\activate
# Install dependencies
pip install -r requirements.txt
# Run the application
python Supervertaler.py
```
## macOS
The macOS install method depends on your Mac’s processor.
### Apple Silicon (M1, M2, M3, M4) — Download Release
1. Go to [GitHub Releases](https://github.com/Supervertaler/Supervertaler-Workbench/releases)
2. Download the latest `.dmg` file
3. Open the `.dmg` and drag **Supervertaler** to your Applications folder
4. Launch from Spotlight or Launchpad
### Intel Macs — Install via pip
The published macOS `.dmg` is built for Apple Silicon only and will not run on Intel hardware. Intel Mac users need to install via pip and provide a system Java for the Okapi sidecar (which handles Word, Excel, HTML and other office-document imports).
```bash
# 1. Install Homebrew (skip if already installed)
/bin/bash -c "$(curl -fsSL https://raw.githubusercontent.com/Homebrew/install/HEAD/install.sh)"
# 2. Install Python 3 (skip if already installed)
brew install python@3.12
# 3. Install Java 17 (Eclipse Temurin, free, no Oracle account required)
brew install --cask temurin@17
# 4. Install Supervertaler
pip3 install supervertaler
# 5. Run it
supervertaler
```
If you skip the Java step, Supervertaler shows a friendly dialog at startup with the install command. Plain-text translation, TMX, termbases, etc. all work without Java – only office-document import/export needs it.
On first DOCX import, Supervertaler downloads the Okapi sidecar JAR (\~28 MB) into `~/Library/Application Support/Supervertaler/okapi-sidecar/`. After that, everything runs locally and offline.
### Run from Source (any Mac)
Follow the [Linux source instructions](#linux) below – the commands are identical except for the spellcheck step, where you’d use `brew install hunspell` instead of `apt install hunspell-*`.
## Linux
Supervertaler is compatible with Linux, though Windows is the primary development platform.
```bash
# Clone the repository
git clone https://github.com/Supervertaler/Supervertaler-Workbench.git
cd Supervertaler
# Create virtual environment
python3 -m venv venv
source venv/bin/activate
# Install dependencies
pip install -r requirements.txt
# Install Hunspell dictionaries (for spellcheck)
sudo apt install hunspell-en-us hunspell-nl # Add your languages
# Run the application
python Supervertaler.py
```
Note
**Linux Users:** If you experience crashes related to spellcheck or ChromaDB, see [Linux-Specific Issues](/workbench/troubleshooting/linux/).
## Dependencies
The main dependencies are automatically installed via `requirements.txt`:
| Package | Purpose |
| ------------------- | ---------------------------- |
| PyQt6 | User interface |
| openai | OpenAI GPT integration |
| anthropic | Anthropic Claude integration |
| google-generativeai | Google Gemini integration |
| python-docx | DOCX file handling |
| pyspellchecker | Spellcheck |
## Next Steps
After installation:
1. [Set up your API keys](/workbench/get-started/api-keys/) for AI translation
2. Follow the [Quick Start Guide](/workbench/get-started/quick-start/)
3. Create your [first translation project](/workbench/get-started/first-project/)
# Quick Start Guide
This guide will get you translating in under 5 minutes.
If you’re not sure where to begin: import a file, translate a few segments, then export back to your CAT tool.
## Step 1: Start Supervertaler
Launch the application by running `Supervertaler.exe` (Windows) or `python Supervertaler.py` (from source).
Note
If you want to use AI translation, set up your API keys first: [Setting Up API Keys](/workbench/get-started/api-keys/).
## Step 2: Import a Document
1. Go to **Project → Import**
2. Choose your file type:
* **DOCX** - Standard Word documents
* **Text File** - Plain text (one segment per line)
* **memoQ Bilingual** - memoQ XLIFF or bilingual DOCX
* **Trados Package** - SDLPPX files
* **Phrase Bilingual** - Memsource bilingual DOCX
* **CafeTran Bilingual** - CafeTran external view
3. Select source and target languages when prompted
4. Your document appears in the translation grid
Note
If you’re working with memoQ/Trados/Phrase/CafeTran, always choose the matching import option so tags and statuses round-trip correctly.
## Step 3: Navigate the Grid
The translation grid has 5 columns:
| Column | Description |
| ---------- | --------------------------------------- |
| **#** | Segment number |
| **Type** | Segment type (¶, heading, list item, …) |
| **Source** | Original text (read-only) |
| **Target** | Your translation (editable) |
| **Status** | Translation status indicator |
### Basic Navigation
| Action | Shortcut |
| ---------------- | ------------------------------- |
| Next segment | `Enter` or `↓` (at end of cell) |
| Previous segment | `↑` (at start of cell) |
| Go to segment | `Ctrl+G` |
Most navigation is designed to feel memoQ-like: arrow keys move within a cell, and at the top/bottom line they can jump between segments.
## Step 4: Translate a Segment
### Manual Translation
1. Click in the **Target** cell
2. Type your translation
3. Confirm the segment (confirmed statuses matter when exporting back to CAT tools)
### AI Translation
1. Select a segment
2. Use the **Translate action** (single segment; **Ctrl+T**) or **Batch Translate** (multiple segments)
3. Review and edit if needed
4. Confirm the segment when you’re happy
Note
If AI translation isn’t available yet, double-check provider setup in [Setting Up API Keys](/workbench/get-started/api-keys/).
## Step 5: Save Your Project
1. Press `Ctrl+S` or go to **Project → Save Project**
2. Choose a location and filename
3. Projects are saved as `.svproj` files
## Step 6: Export Your Translation
1. Go to **Project → Export**
2. Choose the appropriate format:
* **DOCX** - Translated Word document
* **Bilingual Table** - Side-by-side source/target
* **Return Package** - For CAT tool workflows
Caution
For CAT tool workflows, always export the matching return format (for example, SDLRPX for Trados return packages) to preserve tags and statuses.
***
## What’s Next?
### Recommended next steps
* [Setting Up API Keys](/workbench/get-started/api-keys/) – enable AI translation
* [Installation](/workbench/get-started/installation/) – verify dependencies and optional components
* [CAT Tool Integration](/workbench/cat-tools/overview/) – memoQ/Trados/Phrase/CafeTran workflows
* [Keyboard Shortcuts](/workbench/editor/keyboard-shortcuts/) – faster editing and navigation
| | |
| ---------------------------- | ------------------------------------------------------- |
| **Set up AI Translation** | [Configure API keys →](api-keys.md) |
| **Learn Keyboard Shortcuts** | [View all shortcuts →](../editor/keyboard-shortcuts.md) |
| **Work with CAT Tools** | [CAT tool integration →](../cat-tools/overview.md) |
# Supervertaler Re-importable Table (DOCX)
The **Supervertaler Re-importable Table** is a branded Word (DOCX) export that lays your project out as a side-by-side table — handy for reviewing, proofreading, or handing off to someone who doesn’t use a CAT tool. Its defining feature: it can be edited and **re-imported** to pull the changes straight back into your project. (Its plain-text sibling, [Re-importable Text](/workbench/import-export/bilingual-text/), does the same round-trip in an AI-friendly text format.)
## When to use it
* A proofreading round-trip in Word: export, edit the targets, re-import.
* Sharing with a reviewer who doesn’t use your CAT tool.
## Columns
| Column | Description |
| ------------ | ----------------------------------------------------------------------- |
| **#** | Segment number |
| **Source** | Source text |
| **Target** | Target text (edit this when proofreading) |
| **Status** | Segment status |
| **Comments** | Segment comments — edit, add, or clear; changes round-trip on re-import |
A header above the table shows the project name, language pair, segment count, and export date.
## Where to find it
**Project → Export → 🔁 Supervertaler Re-importable → Bilingual Table (DOCX)**. Formatting tags stay visible as markup; edit the Target/Comments cells, save, and bring the changes back in (see below). Don’t change the segment numbers (#) or the source text. The document is titled *Supervertaler Re-importable Table*.
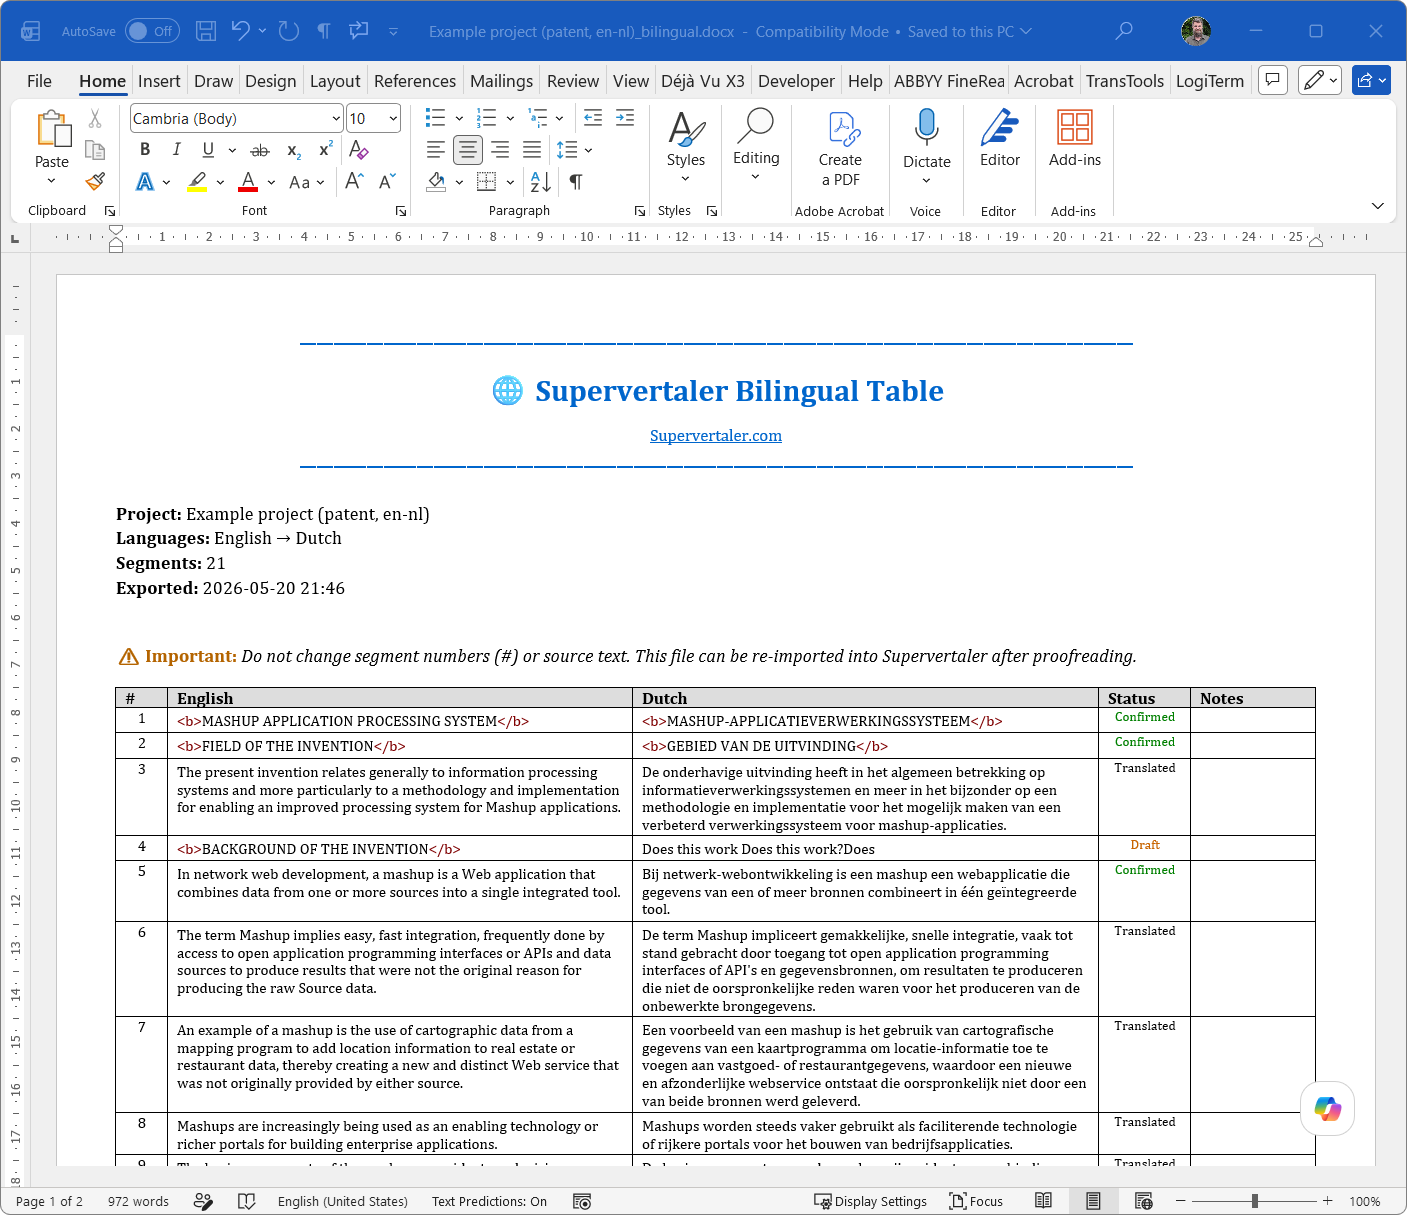
The re-importable Bilingual Table: formatting shown as visible markup, with a notice that segment numbers and source text must stay unchanged so the file can be re-imported after proofreading.
Note
Need a clean copy with real bold/italic for a client, rather than visible tags? Export the finished document itself via **Project → Export → Export Translated Document** — it renders formatting properly in the original file layout.
## Round-trip (proofread and re-import)
1. Export the **re-importable** Bilingual Table.
2. Edit in Word — leave the **#** and **Source** columns untouched:
* The **Target** column for translation edits.
* The **Comments** column to edit, add, or clear segment comments. New comments added to segments that had none in Workbench are also round-tripped.
3. Back in Workbench: **Project → Import → 🔁 Supervertaler Re-importable → Bilingual Table (DOCX) – Update Project**.
4. Supervertaler diffs the file against your project and shows a preview before applying. Target changes set the segment back to “Not Started” so you can re-confirm; comment changes replace the segment’s existing comments verbatim with the proofreader’s text (no `[Review: …]` wrapping or appending — round-trip in, round-trip out).
Note
Re-imports written by Workbench v1.10.182 and earlier had a bug where comments-only edits were silently discarded — only segments whose target text *also* changed had their comments updated. Fixed in v1.10.183: a comment edit on its own is now picked up, and a comment cleared in the bilingual file clears it on the segment.
## Other bilingual tables
To round-trip back into a **CAT tool**, use that tool’s own bilingual format (memoQ, CafeTran, Phrase, Trados Bilingual Review) rather than the Supervertaler table — see [CAT Tool Overview](/workbench/cat-tools/overview/).
## Related
* [Supported File Formats](/workbench/import-export/formats/)
* [Exporting Translations](/workbench/import-export/exporting/)
# Supervertaler Re-importable Text (AI-friendly)
The **Re-importable Text** round-trip lets you send a whole translation out as a plain-text file — for a proofreader or an LLM to edit — and then pull the edits straight back into the same project. It’s the plain-text sibling of the [Re-importable Table (DOCX)](/workbench/import-export/bilingual-tables/), ported from the Supervertaler for Trados plugin. Added in v1.10.231.
Note
**Why “Text” and not “Markdown”?** The file is deliberately plain text. Its segment blocks rely on line breaks being preserved, and a Markdown renderer collapses single line breaks — which would scramble the structure. AI agents read the raw characters when you paste a file into a chat, so plain text is both safe and maximally readable.
## Exporting
**Project → Export → 🔁 Supervertaler Re-importable → Bilingual Text (AI-friendly)…**
You’ll get a small options dialog (include locked segments; which statuses to include), then a save dialog. Two files are written side by side:
* `MyProject_bilingual.txt` — the editable text file.
* `MyProject_bilingual.txt.svexport.json` — a **sidecar** that records, per segment, a stable id, a source hash, and the status. Keep the two files together; the sidecar is what makes a safe re-import possible.
The file opens with a short header that lists exactly which statuses you may set. Each segment is one block:
```plaintext
[SEGMENT 0001]
EN: The quick brown fox {1}
NL: De snelle bruine vos {1}
Status: Confirmed
Comment: Verify the shade of "brown"
```
* The `EN:` line is the **source** — leave it alone. It stays on **one line**, and a `[newline]` in it marks where the original source broke across two lines (e.g. a subtitle cue). The source is read-only and never written back to your project, so these tokens are just there to show its structure — handy for spotting a target that’s missing a break the source has.
* The `NL:` line is the **target** — edit it freely, but **keep it on one line**. Where the target needs a hard line break — for example to split a subtitle across two lines — write the literal token `[newline]`:
```plaintext
NL: Welkom bij dit webinar[newline]over de waardeketenanalyse
```
On re-import `[newline]` is turned back into a real line break, so the two-line layout is preserved on export. *(Introduced in v1.10.255; files exported before that — with the target genuinely wrapped over several lines — still re-import unchanged.)*
* The `Comment:` line is always present (blank when the segment has no comment) so you can see the field exists. **Edit it, fill the blank one, or clear it** — the change re-imports into the segment’s comments. It too may span several lines.
* `…`, `…`, `…` are **cosmetic formatting** — add or remove them as you like.
* `{1}`, `[1}`, `<92>` and similar are **structural tags** — keep them; dropping one will flag the segment on re-import (see below).
A real file looks like this — note the single-line sources and the `[newline]` token marking where each target splits across two lines:
![A Supervertaler Re-importable Text file: the header lists the project details and the editing rules, the NL: source lines each sit on one line, and two EN: targets show the \[newline\] token highlighted where a subtitle is split across two lines.](/.gitbook/assets/SUPERVERTALER-RE-IMPORTABLE-TEXT-newlines.png)
## Editing with an LLM
Hand the `.txt` to ChatGPT, Claude, Gemini, etc. with an instruction such as *“edit only the `NL:` lines; keep each one on a single line, using the literal token `[newline]` for any line break; leave the `[SEGMENT …]` markers, the `EN:` lines, and the `{…}` tags untouched.”* Because each field is one labelled line (not a table column), it survives pipe characters and long inputs without the source/target roles getting confused, and keeping targets to one line stops an agent from accidentally reflowing them.
## Re-importing
**Project → Import → 🔁 Supervertaler Re-importable → Bilingual Text (AI-friendly) - Update Project…**
Pick the edited `.txt` (its sidecar is found automatically). A preview dialog shows how many segments will be updated, how many are unchanged, and how many are skipped — and why. Nothing is applied until you click **Apply changes**.
### Safety guards
* **Source-tamper detection** — if a segment’s source line was changed, that segment is skipped (its hash no longer matches the sidecar).
* **Structural-tag integrity** — if the edited target dropped a required tag, the segment is flagged. With **“Refuse to apply edits that drop required tags”** ticked (the default), such segments are skipped; untick it to apply them anyway. Cosmetic ``/``/`` changes never trip this.
* **Locked segments** are never modified.
### Status
* If you (or the AI) deliberately change a `Status:` line to a different value, that status is applied.
* Otherwise, any segment whose target you edited is marked **Draft** — a translated-but-unconfirmed state, ready for you to review and confirm.
### Comments
* Existing segment comments are written out as a `Comment:` line. Edit it, add a new one to a segment that had none, or delete it — the change re-imports into the segment’s comments. A comment-only edit (target left alone) is applied on its own and shows up in the import preview.
## Tips
* Export reads **live grid state**, so in-progress edits are included even if the segment isn’t confirmed.
* If the sidecar is missing, you can still re-import — segments are then matched by position only, and source-tamper detection is unavailable. You’ll be warned first.
## Related
* [Supervertaler Re-importable Table (DOCX)](/workbench/import-export/bilingual-tables/)
* [Exporting Translations](/workbench/import-export/exporting/)
# Importing DOCX Files
Use DOCX import for normal Word documents (not CAT tool bilingual formats).
DOCX import is handled by the bundled **Okapi sidecar** – an industry-standard localisation library that runs as a small background service. This gives you SRX-based segmentation, proper paragraph and table detection, and a faithful round-trip on export.
## Import steps
1. Go to **Project → Import → Import Document…** (`Ctrl+O`)
2. Select your `.docx` file
3. Choose the **source** and **target** languages when prompted
4. The document is segmented into rows in the translation grid – formatting tags (``, ``, ``, hyperlinks, runs) appear inline so you can preserve them in the translation
A progress dialogue shows extraction progress for large documents – on a 2,500-segment file expect a few seconds.
## What is preserved on round-trip
When you later export back to DOCX, Supervertaler reconstructs the original document via the same Okapi sidecar:
* **Layout**: paragraphs, tables, headers, footers, page breaks
* **Inline formatting**: bold, italic, underline, sub/superscript, colour
* **Hyperlinks**: anchor text and links round-trip identically – broken or working
* **Images and other non-translatable content**: passed through untouched
Note
The document you import becomes the project’s **source**. When you save the project, Supervertaler copies it into the project’s `source/` folder and refers to it by a relative path — so this faithful round-trip keeps working even if you later move, rename, or delete the original you imported from. See [The Project Folder](/workbench/import-export/project-folder/).
## Tips
* If you are working with memoQ/Trados/Phrase/CafeTran, prefer the specific CAT workflow import instead of generic DOCX.
* Keep formatting tags balanced when editing translations (e.g. `text`, not `text`).
* Placeholder tags like `` and `` represent structural elements (hyperlinks, run boundaries). Leave them in the same position as the source so the export reconstructs the document correctly.
## When DOCX import is unavailable
The Okapi sidecar requires Java – Supervertaler ships a bundled JRE, so this is normally invisible. If the sidecar fails to start (Java missing, port 8090 blocked by another process, …) you’ll see an “Okapi sidecar required” dialogue with troubleshooting steps. DOCX import won’t fall back silently to a degraded engine.
Note
Need OCR? Use [PDF Rescue (OCR)](/workbench/tools/pdf-rescue/) to turn scanned PDFs into editable DOCX before importing.
# Export Verification (Word-Count Check)
Whenever you export a translated **DOCX**, Supervertaler runs an automatic safeguard that checks whether any text was lost on the way out of the document. It is a safety net against the rare case where the round-trip drops content that is present and confirmed in the grid.
## What it does
After writing the file, Supervertaler:
1. Counts the words it **expected** to write – the target text of every segment, falling back to the source text for any untranslated segment.
2. Counts the words **actually present** in the exported DOCX (document body, headers, footers, and foot/endnotes).
3. Compares the two. If the exported file contains noticeably fewer words than expected, it shows a warning.
Tags, numbers, and punctuation are counted the same way on both sides, so a genuine loss of text shows up as a clear shortfall while incidental formatting differences stay within tolerance.
## When it runs
* Automatically, on **every DOCX export** – single-file and multi-file, whether the file is built through the Okapi merge or the standard exporter.
* Multi-file projects produce a **single combined warning** listing each affected file, rather than one dialog per file.
## The warning
If a file falls short, you’ll see a **Possible Missing Text in Export** dialog naming the file(s) and roughly how many words appear to be missing. The same result is written to the log, for example:
```plaintext
🔢 Export word-count check [Manual.docx]: 4065/4060 words (100%; threshold 95%)
```
or, when text looks lost:
```plaintext
⚠️ Possible dropped text in export: Manual.docx has only 85% of the expected words — review before delivery.
```
When you see the warning, open the file and check it before delivering.
Note
The check is deliberately **coarse**. It reliably catches a material loss (for example a whole paragraph or many segments going missing), but a single very short segment dropping out can stay within the tolerance band and won’t trigger a warning. It’s a backstop, not a substitute for a final read-through.
## Adjusting or turning it off
The check is configured in your `settings.json` file, under an `"export"` section:
| Key | Default | Meaning |
| ---------------------------- | ------- | --------------------------------------------------------------------------------------------------------------------------------------------------------------------- |
| `word_count_check_enabled` | `true` | Set to `false` to turn the check off entirely. |
| `word_count_check_threshold` | `0.95` | Warn when the exported file has fewer than this fraction of the expected words. Raise it (e.g. `0.99`) for more sensitivity, lower it to tolerate larger differences. |
```json
{
"export": {
"word_count_check_enabled": true,
"word_count_check_threshold": 0.95
}
}
```
If your documents legitimately differ a lot from the segment word count – for example they contain many numbers, or comments that aren’t part of the translation – you may prefer to lower the threshold slightly to avoid false alarms.
Caution
The check currently applies to **DOCX exports only**. Other Okapi formats (IDML, HTML, XLIFF, PPTX, XLSX, PO) are not yet verified this way.
## Related pages
* [Exporting Translations](/workbench/import-export/exporting/)
* [Multi-File Projects](/workbench/import-export/multi-file/)
* [Supported File Formats](/workbench/import-export/formats/)
# Exporting Translations
When you’re done translating, export in a format that matches your workflow.
## Export steps
1. Go to **Project → Export**
2. Choose an export type (for example DOCX, bilingual table, or a CAT return format)
3. Pick a destination and save
Tip
For **Export Translated Document** (and Simple Text), the Save dialog opens in your project’s `target/` folder by default, so finished translations land alongside their sources. You can still browse elsewhere — see [The Project Folder](/workbench/import-export/project-folder/).
## CAT tool round-trips
If you started from a CAT exchange format (memoQ/Trados/Phrase/CafeTran), export the matching return format.
### Important rules for round-trips
* **Segment count must match**: don’t merge or split segments.
* **Keep tags balanced**: for example `text` (not `text`).
* **Don’t “pretty edit” bilingual tables**: changing the table structure in Word can break reimport.
* Run your CAT tool’s QA after reimport.
Caution
Don’t merge or split segments in Supervertaler when you plan to reimport into a CAT tool.
## Choosing the right export
* For CAT tool workflows, use the matching CAT export:
* memoQ bilingual DOCX
* Trados return package (SDLRPX) when you imported SDLPPX
* Phrase bilingual DOCX
* CafeTran bilingual table DOCX
* For review-only delivery, consider [Bilingual Tables](/workbench/import-export/bilingual-tables/).
## Checking the export
After every DOCX export, Supervertaler automatically compares the word count of the exported file against your translated segments and warns you if text looks like it was dropped. See [Export Verification (Word-Count Check)](/workbench/import-export/export-verification/).
## Related pages
* [Supported File Formats](/workbench/import-export/formats/)
* [Export Verification (Word-Count Check)](/workbench/import-export/export-verification/)
* [Bilingual Tables](/workbench/import-export/bilingual-tables/)
* [CAT Tool Overview](/workbench/cat-tools/overview/)
# Supported File Formats
Supervertaler can import and export several formats depending on your workflow.
## Standard documents
* **DOCX** (Microsoft Word): import a document, translate in the grid, export a translated DOCX.
* **TXT** (plain text): each line becomes a segment.
## Other formats via Okapi
The bundled **Okapi sidecar** lets Supervertaler round-trip a wider set of formats. Pick a file in any of the following types via **Project → Import → Import Document…**, translate in the grid, then **Project → Export → Export Translated Document…** to write a translated file back in the same format:
| Format | Extension(s) | Notes |
| ------------------------- | ---------------- | ------------------------------------------------------------------------------------------------------------------------------------------------------------------------ |
| **Adobe InDesign Markup** | `.idml` | Drop in, translate, drop out – no need to round-trip via Trados/memoQ first. Inline tags appear as `...` markers in the grid; preserve them in the translation. |
| **HTML** | `.html`, `.htm` | Anchors, images, buttons, and other inline elements are exposed as `...` / `` tags. The translated HTML reconstructs the original markup byte-perfectly. |
| **XLIFF 1.2** | `.xliff`, `.xlf` | The industry-standard bilingual interchange format. Useful for files exported from any CAT tool that doesn’t have its own dedicated entry. |
| **gettext PO** | `.po` | Source strings are translated; `msgctxt` and plural forms are preserved. |
| **Microsoft Excel** | `.xlsx` | Cells, formulas, and styling round-trip via the Office Open XML filter. |
| **Microsoft PowerPoint** | `.pptx` | Slides and slide notes are extracted; layout and master slides round-trip. |
### How it works
Okapi extracts the translatable content from the source file plus a *skeleton* file that preserves the original structure. You translate the extracted content; the merge step combines your translation with the skeleton to reconstruct the original format with the new text in place.
Note
**Tag handling**: when you see `` / `` / `` markers in the source segment, leave them in the translation in the same positions. They map back to inline elements like links, buttons, or formatting runs in the original file.
## CAT tool exchange formats
Use these formats when you need to round-trip back into a CAT tool.
* **memoQ**
* Bilingual DOCX
* XLIFF (memoQ export)
* **Trados Studio**
* Packages: `.sdlppx` import → `.sdlrpx` return (recommended)
* Bilingual Review DOCX (special workflow)
* **Phrase (Memsource)**
* Bilingual DOCX
* **CafeTran Espresso**
* Bilingual DOCX table
## Multi-file projects
* **Folder import (Multiple Files)**: import a folder containing DOCX/TXT files into a single multi-file project.
Caution
For CAT tool round-trips, always import and export the matching CAT format. Mixing formats can break tags/statuses on reimport.
## Related pages
* [Importing DOCX Files](/workbench/import-export/docx-import/)
* [Importing Text Files](/workbench/import-export/txt-import/)
* [Multi-File Projects](/workbench/import-export/multi-file/)
* [Exporting Translations](/workbench/import-export/exporting/)
* [Bilingual Tables](/workbench/import-export/bilingual-tables/)
# Import Options (File Types)
When you import an Office document (Word, Excel or PowerPoint), Supervertaler uses the bundled **Okapi sidecar** to decide which parts of the file become translatable segments. The **File Types** options let you control that – so you can pull in (or leave out) things like comments, hidden text, headers and footers, and speaker notes.
## Where to set them
There are two places, and they work together:
* **Settings → 📄 File Types** – your **defaults**, applied to every import. Tick a box, and it’s saved straight away. Use **Restore defaults** to go back to the recommended set.
* **The import dialog** – when you import a single document or a folder, the same options appear there, pre-filled from your defaults. Any change you make applies to **that import only**, overriding the default without changing it.
Note
These options apply to Okapi-based imports (DOCX, XLSX, PPTX). Plain text and Markdown files, and CAT-tool bilingual formats, are unaffected.
## Word (DOCX)
| Option | What it does |
| ------------------------------ | ---------------------------------------------------------------------------------------------------------------------------------------------------------------------------------------------------------------------------------------------------------------------------------------------------------------------------------------------------------------------------------------------------------------------------------------------------------------------------------------------------------------------------------------------------------- |
| **Comments** | How to handle Word review comments. **Skip** (default) leaves them out. **Import as comments** brings them in as real comments – anchored to the relevant segment where possible (otherwise to the top of the document), tagged with the original reviewer’s name so they’re easy to tell from your own. These are shown for context and are *not* re-exported (the originals stay in the file). **Import as translatable text** brings each comment in as a segment to translate (labelled “Cmt” in the Type column); those *are* written back on export. |
| **Import hidden text** | Include text formatted as hidden. Off by default. |
| **Import headers & footers** | Include page headers and footers. On by default. |
| **Import document properties** | Include title, author, keywords and similar metadata. Off by default. |
| **Skip drawing/shape names** | Leave out the auto-generated object names Word gives every shape and group (for example *Shape 16*, *Group 574248*). On by default – these are not real content and would otherwise clutter the grid. |
| **Accept tracked changes** | Use the final, accepted text of any tracked changes. On by default. |
## Excel (XLSX)
| Option | What it does |
| ------------------------------------- | --------------------------------------------------------------- |
| **Import hidden rows/columns/sheets** | Include content that is hidden in the workbook. Off by default. |
| **Import sheet (tab) names** | Include the worksheet tab names. Off by default. |
| **Import text in shapes/text boxes** | Include text drawn on the sheet. On by default. |
## PowerPoint (PPTX)
| Option | What it does |
| ---------------------------------- | ----------------------------------------------------- |
| **Import speaker notes** | Include the notes beneath each slide. Off by default. |
| **Import comments** | Include review comments. Off by default. |
| **Import hidden slides** | Include slides marked hidden. Off by default. |
| **Import slide masters / layouts** | Include text on masters and layouts. On by default. |
## How imported parts are labelled
Anything that isn’t ordinary body text is tagged in the grid’s **Type** column so you can tell at a glance where it came from:
* **Cmt** – a comment
* **Hdr** / **Ftr** – a header or footer
* **Prop** – a document property
* **Note** – a PowerPoint speaker note
## Round-trip on export
The options you import with are remembered with the project and reused when you export. That keeps the document structure aligned, so the translated file comes back out cleanly – there’s nothing extra to set at export time.
# Multi-File Projects
Multi-file projects let you import a whole folder of files as a single Supervertaler project.
## Import a folder
1. Go to **Project → Import → Folder (Multiple Files)…**
2. Choose a folder containing supported files (DOCX/TXT/MD)
3. Select which files to include
4. Choose the **source** and **target** languages
## How it behaves
* All segments live in one grid, but each segment is associated with a source file.
* You can jump between files and track progress per file.
* Each DOCX file is imported via the **Okapi sidecar** (the same engine that handles single-file DOCX import) – you get SRX segmentation, faithful round-trip, and hyperlinks/structural tags preserved per file.
* TXT and MD files use the simple per-line import.
* Original files are backed up to a `_source_files/` folder inside the project folder so the export can reconstruct each document faithfully.
## Export
When you export a multi-file project:
* Each DOCX file is reconstructed via the Okapi sidecar’s `/merge` endpoint, using the original from `_source_files/` as the template. Layout, formatting, hyperlinks, and tables round-trip identically.
* TXT/MD files are written with the same per-line structure as the source.
* Output files land in the destination folder you choose, named `_translated.`.
## Tips
* Use this when you receive a set of related files (e.g. claim documents, manual chapters split into separate files, UI strings split across documents).
* Export is done in one operation – pick the destination folder and Supervertaler writes all the translated files at once.
## Requirements
* The Okapi sidecar must be running before you import any folder containing DOCX files. Supervertaler checks this up-front and shows an “Okapi sidecar required” dialogue if it can’t reach the sidecar – better than failing halfway through importing twenty files.
# The Project Folder
A Supervertaler project isn’t just the `.svproj` file — it’s a **folder** that holds the project file together with the documents it works on. Keeping everything in one folder means a project is self-contained: you can move, rename, zip or email the folder and it still opens and exports correctly.
Note
**New Project** has a ”📁 Create a dedicated folder for this project” checkbox (on by default). When it’s on, the first save tucks the `.svproj` into its own folder as shown below. Turn it off to save the `.svproj` flat, wherever you choose — the folder layout is never forced, so you can keep your own naming or nest a project inside a larger job folder.
## What’s in a project folder
```plaintext
My Project/
├─ My Project.svproj ← the project file
├─ source/ ← the original documents you're translating
└─ target/ ← the translated documents you export
```
* **`source/`** — when you **save** a project, its original document is copied here, and the project remembers it by a path *relative* to the folder. That’s what makes the project portable: it no longer depends on the document staying at the exact location you first imported it from. Move or rename the original afterwards and your export still works.
* **`target/`** — when you run **Project → Export → Export Translated Document** (or Simple Text), the Save dialog opens here by default, so your finished translations land next to their sources. You can still browse somewhere else; this is only the default.
## Why this matters
* **Portability** — hand the whole folder to a colleague, or move it between machines, and the structure-preserving export keeps working. Nothing points at a file that only exists on your computer.
* **No accidental cross-wiring** — because the source is stored relative to the project folder, a project can never end up bound to an unrelated document.
Tip
Keep the `.svproj` **inside** its folder. If you want to relocate a project, move or copy the **whole folder**, not just the `.svproj` on its own.
## Existing projects
Projects created before this layout existed still work — they reference their source by an absolute path, and Supervertaler resolves it as before. The next time you **save** such a project, its source is copied into `source/` and the reference switches to the portable relative form automatically.
## Related pages
* [Exporting Translations](/workbench/import-export/exporting/)
* [Your First Translation Project](/workbench/get-started/first-project/)
* [Multi-File Projects](/workbench/import-export/multi-file/)
# Pseudo-translation (Export Test)
**Pseudo-translation** fills your targets with deliberately stress-tested placeholder text so you can export the document and check that it comes out with correct formatting, layout, fonts and tags — **before** you invest any time in real translation. It’s a pre-flight check borrowed from desktop CAT tools.
Find it under **Bulk Operations → 🧪 Pseudo-translate (Export Test)…**.
## Why not just copy source to target?
Copying source into target and exporting tests the *plumbing* — does the file merge and export, do the inline tags survive — but it misses the problems that actually bite at the end of a job:
* **Length stays identical**, so overflowing text boxes, clipped table cells, fixed-width fields, reflow and truncation never show up. Real translations change length.
* **Characters are never exercised** — the source already renders fine in the document’s fonts and encoding, so copying it tells you nothing about whether the *target* language’s characters will.
* **Dropped or merged segments stay invisible**, because target text that equals the source still looks correct.
Pseudo-translation addresses all three at once.
## What it does
For every segment in the chosen scope it rewrites the target so that:
1. **Inline tags are preserved exactly.** Formatting tags (``, ``, …), Trados/SDLXLIFF numeric tags (`<410>`) and memoQ tags are kept verbatim and in order — only the words between them are changed. This is what makes the test trustworthy: the tag round-trip you’re checking isn’t disturbed.
2. **The text is length-expanded** by a ratio you choose, to surface overflow and layout breaks.
3. **Characters are optionally accented** (`werkwijze` → `wéřkwíjžé`) to test diacritics, encoding and font coverage.
4. **Each segment is wrapped in `⟦ ⟧` markers** so a dropped, merged or misplaced segment is obvious in the exported file.
A segment like
```plaintext
De uitvinding betreft een werkwijze voor het sorteren.
```
becomes something like
```plaintext
⟦Dé úítvíñdíñğ bétřéft ééñ lorem wéřkwíjžé lorem vóóř hét šóřtéřéñ. lorem⟧
```
## Options
| Option | What it controls |
| -------------------- | --------------------------------------------------------------------------- |
| **Apply to** | All segments (default), the filtered/visible set, or just your selection. |
| **Length expansion** | 0% (structure only), +30% (typical), up to +200% (max stress). |
| **Characters** | *Accented* (tests encoding/fonts) or *Plain words* (length + markers only). |
| **Boundary markers** | Wrap each segment in `⟦ ⟧`. On by default. |
## Workflow
1. Open the project and run **Bulk Operations → 🧪 Pseudo-translate (Export Test)…**.
2. Pick your options and confirm.
3. Export the document the way you normally would (**Project → Export → Export Translated Document**, or any bilingual/CAT export) and open the result.
4. Check for clipped text, broken tables, missing glyphs, reordered or missing `⟦ ⟧`-marked segments, or tag errors.
5. **Edit → Undo** restores your real (usually empty) targets — the whole operation is recorded as a single reversible step.
Note
Pseudo content overwrites existing targets (Undo restores them). If you’d rather keep your working project untouched, run the test on a **copy** of the project.
## Related
* [Export Verification (Word-Count Check)](/workbench/import-export/export-verification/)
* [Exporting Translations](/workbench/import-export/exporting/)
* [Re-importable Table (DOCX)](/workbench/import-export/bilingual-tables/)
# Importing Text Files
Text import is the simplest workflow: **each line becomes one segment**.
## Import steps
1. Go to **Project → Import → Text / Markdown File (TXT, MD)…**
2. Select your `.txt` file
3. Choose the **source** and **target** languages
## Tips
* Keep one sentence (or one logical unit) per line for best results.
* If your file has encoding issues (weird characters), try saving it as UTF-8.
## Export
Text projects can be exported as:
* Translated TXT
* DOCX
* Bilingual table
# Non-Translatables
Non-translatables are terms you want to keep unchanged (product names, IDs, codes, etc.).
## What you can do
* Maintain a list of non-translatable terms
* Highlight them in the grid
* Reduce accidental changes during editing
## Tips
* Add non-translatables before batch translation for best results.
* Use them for brand names, UI strings, and technical identifiers.
# AI Proofreading
**AI Proofreading** asks an LLM to review your finished translation for accuracy, completeness, terminology and style, and records what it finds as **proofreading comments** on each segment. It’s a translator-side review pass — nothing is changed automatically; you read the feedback and decide what to act on.
Proofreading lives under the top-level **QA** menu:
* **QA ▸ Proofreading ▸ Proofread Translation…** — run a proofreading pass.
* **QA ▸ Proofreading ▸ Delete All Proofreading Comments** — clear every proofreading comment in the project.
## Running a proofreading pass
Open **QA ▸ Proofreading ▸ Proofread Translation…**. The dialog has three things to set:
### 1. Which segments
| Scope | What it checks |
| -------------------------------- | ------------------------------------------------------------------------ |
| **✅ Confirmed only** *(default)* | Only segments you’ve confirmed. |
| **📝 Translated + Confirmed** | Draft *and* confirmed segments. |
| **🔹 Selected** | The rows you’ve selected in the grid (select rows first to enable this). |
| **🌐 All segments** | Every segment, regardless of status. |
### 2. Which model
Proofreading uses your **currently-active AI provider and model** (set in **AI Settings**) — the dialog shows which one, e.g. `📊 Using: Openai (gpt-5.5)`. To proofread with a *different* model, switch the active provider in AI Settings and run the pass again (see [Multiple models](#multiple-models) below).
### 3. Which prompt
* **Default (built-in)** runs the standard four-point check:
1. **Accuracy** — does the target correctly convey the source meaning?
2. **Completeness** — is anything missing or added?
3. **Terminology** — are technical terms correct and consistent?
4. **Grammar & Style** — is the text natural and error-free?
* Or pick a **custom proofreading prompt** from the dropdown — any prompt you’ve saved under the **Bulk Operations/** folder of your [Prompt Library](/workbench/ai-translation/prompt-library/) appears here.
* Or **type a one-off prompt** straight into the box.
Click **Proofread** to start. A progress dialog shows how many segments have been checked, how many issues were found, and how many came back clean; you can cancel partway through.
## Where the results appear
Findings land in the **✅ Proofreading** sub-tab of the **💬 Comments** panel — an all-project list of every proofreading comment, one entry per (segment, model). See [Comments → Proofreading comments](/workbench/editor/comments/#proofreading-comments) for the full rundown. In short:
* Each entry has a clickable **Segment #N · model** header that jumps to the segment.
* Selecting a segment in the grid **scrolls and highlights** the list to that segment’s comments.
* A **🗑️** button deletes a single comment; **QA ▸ Proofreading ▸ Delete All Proofreading Comments** clears them all.
* In the grid, a segment with a proofreading comment shows a **purple** Status-cell background (versus **amber** for a segment comment, and a **split** when it has both).
## Multiple models
Results are stored **keyed by model**, so passes with different models *accumulate* rather than overwrite: proofread once with GPT and once with Claude, and each segment keeps both sets of findings. In the Proofreading list **each engine gets its own colour**, so you can compare at a glance what each model flagged. Running the same model again replaces only that model’s note.
## Good to know
* **Proofreading comments are ephemeral review notes.** They’re stored in the `.svproj` project file but are **not exported** to your final document or bilingual tables — unlike [segment comments](/workbench/editor/comments/), which do export as Word comments. Deleting them is safe: another proofreading pass regenerates them.
* Proofreading is **read-only feedback** — it never edits your target text for you.
* Cost scales with scope and model. Proofreading every segment with a premium model on a large project is a real API spend; the **Confirmed only** default keeps a first pass focused. See [Usage & Costs](/workbench/ai-translation/usage-costs/).
## Related
* [Comments](/workbench/editor/comments/) — where proofreading comments are listed and managed
* [Spellcheck](/workbench/qa/spellcheck/) · [Tag Validation](/workbench/qa/tag-validation/) · [Non-Translatables](/workbench/qa/non-translatables/)
* [Prompt Library](/workbench/ai-translation/prompt-library/) — save custom proofreading prompts
* [Usage & Costs](/workbench/ai-translation/usage-costs/)
# Spellcheck
Supervertaler includes a powerful spellcheck system that highlights misspellings while you translate, with support for regional language variants.
## How It Works
Supervertaler uses a **three-tier spellcheck system** that automatically selects the best available backend:
| Backend | Description | Languages |
| ------------------------- | ---------------------------------------------- | ------------------------------------------------- |
| **Hunspell (cyhunspell)** | Native C library, best accuracy | Any language with .dic/.aff files |
| **Spylls** | Pure Python Hunspell (recommended for Windows) | Bundled: EN, RU, SV + any .dic/.aff files you add |
| **pyspellchecker** | Built-in fallback | EN, NL, DE, FR, ES, PT, IT, RU |
The system automatically falls back through backends: Hunspell → Spylls → pyspellchecker.
Note
**Windows Users:** Spylls is automatically used since cyhunspell doesn’t compile on Python 3.12+. This works great and supports regional variants!
## Features
* **Red wavy underlines** for misspelled words in the translation grid
* **Right-click context menu** with spelling suggestions
* **Add to Dictionary** – Save a word permanently
* **Ignore** – Skip a word for the current session only
* **Regional variants** – Distinguish between en\_US “color” and en\_GB “colour”
## Language Variants
Supervertaler supports regional language variants. The spellcheck dropdown shows variants like:
* English (US), English (GB), English (AU), English (CA), English (ZA)
* Portuguese (PT), Portuguese (BR)
* Spanish (ES), Spanish (MX), Spanish (AR)
* French (FR), French (CA), French (BE)
* German (DE), German (AT), German (CH)
* Dutch (NL), Dutch (BE)
Tip
**Regional spelling works correctly!**
* With **English (GB)**: “colour” ✅ correct, “color” ❌ incorrect
* With **English (US)**: “colour” ❌ incorrect, “color” ✅ correct
## Spellcheck Info Dialog
Access detailed information about your spellcheck setup:
1. Click the **🔤 Spellcheck** button in the grid toolbar
2. Or go to **View → Spellcheck Info**
The dialog shows:
* Current language and backend
* Available languages
* Diagnostic information (which backends are available/initialized)
* Links to download additional dictionaries
* Custom dictionary word count
## Adding More Dictionaries
To add spellcheck support for additional languages or variants:
1. **Download Hunspell dictionaries** (.dic and .aff files) from:
* [hunspell.memoq.com](https://hunspell.memoq.com/) – 70+ languages
* [GitHub: wooorm/dictionaries](https://github.com/wooorm/dictionaries/tree/main/dictionaries) – 92+ languages
* [LibreOffice Extensions](https://extensions.libreoffice.org/?Tags%5B%5D=50) – Rename .oxt to .zip
2. **Extract the files** – You need both `.dic` and `.aff` files (e.g., `nl_NL.dic` and `nl_NL.aff`)
3. **Place them in the dictionaries folder:**
* Open Supervertaler
* Go to Spellcheck Info dialog
* Click ”📁 Open Dictionaries Folder”
* Copy your .dic and .aff files there
* You can also organize in subfolders (e.g., `dictionaries/en/en_GB.dic`)
4. **Restart Supervertaler** – The new language will appear in the dropdown
Note
**Spylls bundled dictionaries** (EN, RU, SV) are stored inside the spylls pip package, not in your dictionaries folder. Add your own .dic/.aff files to the dictionaries folder to extend available languages.
## Custom Dictionary
You can add words that Supervertaler should always accept:
* **Right-click a “misspelled” word** → **Add to Dictionary**
* Or manually edit `user_data/dictionaries/custom_words.txt`
Custom words are stored permanently and apply to all languages.
## Troubleshooting
### Spellcheck not working?
1. **Check the language** – Make sure the correct language variant is selected
2. **Check the backend** – Open Spellcheck Info to see which backend is active
3. **Missing dictionaries** – Some languages require manual dictionary installation
### Wrong language variant?
If you need British English but only have US English:
1. Download `en_GB.dic` and `en_GB.aff` from one of the dictionary sources
2. Place them in your dictionaries folder
3. Select “English (GB)” from the dropdown
### Linux crashes?
On Linux, some Hunspell configurations can cause crashes. Try:
* Installing proper Hunspell dictionaries: `sudo apt install hunspell-` (e.g., `hunspell-pl` for Polish)
* Temporarily disabling spellcheck in Settings → View Settings
* See [Linux-Specific Issues](/workbench/troubleshooting/linux/) for more details
## Technical Details
For developers and advanced users:
| Project | Description |
| ----------------------------------------------------------- | ----------------------------------- |
| [pyspellchecker](https://github.com/barrust/pyspellchecker) | Built-in word frequency spellcheck |
| [spylls](https://github.com/zverok/spylls) | Pure Python Hunspell implementation |
| [Hunspell](http://hunspell.github.io/) | Original C/C++ spellcheck library |
The spellcheck manager is located in `modules/spellcheck_manager.py` and provides:
* Automatic backend selection
* Dictionary file detection (including subdirectories)
* Word caching for performance
* Custom dictionary management
# Tag Validation
When working with formatted documents or CAT tool files, **tags must be preserved**.
## Why tags matter
Tags represent formatting or placeholders. If tags are missing or unbalanced, reimporting into your CAT tool can fail or formatting may be lost.
## Tag display modes
Supervertaler supports two ways of viewing formatting:
* **WYSIWYG mode**: shows *bold/italic/underline* as formatting
* **Tag view**: shows the raw markup (for example `...`)
Use **Tag view** when you are preparing to export/reimport and you want to verify the raw tags.
## Supported formatting tags
These tags are commonly used in Supervertaler projects:
| Tag | Meaning |
| ---------------- | ------------- |
| `...` | Bold |
| `...` | Italic |
| `...` | Underline |
| `...` | Bold + Italic |
| `...` | Subscript |
| `...` | Superscript |
## CAT tool placeholder tags
CAT tools use placeholders/tags that must be preserved exactly:
| CAT tool | Examples |
| ------------------ | ------------------------------------- |
| memoQ | `{1}`, `[2}...{2]`, `{MQ}`, `{tspan}` |
| Trados Studio | `<1>`, ``, `<2/>` |
| Phrase (Memsource) | `{1}`, `{2}` |
## Tips
* Keep tags balanced (for example `text`, not `text`).
* If you’re unsure, switch to Tag View and verify the raw tags.
* Don’t change tag numbers or names (for example `{1}` → `{2}`), even if the translation “looks fine”.
* If you insert a TM match, double-check that tags/placeholders still match the source.
Caution
For CAT tool workflows, don’t delete or edit placeholder tags unless you know exactly what they represent.
# Custom MT endpoint
A **Custom MT endpoint** lets you add your own OpenAI-compatible machine-translation service to QuickTrans, alongside the built-in engines (Google, DeepL, Microsoft, …). It is most useful for a **local MT proxy** – a small server that exposes several free MT engines behind a single OpenAI-compatible API – so you can query them all from Workbench without per-engine API keys.
It is deliberately separate from the **AI custom endpoint** used for the AI Assistant chat, so you can run an MT proxy for quick lookups *and* point the AI chat at a different custom LLM at the same time.
## When to use it
* You run (or have access to) an OpenAI-compatible endpoint that returns translations, e.g. a local MT proxy that maps a `model` name to a specific engine (`google`, `sogou`, `cnpat`, …).
* You want fast, free MT in QuickTrans without configuring each engine’s official API key.
* You want more than one such endpoint – for example a general proxy and a patent-specific one – each appearing as its own QuickTrans result.
## Set it up
1. Open **Workbench Settings → ⚡ QuickTrans**.
2. Under **MT engines**, tick **Custom MT endpoint (OpenAI-compatible)**.
3. Click **+** next to *Profile* and give the profile a name (e.g. `Local proxy`).
4. Fill in:
* **Endpoint URL** – the OpenAI-compatible base URL, e.g. `http://127.0.0.1:1234/v1`
* **Model / engine** – the model (or, for a multi-engine proxy, the engine name, e.g. `google`)
* **API key** – only if your endpoint requires one; leave blank otherwise
* **Show this profile in QuickTrans** – tick to include this profile as a QuickTrans result; untick to keep it configured but hidden
5. Click **💾 Save QuickTrans Settings**.
Each profile that is enabled (**Show this profile in QuickTrans** ticked) and has an endpoint appears as its own result in the QuickTrans popup (summoned with **Ctrl+Alt+Q**). Add more profiles with **+** to expose several engines at once; remove one with **−**.
Note
The “Custom MT endpoint” checkbox is the master on/off for the whole feature; the per-profile “Show this profile in QuickTrans” checkbox lets you pick which of your saved profiles actually appear, so you can keep several configured but show only the ones you want.
Note
The endpoint must be OpenAI **chat-completions** compatible (it receives a `POST` to `/v1/chat/completions` with `messages` and a `model`, and returns the translation as the assistant message). Workbench sends a strict “translate only” prompt, so the endpoint should return just the translated text.
## Example: a local multi-engine MT proxy
A common pattern is a small Python proxy that wraps free web MT engines and presents them as OpenAI “models”. Run it locally (e.g. on `http://127.0.0.1:1234`), then add a Custom MT profile per engine you want, setting **Model / engine** to the engine name the proxy expects.
Note
Free, unofficial web MT services are best-effort: availability and quality can vary, and they may rate-limit without notice. A proxy keeps that handling outside Workbench. Use each service in line with its own terms, and prefer an official provider API for production work.
## Free Dutch ↔ English engines (via a multi-engine proxy)
If your proxy exposes several engines as “models”, set **Model / engine** to the engine’s key. For Dutch ↔ English, these work well:
| Model / engine | Notes |
| ------------------- | ------------------------------------------------------------------------------------------------------------------------------------------------------------------- |
| `google` | Reliable, fast. |
| `microsoft_builtin` | Reliable; good Dutch. |
| `modernmt_builtin` | Reliable. |
| `lingvanex_builtin` | Works; quality varies. |
| `deepl_builtin` | Free DeepL — excellent quality **when available**, but the free endpoint rate-limits aggressively (HTTP 429), so it may intermittently fall back to another engine. |
China-focused engines (`sogou`, `transmart`, `niutrans`) and the patent engine `cnpat` are not recommended for Dutch ↔ English.
Note
These are free, best-effort services and their availability and quality vary; `deepl_builtin` in particular can be throttled. For dependable, production-grade DeepL, use the official DeepL engine (with an API key) built into Workbench’s MT settings.
## Custom MT vs the AI custom endpoint
| | Custom MT endpoint | AI custom endpoint |
| ------------ | ---------------------------------- | ---------------------------------- |
| Lives in | QuickTrans ▸ MT engines | AI Settings ▸ AI/LLM Providers |
| Used for | Fast MT results in QuickTrans | AI Assistant chat & AI translation |
| Independent? | Yes – configure both at once | Yes |
| Profiles | Multiple, each a QuickTrans result | Multiple, one active at a time |
# Machine Translation
Machine translation is delivered by **QuickTrans** – an always-on-top popup (and dockable panel) with translations from every enabled provider. See [QuickTrans](/workbench/quicktrans/overview/) for the full reference.
## Opening QuickTrans
| How | Notes |
| ---------------------------------------------------- | --------------------------------------------------------------------------------------------------------------------------------------------------------------------------------- |
| **Ctrl+Alt+Q** (⌘⌥Q on macOS) | Opens the QuickTrans always-on-top popup and starts the MT fan-out immediately on the selected text. Auto-copies the current selection so you don’t need a separate Ctrl+C first. |
| Editor right-click → ⚡ QuickTrans | Right-click menu in the editor. |
| **🔍 Run in SuperLookup** button in the popup header | After you’ve seen the QuickTrans results, click 🔍 to hand the same query off to Workbench’s SuperLookup tab for a richer concordance / termbase / web look-up. |
## Providers
QuickTrans supports these MT providers (subject to your API keys and per-provider on/off flags):
* DeepL
* Google Translate
* Microsoft Translator
* Amazon Translate
* ModernMT
* MyMemory (free)
Plus optional LLM-based “translation as suggestion” from Claude, OpenAI, Gemini, Mistral, DeepSeek, and a custom OpenAI-compatible endpoint or local Ollama model.
## Configure providers
QuickTrans’s provider list and LLM model selectors live in **Workbench Settings → ⚡ QuickTrans**. Click the ⚙ cog icon in the QuickTrans popup header to jump there in one click.
Per-provider on/off + LLM model choices persist in `general_settings.json` under `mt_quick_lookup`.
## Language behaviour
* QuickTrans uses the active project’s language pair by default.
* The popup has its own From / To dropdowns – override per-query without affecting your project settings.
## Performance
Provider calls run in parallel (each with a 5 s timeout, overall batch capped at 6 s) so total wall-clock is roughly the slowest single provider, not the sum. Results appear in the popup as they arrive – the first to finish is auto-selected so you can hit Enter without waiting for the slow providers.
## Copying results
* Successful results show a **📋 copy button**.
* You can also **double-click** a result row to copy the translation.
* Number keys **1**–**9** select the corresponding result (1 = first, 2 = second, etc.).
Note
If a provider call fails, QuickTrans shows the error message in red. Failed providers don’t block the others.
# QuickTrans
**QuickTrans** shows fast machine translations of the selected text from every enabled provider at once. It runs in two ways:
* a **global always-on-top popup**, summoned with **Ctrl+Alt+Q** anywhere on your computer; and
* a **docked panel** inside the Workbench grid – it can sit below, above, or to the right of the grid (beside TermLens), showing the same results inline as you move between segments.
The rest of this page describes the popup. It’s a single-purpose surface – just translations, no chat – and it stays on top of every other window until you press 1–9 / Enter / click to pick a result, or Esc to dismiss.
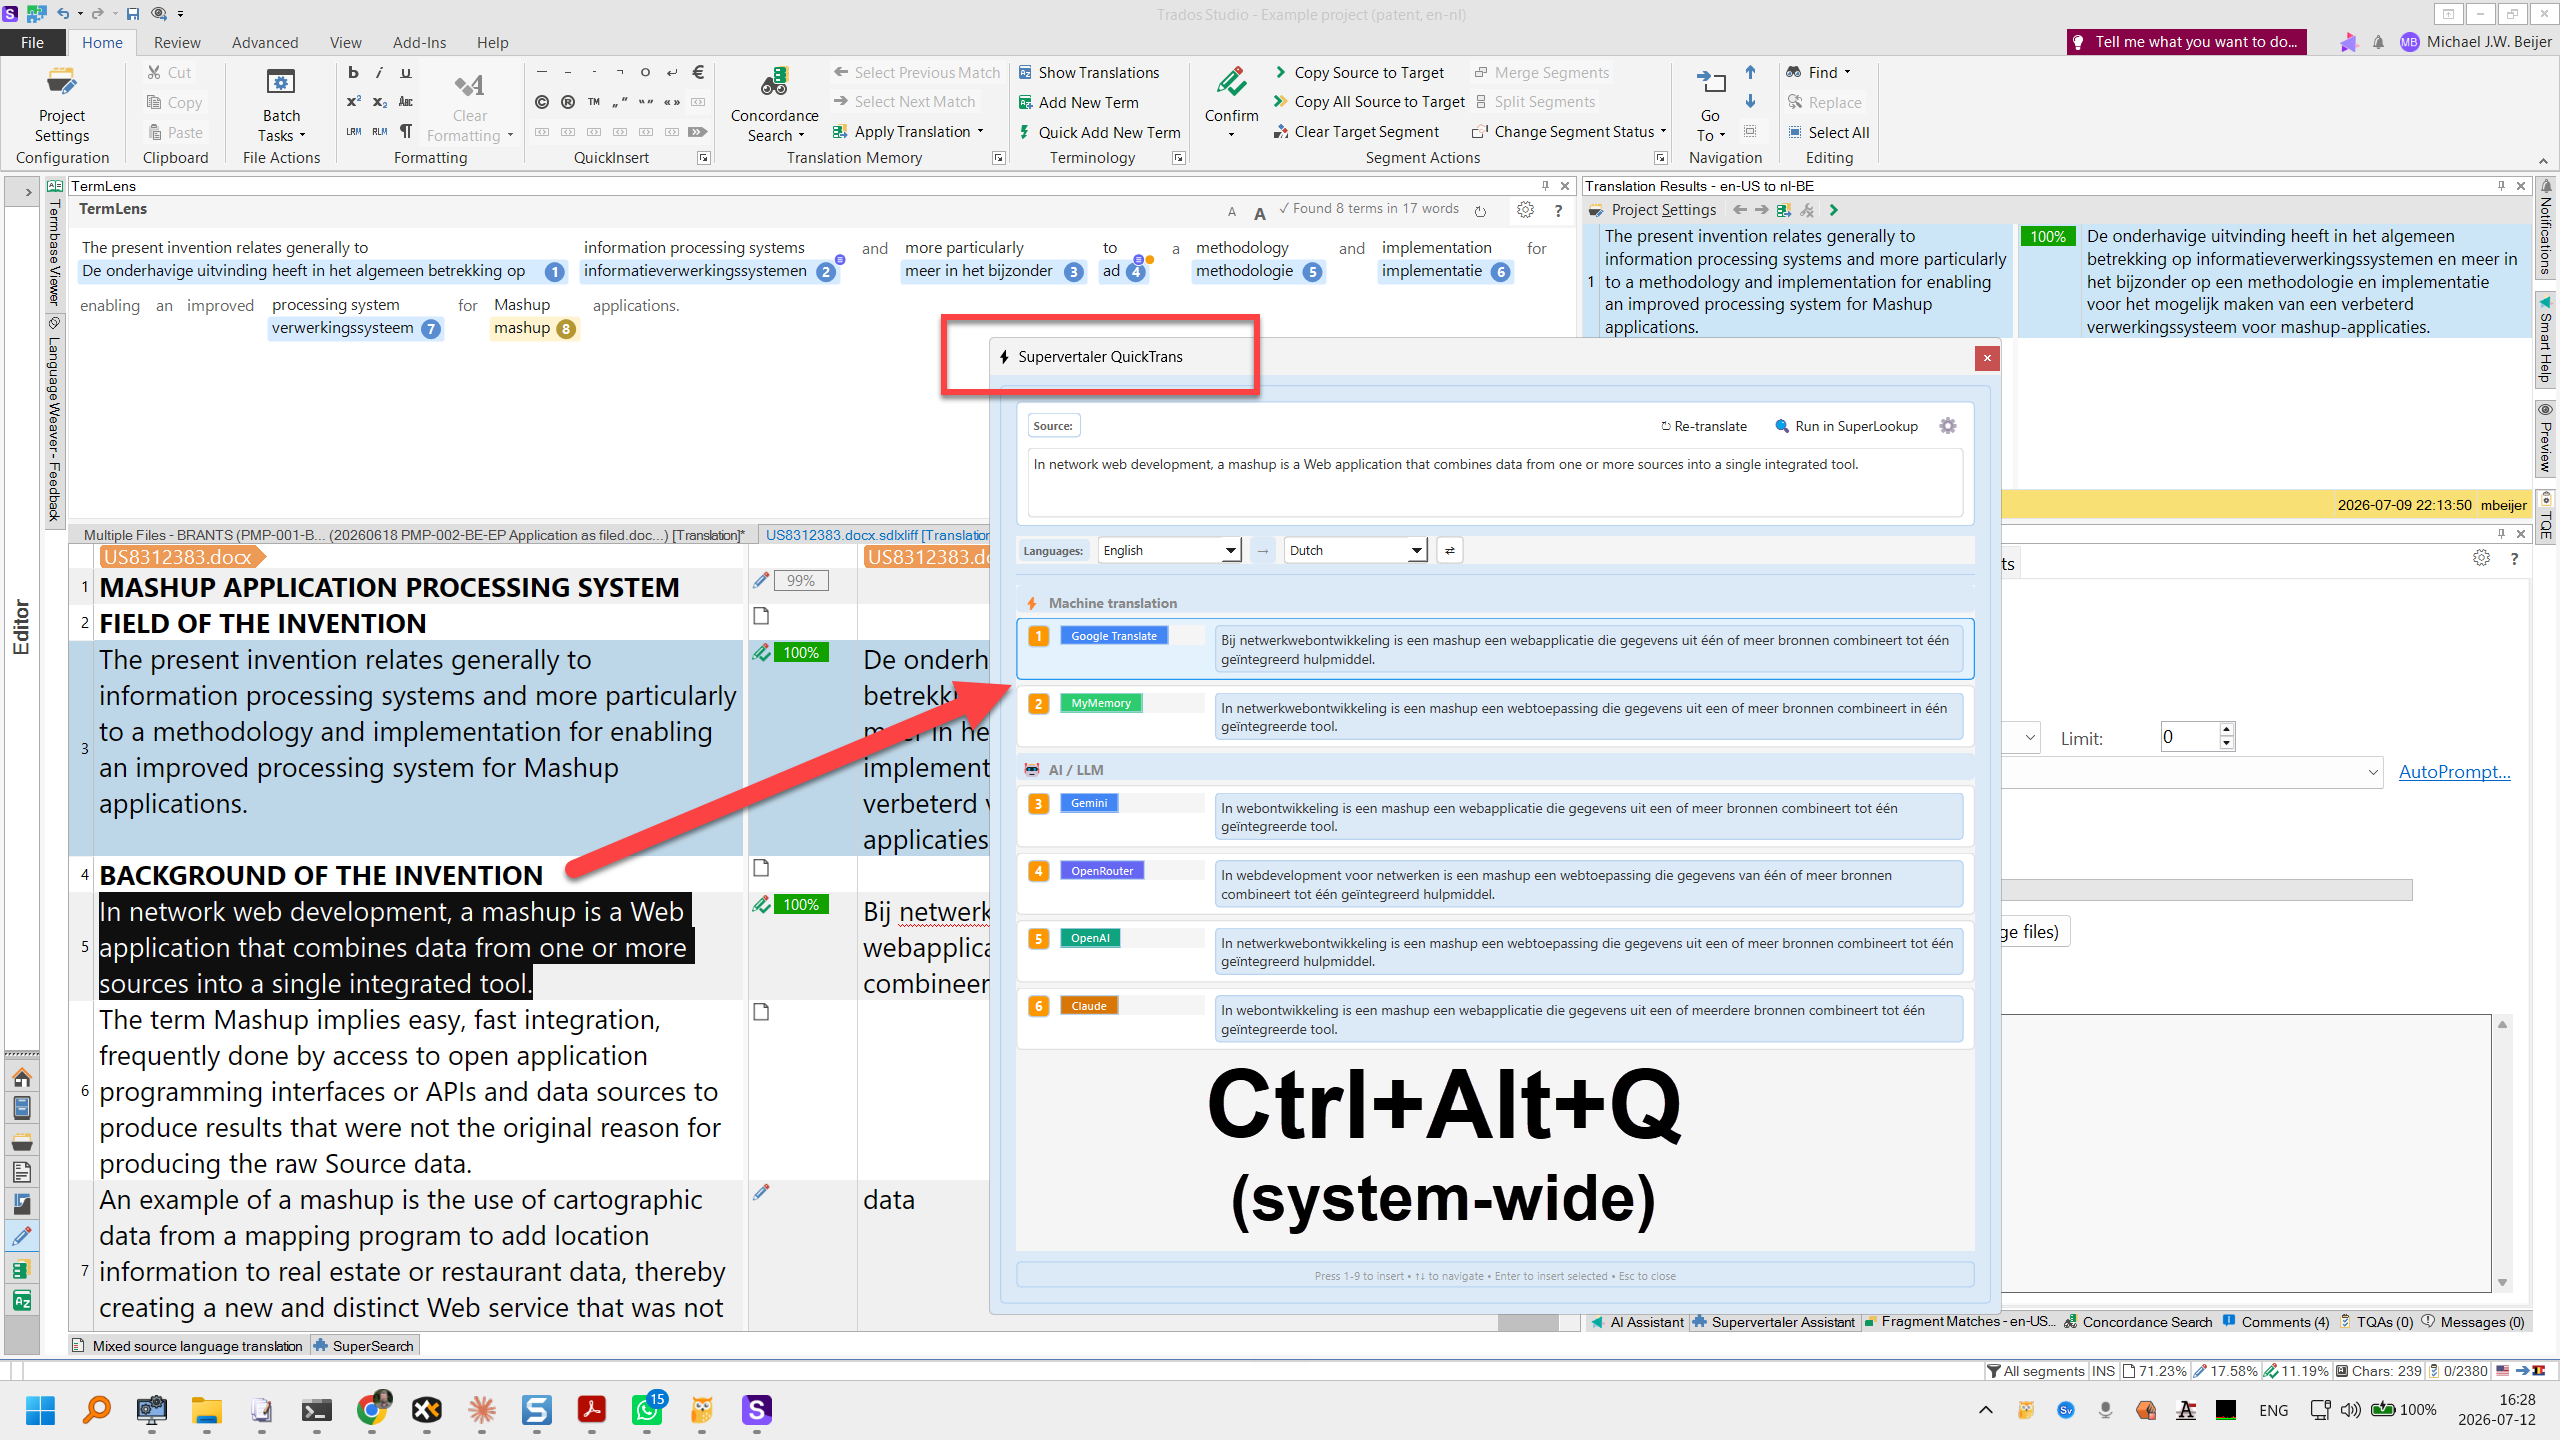
## Opening QuickTrans
| Method | Shortcut | Notes |
| ---------------------------------- | ----------------------------- | ------------------------------------------------------------------------------------------------------------------------------------ |
| Global, from any application | **Ctrl+Alt+Q** (⌘⌥Q on macOS) | Auto-copies the current selection; popup appears with translations |
| In-app, from a Workbench grid cell | **Ctrl+Alt+Q** | Same chord – Ctrl+Alt+Q is registered both as a system-wide global hotkey *and* as an in-app QShortcut, so it works wherever you are |
| Editor right-click → ⚡ QuickTrans | Right-click menu | Uses the selected text in the cell (or the full cell text if no selection) |
After selecting a translation from the global path (Ctrl+Alt+Q from another app), the popup hides itself, returns focus to the source application, and pastes the result over your selection. When invoked in-app, selecting a translation inserts it at the cursor position in the focused grid cell.
## The popup header
A row of three controls runs along the top of the popup:
* **⚡ Supervertaler QuickTrans** – title
* **🔍 Run in SuperLookup** – closes the popup and opens Workbench’s SuperLookup tab with the same query pre-filled and the search auto-fired. Useful when you’ve translated a phrase via QuickTrans and then think “actually, I want to look this up in my TMs / termbases / web resources too” – one click instead of dismissing the popup and pasting the query again
* **⚙ Settings** – opens Workbench Settings → ⚡ QuickTrans so you can enable / disable providers and pick LLM models
## Translation results
Results arrive as they complete from each provider and are displayed in a numbered list. The first result to arrive is automatically selected, so for the typical “fast provider → press Enter” flow you don’t need to wait for the slow ones.
| Method | Action |
| ---------------------- | ------------------------------------------- |
| **Press 1–9** | Insert the numbered translation immediately |
| **Arrow keys + Enter** | Navigate and select |
| **Click** | Insert the translation |
| **Esc** | Dismiss the popup without inserting |
Each translation row shows the provider name on the left and the translated text on the right.
## Supported providers
QuickTrans queries up to eleven providers in parallel. Each one is independently enabled / disabled in **Workbench Settings → ⚡ QuickTrans**.
**Machine translation engines** (each row needs an API key for that service, except MyMemory):
| Engine | API key required? |
| -------------------- | ----------------------- |
| Google Translate | Yes |
| DeepL | Yes |
| Microsoft Translator | Yes |
| Amazon Translate | Yes |
| ModernMT | Yes |
| MyMemory | No (free, rate-limited) |
**LLM providers** (each row needs an API key for that service; reuses the keys configured in Settings → AI Settings):
| Provider | Notes |
| -------- | -------------------------------------------------------------------------------------- |
| Claude | Pick the model in Settings → ⚡ QuickTrans (e.g. claude-haiku-4-5 vs claude-sonnet-4-6) |
| OpenAI | Pick the model (e.g. gpt-5.4-mini vs gpt-5.5) |
| Gemini | Pick the model |
| Ollama | Local-only; uses the active Ollama model |
| Custom | One configurable OpenAI-compatible endpoint (URL + model) |
The LLM providers are **disabled by default** – tick them in Settings → ⚡ QuickTrans if you want LLM-based “translation as suggestion” alongside the MT engines. (Ticking all eleven makes for a slow popup; most users keep three or four MT engines plus one LLM.)
## Language pair
QuickTrans uses **the active project’s source and target language**. There’s no per-query language override in the popup itself – set the language pair at the project level and QuickTrans inherits it.
If no project is open, QuickTrans falls back to English → Dutch (the default for unconfigured installs).
## Configuring providers
Open **Workbench → Settings → ⚡ QuickTrans** (or click the ⚙ cog in the popup header) to enable / disable individual providers and pick LLM models. The settings live in `general_settings.json` under the `mt_quick_lookup` key and persist across restarts.
Tick a provider, save, then trigger Ctrl+Alt+Q again – the popup picks up the new provider list the next time it opens.
## Tips
* **Ctrl+Alt+Q is the fastest way to translate** – select text anywhere, press the shortcut, results appear instantly. The synthetic Ctrl+C happens internally, so you don’t need to copy first.
* **Use the 🔍 Run in SuperLookup hand-off** for terminology questions. QuickTrans is great for “how does this phrase translate?”, SuperLookup is great for “have I translated this term before? what does it mean? is it in a termbase?”.
* **The popup lives on top of every other window**, so you can summon it from a browser, a PDF reader, your CAT tool, or anywhere – it overlays whatever’s foreground.
* **Different from Chat.** QuickTrans gives you N parallel translations from N providers; the Chat tab in Workbench’s right panel is a conversational AI assistant. Use QuickTrans when you want options, Chat when you want a conversation.
## Customising the hotkey
The QuickTrans chord can be rebound in **Settings → Keyboard Shortcuts**. The action is called *QuickTrans (instant translation popup)*, default **Ctrl+Alt+Q**. The same chord registers as both an in-app QShortcut and an OS-level global hotkey, so changing it once changes both.
## Related pages
* [Machine Translation engines](/workbench/quicktrans/machine-translation/)
* [Custom MT endpoint](/workbench/quicktrans/custom-mt-endpoint/)
* [SuperLookup Overview](/workbench/superlookup/overview/)
* [Keyboard Shortcuts](/workbench/settings/shortcuts/)
# Changelog
This page shows you where to find **what changed between versions** of Supervertaler.
## ✅ View the full changelog
The complete changelog is maintained on GitHub:
* [Open CHANGELOG.md on GitHub](https://github.com/Supervertaler/Supervertaler-Workbench/blob/main/CHANGELOG.md)
## What you’ll find there
* New features and improvements (what was added)
* Bug fixes (what was corrected)
* Version numbers and release dates
## Tip
If you’re troubleshooting, start by checking whether your issue was already fixed in a newer version.
# Contributing
Contributions are welcome – bug reports, documentation improvements, and code changes.
## Where to start
* Report issues:
* Questions / discussion:
## Documentation edits
Supervertaler Help is synced from the repository. If you spot missing or unclear documentation, open an issue or submit a pull request.
## Tip
When reporting a bug, include:
* Your OS
* Your Supervertaler version
* Steps to reproduce
* Any error message text
# User Data Folder
Supervertaler Workbench keeps your termbases, translation memories, prompt library, settings, and projects in a single user data folder. This folder is **shared with [Supervertaler for Trados](https://docs.supervertaler.com/trados/data-folder/)**, so both programs read and write the same terminology, TMs, and prompts without duplicating files.
## Folder location
By default the folder lives in your home directory:
```plaintext
Windows: C:\Users\\Supervertaler\
macOS / Linux: ~/Supervertaler/
```
You can choose a different location during first-run setup. The chosen path is recorded in a small pointer file in your user configuration directory (on Windows, `%APPDATA%\Supervertaler\config.json`), which both programs read so they always agree on where the data lives.
## Folder structure
```plaintext
Supervertaler/
│
├── prompt_library/ Shared
│ ├── domain_expertise/
│ ├── project_prompts/
│ └── style_guides/
│
├── resources/ Shared
│ ├── supervertaler.db
│ ├── termbases/
│ ├── tms/
│ ├── non_translatables/
│ └── segmentation_rules/
│
├── workbench/ Supervertaler Workbench only
│ ├── settings/
│ │ ├── settings.json
│ │ ├── themes.json
│ │ ├── shortcuts.json
│ │ └── ...
│ ├── dictionaries/
│ ├── projects/
│ ├── ai_assistant/
│ ├── voice_scripts/
│ └── web_cache/
│
└── trados/ Supervertaler for Trados only
├── settings/
├── projects/
└── batch_backups/
```
### Shared resources
The **prompt library** and **resources** folders are shared between both programs. A prompt you create or edit in Workbench is immediately available in the Trados plugin, and vice versa. The SQLite database (`supervertaler.db`) holds your termbases and translation memories — Workbench has full read-write access to it.
### Program-specific folders
Each program stores its own settings, projects, and runtime data in a dedicated subfolder (`workbench/` or `trados/`), so the two never interfere with each other. Workbench’s `workbench/` subfolder holds your `settings/` (including `shortcuts.json` and `themes.json`), custom spellcheck `dictionaries/`, saved `projects/`, AI assistant data, voice scripts, and a web cache.
## Automatic migration
If you’re updating from an older version, Workbench reorganises the folder automatically on its next startup. No manual action is required — your settings and data are preserved.
## Related
* [Supervertaler for Trados — User Data Folder](https://docs.supervertaler.com/trados/data-folder/)
* [General Settings](/workbench/settings/general/)
# AutoCorrect while typing
Supervertaler can automatically convert straight quotes, three-dot ellipses, and double-hyphen dashes to the correct typographic forms **as you type in the target field**. Quote shapes follow the **target language** — German targets get `„…"`, French targets get `« … »`, Russian targets get `«…»`, English targets get `"…"`, and so on.
This feature was requested in [discussion #211](https://github.com/orgs/Supervertaler/discussions/211) and ships from **v1.10.230**.
## Where to find it
**Settings → ✍️ AutoCorrect** (its own tab in the Settings sidebar, just below General).
The master switch enables or disables all rules at once. Each rule below it can also be toggled individually.
This tab **saves automatically** — there is no Save button. Every toggle is written to your settings the moment you click it and takes effect on the **very next keystroke** — no app restart, no grid reload.
## Rules
| Rule | Behaviour | Default |
| --------------------------------- | --------------------------------------------------------- | ------------------------------------ |
| Smart double quotes | `"foo"` → language-correct typographic pair | on |
| Smart single quotes / apostrophes | `'foo'` → typographic single pair · `don't` → `don't` | on |
| Ellipsis | `...` → `…` | on |
| En-dash | `word-- word` → `word– word` | on |
| Em-dash | `word--- word` → `word— word` | **off** (the project uses en-dashes) |
| French typographic spacing | Insert a narrow non-breaking space before `:` `;` `!` `?` | on for `fr-*` targets |
## Quote shapes by target language
The smart-quote rule reads your project’s target language and picks the appropriate shape:
| Languages | Open | Close |
| -------------------------------------------------------------------------------- | ---------------- | ---------------- |
| English, Dutch, Portuguese, Turkish, Romanian, Danish | `"` | `"` |
| German, Czech, Slovak, Slovenian, Croatian, Hungarian, Polish *(close uses `"`)* | `„` | `"` / `"` |
| French | `« `(with NNBSP) | `»` (with NNBSP) |
| Spanish, Italian, Russian, Ukrainian, Norwegian | `«` | `»` |
| Swedish, Finnish | `"` | `"` |
The engine decides between “open” and “close” shape from what immediately precedes the typed quote — whitespace or an opening bracket → open shape; a letter, digit or closing bracket → close shape. Tag markers (`{1}`, ``, `[2}`) are treated as transparent, so a quote opened straight after an inline tag still gets the opening shape.
## Backspace cancels the last conversion
If AutoCorrect converts something you actually wanted to leave alone, press **Backspace immediately**. One Backspace restores your literal typing (the straight quote, the three dots, the double hyphen, etc.) — exactly as it works in Word and memoQ. The next keystroke clears that one-shot undo memory, so the safety net is only available for the conversion you just made.
## What AutoCorrect does *not* touch
* **Inside tag markers** (`{1}`, `[2}`, ``). Auto-correcting inside a tag would corrupt the boundaries and break the round-trip back to your source format, so the engine skips these.
* **Paste**. Pasting a block of text never triggers any rule — only single typed characters do. If you want the engine to clean up pasted text, do it explicitly with Find & Replace.
* **Programmatic content** (loaded translations, MT/TM insertions, Copy Source → Target). Same reason — these aren’t user keystrokes.
* **Dictation**. Voice-typed content arrives via a different input path and is not auto-corrected.
* **The source column**. AutoCorrect is target-only.
## Turning a single rule off temporarily
Use the per-rule toggles on the **Settings → ✍️ AutoCorrect** tab. Because the tab saves automatically, both the master switch and the per-rule checkboxes are honoured on the next keystroke without clicking anything else. There’s no per-segment override yet — if you want one in a future version, please open an issue.
## See also
* [Settings → General](/workbench/settings/general/)
* Tracking issue: [#213 — Typographic auto-convert / AutoCorrect-while-typing system](https://github.com/Supervertaler/Supervertaler-Workbench/issues/213)
* Original request: [Discussion #211](https://github.com/orgs/Supervertaler/discussions/211)
# Backup
Supervertaler protects your work with two independent backup mechanisms, both on the **Settings → 💾 Backup** tab. Use the **?** button on that tab (or press **F1**) to return to this page.
## Auto Backup (time-based)
Automatically saves the current project at a regular interval to guard against crashes and forgotten saves.
* **Enable automatic backups** – turn the timer on or off.
* **Backup interval** – how often to save, in minutes (default **5**, range 1–60).
Each run saves the project file and exports a `_backup.tmx` alongside it. This **overwrites** the working files in place — it keeps the latest state current, but it is not a history you can step back through. For that, use timestamped backups below.
## Timestamped project backups (every N saves)
Keeps **immutable, dated snapshots** of the project file (`.svproj`) so you can roll back to an earlier state — like a lightweight version history.
* **Keep timestamped project backups** – enable or disable the feature.
* **Back up every N saves** – how often a snapshot is taken, counted in save operations (default **1** = every save). Both manual saves (Ctrl+S) and the timed auto-backup above count toward N.
* **Keep the last K backups** – how many snapshots to retain per project (default **100**). Older ones are pruned automatically.
Snapshots are written to a dedicated folder under your user-data location:
```plaintext
\workbench\backups\\_YYYYMMDD-HHMMSS.svproj
```
Use the **Open folder…** button on the Backup tab to jump straight there.
Note
Taking a snapshot just copies the project file you already saved, so it adds no noticeable delay — backing up on every save is fine even on large projects.
### Restoring a backup
1. Click **Open folder…** on the Backup tab (or browse to the path above).
2. Find the snapshot with the timestamp you want (filenames sort chronologically).
3. Copy it somewhere safe and rename it (e.g. drop the timestamp), then open it from **Project → Open**, or replace your current `.svproj` with it while Supervertaler is closed.
Tip
Because every save can be a snapshot and old ones are pruned for you, if something ever goes wrong you can almost always step back to a known-good version from a minute or two earlier.
## Related
* [General Settings](/workbench/settings/general/)
# Fonts
Font settings control the typeface and size used in the translation grid and the companion tabs.
## What you can change
* **Font family** – any font installed on your system; the dropdown shows available fonts
* **Font size** – point size for the grid; companion tabs use the same family at their own size
* **Global UI font scale** – a single slider that scales every UI element (menus, tabs, settings, Chat panel, Clipboard history, SuperLookup, status bar) at once
## Choosing a font
* For general translation work, a clear humanist sans-serif (Segoe UI, Inter, Calibri) keeps long sessions comfortable
* For technical or code translation, a monospaced font (Consolas, JetBrains Mono) can help align numbers and symbols
* For right-to-left languages (Arabic, Hebrew), choose a font with good RTL glyph coverage
## Global UI font scale (Retina / high-DPI displays)
Settings → AI Settings → **🖥️ Global UI Font Scale** holds a single slider (50%–200%, default 100%) that scales the entire application UI – not just the grid. Useful when you find Qt’s defaults uncomfortably small on a MacBook Retina screen, a 4K monitor, or any high-DPI display.
The slider covers:
* The grid (segment numbers, type column, source and target text)
* Companion tabs (Clipboard 3-column tree, SuperLookup web resources, Voice command table, Chat panel)
* QuickTrans always-on-top popup
* Tabs, settings panels, AI tools, status bar, menus
* Termbase and TM panes
Apply the change with the **Apply** button next to the slider; most areas update immediately. Lazy-constructed widgets (Clipboard, SuperLookup, Voice) pick up the new size when they are next opened, so switch away from a companion tab and back once after changing the slider.
If you’ve also customised the grid font size (above), that value still applies on top of the scale – so a 12 pt grid font at 150% renders at 18 pt. Grid zoom (Ctrl+= / Ctrl+-) continues to work at any scale.
## Tips
* Font changes apply immediately in the grid – no restart needed
* If glyphs for a specific language appear as boxes, install a font with full Unicode coverage for that script (Noto Sans is a good all-rounder)
* On a 4K or Retina display, try 125% or 150% UI scale before reaching for individual font-size sliders – it keeps every panel proportional
* The QuickTrans popup’s header controls (🔍 Run in SuperLookup, ⚙ Settings) deliberately don’t scale with the slider, because they live in fixed-size buttons and scaling the glyph alone would overflow them
## Related pages
* [View Settings](/workbench/settings/view/)
* [Theme (Light/Dark Mode)](/workbench/settings/theme/)
# General
## Where to find settings
Open **Settings** from the main toolbar or the **View** menu. Settings are organised into tabs across the top of the settings panel.
## AI Settings
* **Provider** – select OpenAI, Anthropic (Claude), Google Gemini, Mistral, or a custom OpenAI-compatible endpoint
* **API key** – enter and save your key for the selected provider; keys are stored locally in your user data folder
* **Model** – choose which model to use for AI translation and the Chat assistant
* **Temperature** – controls how creative vs. literal the AI output is (lower = more consistent)
* **Max tokens** – upper limit on response length
See [Setting Up API Keys](/workbench/get-started/api-keys/) for step-by-step instructions.
## Project settings
* **Default source language / target language** – pre-filled when creating new projects
* **Autosave interval** – how often the current segment is saved automatically (in seconds); set to 0 to disable
## Voice settings
The [🎤 Voice top tab](/workbench/voice/overview/) contains all voice command and dictation settings (engine, model, sensitivity, push-to-talk mode). They are not duplicated here – open the Voice tab directly to configure them.
## Related pages
* [Setting Up API Keys](/workbench/get-started/api-keys/)
* [AI Translation Overview](/workbench/ai-translation/overview/)
* [Theme (Light/Dark Mode)](/workbench/settings/theme/)
* [Keyboard Shortcuts](/workbench/settings/shortcuts/)
# Language (UI Translation)
Supervertaler Workbench can display its menus and settings labels in languages other than English. Translations are contributed by the community as **XLIFF 1.2** files – the industry-standard interchange format that every CAT tool reads natively.
This page covers:
* How to pick your display language
* Which languages are currently available
* How the translation files work (file location, format)
* How to contribute a translation
Note
**Current scope (MVP, v1.10.208).** This first translation pass covers the **menu bar**, **Settings tab labels**, and **General-tab group titles** – around 180 strings. Dialog bodies, error messages, status-bar text, and per-cell tooltips remain in English for now. Subsequent passes will widen coverage as translators contribute.
## Picking your display language
1. Open **Settings → General → 🌐 Language**.
2. Use the **Display language** dropdown to choose a locale.
3. Click **OK** to close Settings.
4. **Restart Supervertaler** for the new language to take effect.

Settings → General → Language dropdown
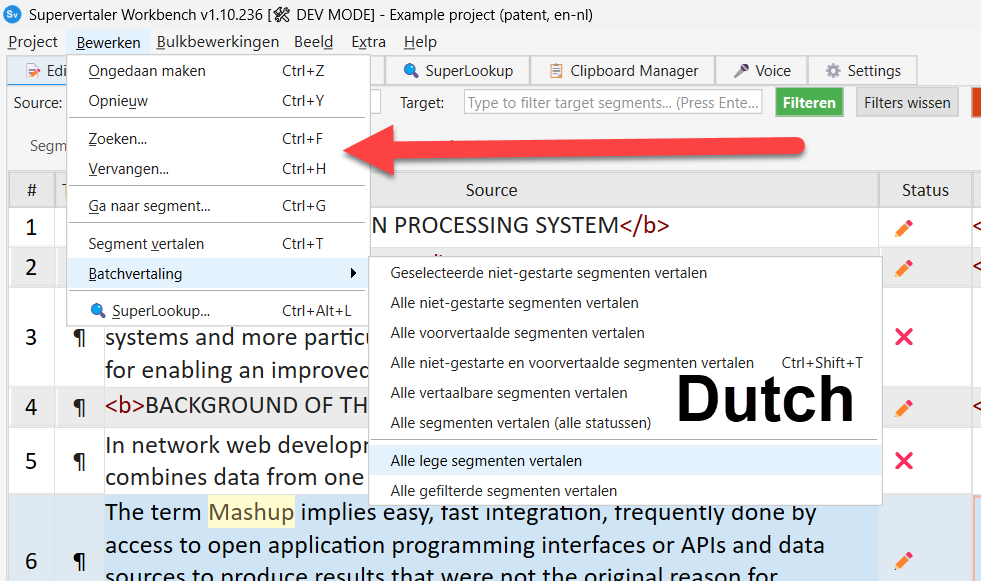
The Workbench interface after picking a locale – here localised to Dutch
### Locale options
| Entry | Meaning |
| -------------------------- | ------------------------------------------------------------------------------------------------------------------------- |
| **System default** | Use whatever language your operating system reports. Falls back to English if no translation file exists for that locale. |
| **English** | Source language – no translation file needed. |
| Locales with a `.xlf` file | Use that translation. |
| `[no translation yet]` | Locale code is recognised but no `.xlf` has been contributed yet. Picking it falls back to English. |
If a locale is partially translated, the strings that *have* been translated are used; the rest fall through to English. Partial coverage is fine.
### Why a restart is required
Most Supervertaler dialogs are hand-coded rather than built with Qt Designer, which means they don’t automatically refresh their text when the language changes mid-session. A restart is the simpler approach for v1; live language switching may come in a future version.
## Where the translation files live
Each locale’s translation lives in a single `.xlf` file in the **`translations/`** folder:
* **Installed Windows build:** alongside `Supervertaler.exe` (open the install folder, find `translations\`)
* **From source:** in the repository root, `translations/`
* **macOS:** inside the `.app` bundle at `Supervertaler.app/Contents/Resources/translations/`
File names follow the pattern `supervertaler_.xlf`:
```plaintext
translations/
├── supervertaler_template.xlf <- source-only English template (auto-generated)
├── supervertaler_zh_CN.xlf <- Simplified Chinese
├── supervertaler_zh_TW.xlf <- Traditional Chinese
├── supervertaler_pl.xlf <- Polish
└── ...
```
**You can drop a new locale’s `.xlf` into this folder manually** – the next launch will pick it up and the Language dropdown will offer it. No reinstall, no rebuild.
## What’s inside an XLIFF file?
The format is standard **XLIFF 1.2** – the same format Workbench imports through **Project → Import → Import Document…** (using the XLIFF filter). Every CAT tool in regular use reads it natively.
A `.xlf` file has one entry per translatable string. Each entry looks like this:
```xml
&Project
项目(&P)
SupervertalerQt
Supervertaler.py
9698
```
What each piece means:
* **``** — the original English string. Never edit this.
* **``** — your translation. Set the `state` attribute to `translated` (or `signed-off` / `final`) when you’re happy with it. Targets left as `state="needs-translation"` are skipped at runtime – Workbench shows the English source instead.
* **``** — where the string appears in the UI. The `x-qt-context` value tells you the dialog/class; the `sourcefile` and `linenumber` are pointers into the source code (rarely needed for translation, but handy for troubleshooting).
* **`&`** — XML-escaped `&`. The character marks the **next letter as a keyboard mnemonic** – `&Edit` becomes underlined **E**dit, activated by **Alt+E**. Translations should preserve mnemonics, often by putting them in parentheses (`编辑(&E)` for Chinese).
## How to contribute a translation
The whole flow is designed so you can use whichever CAT tool you already work in. No new tooling required.
### Quick version
1. Grab `translations/supervertaler_template.xlf` from the [GitHub repo](https://github.com/Supervertaler/Supervertaler-Workbench/tree/main/translations).
2. Save a copy as `supervertaler_.xlf` (for example `supervertaler_de.xlf` for German).
3. Open it in your CAT tool (Trados, memoQ, Phrase, OmegaT, or Workbench itself).
4. Set the target language on the `` element (`target-language="de"` for German). Most CAT tools do this for you when they ask which target language you’re translating into.
5. Translate the strings. Mark each as **confirmed/translated/approved** in your tool – this sets the `state="translated"` attribute behind the scenes.
6. Save / export back to XLIFF.
7. Open a PR on the [Supervertaler-Workbench repo](https://github.com/Supervertaler/Supervertaler-Workbench/pulls) adding your `.xlf` file under `translations/`.
### CAT-tool specifics
**Workbench itself:** Project → Import → **Import Document…** and choose the generic XLIFF filter (not SDLXLIFF or MQXLIFF). Translate in the editor, then export back via Project → Export → **Export Translated Document…**.
**Trados Studio:** File → Open → Translate Single Document → select the `.xlf`. Studio recognises XLIFF 1.2 out of the box. Save Target As to export.
**memoQ:** Project → Import documents → select the `.xlf`. Use the standard XLIFF filter.
**Phrase TMS:** Upload as a regular bilingual file.
**OmegaT:** Drop into the project’s `source/` folder. OmegaT outputs the completed file to `target/`.
**Poedit:** Although Poedit is best-known for `.po` files, recent versions also handle `.xlf` natively.
### Notes for translators
* **Mnemonics (`&letter`)** mark keyboard accelerators. Preserve them in the translation. Place them where the underlined letter feels natural in your language. For Chinese / Japanese / Korean, the convention is to put the mnemonic in parentheses after the term: `编辑(&E)`.
* **Avoid mnemonic collisions** within the same menu. Two items both using `&S` will cause one to silently lose the shortcut.
* **Emoji** (📁 🔍 ⚙️ etc.) stay in the translation – they’re part of the visual identity.
* **Newlines (`\n`)** in source strings should be preserved.
* **Placeholders** like `{0}` or `%1` are not in this MVP’s strings, but if you see one, leave it verbatim.
## How translations are picked up
Each launch, Supervertaler:
1. Reads `general.ui_locale` from the unified `settings.json`.
2. Resolves `"system"` to the operating system’s locale via Qt’s `QLocale.system()`.
3. Looks for `translations/supervertaler_.xlf` next to the executable.
4. Parses the XLIFF, collects all `` entries whose `` is in a “done” state (`translated`, `signed-off`, `final`, or stateless).
5. Installs a `QTranslator` on the QApplication so every `tr()` call resolves through that dictionary.
6. If the file is missing, the locale has zero finished translations, or the locale is `en` / unknown – English is used silently.
Total cost at startup: about 10 ms. Negligible against the rest of the cold-start.
## Troubleshooting
**The dropdown shows my locale as `[no translation yet]` even though I added the file.**
Make sure the file:
* Lives in `translations/` (next to `Supervertaler.exe`, or in the source-tree root)
* Is named `supervertaler_.xlf` exactly – matching the locale code in the dropdown (case-sensitive)
* Is valid XML (a single missing `` will fail the load silently)
**The dropdown picks the right locale, but the menu still shows English.**
Check that:
* Each `` element has `state="translated"` (or `signed-off` / `final`), not `state="needs-translation"`
* The `` actually contains text, not just whitespace
* The `` text matches the codebase exactly (case, punctuation, spaces, emoji)
* You’ve actually restarted Supervertaler
**XML parse errors at startup.**
Open the `.xlf` in a text editor. Common causes:
* Unescaped `&` in a translation – use `&` instead
* Mismatched `<` / `>` in a translation – use `<` and `>`
* A CAT tool reordered elements in a way Workbench doesn’t expect
Open an issue with the `i18n` label on the [Workbench tracker](https://github.com/Supervertaler/Supervertaler-Workbench/issues) and attach the failing `.xlf`.
## See also
* [`translations/TRANSLATING.md`](https://github.com/Supervertaler/Supervertaler-Workbench/blob/main/translations/TRANSLATING.md) – the in-repo contributor guide with extra detail
* [General Settings](/workbench/settings/general/) – the parent Settings tab
* Tracker issues [#178](https://github.com/Supervertaler/Supervertaler-Workbench/issues/178) and [#190](https://github.com/Supervertaler/Supervertaler-Workbench/issues/190) – the original i18n requests
# Customising Shortcuts
Supervertaler has one keyboard shortcut per action. The same combination works whether Supervertaler is the focused application or whether you trigger it from another app – there’s no longer a separate “Global” entry to keep in sync with the in-app one.
## Managing shortcuts
Open **Settings → Keyboard Shortcuts**. Each row is one action. Click a row to edit, press the new combination, hit OK. Changes apply immediately – no restart needed.
Rows whose action label starts with 🌍 also register as an OS-level global hotkey, so they fire from any application. The rest are in-app only (e.g. segment navigation, match insertion).
## Default shortcuts that work everywhere
The 🌍 actions and their out-of-the-box bindings:
| Action | Default | Notes |
| ------------------------------ | -------------------------------------------- | ---------------------------------------------------------------------------------------------------------------------------- |
| Open Clipboard | **Ctrl+Alt+C** (Win/Linux) / **⌘⌥C** (macOS) | Auto-copies the current selection, then opens Workbench’s Clipboard tab |
| Open SuperLookup | **Ctrl+Alt+L** / **⌘⌥L** | Auto-copies the current selection, then opens Workbench’s SuperLookup tab with the text pre-filled and the search auto-fired |
| QuickTrans | **Ctrl+Alt+Q** / **⌘⌥Q** | Instant translation popup; auto-copies the selection |
| Voice dictation / push-to-talk | **Ctrl+Shift+Space** / **⌘⇧Space** | Toggles recording; a ”🎤 Listening…” toast confirms the mic is live |
| Voice Always-On (toggle) | **Ctrl+Alt+A** / **⌘⌥A** | Continuous listening on/off |
Note
**Ctrl+Alt+K** used to summon a floating Supervertaler Sidekick window through v1.10.3. That window was retired in v1.10.4 and the chord is now unbound by default. The Clipboard Manager, Voice, and SuperLookup tabs are reachable via the dedicated hotkeys above; Chat lives in the AI tab and in Workbench’s right panel.
Rebind any of these in **Settings → Keyboard Shortcuts** by clicking the row and pressing a new combination.
## macOS vs Windows: symbols and modifier names
The two platforms use different conventions for naming and drawing modifier keys. Supervertaler shows the platform-native symbols in the UI, but it’s useful to know what each one means:
| Symbol | macOS name | Windows / Linux name | Physical key |
| ------ | -------------- | -------------------- | ------------------------------------------ |
| **⌘** | Command (Cmd) | – | The key with the Apple/Command glyph |
| **⌃** | Control (Ctrl) | Ctrl | The Control key |
| **⌥** | Option (Opt) | Alt | The Alt key (top of the Option key on Mac) |
| **⇧** | Shift | Shift | The Shift key |
So a shortcut shown as **⌃⌘L** on macOS is read “Control + Command + L”. See the next section for how Supervertaler stores that internally and why the stored name doesn’t always match the Mac symbol.
## What “Ctrl” means inside Supervertaler
Internally, shortcuts are stored in Qt’s cross-platform format, which uses **Ctrl**, **Alt**, **Shift**, and **Meta** as labels. Qt swaps **Ctrl** and **Meta** on macOS so that the same shortcut string works on every platform. The mapping:
| Stored as… | …means on Windows / Linux | …means on macOS |
| ---------- | ------------------------- | --------------- |
| `Ctrl` | Ctrl | **Cmd** (⌘) |
| `Alt` | Alt | **Option** (⌥) |
| `Shift` | Shift | **Shift** (⇧) |
| `Meta` | Windows key | **Control** (⌃) |
You only ever see this if you export shortcuts to JSON or look at the cheatsheet HTML – the UI itself always shows you platform-native symbols on macOS and plain names on Windows. The default for SuperLookup is therefore stored as `Ctrl+Alt+L` and displayed as **Ctrl+Alt+L** on Windows and **⌘⌥L** on macOS, both of which fire the same physical chord on each platform.
## Per-platform notes
**macOS**
Global hotkeys require Accessibility permission on whichever binary launched Python:
* Bundled `Supervertaler.app` → add **Supervertaler** in System Settings → Privacy & Security → Accessibility
* Launched from `Terminal.app` → add **Terminal.app** instead
* Launched from iTerm2 → add **iTerm2.app** instead
Also requires the `pyobjc-framework-Cocoa` Python package (`pip install pyobjc-framework-Cocoa`); the bundled `.app` ships with it.
The Status indicator on the right-hand side of Settings → Keyboard Shortcuts shows **Active (via NSEvent)** when global hotkeys are working on macOS.
**Windows**
Global hotkeys are registered via the native `RegisterHotKey` API, which consumes the keystroke at the OS level. The combination is reserved for Supervertaler whenever it’s running. If another app has already claimed the same combination, Supervertaler logs a `failed_hotkeys` warning and that one combination won’t fire – re-bind to something free in Settings → Keyboard Shortcuts.
**Linux**
Global hotkeys go through `pynput`, which uses XGrabKey under X11. If hotkeys silently don’t fire, your user may need to be in the `input` group (`sudo usermod -aG input $USER`, then log out and back in).
## Quick-lookup tab keyboard navigation
When you’ve summoned the Clipboard, SuperLookup, or Voice tab via a global hotkey, these shortcuts work straight away – no clicking around to land your focus first:
| Shortcut | Action |
| --------- | ---------------------------------------------------------------------------------------------------------- |
| **Esc** | Hide Workbench to the system tray (quick-lookup tabs only – Editor / Settings / etc. keep the natural Esc) |
| **↑ / ↓** | Navigate within the focused column (e.g. clipboard text history, snippet list) |
| **← / →** | Move focus between columns in the Clipboard tab (Text → Images → Menu) |
| **Enter** | Activate the selected item (paste clip, run snippet, fire conversion) |
### Pressing Esc dismisses Workbench to the tray
On the surfaces you summon with a global hotkey – SuperLookup, Clipboard, and Voice – pressing **Esc** hides Workbench back to the system tray. Handy when you’re using Workbench as a popup utility from another app: hotkey to summon, Esc to dismiss.
* **On SuperLookup**: Esc unconditionally hides Workbench, even when the cursor is in the search box. SuperLookup is mostly a one-shot query, so there’s nothing worth keeping if you change your mind.
* **On Clipboard and Voice**: Esc hides Workbench *unless* the focused widget is a text input (search field, command editor, etc.) – in those cases Esc behaves the way it does in any other app (clears the field, closes a dropdown, etc.).
* **On Editor, TMs, Termbases, AI, Settings**: Esc keeps its natural editor / dialog / combo-box behaviour. Workbench is never hidden by accident from the surfaces where you actually do work.
### Tray quick-jump menu
Right-click the Workbench tray icon (the orange **Sv**) for a menu with **Show Workbench**, **Open SuperLookup**, **Open Clipboard**, **Open Voice**, **Open Settings**, plus toggles for **Close to tray** and **Start with computer**.
## Editor shortcuts
The editor (translation grid) has its own set of shortcuts for navigation, match insertion, term operations, and so on. See [Editor Keyboard Shortcuts](/workbench/editor/keyboard-shortcuts/) for the full list.
## Exporting a printable cheatsheet
The settings page has an **Export Cheatsheet (HTML)** button on the right-hand panel. It writes a self-contained HTML file showing every shortcut grouped by category, with the platform-native symbols already substituted in. Print it or save it as PDF.
## Related pages
* [Editor Keyboard Shortcuts](/workbench/editor/keyboard-shortcuts/)
* [Voice Commands & Dictation](/workbench/voice/overview/)
* [Clipboard Manager](/workbench/clipboard/overview/)
# Termbase Settings
The **Termbase settings** box (Settings → General) controls how termbase matches are displayed while you translate.
## Highlight termbase matches in source cells
When enabled, termbase matches are highlighted with coloured backgrounds directly in the source column of the grid. Higher-priority terms are shown in darker blue, lower-priority terms in lighter blue – similar to memoQ’s termbase highlighting. This gives you instant visual feedback about which words in the source are covered by your termbases.
## Hide shorter termbase matches included in longer ones
When enabled, shorter terms that are fully contained within a longer matched term are hidden from the results.
For example, if both *cooling* and *cooling system* match, only *cooling system* is shown. This reduces clutter in the translation results panel when overlapping terms are present.
# Theme
Supervertaler supports light and dark themes. Switch between them in **Settings → Theme** or via the toolbar theme toggle.
## Why use Dark Mode
* Better comfort in low-light environments
* Reduced eye strain during long evening sessions
* Lower screen brightness without sacrificing readability
## Switching themes
The change takes effect immediately – no restart needed. All panels (grid, companion tabs, dialogs, popups) switch at once.
## Tips
* If any UI element looks visually wrong after switching (rare Qt repaint quirk), try switching to a different tab and back, or restarting the app
* Dark mode does not affect PDF Rescue’s OCR output or exported DOCX files — those are document colours, not UI colours
## Related pages
* [View Settings](/workbench/settings/view/)
* [Font Customisation](/workbench/settings/fonts/)
# TM Settings
The **TM settings** box (Settings → General) controls how translation memory matches are inserted and propagated as you work.
## Auto-fill empty segments with 100% TM matches
When you select an empty segment that has a 100% TM match, its translation is filled in automatically. This saves time on repetitive content – exact matches appear without any manual action.
Note
Only empty segments are auto-filled. Segments that already contain a translation are left untouched.
* **↳ Mark auto-filled segments as confirmed** – when enabled, an auto-filled segment lands as **confirmed**. Otherwise the auto-filled translation is inserted as a **draft** for you to review.
## Auto-propagate confirmed translations to identical segments
When you confirm a segment, its translation is copied to every other segment whose source text is identical. This is the memoQ/Trados-style propagate-on-confirm behaviour – translate a repeated sentence once, confirm it, and the rest of the document catches up automatically.
By default, only **empty** identical segments are filled, and they are inserted as drafts.
* **↳ Mark propagated segments as confirmed** – propagated segments land as **confirmed** instead of **draft**.
* **↳ Overwrite existing translations when propagating** – propagation also replaces existing target content in identical segments. When disabled, only empty segments are filled.
## Auto-confirm 100% TM matches when navigating (Ctrl+Enter)
When enabled, pressing **Ctrl+Enter** automatically inserts, confirms, and skips past any segment that has a 100% TM match, so you can move quickly through perfect matches.
* **↳ Also overwrite existing translations with 100% TM matches** – auto-confirm also replaces existing target content (including pre-translations or machine translations) with the 100% match.
## TM Save Mode
Controls what happens when the same source segment is saved to the TM more than once.
* **Save all translations (with timestamps)** – keeps every version of a translation for a given source, with timestamps. The most recent translation is preferred when showing matches.
* **Save only latest translation (overwrite)** – keeps only the most recent translation, overwriting older ones. This prevents the TM from growing with obsolete entries. *(Default.)*
# View
View settings control how the translation grid and the side panels look while you translate.
## Grid display
* **Show invisibles** – reveals spaces, tabs, and line breaks as visible markers; useful for catching trailing whitespace
* **Tag colour** – the highlight colour used for inline formatting tags (``, ``, etc.)
* **Row height** – compact, normal, or spacious; affects how many segments you see at once without scrolling
## Right panel (Chat, matches)
* **Right panel default width** – default width of the right-hand panel that hosts the Match Panel and the 💬 Chat tab. Can also be dragged at runtime; the width is remembered across sessions.
## Tips
* If tags are hard to see, increase tag colour saturation or switch to **Tag View** (shows placeholder boxes instead of raw tag text).
* For long sessions, try a slightly larger row height — it reduces eye strain when scanning for specific segments.
* Dark mode is set in [Theme](/workbench/settings/theme/), not here.
## Related pages
* [Theme (Light/Dark Mode)](/workbench/settings/theme/)
* [Font Customisation](/workbench/settings/fonts/)
* [Keyboard Shortcuts](/workbench/settings/shortcuts/)
# Overview
SuperLookup is your unified concordance and research hub, bringing together all lookup resources in one place. If you’ve used **LogiTerm Pro**, the idea will feel familiar: one search box across your termbases, translation memories, and web resources.
It’s a top tab in Workbench (🔍 SuperLookup), alongside Editor, TMs, Termbases, Clipboard, Voice, and Settings.
## Opening SuperLookup
| How | Shortcut | Notes |
| ---------------------------------- | ----------------------------------------------------- | ---------------------------------------------------------------------------------------------------------------------------------------------------------------------------------------------------------------------------------------- |
| From the translation grid | **Ctrl+K** | Selects the 🔍 SuperLookup top tab; selected text is used as the search query automatically |
| From any application (system-wide) | **Ctrl+Alt+L** | Select any text in any app, press the shortcut, and Workbench opens with the SuperLookup tab forward, text pre-filled, and the search auto-fired. The sub-tab it lands on is configurable – see **Configurable landing tab** below. |
| From any application (system-wide) | **Ctrl+Alt+Q** | Opens the [QuickTrans always-on-top popup](/workbench/quicktrans/overview/) with parallel translations from every enabled provider. Different from SuperLookup – use SuperLookup for terminology lookup, QuickTrans for fast MT options. |
| Via the system tray | Right-click the orange Sv icon → **Open SuperLookup** | Useful when the global hotkey is taken by another app |
## Configurable landing tab
By default, Ctrl+Alt+L lands on the **Termbases** sub-tab. You can change this in **SuperLookup Settings → “Ctrl+Alt+L lands on”** – pick from QuickTrans, TMs, Termbases, or Web Resources. The choice persists across restarts. Whichever sub-tab you choose is fired immediately on the hotkey; the others are deferred until you actually navigate to them, so you don’t pay the cost of work you may not look at.
## Tabs
### TM Matches
Search your Translation Memories for similar text:
* Fuzzy matching with percentage scores
* Horizontal (table) or vertical (list) view toggle
* Source TM column shows which TM the match came from
* Search direction: Both, Source only, or Target only
### Termbase Matches
Search your termbases:
* Shows Source, Target, Domain, Notes columns
* Right-click to “Edit in Termbase”
* Direction and language filters (Both / Source / Target + From/To)
### Machine Translation
Get instant MT from multiple providers:
* Google Translate, DeepL, Microsoft Translator
* Amazon Translate, MyMemory, ModernMT
Configure providers in **Settings → MT Settings**.
### Web Resources
Quick access to online reference sites: IATE, Linguee, ProZ.com, Reverso Context, Wikipedia, Wiktionary, Google, Google Patents, Juremy, AcronymFinder, BabelNet, and more.
Web resource tabs maintain login sessions between searches, so you stay logged in to sites like ProZ.com.
## Search controls
**Language filters** – use the **From** and **To** dropdowns to filter by language pair. Auto-populated from your TMs and termbases.
**Search direction** – **Both** searches source and target columns; **Source** and **Target** restrict to one side.
**Search box** – type a query and press Enter (or click 🔍). When Ctrl+K or Ctrl+Alt+L opens SuperLookup, the selected text is placed in the search box and the search runs immediately.
## Tips
* Double-click a result to copy it to the clipboard.
* Right-click a result for additional options.
* Press **Esc** to hide Workbench back to the system tray once you’ve grabbed what you needed – Esc unconditionally dismisses from SuperLookup, regardless of whether you were typing in the search box.
***
## Related pages
* [QuickTrans](/workbench/quicktrans/overview/)
* [TM Concordance Search](/workbench/superlookup/tm-search/)
* [Termbase Search](/workbench/superlookup/termbase-search/)
* [Web Resources](/workbench/superlookup/web-resources/)
# Termbase Search
SuperLookup’s **Termbases** tab searches your Supervertaler termbases for preferred terminology.
## Open it
* **In Supervertaler:** press `Ctrl+K` (or open the **SuperLookup** tab, or **Tools → SuperLookup**).
* **From any application:** press `Ctrl+Alt+L` (system-wide hotkey).
## How to search
1. Type (or paste) a term into the search box.
2. Press `Enter` (or click **Search**).
3. Optional filters:
* **Direction:** Both / Source / Target
* **From / To:** filter by termbase language pair (leave as **Any** to search across languages)
## What you’ll see
Results are shown in a table with:
* **Source**
* **Target**
* **Termbase** (termbase name)
* **Domain**
* **Notes**
The current search term is highlighted in the results.
## Actions
* **Double-click** a row to copy the translation.
* **Copy Translation** copies the selected target term.
* **Add to Termbase** opens a dialog to add a new term pair (you’ll be prompted to pick a writable termbase).
## Edit in Termbase (jump to the entry)
Right-click a result to open a context menu with:
* **Edit in Termbase: …**
This navigates to the **Termbases** tab, selects the termbase, and filters the terms list to the source term.
## Termbase selection
In **SuperLookup → Settings → Termbases**, you can pick which termbases SuperLookup searches.
Note
If you don’t select any termbases in the SuperLookup Settings tab, SuperLookup searches **all available** termbases.
# TM Search (Concordance)
SuperLookup’s **TMs** tab lets you do fast concordance searches in your Translation Memories (“find where I translated this before”).
## Open it
* **In Supervertaler:** press `Ctrl+K` (opens SuperLookup with the current selection, if any).
* **From any application:** press `Ctrl+Alt+L` — a true system-wide hotkey (registered natively on Windows; no AutoHotkey required).
## How to search
1. Type (or paste) text into the search box.
2. Press `Enter` (or click **Search**).
3. Optional filters:
* **Direction:** Both / Source / Target
* **From / To:** language pair filter (leave as **Any** to use all languages)
## Views
At the top of the tab you can switch between:
* **Horizontal (Table):** match % + Source/Target side-by-side.
* **Vertical (List):** stacked Source/Target entries (classic concordance layout).
## Actions
* **Double-click** a result to copy the target text.
* **Copy Target** copies the selected target.
* **Insert Target** copies the target and prompts you to paste with `Ctrl+V` in your active application.
## TM selection
In **SuperLookup → Settings → Translation Memories**, you can choose which TMs to search.
Note
If you don’t select any TMs in the SuperLookup Settings tab, SuperLookup searches **all available** TMs.
# Web Resources
SuperLookup’s **Web Resources** tab gives you a one-click sidebar of reference sites for terminology and research.
## How it works
* You use the **main SuperLookup search box** (top of the window) and click **Search**.
* The Web Resources tab uses your **From → To** language direction when building URLs.
## Browser modes
In the left sidebar you can choose a mode:
* **Embedded:** opens sites inside Supervertaler (requires `QtWebEngine`).
* Uses a persistent browser profile so logins/cookies are kept between sessions.
* **External:** opens your default browser.
Note
When Embedded mode is available, SuperLookup can pre-load searches for all resources at once.
## Search options
* Select a single resource (e.g. IATE) and click **Search**.
* Click **Search All** to load results for all resources (Embedded mode).
* Use **Open in Browser** to open the last search URL in your default browser.
## Included resources
The sidebar includes (by default):
* IATE
* Linguee
* ProZ.com
* Reverso Context
* Google Search
* Google Patents
* Wikipedia (Source)
* Wikipedia (Target)
* Juremy
* beijer.uk
* AcronymFinder
* BabelNet
* Wiktionary (Source)
* Wiktionary (Target)
## Show/hide resources
In **SuperLookup → Settings → Web Resources**, you can toggle which sites appear in the sidebar.
# Sending Terms to the AI
Supervertaler can send your termbase entries to the AI as reference during translation, so the model uses your approved terminology instead of guessing. This is on a per-termbase basis and takes one click to enable.
## How to enable it
Each termbase in the **Termbase Manager** has an **AI** checkbox (the orange/purple tick), separate from the Read/Write activation checkboxes.
1. Open the **Termbases** tab.
2. Find the termbase whose terms you want the AI to use.
3. Tick its **AI** checkbox.
That’s the only setup step. From then on, matching terms are automatically included in every translation prompt for the current project.
Note
The **AI** checkbox is independent per termbase. You might, for example, feed a small client-approved glossary to the AI while keeping a large general reference termbase for lookups only.
## What happens during translation
When you translate a segment, Supervertaler:
1. Scans the source text of that segment.
2. Finds any terms from your AI-enabled termbases that actually appear in it.
3. Adds them to the prompt sent to the AI under a **TERMBASE** heading, instructing the model to use those approved terms.
The section added to the prompt looks like this:
```plaintext
# TERMBASE
Use these approved terms in your translation:
- machine learning → machinaal leren
- click → klikken
- widget → ⚠️ DO NOT USE: widget
```
### Only relevant terms are sent
Supervertaler sends **only the terms that appear in the current segment**, not your entire termbase. Matching is whole-word for spaced languages and substring-based for CJK/Thai. This keeps each prompt focused, avoids diluting the AI with irrelevant terminology, and saves tokens.
### Forbidden terms
If you mark a term as **forbidden** in the termbase, the AI is explicitly told **DO NOT USE** that translation. This is useful for steering the model away from a wrong-but-tempting rendering, or away from an old term a client has since replaced.
## Tips
* **Keep AI-enabled termbases focused.** Very large termbases trigger a warning, because sending a lot of terminology can dilute translation quality. Thanks to per-segment filtering this rarely bites in practice, but a tight, curated glossary gives the best results.
* **Works everywhere.** Term injection applies to single-segment translation, batch translation, and keyboard-shortcut translation alike.
* **Combine with TM.** Fuzzy TM matches are injected alongside termbase terms, so the AI gets both your approved terminology and your existing translations as reference.
## See Also
* [Termbase Basics](/workbench/termbases/basics/)
* [Importing Terms](/workbench/termbases/importing/)
* [AI Translation Overview](/workbench/ai-translation/overview/)
* [Prompts](/workbench/ai-translation/prompts/)
# Termbase Basics
Termbases help ensure consistent terminology across your translations.
## What is a Termbase?
A termbase is a database of terms with their translations:
| Source (EN) | Target (NL) | Domain | Notes |
| ---------------- | --------------- | ------ | --------------- |
| software | software | IT | Don’t translate |
| click | klikken | IT | Verb |
| machine learning | machinaal leren | AI | Official term |
## Why Use Termbases?
1. **Consistency**: Same term = same translation every time
2. **Efficiency**: Don’t look up the same term twice
3. **Quality**: Use approved terminology
4. **Client requirements**: Follow style guides
## Termbase Features in Supervertaler
### Automatic Highlighting
Terms from active termbases are highlighted in the source text:
* Green background by default
* Hover to see the translation
* Higher priority = darker shade
### Multiple Termbases
Maintain separate termbases for:
* Different clients
* Different domains (legal, medical, IT)
* Different projects
### Priority Levels
Assign priority (1-10) to terms:
* Priority 1 (highest): Must be used
* Priority 5: Standard terms
* Priority 10: Optional/suggestions
### Forbidden Terms
Mark terms as “forbidden” to flag text that should NOT be translated or should be avoided.
## Creating Your First Termbase
1. Go to the **Termbases** tab
2. Click **+ Create Termbase**
3. Enter a name (e.g., “Client ABC Terminology”)
4. Choose source and target languages
5. Click **Create**
## Adding Terms
### Manually
1. Click on your termbase
2. Click **+ Add Term**
3. Enter source term, target term
4. Optionally add domain, notes, priority
5. Click **Save**
### From Selection
1. Select text in the source column
2. Right-click → **Add to Termbase**
3. Enter the target translation
4. Choose which termbase to add to
### Import from File
1. Go to the **Termbases** tab
2. Click **Import**
3. Select a TSV file (tab-separated: source, target, domain, notes)
4. Watch the progress dialog
## Termbase Settings
### Activation
Termbases must be activated to show matches:
* ✅ **Read**: Terms are highlighted and shown in lookups
* ✅ **Write**: New terms can be added during translation
### Highlight Style
Choose how terms appear in the grid:
* **Background**: Green background shading
* **Dotted Underline**: Subtle underline
* **Semibold**: Bold text
Go to **Settings → View Settings → Termbase Highlight Style**.
***
## See Also
* [Creating Termbases](/workbench/termbases/creating/)
* [Importing Terms](/workbench/termbases/importing/)
* [Term Highlighting](/workbench/termbases/highlighting/)
* [Sending Terms to the AI](/workbench/termbases/ai-injection/)
* [TermLens (Inline Terminology)](/workbench/termbases/termlens/)
* [Term Extraction](/workbench/termbases/extraction/)
# Creating Termbases
Termbases help you enforce terminology consistently.
## Create a termbase
1. Open the **Termbases** tab
2. Click **Create Termbase**
3. Give it a name and select languages
## Add terms while translating
You can build terminology as you work:
* Select text in both Source and Target
* Use **Add to Termbase** from the context menu
The right-click menu offers several routes: **Add to Termbase** (`Ctrl+Alt+T`, opens the entry dialog), and the quick-adds **Quick Add to Project Termbase** (`Alt+Up`) and **Quick Add to Background Termbase** (`Alt+Down`).
## Similar Term Found — merge as a synonym
If the term you are adding shares its source with an existing entry (but has a different target), or shares its target (but a different source), Workbench shows a **Similar Term Found** prompt instead of silently creating a near-duplicate. You can:
* **Add as Synonym** — fold the new term into the existing entry as a synonym
* **Add & Edit…** — do that, then open the entry editor to review it
* **Keep Both** — create a separate entry anyway
* **Cancel** — abandon the add
The prompt only appears when there is an actual overlap, so the quick-adds stay instant otherwise. Exact duplicates (same source *and* target) are skipped as before. This matches the behaviour of the Supervertaler for Trados plugin.
## Tips
* Use a separate termbase per client when terminology differs.
* Add high-priority terms first (product names, UI strings).
# Term Extraction
**Term extraction** sends your project’s source text to your configured AI model and returns a proposed **bilingual project glossary** – source terms paired with translations – which you review, edit, and turn into a project termbase in one step.
Note
**Requires Workbench v1.10.357 or later.** Earlier versions used a mechanical frequency-based extractor (monolingual, no translations); it has been retired. Extraction now uses the same AI provider and model as your translations, configured under **AI → Settings**.
### Opening the extraction dialogue
Go to the **Termbases** tab and click **🔍 Extract Terms** in the button bar beneath the termbase list, next to **+ Create New**.
Extraction reads the source segments of the open project, so open a project first – clicking with none open just tells you to.
### Choosing the source text
The dialogue offers two sources:
* **Use project segments** (default) – extracts from all source segments in the loaded project.
* **Paste text manually** – enables the text box below, so you can extract from arbitrary text. Useful for a reference document or a client’s style guide.
### Extraction settings
| Setting | Default | What it does |
| -------------------- | ----------------------------- | ------------------------------------------------------------------------------------------------------------------------------------ |
| **Source Language** | the project’s source language | Tells the model what language the text is in. Free text – any language works. |
| **Target Language** | the project’s target language | The language the model translates each term into. |
| **Domain / Subject** | blank | Optional hint, e.g. `mechanical engineering` or `sewing machines`. Leave blank and the model infers the domain from the text itself. |
Click **🤖 Extract Terms with AI**. Small texts return in seconds; a full-length document (e.g. a complete patent application) takes a minute or so. The dialogue stays responsive while it runs.
Note
**Your source text is sent to the configured AI provider** – the same one that handles your translations, so this adds no exposure beyond translating the project. If a project must not leave your machine, use a local model (Ollama) as your provider.
### Reviewing the results
Results fill a table of term pairs:
| Column | Meaning |
| ---------- | -------------------------------------------------------------------------------------------------------------- |
| **Select** | Tick box controlling whether the pair is added. Every row starts ticked. |
| **Source** | The term, in its canonical (dictionary) form. **Editable** – click to correct. |
| **Target** | The model’s translation. **Editable.** May be empty where the model was unsure – fill it in or untick the row. |
| **Note** | Optional context from the model, such as a domain label or a caveat. |
Edit cells directly to fix anything before committing – your edits are what gets saved, not the model’s original answer.
To tick or untick many rows at once, select them (Shift/Ctrl+click) and **right-click** → *Untick selected* / *Tick selected*.
On very large projects only the first portion of the text (roughly 8–9k words) is analysed, and the results label says so explicitly – nothing is truncated silently.
### Creating the project termbase
Click **Create Project Termbase**, then give it a name. The default is ` Terminology`.
Supervertaler creates a project-scoped **bilingual** termbase containing every ticked pair and makes it the **Project termbase** – it appears in the Termbases tab with the pink **Project** tick and **Read** enabled, so terms with targets immediately produce [TermLens](/workbench/termbases/termlens/) suggestions. Empty-target entries can be completed later – see [Creating termbases](/workbench/termbases/creating/).
Note
**One project termbase per project.** If the project already has one, you are asked what to do (v1.10.358+): make the new termbase the project termbase (the existing one is kept as a regular termbase), save the new one as a regular termbase alongside, or cancel. Nothing is deleted in any case.
### Tips
* The model’s output is a proposal, not a verdict – review it as you would any AI suggestion, especially target translations of ambiguous terms.
* A one-word domain hint noticeably improves precision on specialised texts.
* If you build prompts with **AutoPrompt**, note that it already performs glossary extraction as part of prompt generation – the two are complementary: this feature produces a *termbase* you can edit, share, and reuse across sessions.
***
### See Also
* [Termbase Basics](/workbench/termbases/basics/)
* [Creating termbases](/workbench/termbases/creating/)
* [Importing termbases](/workbench/termbases/importing/)
* [AI injection](/workbench/termbases/ai-injection/)
* [TermLens overview](/workbench/termbases/termlens/)
# Term Highlighting
When a termbase is active, Supervertaler highlights matching terms in the grid.
## Why it helps
* Prevents terminology drift
* Speeds up review
* Makes it obvious when a preferred term exists
## Tips
* If the highlight is too strong or too subtle, adjust it in [View Settings](/workbench/settings/view/).
* Tag highlighting and termbase highlighting are separate: tags are for placeholders/formatting, termbases are for terminology.
* For a word-by-word terminology view with translations underneath each term, see [TermLens](/workbench/termbases/termlens/).
# Importing Terms
You can import terminology from common formats such as TSV/CSV (and other supported termbase exports).
## Import steps
1. Open the **Termbases** tab
2. Choose **Import**
3. Select your file
## Tips
* Clean your source file (consistent columns) before importing.
* Import before batch translation so AI can follow your terminology.
Note
If you don’t see terms highlighting in the grid, ensure the termbase is enabled (Read/active) in the **Termbases** tab.
# TermLens
TermLens is Supervertaler’s inline terminology display. It shows the source text of the current segment word by word, with termbase translations directly underneath each matched term.
## How it works
When you select a segment, TermLens analyses the source text against all active termbases and displays the result in a visual layout:
* **Matched words** appear with their termbase translation underneath
* **Unmatched words** are shown in light text so you can read the full source sentence in context
* **Project termbase** matches appear in pink; **Background termbase** matches appear in blue
* **Non-translatable** terms (if configured) are shown in a distinct style
This gives you an at-a-glance overview of every term in the segment that has a termbase entry – without having to hover or click anything.
## Where to find it
TermLens appears in two places:
1. **Below the grid** – the “TermLens” tab in the bottom panel (toggle with **View → TermLens Under Grid**)
2. **In the Match Panel** – the right-side panel that also shows TM matches
Both instances update simultaneously when you navigate to a new segment.
## Inserting terms
You can insert a termbase translation from TermLens into your target text in three ways:
### Click to insert
Click any translation shown under a source word. The translation is inserted at the cursor position in the target field.
### Keyboard shortcuts (Alt+1 through Alt+9)
Each matched term in TermLens is assigned a numbered badge. Press **Alt+1** to insert the first match, **Alt+2** for the second, and so on.
**Double-tap** for terms 10 and above: press **Alt+1, Alt+1** quickly to insert term 11, **Alt+2, Alt+2** for term 22, etc.
> **Note:** Alt+0 is reserved for the Compare Panel. TermLens numbering starts at 1.
### Right-click menu
Right-click a term in TermLens to:
* **Insert** the translation
* **Edit** the termbase entry
* **Delete** the termbase entry
## On-demand views (popup & picker)
In addition to the always-visible panels, two on-demand views show the same matches in a more focused layout. Use them when the docked panel is hidden, on small screens, or when you want a keyboard-only insertion flow.
| View | Trigger | Best for |
| ---------------------------------------------------------- | ---------------- | ------------------------------------------------------------------------------------------- |
| [**TermLens popup**](/workbench/termbases/termlens-popup/) | **Ctrl** tap | Floating mirror of the docked panel; cycle chips with arrow keys, insert with Enter or 1–9. |
| [**TermPicker**](/workbench/termbases/termpicker/) | **Ctrl+Shift+P** | Modal tabular grid with #/Source/Target/Termbase columns and expandable synonym sub-rows. |
Both pull from the same data the docked panel uses, so the chips / rows you see are identical – just laid out differently.
## Font settings
You can customise the TermLens font independently from the grid font:
1. Go to **Settings → View Settings → TermLens Font Settings**
2. Choose font family, size (6–16 pt), and bold/normal weight
3. Changes apply immediately to both TermLens instances
## Tips
* Press **F5** to force a refresh if matches appear to be missing.
* TermLens respects termbase activation – only terms from activated termbases are shown.
* If you have many termbases, designate one as the **Project termbase** (shown in pink) to make its terms stand out.
## TermLens for Trados
A standalone version of TermLens is also available as a plugin for **Trados Studio 2024+**. It reads the same SQLite termbase format used by Supervertaler and displays terminology matches directly inside the Trados editor.
→ [TermLens for Trados on GitHub](https://github.com/michaelbeijer/TermLens)
***
## See Also
* [TermLens popup](/workbench/termbases/termlens-popup/) – on-demand floating mirror of the panel (Ctrl tap)
* [TermPicker](/workbench/termbases/termpicker/) – tabular grid view of the same matches (Ctrl+Shift+P)
* [Termbase Basics](/workbench/termbases/basics/)
* [Term Highlighting](/workbench/termbases/highlighting/)
* [Keyboard Shortcuts](/workbench/editor/keyboard-shortcuts/)
# TermLens popup
The **TermLens popup** is a borderless floating version of the docked TermLens panel for the active segment. It mirrors the panel’s chips, colours, and metadata indicators exactly, but appears at the cursor on demand – designed for keyboard-only term selection on small screens, and for translators who want to insert terms without ever reaching for the mouse.
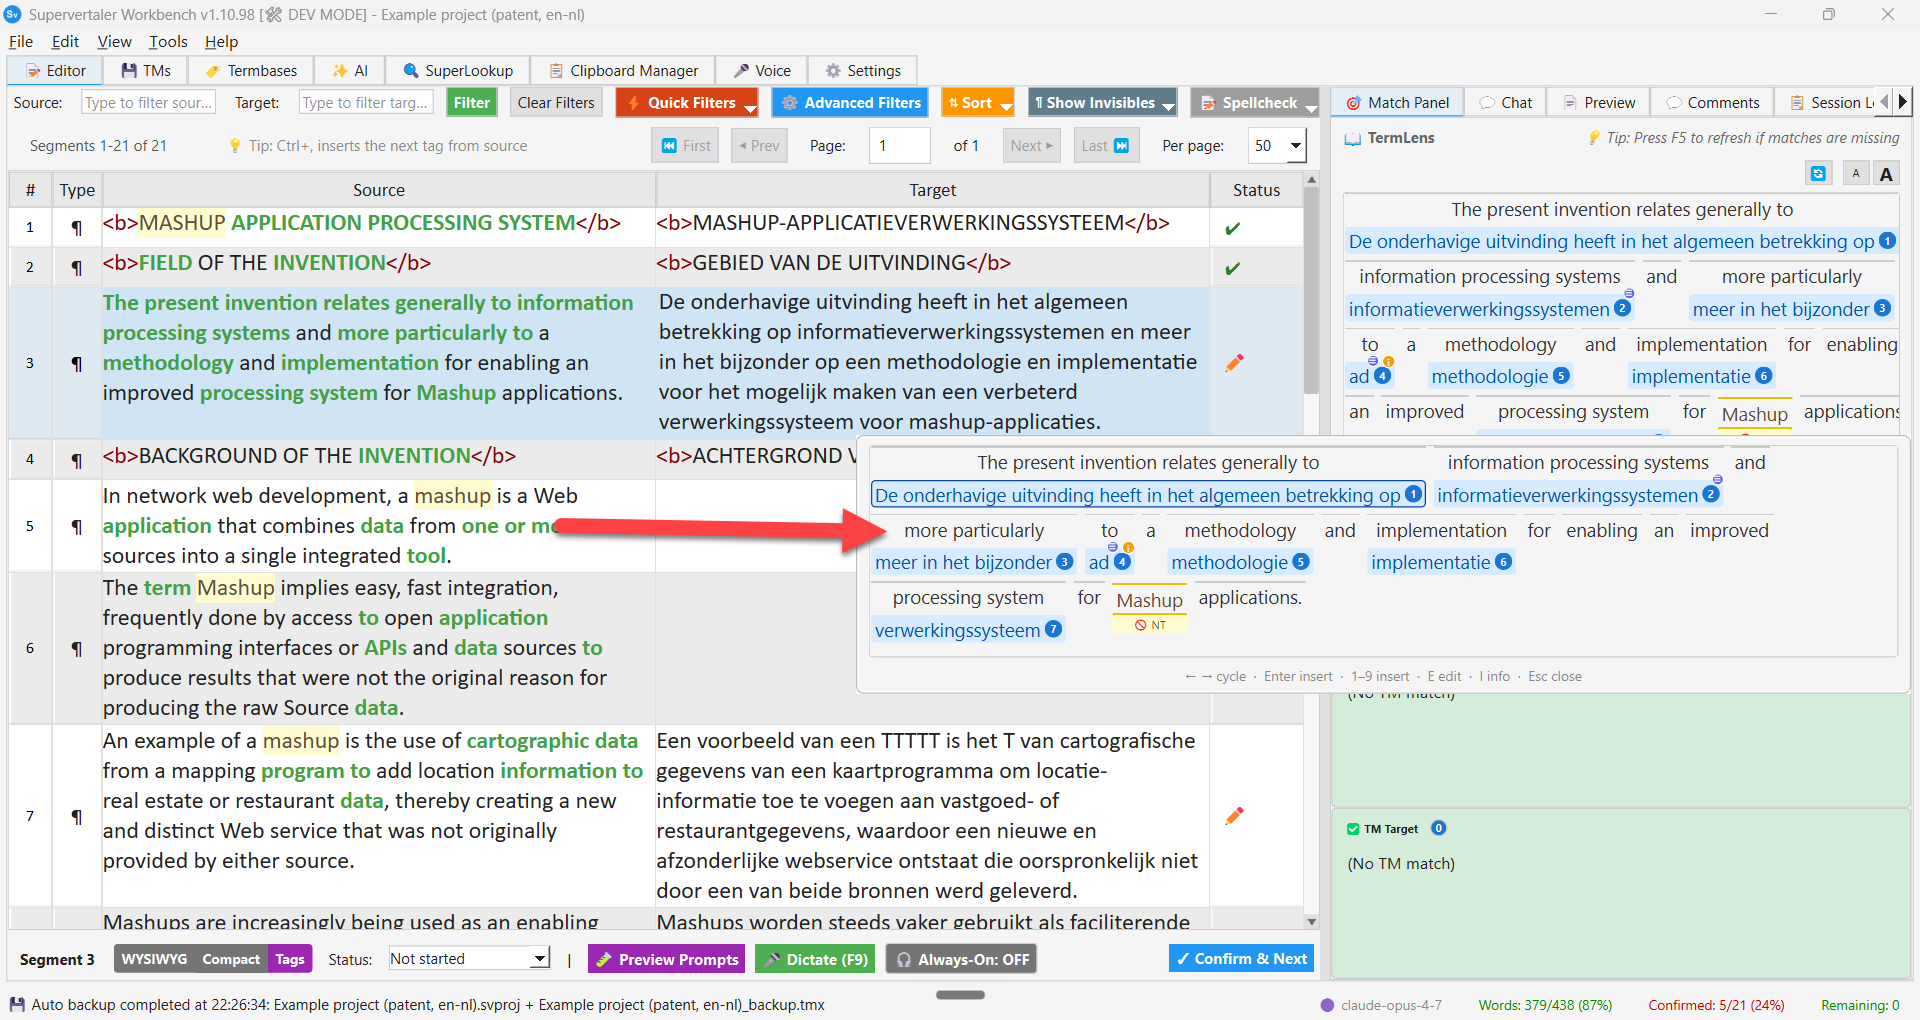
The TermLens popup floating at the cursor over the active segment, with the current match highlighted (blue ring around the chip). The docked TermLens panel on the right shows the same matches – the popup is its on-demand mirror.
### When to use it
* **Small screens / laptops** – keeping the docked TermLens panel always-visible can cost too much vertical space, especially for longer source sentences. The popup gives you the same view on demand and disappears when you’re done.
* **Pure-keyboard workflows** – Ctrl tap, cycle, Enter, back to typing. No mouse, no menu hunting.
### Opening and closing
| Key | Action |
| ----------------------- | ------------------------------------------------ |
| **Ctrl** (tap) | Toggle the popup (open if closed, close if open) |
| **Esc** | Close without inserting |
| Click outside the popup | Close without inserting |
| Move the mouse > 4 px | Close (the popup is meant to be transient) |
A “Ctrl tap” is a press-and-release of the Ctrl key on its own – no other key in between. Same memoQ-style trigger you might already use for the docked panel’s Insert-by-number flow.
### Cycling between matches
When the popup opens, the first chip has a thin blue ring around it – that is the **current chip** that Enter will insert. The cycle skips bare source words; only chips you can actually insert get the highlight.
| Key | Action |
| ------------------------------ | ------------------------------------------------ |
| **Right** / **Down** / **Tab** | Move the current-chip highlight to the next chip |
| **Left** / **Up** | Move it to the previous chip |
Cycling wraps: from the last chip, Right takes you back to the first.
### Inserting
| Key / action | Result |
| ------------------ | ------------------------------------------------------------------------------------------------- |
| **Enter** | Insert the current chip into the target segment, close the popup, return focus to the target cell |
| **1–9** | Insert that-numbered chip directly (same numbering as the docked panel’s Alt+N shortcut) |
| **Click any chip** | Insert that chip into the target segment, close the popup, return focus to the target cell |
All paths share the same insertion logic – there is no difference between picking by keyboard and picking by mouse.
### Editing a match
Press **E** while a chip is highlighted to open the term-entry editor for that entry. The popup closes first so the editor opens with clean focus. The editor is the same dialogue the docked panel’s right-click “Edit Termbase Entry…” menu uses, including the multi-termbase “Editing:” dropdown that lets you switch between sibling entries from other active termbases.
### Showing metadata
Press **I** while a chip is highlighted to toggle the sticky metadata popup for that entry – the same hover popup the docked panel shows, with the entry’s synonyms, abbreviations, definition, domain, notes, and URL fields. Press **I** again to dismiss it.
### Visuals
The popup uses the same chip rendering, colour scheme, and metadata indicators as the docked TermLens panel:
| Chip style | Meaning |
| ---------------------------------- | ------------------------------------------------ |
| **Pink** background | Project termbase term |
| **Blue** background | Background termbase term |
| **Amber / yellow** background | Non-translatable term |
| **Red** background + strikethrough | Forbidden term |
| **Purple** background | Match via abbreviation (shows abbreviation pair) |
| **ℹ** corner indicator | Entry has metadata (definition / domain / etc.) |
| **≡** corner indicator | Entry has synonyms |
| **+N** badge on chip | N more cross-termbase entries available |
See the [TermLens overview](/workbench/termbases/termlens/) for the full colour key.
### TermLens popup vs TermPicker
Both show the same matches for the active segment. Pick whichever fits your style:
| | TermLens popup (Ctrl tap) | [TermPicker](/workbench/termbases/termpicker/) (Ctrl+Shift+P) |
| -------- | ------------------------------------------------------ | ------------------------------------------------------------- |
| Layout | Source segment with chips underneath each matched word | Sortable, scrollable table |
| Best for | Skimming matches in segment context | Many matches that benefit from sorting / typing-to-jump |
| Keyboard | Arrow / Tab cycles a highlighted chip | 0–9 jumps directly; Up / Down navigate |
| Modality | Modeless – Esc / mouse move / click outside to dismiss | Modal – Esc or Cancel to close |
***
### See Also
* [TermLens overview](/workbench/termbases/termlens/)
* [TermPicker](/workbench/termbases/termpicker/)
* [Keyboard Shortcuts](/workbench/editor/keyboard-shortcuts/)
# TermPicker
**TermPicker** is a modal dialogue that lists all matched termbase terms and non-translatables for the current segment in a tabular, keyboard-navigable grid. It is useful when [TermLens](/workbench/termbases/termlens/) shows many matches and you want a quick overview without the chip layout – or when you want to compare alternative translations side-by-side before committing.
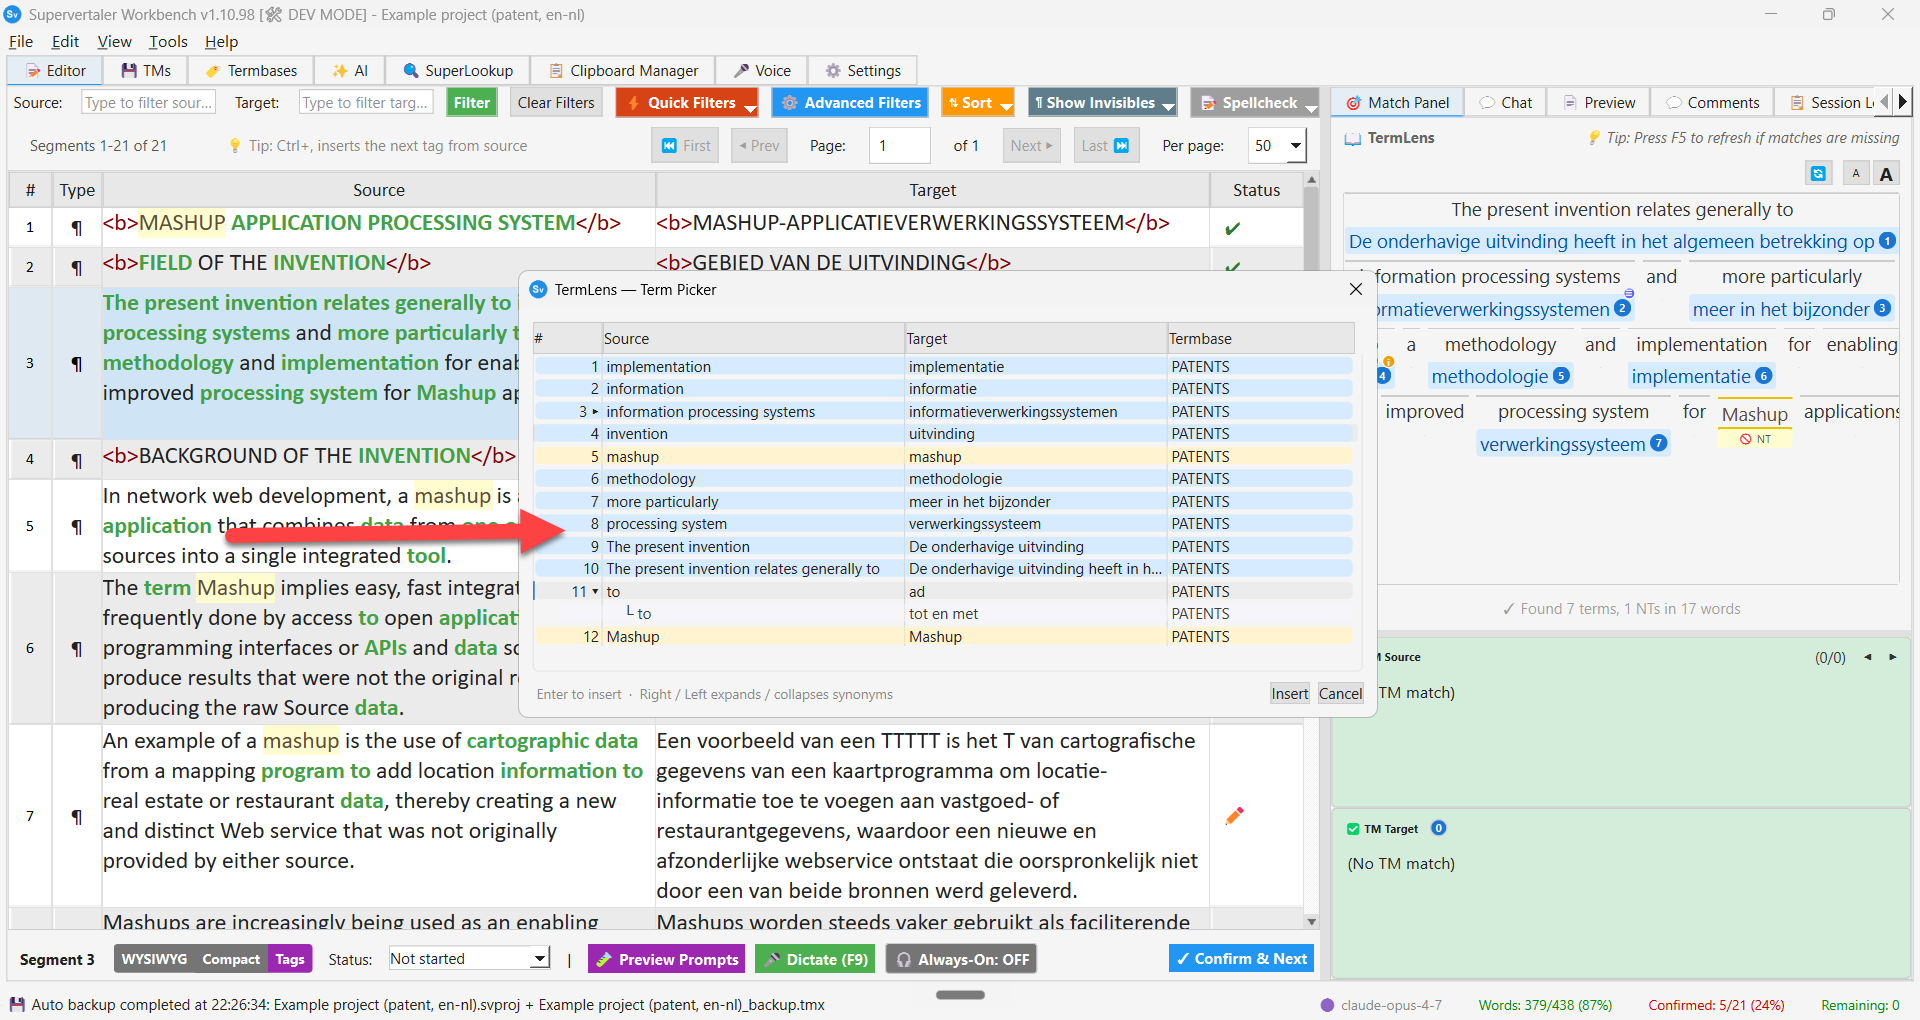
The TermPicker dialogue floating over the editor for the active segment, listing every termbase + NT match in a sortable grid. Row 3 is expanded (▾) to show a synonym sub-row underneath. The docked TermLens panel on the right shows the same matches as chips.
Note
**TermLens and TermPicker are sibling surfaces, not parent/child.** Both consume termbase matches for the current segment, but present them in completely different ways:
* **TermLens** shows matches *in context* – the source sentence with terms highlighted in place and translation chips anchored to where each term sits. Best for reading and scanning.
* **TermPicker** shows the same matches as a flat sortable list with keyboard-driven Enter-to-insert. Best for quick insertion when you already know which term you want.
Underneath both: your termbases.
### Opening TermPicker
Press **Ctrl+Shift+P** to open TermPicker. It appears as a modal window above the editor. (P = **P**icker — matches the Trados plugin and follows the VS Code-style command-palette convention.)
The shortcut is fully remappable via **Settings → Keyboard Shortcuts** under the `term_picker` action.
> Looking for the lone-Ctrl-tap behaviour? That opens the [TermLens popup](/workbench/termbases/termlens-popup/) – a more compact in-context view of the same matches. TermPicker described on this page is the table-based alternative for users who prefer a tabular UI.
### Colour-coded rows
Each row is colour-coded by its source:
| Colour | Meaning |
| ------------------- | -------------------------------- |
| **Pink** | Project termbase term |
| **Blue** | Background termbase term |
| **Yellow / amber** | Non-translatable term |
| **Grey** (indented) | Synonym sub-row of the row above |
This lets you instantly see where each term comes from and how it should be handled.
### Expandable synonyms
Terms with multiple translations (either target synonyms recorded on a single entry, or multiple termbase entries hitting the same source word) display a right-arrow indicator (**▸**) next to the row number. To expand and see all alternative sub-rows:
* Select the row and press the **Right arrow** key
* The sub-rows appear underneath, indented with a `└` and shown in grey, one per available translation
* The indicator switches to **▾** to show the row is expanded
Press **Left arrow** to collapse the synonyms again.
### Keyboard navigation
TermPicker is designed for fast keyboard use:
| Key | Action |
| ------------- | -------------------------------------------------------------- |
| **0–9** | Jump to that-numbered row; auto-inserts when ≤ 9 total matches |
| **Enter** | Insert the selected term and close the picker |
| **Esc** | Close the picker without inserting |
| **Up / Down** | Navigate between rows (wraps around) |
| **Right** | Expand synonyms for the selected row |
| **Left** | Collapse synonyms (jumps to parent row when on a sub-row) |
**Number-key behaviour:** when the segment has 9 or fewer matches, pressing a digit selects *and* inserts the corresponding row in one keystroke. When there are 10 or more matches, the digit only selects the row – press **Enter** to insert. This guards against unintended auto-inserts when a digit was the first character of a two-digit number you were typing.
### Inserting a term
You can insert a term in three ways:
* **Double-click** any row to insert that term at the cursor position in the target field
* **Press Enter** on the selected row to insert and close
* **Click “Insert”** in the dialog footer
The selected translation lands at the current cursor position in the target segment.
### Persisted layout
TermPicker remembers your preferred size and column widths between sessions, so once you resize it to fit your screen the layout sticks.
> TermPicker shows the same matches as TermLens, but in a flat sortable list format that scales better when there are many results.
***
### See Also
* [TermLens overview](/workbench/termbases/termlens/)
* [TermLens popup](/workbench/termbases/termlens-popup/)
* [Termbase Basics](/workbench/termbases/basics/)
* [Keyboard Shortcuts](/workbench/editor/keyboard-shortcuts/)
# Pdf Rescue
## Overview
**PDF Rescue** is a specialised AI-powered OCR tool designed to extract clean, editable text from poorly formatted PDFs. Built into Supervertaler, it uses vision-capable LLM OCR to intelligently recognise text, formatting, redactions, stamps, and signatures–producing professional, translator-ready documents.
### 🎯 The Problem It Solves
Have you ever received a PDF translation job where:
* The text won’t copy-paste cleanly?
* Line breaks are all over the place?
* Formatting is completely broken?
* Traditional OCR produces gibberish?
* Redacted sections show as black boxes?
* Stamps and signatures clutter the text?
**PDF Rescue fixes all of this.**
### Real-World Success Story
> *“I had a client reach out for a rush job–a 4-page legal document that had clearly been scanned badly. Traditional OCR couldn’t handle it, and manual retyping would have taken hours.*
>
> *I used PDF Rescue’s one-click PDF import, processed all 4 pages with AI OCR, and it produced a flawless Word document that I could immediately start working with. What would have been a multi-day nightmare became a straightforward job I could deliver on time.*
>
> *I was able to tell my client that I could handle the job–and delivered professional quality. PDF Rescue literally saved a client relationship.”*
>
> – Michael Beijer, Professional Translator
***
## ✨ Key Features
### 1. 📄 **One-Click PDF Import**
* **No external tools needed** - Import PDFs directly
* **Automatic page extraction** - Each page saved as high-quality PNG (2x resolution)
* **Persistent storage** - Images saved next to source PDF in `{filename}_images/` folder
* **Client-ready** - Images can be delivered to end clients if needed
### 2. 🧠 **Smart AI-Powered OCR**
* **Vision-capable LLM OCR** - High accuracy OCR
* **Context-aware** - Understands document structure and formatting
* **Intelligent cleanup** - Fixes line breaks, spacing, and formatting issues
* **Redaction handling** - Inserts descriptive placeholders like `[naam]`, `[bedrag]` in document language
* **Stamps & signatures** - Detects and describes non-text elements: `[stempel]`, `[handtekening]`
### 3. 🎨 **Optional Formatting Preservation**
* **Markdown-based** - Uses `**bold**`, `*italic*`, `__underline__`
* **Toggle on/off** - User-controlled via checkbox
* **Clean output** - Markdown converted to proper formatting in DOCX export
* **Visual preview** - See formatting markers before export
### 4. 📊 **Batch Processing**
* **Process selected** - Work on individual images
* **Process all** - Batch process entire document
* **Progress tracking** - Visual progress bar and status updates
* **Skip processed** - Already-processed images are skipped (unless re-selected)
### 5. 📝 **Comprehensive Logging**
* **Activity log integration** - All operations logged with timestamps
* **PDF import progress** - Each page extraction logged
* **OCR processing** - Per-image processing logged
* **DOCX export** - Export operations tracked
### 6. 👁️ **Full Transparency**
* **“Show Prompt” button** - View exact instructions sent to AI
* **Configuration display** - See model, formatting settings, max tokens
* **No black boxes** - Complete visibility into AI processing
### 7. 📊 **Professional Session Reports**
* **Markdown format** - Clean, readable documentation
* **Complete configuration** - All settings recorded
* **Processing summary** - Table of all images and status
* **Full extracted text** - All OCR results included
* **Statistics** - Character/word counts and averages
* **Supervertaler branding** - Professional client-ready reports
### 8. 💾 **Flexible Export Options**
* **DOCX export** - Formatted Word documents with optional bold/italic/underline
* **Copy to clipboard** - Quick text extraction
* **Session reports** - Professional MD documentation
### 9. 🚀 **Standalone Mode**
Can run independently outside Supervertaler:
```bash
python modules/pdf_rescue.py
```
Full-featured standalone application with all capabilities.
***
## 🎯 Workflow
### Quick Start (5 Steps)
1. **Open PDF Rescue** - Open the **Tools menu** at the top of the window → **🔍 PDF Rescue**. The tool opens in its own window.
2. **Import PDF** - Click ”📄 PDF” button, select your badly-formatted PDF
3. **Check formatting option** - Leave “Preserve formatting” checked (default)
4. **Process** - Click ”⚡ Process ALL” to OCR all pages
5. **Export** - Click ”💾 Save DOCX” to create Word document
**That’s it!** You now have a clean, editable Word document ready for translation.
***
### Detailed Workflow
#### Step 1: Import Your PDF
**Method 1: Direct PDF Import** (Recommended)
```plaintext
Click: 📄 PDF button
→ Select PDF file
→ Automatic page extraction to {filename}_images/ folder
→ All pages added to processing queue
```
**Method 2: Manual Image Import**
```plaintext
Click: 📁 Add Files → Select individual images
OR
Click: 📂 Folder → Select folder with images
```
**Result**: All images listed in left panel with ✓ status indicators
***
#### Step 2: Configure Settings
**Model Selection** (vision-capable models, grouped by provider):
* **OpenAI**: `gpt-5.5` (Recommended - flagship), `gpt-5.4-mini` (budget option)
* **Claude**: `claude-sonnet-4-6`, `claude-haiku-4-5-20251001`, `claude-opus-4-8`
* **Gemini**: `gemini-3.1-flash-lite`, `gemini-2.5-pro`, `gemini-3.1-pro-preview`
**Formatting Option**:
* ✓ **Preserve formatting (bold/italic/underline)** - Enabled by default
* Unchecked = Plain text output only
**Extraction Instructions**:
* Default instructions optimized for badly formatted PDFs
* Handles redactions, stamps, signatures automatically
* Can customize if needed (advanced)
* Click **“👁️ Show Prompt”** to see exact AI instructions
***
#### Step 3: Process Images
**Option A: Process Selected**
```plaintext
1. Select image(s) in list
2. Click: 🔍 Process Selected
3. View result in preview pane
```
**Option B: Process All** (Recommended)
```plaintext
1. Click: ⚡ Process ALL
2. Confirm batch processing dialog
3. Watch progress bar
4. All pages processed automatically
```
**Processing Details**:
* Each image sent to the OCR model
* Text extracted with context awareness
* Formatting detected (if enabled)
* Redactions/stamps/signatures handled
* Results stored in memory
* ✓ indicator appears when processed
***
#### Step 4: Review & Export
**Review Extracted Text**:
* Click any processed image in list
* Preview pane shows extracted text
* Formatting shown as markdown (`**bold**`, `*italic*`, etc.)
* Verify quality before export
**Export Options**:
1. **💾 Save DOCX** (Primary export)
* Formatted Word document
* Markdown converted to proper formatting
* One page per document page
* Page headers with filenames
* Ready for translation work
2. **📋 Copy All**
* All text to clipboard
* Includes page separators
* Quick paste into any application
3. **📊 Session Report**
* Professional markdown documentation
* Complete configuration record
* All extracted text included
* Statistics and metadata
* Client-ready deliverable
# Statistics (Analyse Against TM)
The **Statistics** tool analyses the document you have open against one or more of your translation memories and produces a match breakdown — the same kind of report you get from the “Analyze Files” step in Trados Studio or memoQ. It tells you, before you start, how much of the job is already covered by your TMs and how much is genuinely new, so you can scope the work and quote accurately.
## Where to find it
* Open the **Tools menu** → **📊 Statistics (Analyse Against TM)…**
You need a project open with segments. Press **F1** (or the **?** in the top-right of the dialog) to return to this page at any time.
## ⚡ Quick Count (no project needed)
When you just want a fast count and don’t want to set up a project, use **Tools → ⚡ Quick Count…** instead:
1. Browse to **one or more files**. Supported: **DOCX** (plus IDML, HTML, XLIFF, PO, XLSX, PPTX via Okapi) and the CAT bilingual formats **Trados `.sdlxliff`** and **memoQ `.mqxliff`**.
2. The same Statistics dialog opens — pick your TMs and matching depth, then **Analyse**.
DOCX files are sentence-segmented through Okapi exactly like a normal import, so the numbers match the project-based tool. If a file can’t be read it’s reported on its own and the rest are still counted. The language pair used for segmentation/matching is the open project’s, or your last-used import pair if no project is open.
Note
**Selecting several files:** in the file browser, Ctrl-click (or Shift-click) to select multiple files in the *same folder*, then click **Open**. The native dialog can’t select across different folders at once.
### Per-file breakdown
When you analyse **more than one file** (Quick Count with several files, or a multi-file project), each translation memory’s result shows a combined **All files** total followed by a **per-file** table, so you can see how each file contributes. The breakdown also appears in the HTML/Excel/CSV exports. Single-file analyses just show the one total.
## How to use it
1. Tick one or more translation memories to analyse against. The TMs already activated for the current project are ticked for you.
* **Leave every TM unticked** to get a plain word count plus internal repetitions only (no TM lookup).
2. Choose a **Matching depth** (see below).
3. Click **Analyse**. The analysis runs in the background — you can cancel it at any time. Results appear per TM as each one finishes.
4. Optionally click **Export…** to save the report as **HTML**, **Excel (.xlsx)**, or **CSV**.
## Matching depth
The fuzzy-match pass is the slow part on a large TM, so you can trade thoroughness for speed:
| Depth | What it does |
| ---------------------- | --------------------------------------------------------------------------------------------------------- |
| **Standard** | Exact matches plus fuzzy matches down to 75%. The default — fast and covers almost all reusable material. |
| **Thorough** | Exact plus fuzzy down to 50%. Fills the lower fuzzy bands; a little slower. |
| **Exact matches only** | Skips the fuzzy pass entirely. Near-instant, even on a TM with hundreds of thousands of entries. |
Behind the scenes the fuzzy search uses the TM’s full-text index to look only at the most relevant candidates (no sub-segment/fragment search), which is conceptually the same as Trados Studio’s “Optimized Performance” option.
## What the match types mean
| Type | Meaning |
| ------------------------ | ---------------------------------------------------------------------------------------------------------------------------------------------------- |
| **Repetitions** | Source text that repeats earlier in the document. The first occurrence is counted under a match band; the repeats land here (translate once, reuse). |
| **101% (Context Match)** | An exact match whose surrounding context also matches the TM — the safest reuse, normally needs no editing. |
| **100%** | An exact match of the source text in the TM (context not checked). |
| **95%–99%** | Very high fuzzy match — usually a tiny edit. |
| **85%–94%** | High fuzzy match — minor editing expected. |
| **75%–84%** | Medium fuzzy match — noticeable editing expected. |
| **50%–74%** | Low fuzzy match — often faster to retranslate than to fix. |
| **No match** | No usable TM match — translate from scratch. |
Each row reports the number of **segments**, **words**, **characters** (tags excluded), **tags**, and the **percentage** of total words. The exported report includes this legend and the project name.
## Related
* [Translation memory](/workbench/translation-memory/basics/)
* [Fuzzy matching](/workbench/translation-memory/fuzzy-matching/)
* [Managing TMs](/workbench/translation-memory/managing-tms/)
# TMX Editor
Supervertaler includes a built-in TMX editor for inspecting and editing TMX translation memories.
## Where to find it
* Open the **Tools menu** at the top of the window → **✏️ TMX Editor**. The editor opens in its own window.
## What you can do
* Open, edit, and save TMX files.
* Search and filter by source/target text.
* Edit TMX header metadata.
* Run basic validation and view statistics.
* Perform bulk operations (for example: delete entries, copy source → target).
## Common workflows
### Clean up a TMX before importing
1. Open the TMX in **✏️ TMX Editor**.
2. Fix any obvious formatting issues (wrong language, empty segments, etc.).
3. Save the TMX.
4. Import it into your project via [Importing TMX files](/workbench/translation-memory/importing-tmx/).
### Remove unwanted tags
If you’re trying to simplify a TMX that contains formatting or CAT-tool tags, you can remove them before importing.
Note
TMX is just XML – some tags are real inline markup (TMX/XLIFF-style), others are literal text like `<b>...</b>`. Cleaning tags can improve matching, but it can also remove important formatting. If you’re unsure, test on a copy first.
## Related
* [Importing TMX files](/workbench/translation-memory/importing-tmx/)
* [Translation memory](/workbench/translation-memory/basics/)
# Translation Memory Basics
Translation Memory (TM) helps you reuse previous translations.
## What is Translation Memory?
A Translation Memory stores pairs of source and target text:
| Source | Target | Match % |
| ------------------- | --------------------- | ------- |
| “Save the file" | "Sla het bestand op” | 100% |
| “Save the document" | "Sla het document op” | 85% |
When you translate new text, the TM finds similar segments.
## How TM Works
1. **You translate** a segment
2. **TM stores** the source + target pair
3. **Later**, when similar text appears:
* TM finds matches
* Shows them in the Translation Results panel
* You can insert or adapt them
## Match Types
| Type | Match % | Description |
| ---------------- | ------- | ------------------------------------------- |
| **Exact** | 100% | Identical source text |
| **High Fuzzy** | 90-99% | Minor differences (numbers, capitalization) |
| **Medium Fuzzy** | 75-89% | Some words different |
| **Low Fuzzy** | 50-74% | Significant differences |
## Benefits
### Save Time
Don’t translate the same sentence twice. TM automatically suggests previous translations.
### Consistency
Same source = same translation. Important for technical documentation, UI strings, and legal text.
### Cost Savings
Clients often pay less for TM matches:
* 100% match: Lowest rate
* Fuzzy match: Reduced rate
* New text: Full rate
## TM in Supervertaler
### Translation Results Panel
When you select a segment:
1. TM searches for matches
2. Results appear in the panel on the right
3. Shows match percentage, source, and target
4. Double-click to insert
### Using Matches
| Action | How |
| --------------- | ------------------------------------------------- |
| Insert match | Double-click, or select it and press `Ctrl+Space` |
| Copy match | Right-click → Copy |
| View in context | Right-click → View in TM |
### Building TM
Your TM grows as you translate:
1. Translate a segment
2. Confirm with `Ctrl+Enter`
3. The pair is saved to active TM
## Multiple TMs
You can have multiple TMs:
* **Project TM**: For the current project
* **Client TMs**: One per client
* **Master TM**: All your translations
### TM Priority
When multiple TMs match:
* Higher priority TMs shown first
* Can reorder in the **TMs** tab
### Sending segments to several TMs at once
To push your confirmed translations into more than one TM in a single run, use **Bulk Operations ▸ Update active TMs**. Under **Target Translation Memories**, tick every TM you want to update – the segments are written to all of them in one pass, with a per-TM summary of how many were sent to each.
***
## See Also
* [Creating & Managing TMs](/workbench/translation-memory/managing-tms/)
* [Importing TMX Files](/workbench/translation-memory/importing-tmx/)
* [Fuzzy Matching](/workbench/translation-memory/fuzzy-matching/)
# Fuzzy Matching
Fuzzy matching finds similar segments (not just exact duplicates).
## How to use it
* As you navigate, Supervertaler searches your TMs for similar source text.
* Matches are scored by similarity.
## When to trust a match
* **High scores** are often safe to insert as a starting point.
* **Mid/low scores** can still be useful, but should be treated as suggestions.
## Tips
* Always review fuzzy matches before inserting.
* For formatted text, preserve tags when inserting matches.
# Importing TMX Files
TMX is the common exchange format for translation memories.
## Import steps
1. Open the **TMs** tab
2. Choose **Import TMX**
3. Select your `.tmx` file
Note
Import your TM(s) before batch translation to maximize reuse.
## Tips
* Import TMs before batch translation to maximize reuse.
* If matches don’t show up, verify the TM language pair.
# Creating & Managing TMs
Translation Memories (TMs) help you reuse past translations.
## Add or create a TM
1. Open the **TMs** tab
2. Add an existing TM (or create a new one)
3. Enable **Read** to use it for matches
4. Enable **Write** if you want new translations saved into it
## Using TM matches
* TM matches appear automatically as you navigate.
* You can insert matches quickly:
* **Ctrl+Space** inserts the currently selected match
* Double-click a match in the panel to insert it
## Tips
* Keep separate TMs per client or domain if needed.
* Ensure the TM language pair matches your project.
* If a segment contains tags/placeholders, keep them intact when inserting a match.
# Shared TM Bridge with Trados
The Shared TM Bridge lets you attach Workbench’s translation memories directly inside Trados Studio – no TMX export/import dance, no separate copy. The Trados side reads from the same `supervertaler.db` SQLite file Workbench writes, so a TU added in Workbench appears in Trados on the next lookup, and vice versa once write-back ships in a later phase.
Both halves of the feature are off by default. You opt-in TM by TM, so freelancers with multi-client TM libraries don’t accidentally surface client A’s memory inside a Trados project for client B.
## Half one: tick a TM as “Bridge” in Workbench
1. Open the **TMs** tab.
2. Find the TM you want to expose to Trados.
3. Tick the **Bridge** column for that row. (The column shows an orange checkmark when on.)
That’s the entire Workbench side. The TM is now eligible to appear inside Trados Studio.
You can flip the flag at any time. Un-ticking it does NOT delete data – it just hides the TM from the Trados-side picker. Any Trados projects that already attached the bridge will start showing an “offline” status pill for it until you tick it again.
Note
The **Bridge** column is independent from the **Read** and **Write** flags. Those control whether the TM participates in Workbench’s *own* match panel and segment-confirm pipeline. Bridge is purely about exposure to Trados Studio.
## Half two: attach the bridged TM inside Trados
You need the **Supervertaler for Trados** plugin installed (`v4.20.26` or newer) and Trados Studio open on a project with the right language pair.
1. In Trados Studio, open your project’s **Project Settings** → **Language Pairs** → **All Language Pairs** → **Translation Memory and Automated Translation**.
2. Click **Add** → **Supervertaler TM**.
3. The picker dialogue lists every TM you’ve ticked as Bridge in Workbench, filtered to those whose language pair matches the current project’s pair (with loose matching – bare `nl` matches `nl-NL`, `en` matches `en-GB`).
4. Tick one or more TMs to attach. Click **OK**.
The TM now shows up alongside any SDLTMs you’ve attached, with its full name (e.g. *Supervertaler TM: BRANTS (URSU-008-BE-EP)*).
## What you get in this release
* **Exact matches (100%)** – pulled into Trados’s TM-results pane the same way a regular SDLTM would.
* **Concordance search** – source-side AND target-side, via the FTS5 index Workbench already maintains. Works in both Trados’s built-in Concordance window and the SuperSearch tab.
* **Multiple TMs attached at once** – the per-hit origin strip identifies which bridged TM produced each match (e.g. *Supervertaler: BRANTS (URSU-008-BE-EP)* vs *Supervertaler: PATENTS*).
## What’s NOT in this release
* **Write-back from Trados.** Currently read-only. Edits you make to a segment in Trados are confirmed to your normal SDLTM, not to the bridged TM. Bridge support for write-back will land in a later phase.
* **Fuzzy matches.** Only 100% matches are returned. Sub-100 fuzzies fall through to any other providers attached to the project. Fuzzy matching against bridged TMs will also land in a later phase.
## Diagnostics
If a bridged TM isn’t showing up where you expect, the easiest first checks are:
* **Bridge ticked in Workbench?** TMs tab → confirm the orange checkmark is on.
* **Language pair matches?** The bridge does loose matching (`nl` matches `nl-NL`) but it still has to match. A TM stored as `en` won’t show up for a `fr-FR → de-DE` project.
* **Bridge log.** The Trados plugin writes a diagnostic log to `%TEMP%\supervertaler-tm-bridge.log` every time it talks to a bridged TM. If a lookup is failing, this log usually points straight at the cause.
## See also
* [Translation Memory Basics](/workbench/translation-memory/basics/) – the rest of how TMs work in Workbench.
* The matching Trados-side help page lives at [Shared TM Bridge with Workbench](/trados/shared-tm-bridge/).
# Trados Sdltm
You can attach a Trados Studio Translation Memory (`.sdltm` file) directly to Supervertaler and consult it for matches – without exporting it to TMX first, and without closing Trados.
## When to use this
The typical scenario: you’re translating a project in Trados Studio with a working TM. You’d like to consult that same TM from inside Supervertaler – maybe to use its concordance, run AI translations against it, or work on a different project that shares terminology with the Trados project. Rather than exporting to TMX every few minutes, you point Supervertaler at the `.sdltm` directly and let it stay in sync.
## Attach a Trados TM
1. Open **TMs → TM List**.
2. Click **🔗 Attach Trados TM** (next to **📥 Import TMX**).
3. Pick the `.sdltm` file.
4. Confirm the dialog – it shows the TM’s languages, name, and translation-unit count.
5. Optionally edit the display name (defaults to the full filename including `.sdltm` so it’s easy to spot in the TM list).
6. Watch the progress dialog as Supervertaler mirrors the TUs (≈ 5 seconds for a 13 K-TU TM).
The TM is created **read-only** by default. Supervertaler never writes back to your `.sdltm`; that file remains the source of truth and stays under Trados’s exclusive control for writes.
## How sync works
Once attached, the mirror **stays in sync with the live `.sdltm`**. Every 5 seconds Supervertaler checks the file’s modification time. When Trados saves a new or modified TU and the file timestamp changes, Supervertaler pulls in just the delta – not a full re-read – and updates the TM’s entry count automatically. The mtime check itself is essentially free, so idle ticks cost nothing.
You can keep working in Trados; new TUs you confirm there appear in Supervertaler within a few seconds.
## Tag preservation
Trados-style inline tags are preserved as Supervertaler’s `...` markers on the way in:
| Trados | Supervertaler |
| --------------------- | ------------- |
| Start tag, ID 116 | `<116>` |
| End tag, ID 116 | `` |
| Standalone tag, ID 12 | `<12/>` |
This is the same format Supervertaler uses when it imports SDLXLIFF segments directly, so a TM hit drops cleanly into the editor grid alongside your working segments.
The tag IDs in the TM hit won’t necessarily match the IDs in the segment you’re translating – TM `<116>` might be your current `<11>`. Structure (start/end pairs, count) is preserved, but you’ll still need to renumber tags on insertion if the IDs differ.
## Refreshing manually
If you’d rather refresh on demand than rely on the 5-second timer, click **🔗 Attach Trados TM** again on the same `.sdltm`. You’ll be asked “TM already attached – replace?”; click **Yes** and Supervertaler wipes the existing entries and re-mirrors from disk in one go.
## Limitations
* **Read-only**: Supervertaler never writes back to the `.sdltm`. New translations you confirm in the Workbench go to your normal Supervertaler TMs, not back into the Trados file.
* **Tag IDs differ**: as noted above, the numeric IDs on tags in TM hits may differ from the IDs in your current segment. Tag *structure* is preserved.
* **Match scores differ slightly**: Supervertaler uses Python’s SequenceMatcher; Trados uses its own token-aligned algorithm. Ranking of matches is similar; exact percentages can be a few points apart.
* **Concurrent use is safe**: opening the `.sdltm` while Trados has it open is fine – Supervertaler reads via SQLite’s URI read-only mode, and Trados uses WAL.
# API Connection Problems
If AI translation isn’t working, this page helps you diagnose provider/API issues.
## Common causes
* Missing or invalid API key
* No internet connection
* Provider rate limits or quota limits
* Wrong model selected
## Quick checks
1. Verify your API key in [Setting Up API Keys](/workbench/get-started/api-keys/)
2. Confirm you selected a **provider** and **model** in Settings (LLM/AI settings)
3. Try translating a single short segment (`Ctrl+T`)
4. Check whether your account has credits/quota
## Common errors and fixes
| Symptom / message | Likely cause | What to do |
| ----------------------------------------- | ----------------------------------------------------- | -------------------------------------------------------------------------------------------- |
| “Invalid API key” / authentication failed | Key is wrong or has extra whitespace | Re-paste the key; make sure there are no leading/trailing spaces; Save and restart if needed |
| “Rate limit exceeded” | Provider is throttling requests | Wait 1–2 minutes; reduce batch size; try a different model |
| “Quota/credits exceeded” | Account has no credits or billing disabled | Check provider dashboard; add credits/enable billing |
| “Model not found” | Selected model name not available | Pick a supported model in Settings; update if the provider changed model names |
| “No response” / empty translation | Transient provider failure, network issue, or timeout | Try single-segment translation; retry the segment; try a different model/provider |
| Connection errors / timeouts | Network/VPN/firewall/proxy issues | Try another network; disable VPN; allow Python/Supervertaler through firewall |
## Tips for reliable translation
* Start with **single-segment** translation to verify your setup before running batch.
* If batch translation returns empty segments, enable the retry option in the batch dialog.
* If your segments contain tags/placeholders, add a prompt rule to preserve them exactly.
## Error messages
If you see an error dialog, copy the message and include it when asking for help.
Include:
* Provider + model
* Whether single-segment translation works
* The exact error text
# Common Issues
Solutions to frequently encountered problems.
## Startup Issues
### Application won’t start
**Symptoms:** Double-click does nothing, or window briefly appears then closes.
**Solutions:**
1. **Run from command line** to see error messages:
```bash
python Supervertaler.py
```
2. **Reset UI preferences** (corrupted window state):
* Delete `user_data/ui_preferences.json`
* Restart the application
3. **Check dependencies**:
```bash
pip install -r requirements.txt
```
4. **Verify Python version** (needs 3.10+):
```bash
python --version
```
### “Module not found” error
Install the missing module:
```bash
pip install
```
Or reinstall all dependencies:
```bash
pip install -r requirements.txt --force-reinstall
```
***
## Import Problems
### ”Cannot read file” error
* Close the file in other programs (Word, Excel, etc.)
* Check if the file is read-only
* Try copying the file to a different location
### memoQ bilingual shows no segments
* Ensure you exported as **Bilingual DOCX** (table format)
* Check the file in Word to verify it has a source/target table
### Trados package fails to extract
* The SDLPPX might be corrupted
* Re-export from Trados Studio
* Check if the package includes all required files
### Encoding errors (garbled text)
* Open the source file in Notepad++ to check the detected encoding; if it shows ANSI/Windows-1252 with mojibake, use *Encoding → Convert to UTF-8* and re-save.
* For more stubborn cases, run [`ftfy`](https://pypi.org/project/ftfy/) on the file from the command line.
* Re-export from the source tool with UTF-8 encoding when possible.
***
## Translation Issues
### AI translation returns empty
1. Check your API key is valid
2. Verify you have credits with the provider
3. Check internet connection
4. Try a different model
### ”Rate limit exceeded” error
* Wait 1-2 minutes and try again
* Reduce batch size
* Upgrade your API plan
### Wrong translation language
* Check your prompt specifies the correct language pair
* Verify source/target languages are set correctly in project settings
### Tags are removed or moved
Add explicit instructions to your prompt:
```plaintext
Keep all formatting tags like {1}, , in exactly
the same positions in the translation.
```
***
## Reimporting Issues
### Segments don’t match on reimport
**Cause:** Segment structure changed.
**Solution:**
* Don’t merge or split segments in Supervertaler.
* Export the matching format for your CAT tool/workflow.
* If you’re working from a bilingual table, don’t modify the table structure in Word.
### Formatting lost on reimport
**Cause:** Tags/placeholders weren’t preserved.
**Solution:**
* Verify tags in Tag view before exporting.
* Ensure tags are balanced and not renumbered.
* Run CAT tool QA after import to catch tag issues early.
### TM matches not appearing
**Cause:** TM not loaded, disabled, or language mismatch.
**Solution:**
* Open the **TMs** tab.
* Ensure the TM is added and **Read** is enabled.
* Verify source/target language pair matches your project.
***
## Export Problems
### Exported DOCX has no translations
* Make sure you translated the segments (target column isn’t empty)
* Check you’re exporting the correct format
* Verify the segments are confirmed
### ”Source file not found” on export
The original imported file was moved or deleted.
* Use **Project → Export → 🔗 Relocate Source Folder** to point to the new location
* Or re-import the source file
### Formatting lost after round-trip
* Keep all inline tags in your translations
* Don’t modify the structure of bilingual tables
* Check CAT tool import settings
***
## Performance Issues
### Application is slow
1. **Pick a smaller Per page size** above the grid (the grid shows all segments by default; try 100 or 50)
2. **Disable spellcheck** if not needed (Settings → View)
3. **Close other heavy applications**
### Large files take forever to import
* Very large files (10,000+ segments) may take time
* Consider splitting into smaller files
* Use multi-file import for better organization
***
## Spellcheck Issues
### Spellcheck not working
1. Check spellcheck is enabled: **Settings → View Settings → Spellcheck**
2. Verify the correct language is selected
3. For Hunspell, ensure dictionaries are installed
### Wrong language being checked
Go to **Settings → View Settings → Spellcheck** and select the correct target language.
### Red underlines appear everywhere
The spellcheck language might not match your target language. Or you might need to add technical terms to your dictionary.
***
## UI Issues
### Dark mode colors look wrong
Some widgets apply styles when becoming visible. Try:
* Switch themes back and forth
* Restart the application
### Window opens off-screen
Delete `user_data/ui_preferences.json` to reset window position.
### Fonts look different/wrong
Go to **Settings → View Settings** and select your preferred font family.
***
## Still Having Issues?
1. Check the [GitHub Issues](https://github.com/Supervertaler/Supervertaler-Workbench/issues) for known bugs
2. Open a new issue with:
* Your OS and Python version
* Steps to reproduce the problem
* Error messages (if any)
* Screenshots (if helpful)
# Import/Export Errors
This page covers common problems when importing or exporting files.
## “Cannot read file” / import fails
**Common causes:**
* The file is open in Word (or another app)
* The file is read-only or in a protected location
* The file format doesn’t match the workflow
**Fix:**
1. Close the file everywhere (Word, CAT tool editors, preview panes)
2. Copy it to a simple path (for example `C:\Temp\`) and try again
3. Re-export from the CAT tool using the recommended bilingual/package format
## memoQ bilingual shows no segments
**Cause:** Export format doesn’t contain the expected bilingual table.
**Fix:**
* Re-export from memoQ as **Bilingual DOCX** in a **two-column table** format.
* Open the DOCX in Word and confirm it really contains a Source/Target table.
## Trados SDLPPX fails to extract
**Common causes:**
* Corrupt/partial package
* Unsupported package structure
**Fix:**
* Ask for a fresh export from Trados Studio.
* Ensure the package includes all required files.
## Garbled characters / encoding issues
**Cause:** Text encoding problems coming from the source file or export.
**Fix:**
* Re-export from the source tool with a modern Unicode/UTF-8-friendly path when possible.
* For Latin-1/Windows-1252 mojibake (e.g. “é” appearing where “é” should be), open the file in a text editor that supports re-interpreting the encoding (Notepad++ has *Encoding → Convert to UTF-8*) or run `ftfy` on it from the command line.
## Segments don’t match on reimport
**Cause:** Segment structure changed.
**Fix:**
* Don’t merge or split segments in Supervertaler
* Export using the matching CAT format
* Avoid deleting placeholder/tag-only segments
## “Source file not found” during export
**Cause:** The original source file/folder was moved after import.
**Fix:**
* Use **Project → Export → 🔗 Relocate Source Folder** and point it to the new location.
* If the original source is gone, re-import the project from the correct source.
## Exported file has no translations
**Cause:** Targets are empty or the wrong export format was chosen.
**Fix:**
* Verify the Target column contains translations.
* Export the matching format for the workflow you imported.
## Formatting lost on reimport
**Cause:** Tags not preserved.
**Fix:**
* Verify tags are balanced (for example `text`)
* Don’t delete CAT placeholder tags
* Re-export using the correct CAT workflow
## Bilingual table reimport fails
**Cause:** Bilingual tables are great for review, but not always suitable for CAT tool reimport.
**Fix:**
* Prefer the dedicated CAT exchange formats (memoQ/Trados/Phrase/CafeTran).
* If you must use a bilingual table, don’t edit the table structure in Word.
# Linux-Specific Issues
Supervertaler is Linux compatible, but Windows is the primary development platform.
## Spellcheck dictionaries
If spellcheck isn’t working, you may need to install Hunspell dictionaries for your language:
```bash
sudo apt install hunspell-en-us
```
If the dictionary package for your language exists, install it using the language code you need (for example `hunspell-de-de`, `hunspell-nl`, etc.).
## Stability tips
If you encounter instability:
* Disable spellcheck temporarily
* Disable semantic memory features temporarily
* Use a smaller project to isolate the issue
## Crashes / memory access violations
Some native dependencies (spellcheck backends, tokenization libraries) can crash the Python process on certain Linux setups.
If you see random crashes (segfaults) when interacting with the grid:
1. Disable spellcheck and restart
2. Retry on a smaller project
If that stabilizes the app, re-enable features one by one.
# Performance Tips
Supervertaler is designed to stay responsive on large projects, but performance can vary with project size and enabled features.
## Tips
* Pick a smaller **Per page** size for very large projects (the grid shows all segments by default; projects over 2000 segments auto-paginate at 500). See [Pagination](/workbench/editor/pagination/)
* Keep only the needed TMs and termbases enabled
* If semantic search is enabled, allow indexing to complete
## Quick wins when it feels slow
1. Disable spellcheck temporarily (Settings → View Settings)
2. Close other heavy apps (browsers with many tabs, IDE builds, etc.)
3. Restart Supervertaler and reopen the project
## Large projects
Very large files (thousands of segments) can stress any UI grid.
* Prefer pagination.
* Consider splitting source documents or using multi-file projects.
## If it feels slow
Try restarting the app and reopening the project.
If performance is still poor, note:
* Project size (segment count)
* Whether spellcheck is enabled
* Which CAT format you imported
# Voice
**Voice** is Supervertaler’s voice command and dictation engine. It lets you control any application on your computer – Trados, memoQ, Word, or anything else in the foreground – using your voice, while Supervertaler Workbench stays running in the background.
Open it via the **🎤 Voice** top tab in Workbench, the tray icon’s **Open Voice** entry, or press **Ctrl+Alt+A** to toggle Always-On listening from anywhere on your computer.
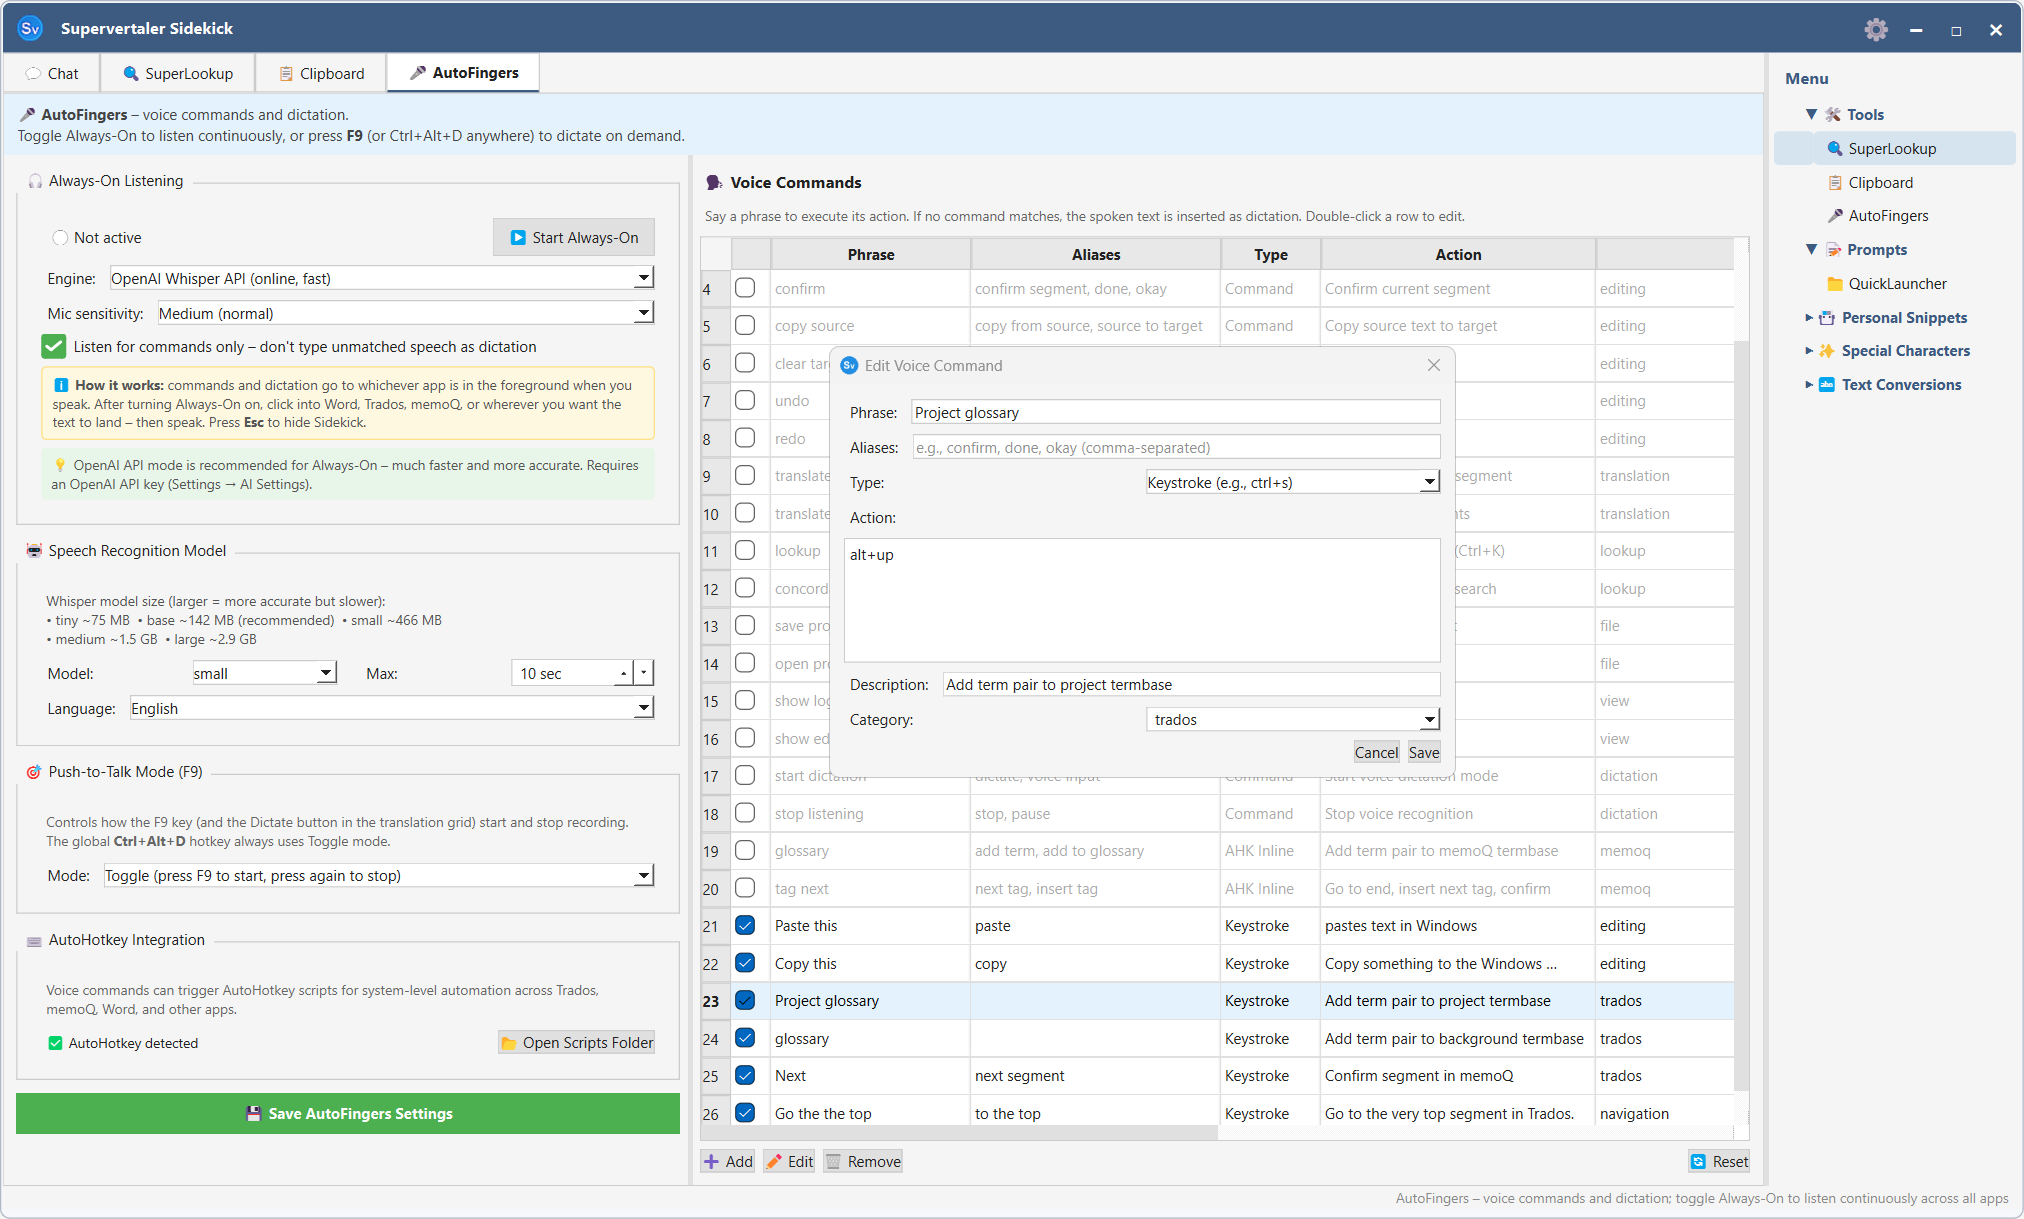
***
## Three modes
### Always-On listening
Always-On runs a continuous microphone stream in the background. When you speak, Voice detects speech via amplitude-based VAD (voice activity detection), captures the utterance, and hands it to the active recognition engine.
**With the Vosk engine** *(default)* the recogniser only emits text for phrases in your command list – anything else is silently dropped as `[unk]`. So Vosk Always-On is “commands only” by design: you can leave it on all day, talk to colleagues, take phone calls, etc., and only matching command phrases will trigger actions.
**With faster-whisper or OpenAI Whisper API** every utterance is transcribed in full. If it matches a command the action fires; if not (and “Listen for commands only” is off), the transcribed text is typed into whichever window is in the foreground.
**To start:** click **▶ Start Always-On** in the Voice tab, or press **Ctrl+Alt+A** from any application. A red mic icon appears in the system tray while Always-On is active.
**To stop:** click **⏹ Stop Always-On** or press **Ctrl+Alt+A** again.
**Focus matters:** Voice sends keystrokes and text to whichever window is currently focused. After starting Always-On, click into Trados, Word, or your browser before you speak.
### Push-to-Talk dictation (Ctrl+Shift+Space)
Press **Ctrl+Shift+Space** (the default dictation hotkey – ⌘⇧Space on macOS; works globally, from any application, and is configurable in **Settings → Keyboard Shortcuts**) to record a single utterance for free-form running-text dictation. A small ”🎤 Listening…” toast appears in the top-right of the screen so you know the recording is live; it goes away again when you stop. Recording stops when you release the key (in hold-to-talk mode) or when you press the trigger again (in toggle mode). The transcribed text is then typed at the cursor position.
**Always-On + push-to-talk coexist.** If Always-On is running when you trigger push-to-talk, Voice pauses the always-on listener for the duration of the recording, runs the dictation, then resumes Always-On automatically. So you get free continuous Vosk command recognition all day *plus* a hotkey for occasional running-text dictation, without having to manually toggle Always-On off and on.
**Push-to-talk modes** (configurable in the Push-to-Talk settings):
* **Toggle** (default) – press once to start, press again to stop
* **Hold-to-talk** – hold the key to record, release to stop. *Note: hold-to-talk only works if you rebind dictation to a non-global (in-app) key. The default global hotkey always uses Toggle mode (Windows can’t reliably deliver key-up events across processes for global hotkeys).*
### Push-to-Talk for commands (Ctrl+Alt+V) — v1.10.193
Press and **hold** **Ctrl+Alt+V** (the default; configurable in **Settings → Keyboard Shortcuts**) to temporarily activate the command listener for the duration of the hold. Release the key to stop it again. Works globally, from any application.
This is a third mode that sits between the two above:
* Always-On is the **toggle** version of command listening — mic open continuously, listens for commands all day.
* Command Push-to-Talk is the **hold** version — mic open only while you hold the chord, so the rest of the time the microphone is genuinely free for other applications.
**When to use this mode:**
* You also use an external dictation app (Wispr Flow, Dragon, macOS Dictation, etc.) for running-text dictation and don’t want Supervertaler’s always-on mic competing for the audio stream.
* You only need voice commands occasionally — pressing a hotkey when you want to issue one is less intrusive than leaving the mic open all day.
* You’re on a laptop battery-conscious about the always-on Vosk model running 24/7.
**Coexistence with the toggle mode:** if Always-On is already running when you press Ctrl+Alt+V, the hotkey is a no-op — it won’t restart what’s already going, and releasing it won’t stop Always-On either (we never touch what we didn’t start). So the two modes don’t fight each other; you can use whichever feels right for the moment.
**Platform notes:** release detection on Windows uses `GetAsyncKeyState` polling (same mechanism as the dictate PTT). On macOS / Linux, the listener stays running until you press Ctrl+Alt+A or click ⏹ Stop Always-On — it doesn’t auto-stop on key release. Lift to a manual toggle there.
### Pause Always-On for external dictation — v1.10.246
The opposite trade-off to Command Push-to-Talk: keep Always-On running **permanently**, but have it step off the microphone for the moments you’re dictating into an **external** tool (Wispr Flow, Dragon, macOS Dictation, …). You bind one of *your* keys — the same key you press to start your external dictation — and Always-On pauses while it’s engaged, then resumes. So your voice commands stay available all day, and the two never fight over the mic.
The key is **recorded, not typed**, so it works with keys you can’t express as text — including media keys like **fast-forward**, which many people use to trigger their dictation tool.
**To set it up** — Voice tab → **⏸️ Pause Always-On for external dictation**:
1. Click **Record key**, then press the key you use for your external dictation tool. The label shows what was captured (e.g. *Media Next / Fast-Forward*).
2. Choose a **mode**:
* **Hold** *(default)* — Always-On pauses only while you hold the key and resumes the instant you release it. Pair this with **hold-to-talk** tools like Wispr Flow: hold your key → speak → release, and Always-On is live again.
* **Toggle** — press once to pause, press again to resume. Use this if your tool starts/stops dictation on a single tap.
It works **globally** (the Workbench doesn’t need to be focused) and the key is observed *passively* — your external tool still receives it normally. Press detection and release both come from the same low-level hook used by Command Push-to-Talk.
Note
**Which to use — this or Command Push-to-Talk (Ctrl+Alt+V)?** They solve the same problem from opposite ends. Command Push-to-Talk keeps Always-On **off** and listens for commands only while you hold its chord. The pause hotkey keeps Always-On **on** and only pauses it while you hold *your* key. Pick the pause hotkey if you want commands available most of the time and just need to duck out of the mic during external dictation.
***
## Voice commands
Voice commands execute specific actions when you speak a trigger phrase. They can type text, press keyboard shortcuts, run AutoHotkey scripts, or call internal Workbench functions.
### The commands table
The commands table (right side of the Voice tab) lists all your configured commands.
| Column | Description |
| -------- | -------------------------------------------------------------------------- |
| ☑ | Enable/disable checkbox – uncheck to silence a command without deleting it |
| Phrase | The primary trigger word or phrase |
| Aliases | Alternative phrases that also trigger the command |
| Type | Command / Keystroke / AHK Script / AHK Inline |
| Action | What happens when the phrase is recognised |
| Category | Organisational label (Navigation, Editing, etc.) |
### Enabling and disabling commands
* **Single command** – click the checkbox in the first column
* **All commands** – click the checkbox column header to toggle all at once (enables any disabled, or disables all if all are already active)
* **Multiple commands** – select rows with **Shift+Click** or **Ctrl+Click**, then right-click and choose **✅ Activate** or **⬜ Deactivate**
Disabled commands are greyed out and are skipped during recognition. Their settings are preserved.
### Editing a command
Double-click any row to open the Edit Voice Command dialog. You can change the phrase, aliases, action type, and action value.
You can also use the **Edit** button in the toolbar above the table.
### Adding a command
Click **+ Add** above the table. Choose a command type:
* **Command** – calls an internal Workbench action (confirm segment, next segment, etc.)
* **Keystroke** – sends a key combination to the active window. Click into the **Keystroke** field and press the keys you want to send (e.g. press Ctrl+Enter); the field shows the platform-native symbols (⌘⇧⌥⌃ on macOS, Ctrl+Shift+Alt elsewhere) so you don’t have to translate between platforms.
* **AHK Script** – runs an AutoHotkey v2 script file
* **AHK Inline** – runs a short AutoHotkey v2 snippet directly
The Edit Voice Command dialog includes a **context-sensitive cheat sheet** below the Action field that updates with the Type dropdown – it explains the press-to-capture editor for Keystroke commands, lists common AHK patterns for AutoHotkey Code, names the available internal actions, etc. So you don’t need to memorise the full reference up front.
Note
**Keystroke commands are cross-platform.** A command captured as **Ctrl+S** on Windows is stored in Qt’s portable format and fires **⌘S** automatically on macOS – the macOS dispatcher swaps Ctrl ↔ Cmd internally to match what every Mac app does. So you can build your command list once and it works on whichever machine Supervertaler is running on. Under the hood, Windows uses `SendInput` (compatible with WPF apps like Trados Studio) and macOS uses AppleScript via `osascript`.
### Removing a command
Select the row and click **Remove**, or select multiple rows and remove them together.
### Edits take effect immediately under Vosk
When the Always-On engine is **Vosk**, adding / editing / removing / disabling a command immediately rebuilds Vosk’s recogniser grammar in the background – you don’t have to stop and restart Always-On to “teach” Vosk a new phrase. The status bar briefly shows `🔄 Vosk grammar refreshed (N phrases)` to confirm the swap took effect. The next utterance you speak will use the new grammar.
***
## Settings
### Always-On engine
The dropdown in the Always-On section picks which speech-recognition backend listens for commands.
| Engine | Best for | Speed | Cost | Internet |
| --------------------------------- | ------------------------------------------------------------------- | ----------------- | ------------------------ | ------------- |
| **Vosk** *(default, recommended)* | Commands only – your phrase list, ignores everything else | Instant (\~30 ms) | Free | No |
| **faster-whisper** | Commands + dictation of running text from one continuous mic stream | \~1–3 s | Free | No |
| **OpenAI Whisper API** | Same as faster-whisper but offloaded to OpenAI’s servers | \~0.5–2 s | $0.006 / minute of audio | Yes (API key) |
**Vosk** is the default for new installs. It’s purpose-built for fixed-vocabulary command recognition: pass it your active phrase list, and it biases the recogniser toward those phrases while silently dropping anything else as `[unk]`. That makes it both faster *and* more accurate for commands than any Whisper variant – and you can leave Always-On running all day for $0 in API fees and near-zero CPU load.
**faster-whisper** runs the same Whisper models OpenAI ships, but on a CTranslate2 C++ engine – roughly 4× faster than the original `openai-whisper` package on CPU, with much lower RAM. Choose this if you want **continuous dictation of running text** in always-on mode (every utterance gets transcribed in full, then either typed if it doesn’t match a command, or fires the matched command).
**OpenAI Whisper API** sends each utterance to OpenAI’s hosted `whisper-1` model. Slightly faster end-to-end than running faster-whisper locally on most laptops, but each minute of audio costs about $0.006 – so leaving it on all day adds up. Requires an OpenAI API key in **Settings → AI Settings**.
The first time you start Always-On with Vosk, the small English model (\~40 MB) auto-downloads to `/vosk-models/`. Same for the small Dutch model when your project’s target language is Dutch. Models are cached forever after the first download.
### Push-to-talk dictation engine
The **Dictation engine** dropdown in the Push-to-Talk Mode group controls what handles your push-to-talk dictation hotkey (**Ctrl+Shift+Space** by default). This is independent of the Always-On engine, because the two paths have different needs:
| Setting | What runs when you trigger push-to-talk dictation |
| ------------------------------------- | ----------------------------------------------------------------------------------------------------------------------------------------------- |
| **Same as Always-On** *(default)* | Auto-routes: Vosk or faster-whisper Always-On → faster-whisper push-to-talk; OpenAI API Always-On → OpenAI API push-to-talk |
| **faster-whisper (offline)** | Always faster-whisper, regardless of Always-On engine |
| **OpenAI Whisper API (online, fast)** | Always the API, regardless of Always-On engine. Useful pairing: Vosk for free continuous commands + OpenAI API for fast running-text dictation. |
The “ℹ️ Push-to-talk will use: …” indicator below the dropdown shows the *resolved* engine (after auto-routing) so you always know which backend will run.
**Why isn’t Vosk an option here?** Vosk’s grammar mode is built for fixed phrases, not free-form transcription. Pressing Ctrl+Shift+Space produces running text, which Whisper handles vastly better. So push-to-talk silently falls through to a Whisper engine even when Always-On is set to Vosk.
### faster-whisper model
The Whisper model size dropdown applies whenever a Whisper engine is active – that’s faster-whisper for either Always-On or push-to-talk, *or* the OpenAI API. (The API ignores this setting and always uses `whisper-1` server-side.) Larger models are more accurate but slower and need more RAM.
| Model | Download size | Notes |
| ------ | ------------- | -------------------------- |
| tiny | \~75 MB | Very fast, lowest accuracy |
| base | \~142 MB | Good balance (recommended) |
| small | \~466 MB | Noticeably better accuracy |
| medium | \~1.5 GB | High accuracy |
| large | \~2.9 GB | Best accuracy, slow on CPU |
### Mic sensitivity
Controls the amplitude threshold used to detect speech onset.
* **Low (noisy)** – raises the threshold; ignores quiet background sounds but may miss soft speech
* **Medium (normal)** – default; works well in a typical home office
* **High (quiet)** – lowers the threshold; captures quiet voices but may trigger on background noise
### Listen for commands only
*Whisper engines only.* The checkbox is hidden when the Always-On engine is **Vosk**, because Vosk’s grammar mode already drops non-command speech at the recogniser level – the setting would be a structural no-op there.
For **faster-whisper** and the **OpenAI Whisper API**: when checked, Always-On fires voice commands but discards any speech that doesn’t match a command – it is not typed. Use this if you only want voice control with a Whisper engine, not dictation. When unchecked, unmatched speech is transcribed and typed at the cursor position.
### Maximum recording duration
Sets the upper limit (in seconds) for a single voice clip. Speech that exceeds this length is cut and transcribed up to the limit. Useful to prevent long silences from being held open indefinitely.
### Language
* **Auto** – uses the project’s target language as the transcription hint
* Explicit language – forces Whisper to transcribe in the selected language, which improves accuracy when the target language differs from the source
***
## AutoHotkey integration
AutoHotkey v2 must be installed for AHK-type commands to work. Supervertaler checks for it automatically and shows the path in the AutoHotkey section of the Voice settings panel.
To verify: the status line shows either the AHK path (green) or “AutoHotkey v2 not found” (orange).
Click **Open scripts folder** to open the folder where standalone AHK script files are stored.
***
## Using Voice with Trados Studio
Voice sends input at the Win32 hardware-input level (equivalent to physical keystrokes), which is fully compatible with Trados Studio’s WPF editor. Useful commands to add:
| Phrase | Type | Action |
| ------------------ | --------- | ------------ |
| ”confirm segment” | Keystroke | `ctrl+enter` |
| ”next segment” | Keystroke | `alt+down` |
| ”previous segment” | Keystroke | `alt+up` |
| ”go to top” | Keystroke | `ctrl+home` |
| ”undo” | Keystroke | `ctrl+z` |
After creating a command, start Always-On, click into Trados Studio, and speak the phrase.
***
## Global hotkeys
| Shortcut | Action |
| --------------------------------------- | ---------------------------------------------------- |
| **Ctrl+Alt+A** (⌘⌥A on macOS) | Toggle Always-On listening |
| **Ctrl+Shift+Space** (⌘⇧Space on macOS) | Push-to-talk (one utterance) — default, configurable |
Global hotkeys work on macOS too (via the NSEvent monitor), but require Accessibility permission for whichever binary launched Python – see [Keyboard Shortcuts](/workbench/settings/shortcuts/#per-platform-notes) for setup. All hotkeys can be customised in **Settings → Keyboard Shortcuts**.
***
## Related pages
* [Clipboard Manager](/workbench/clipboard/overview/)
* [Keyboard Shortcuts](/workbench/settings/shortcuts/)
* [General Settings](/workbench/settings/general/)